fRaMe oPeRaTIon
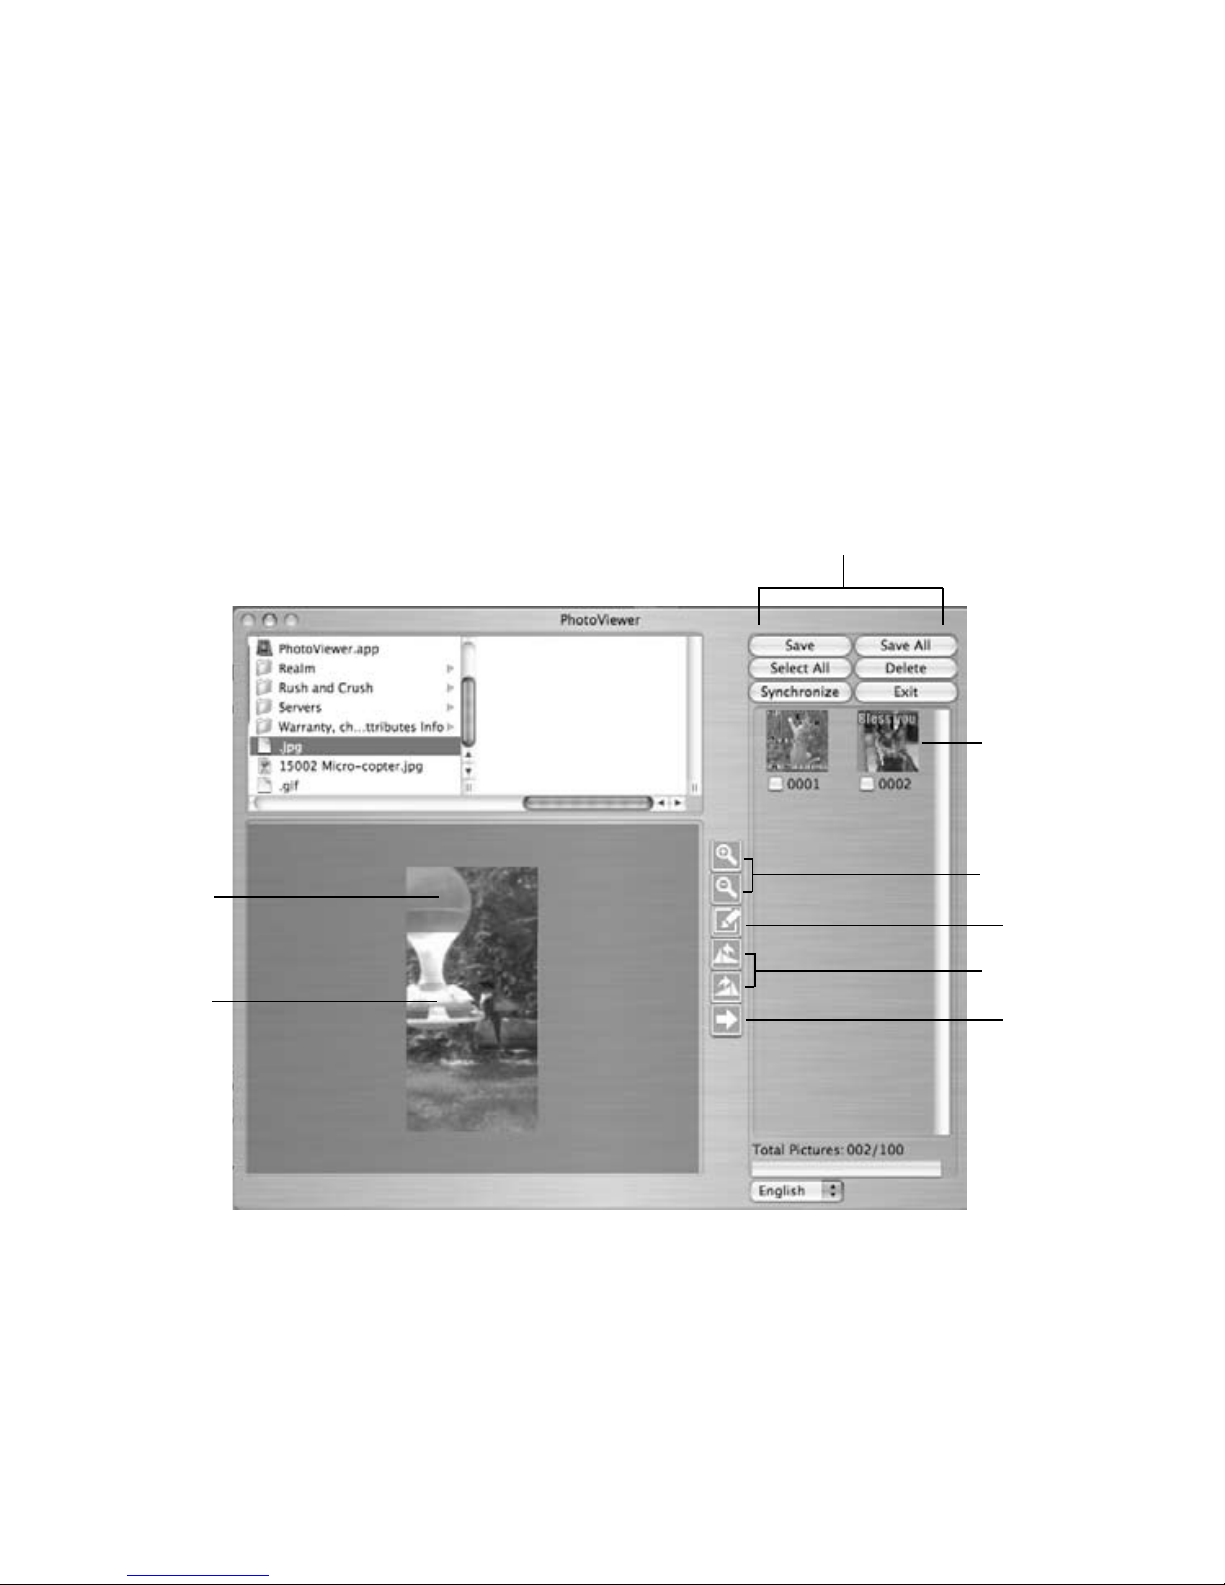
DOWNLOADING AND EDITING PHOTOS WITH PHOTOVIEWER
Connect the Digital Photo Keychain to your computer with the USB CABLE
and open the PhotoViewer software.
Using the PhotoViewer software, browse your computer for photo(s).
Click on the chosen photo file in the list of photos, and it will appear in
the large PhotoViewer window (see example at right for all tool locations).
You may adjust the view by clicking and dragging the Selection Box to the
sections of the photo. If you want a close-up of a section to appear on
the frame, use the + Magnifying Tool to enlarge the photo, and drag the
Selection Box to center your desired subject. Use the - Magnifying Tool
to revert to the original photo size.
Use the clockwise and counterclockwise Flip Tools to flip your photo.
Use the Pen Tool to fit the original photo to the frame's screen (keep in
mind that this may distort the photo).
When you have finished editing the photo, click the Arrow Tool to save
the edited photo to the frame's drive.
Click on Synchronize in the Control Panel when you are finished locating,
editing and saving all photos. This will load them to the Digital Photo Keychain.
Note: You may also edit/delete selected photos already downloaded on
the frame by selecting them. Just click on the Photo Thumbnail and the
photo will appear in the large PhotoViewer window.
1.
2.
3.
4.
5.
6.
7.
8.
7