BROOMX MK360 User manual

MK360
Immersive VR projector
User manual

MK360
2
Welcome
Thank you for acquiring the MK360, the rst immersive projection system to
enjoy 360° media and interactive Virtual Reality applications in real spaces.
Please read the following manual carefully before installing and using the
MK360. This manual is subject to modication, please refer to this online
copy to stay updated. For further information please contact: client@
broomx.com.
The Broomx Technologies team.

MK360
3
Welcome _________________________________________________ 2
Overview _____________________________________________________ 4
Description ______________________________________________ 4
Technical specications __________________________________ 5
Connections ______________________________________________ 6
Identication _____________________________________________ 7
Installation ____________________________________________________ 8
Content of package ______________________________________ 8
Projection space _________________________________________ 9
Setup ___________________________________________________ 10
Power & conguration ____________________________________11
Wi dongle _____________________________________________ 14
LAN connection _________________________________________ 15
Web Manager ________________________________________________ 16
Description _____________________________________________ 16
Connection _____________________________________________ 17
Sections _________________________________________________ 18
Playback & navigation ___________________________________ 23
iOS application _______________________________________________24
Download & connection _________________________________24
Sections ________________________________________________ 25
Controls _________________________________________________ 26
Playback & navigation ___________________________________ 27
User content _________________________________________________28
Media specications _____________________________________28
Web Manager ___________________________________________ 29
USB drive________________________________________________ 31
Health & safety ______________________________________________ 32
Warranty _____________________________________________________ 36
Table of contents
MK360
4
Description
The MK360 is an immersive projection system to enjoy 360 media and
interactive Virtual Reality applications in real spaces, socially and headset
free.
It is compact, portable and easy to use. It includes a projection module,
CPU, GPU, an audio speaker, internet connection and IoT communication.
It is controlled using an iOS application or a cross-platform Web Manager,
enabling users to display and navigate through an extensive catalog of
included content, as well as upload and manage their personal content.
For further information, please visit: www.broomx.com
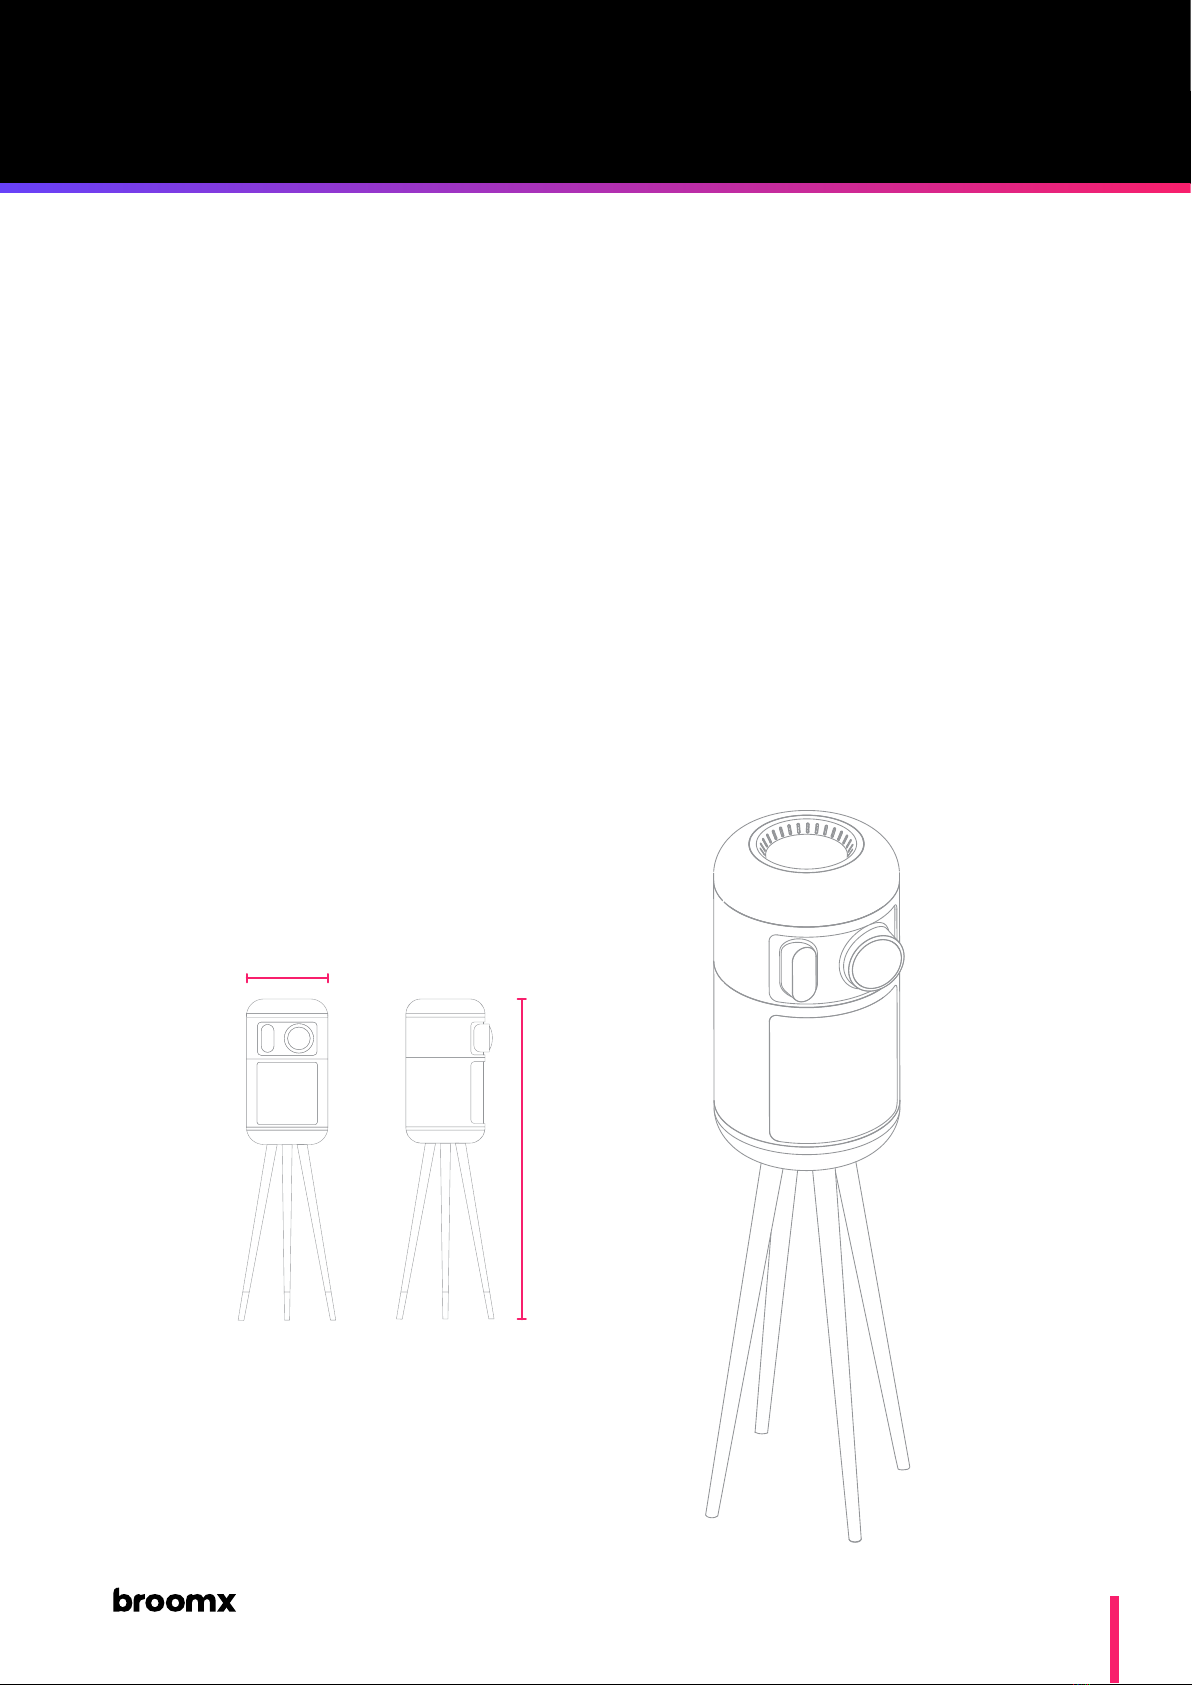
Front view Side View
42cm Ø
168cm
Isometric view
Weight:
32Kg
Overview

MK360
5
Technical Specications
286W
180 cm (height) x 42 cm (diam)
32 Kg
100x55x55 cm
57 Kg
3LCD
Full HD 1080p, 1920x1080p, 16:9
2500 Lumens
1.073 billion colors
60,000:1
Horizontal: 185° / Vertical: 90°
UHE, 200W, life 4500h, life 7500h (eco mode)
60.000 : 1
Vertical
Manual
10Bits
101 dB
50W (25W + 25W)
500 GB*
General
Power consumption
Size
Weight
Size with ight case
Weight with ight case
Projector
Technology
Resolution
Light output
Color Depth
Contrast ratio
Field of View
Lamp
Contrast ratio
Lens Shift
Focus
Video Processing
Audio
Maximum SPL
Output power (RMS)
Storage
Disk
* Total disk space is shared between factory
system and content, and user content.
Overview

MK360
6
Connections
Power On / Off the MK360
On / Off Switch
Audio In
Input connection for external audio
source (PC, tablet, smartphone, …).
Signal is mixed with system sound.
Audio Out
Output connection to external audio
system. Internal speaker isn’t muted.
Output is the result of system audio +
“Audio In”.
WAN
Internet input connection. USB 3.0 connection for charging
external devices.
USB
Input connection for USB drive.
USB In
Audio output connection to
headphones. Internal speaker is muted.
Headphones
Voltage Selector
Select voltage (110-220V) according to
region.
Overview

MK360
7
Identication
The identication plate is located on the rear panel of the MK360. It contains
useful information for technical support operations.
1Batch
12
3
Overview
2Identication number 3Production year
MK360
8
Content of package
*Optional accessory
1 MK360
4 Legs
1 Power cable
1 Ethernet cable
1 Fabric sleeve
4 itting washers
1 2mm Allen wrench
1 ightcase*
Installation
MK360
9
Projection Space
InteriorType of space
10-70 m2Surface
2.5 - 5 mCeiling height
Complete darknessLighting
Planar or curved
Smooth and even surface
White or clear color
Reduced furnishing
Do not project over windows, glass or
reecting materials
Projection surface
Flat and stable, 55 cm2Floor
Directly opposite and perpendicular to
main projection wall.
Placement
2,5 - 7 mDistance to main projection wall
Seated under the MK360, facing main
projection wall.
Optimal placement of viewer
Installation
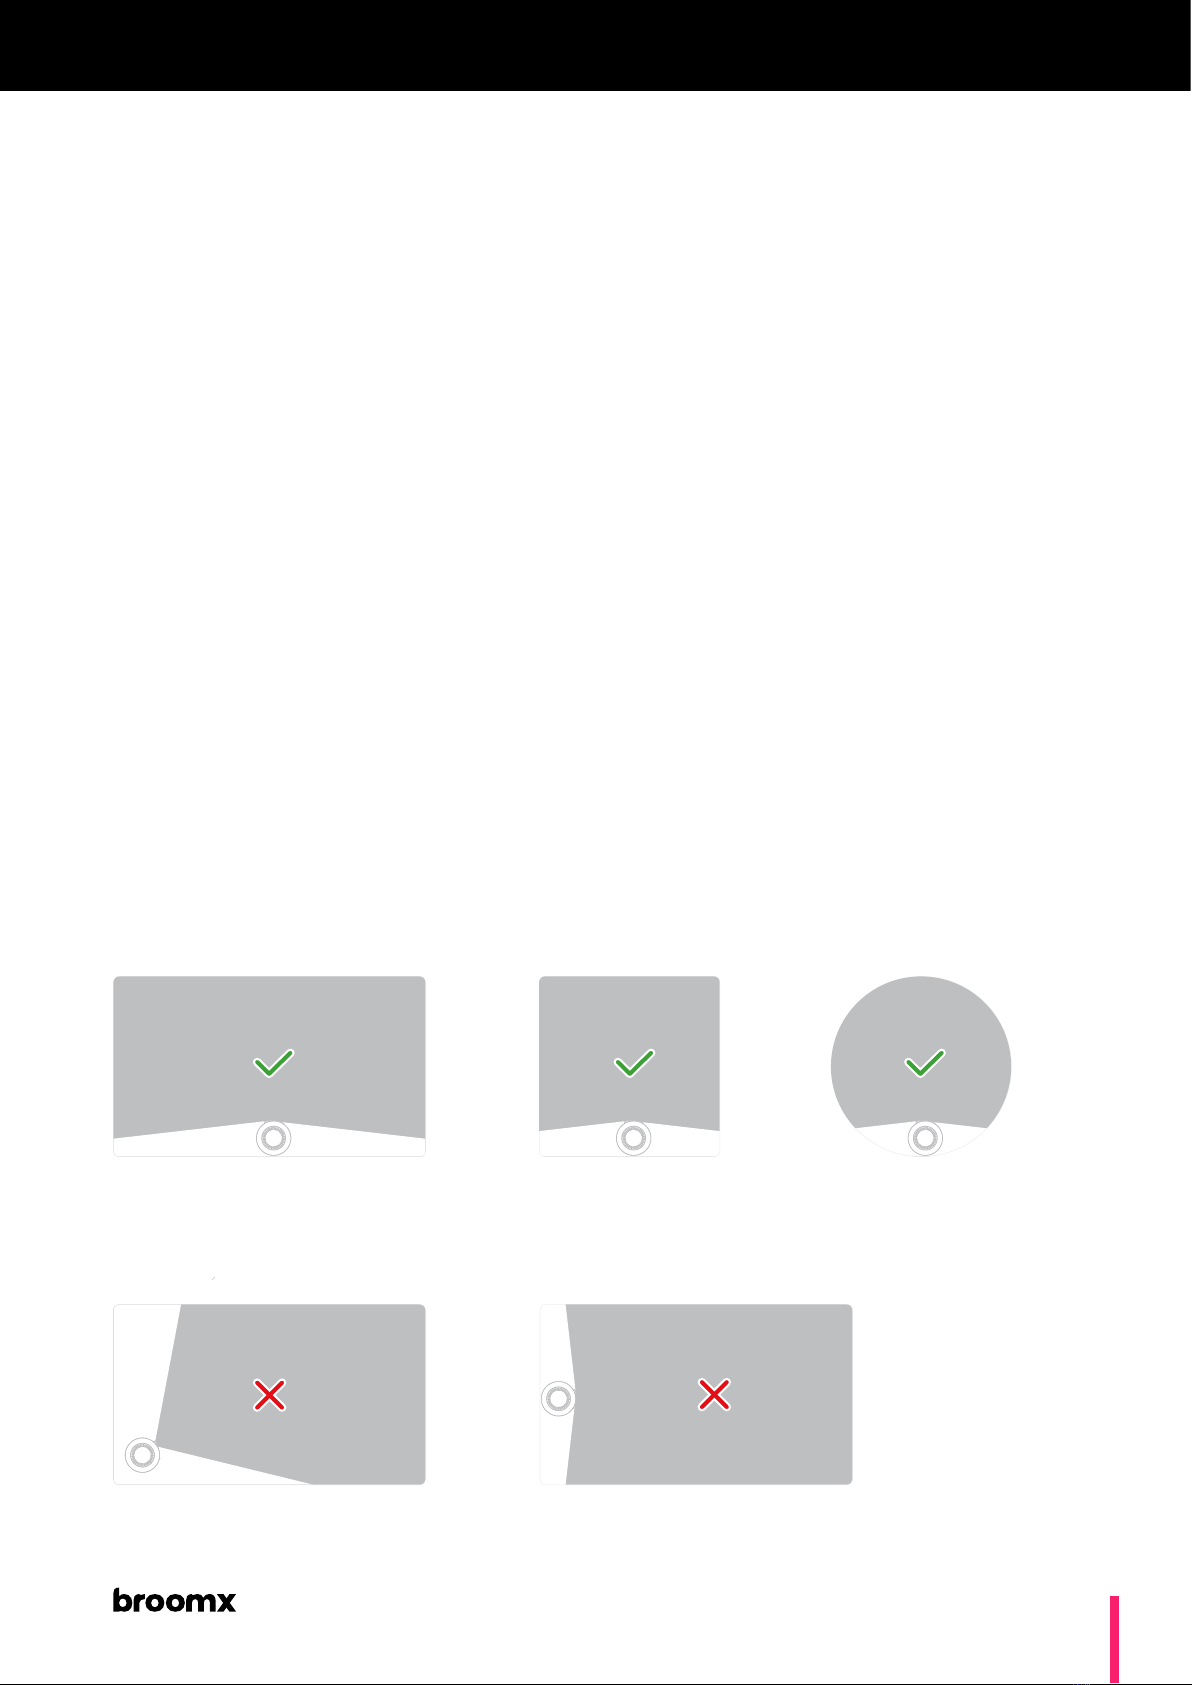
Correct placements
Rectangular spaces Circular spaces & domesSquare spaces
Diagonal projection in
rectangular spaces
Length-oriented projection in
rectangular spaces
Incorrect placements
MK360
10
Setup
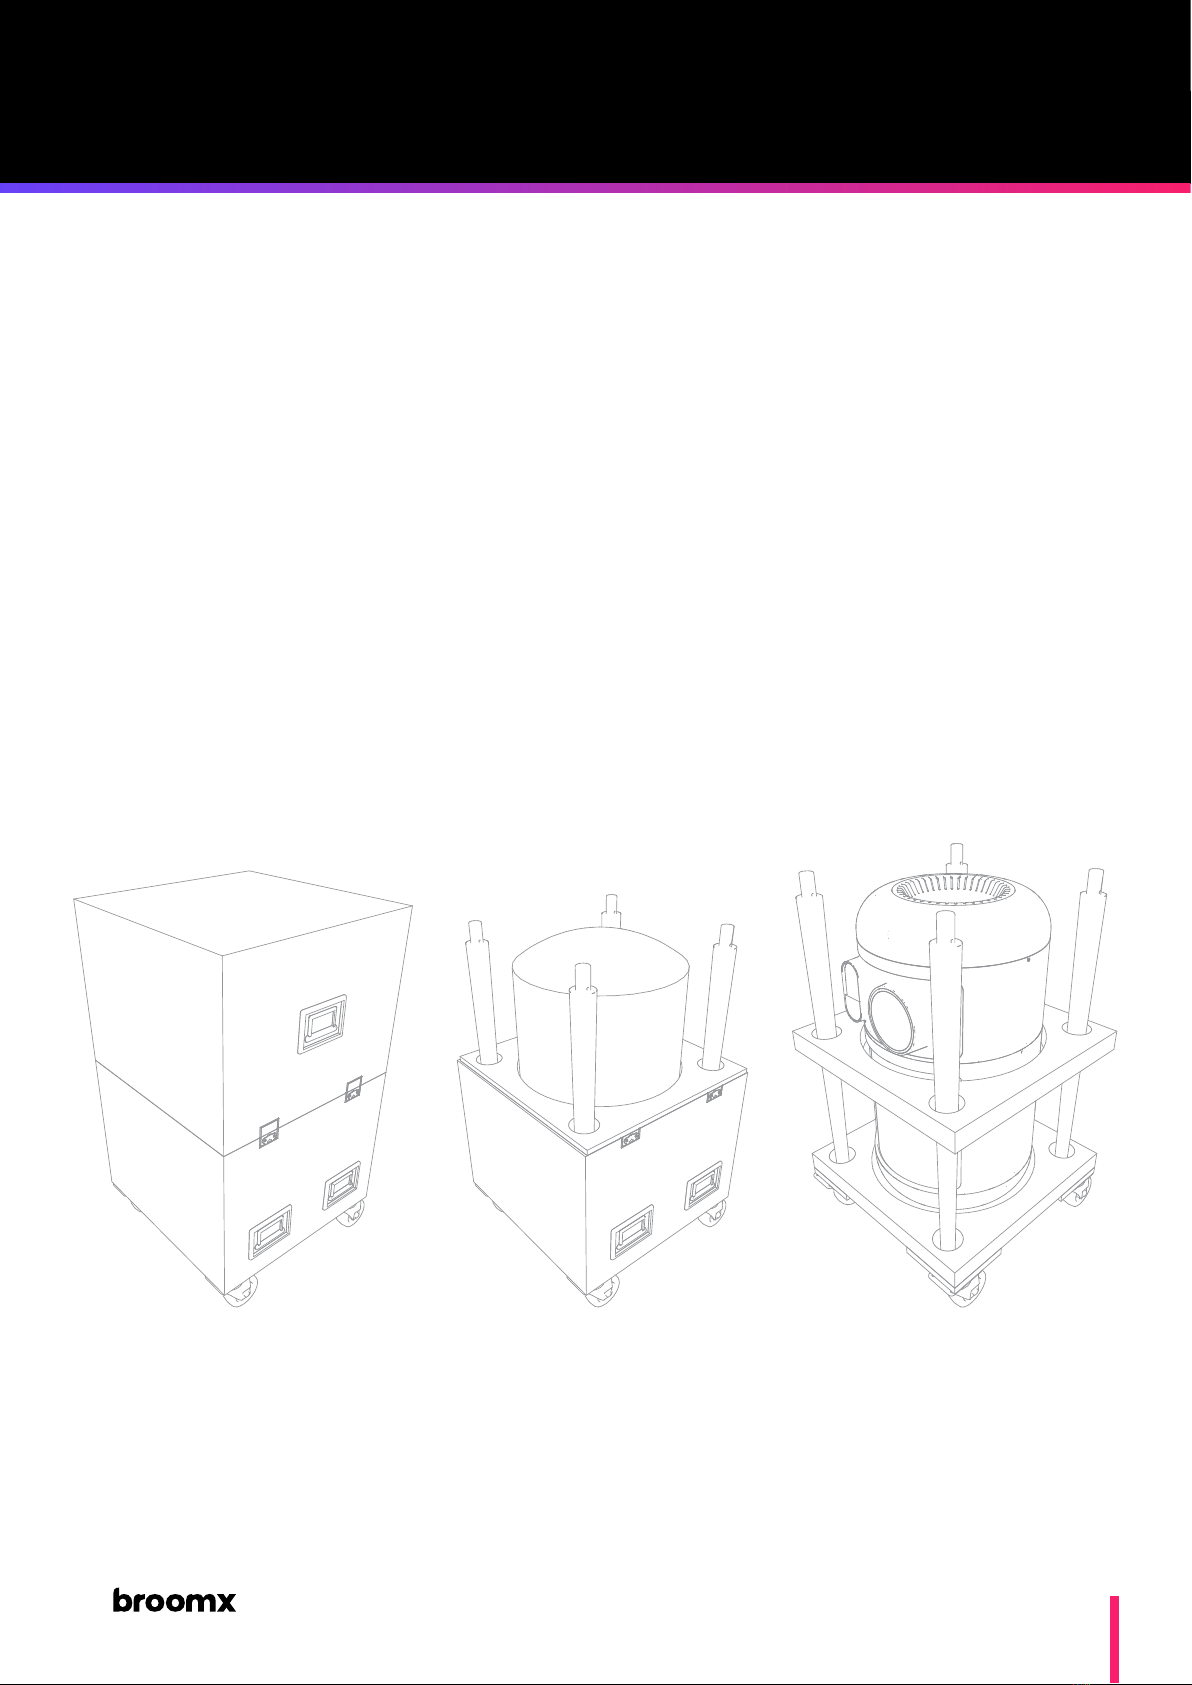
Unpacking*
*The MK360 can be delivered in a wooden transport case, or an aluminum Flight Case
(with additional cost).
1 Remove the top panel of the ightcase or transport case.
2Remove the MK360 using the fabric sleeve handles.
3Remove the 4 legs.
4Remove the fabric sleeve from the MK360 by sliding down.
Mounting the legs
1 Place the MK360 horizontally on a soft surface.
2Screw together top and bottom sections of each leg
3Insert the legs into the corresponding slots on the base of the MK360,
push until hearing a click.
Lifting to position
Make sure the legs are properly inserted and secured, then lift the MK360
to its upright position and place at the desired location.
Installation
The setup process requires 2 persons.
Important
The MK360 package includes 4 tting washers, which can be used to regulate the
height of each leg to compensate for oor imperfections.
Note
An extra Floor Fixation is available from our catalog at broomx.com
Note
Table of contents


