BSH BGS5 Setup guide

Repair Instructions Consumer Products - BGS5 - Table of content
2014-01-27 / DIS 118_58300000157376_ARA_EN_C Repair Instructions Consumer Products BGS5 Page 1 of 34
1 Concerning this document 2
1.1 Purpose and target group..................................................... 2
1.2 Other applicable documents..................................................2
2 Safety 3
2.1 Qualification........................................................................... 3
2.2 Information in warnings......................................................... 3
2.3 Basic safety instructions........................................................ 4
2.4 Basic warning instructions..................................................... 5
3 Design and function 7
3.1 Overview of appliances, general........................................... 7
4 Fault diagnosis 8
4.1 Malfunction.............................................................................8
4.2 Electrical faults.......................................................................9
4.3 Result faults......................................................................... 10
4.4 Mechanical faults................................................................. 11
4.5 Noises.................................................................................. 12
5 Test 13
5.1 Check cable reel..................................................................13
5.2 Check motor........................................................................ 15
5.3 Check filter cleaning motor..................................................16
5.4 Check filter cleaning............................................................ 17
6 Repairs 19
6.1 Replace cover......................................................................19
6.2 Replace knob.......................................................................21
6.3 Replace cog.........................................................................23
6.4 Replace upper part..............................................................24
6.5 Replace filter cleaning motor...............................................28
6.6 Replace motor control module............................................ 29
6.7 Replacing the cable reel......................................................31
6.8 Replace motor..................................................................... 32

Concerning this document
2014-01-27 / DIS 118_58300000157376_ARA_EN_C Repair Instructions Consumer Products BGS5 Page 2 of 34
1.1 Purpose and target group
These repair instructions include information on troubleshooting and repairs.
This information supports the following employees in customer service:
• Service technicians who repair domestic appliances
• Technical storemen in the spare-parts warehouse who determine the required
spare parts
• Call centre employees who take orders
1.2 Other applicable documents
The following documents include additional relevant repair information:
• Documents “Design and function” and “Customer advice”
• Test programmes
• Circuit diagrams
• Exploded drawings
• Parts lists
• Repair videos

Safety
2014-01-27 / DIS 118_58300000157376_ARA_EN_C Repair Instructions Consumer Products BGS5 Page 3 of 34
2.1 Qualification
In Germany repair work may be performed only by electrical engineers who have
been trained by BSH or a centre authorised by BSH.
In all other countries repair work may be performed by comparably trained
technicians only.
2.2 Information in warnings
2.2.1 Danger levels and warning symbols
Warnings are provided in this document with danger levels and warning symbols.
The danger levels consist of a symbol and a warning word. The warning word
identifies the severity of the danger.
Danger level Meaning
Failure to observe the warning will result in death or serious in-
juries.
Failure to observe the warning may result in death or serious
injuries.
Failure to observe the warning may result in minor injuries.
Failure to observe the warning may result in damage.
Table 1: Danger levels
Warning symbols are symbolic illustrations which indicate the type of danger.
Symbol Meaning
General warning
Danger of electric shock
Risk of explosion
Risk of cut injuries

Safety
2014-01-27 / DIS 118_58300000157376_ARA_EN_C Repair Instructions Consumer Products BGS5 Page 4 of 34
Symbol Meaning
Risk of crush injuries
Danger - hot surfaces
Danger - strong magnetic
Danger - non-ionising radiation
Table 2: Warning symbols
2.2.2 Structure
Warnings in this document have a uniform appearance and structure.
Type and source of danger!
Consequences of ignoring the warning.
► Actions to protect from danger.
The following example shows a warning which warns of an electric shock:
High voltage!
Death by electric shock.
► Disconnect appliance from grid.
► Discharge high-voltage capacitor.
2.3 Basic safety instructions
These repair instructions form the basis for a systematic and
safety-conscious procedure for the repair of domestic appliances.
2.3.1 Measures to be taken for each repair
The following dangers are associated with the repair of domestic appliances:
• Danger of electric shock from exposed, live wires and components
• Risk of cut injuries from sharp edges
• Risk of destruction of electronic components by electrostatic discharge
Specific measures prevent injuries and damage. Service technicians are obliged to
take these measures for each repair.
Preventive measures
... against electric shock When carrying out repairs:
• Disconnect appliance from power
supply.
When running tests with power supply
on:
• Use a residual-current-operated cir-
cuit-breaker.
• Select protective conductor connec-
tion less than standard value.
... to prevent cut injuries • wear protective gloves.
... electronic components • wear earthing wrist strap.
• Discharge capacitors.
Table 3: Measures to be taken for each repair

Safety
2014-01-27 / DIS 118_58300000157376_ARA_EN_C Repair Instructions Consumer Products BGS5 Page 5 of 34
2.3.2 Measures to be taken after each repair
State of the appliance Measures
Appliance has been repaired and is
functionally reliable.
• Run tests in accordance with VDE
0701 or comparable national regula-
tions.
• Conduct a performance test.
• Document repair work, tests, mea-
sured values and functional reliabili-
ty.
Appliance is still defective and not func-
tionally reliable.
• Clearly identify appliance as "not
functionally reliable".
• Inform customer in writing about the
lack of functional safety.
Table 4: Measures to be taken after each repair
2.4 Basic warning instructions
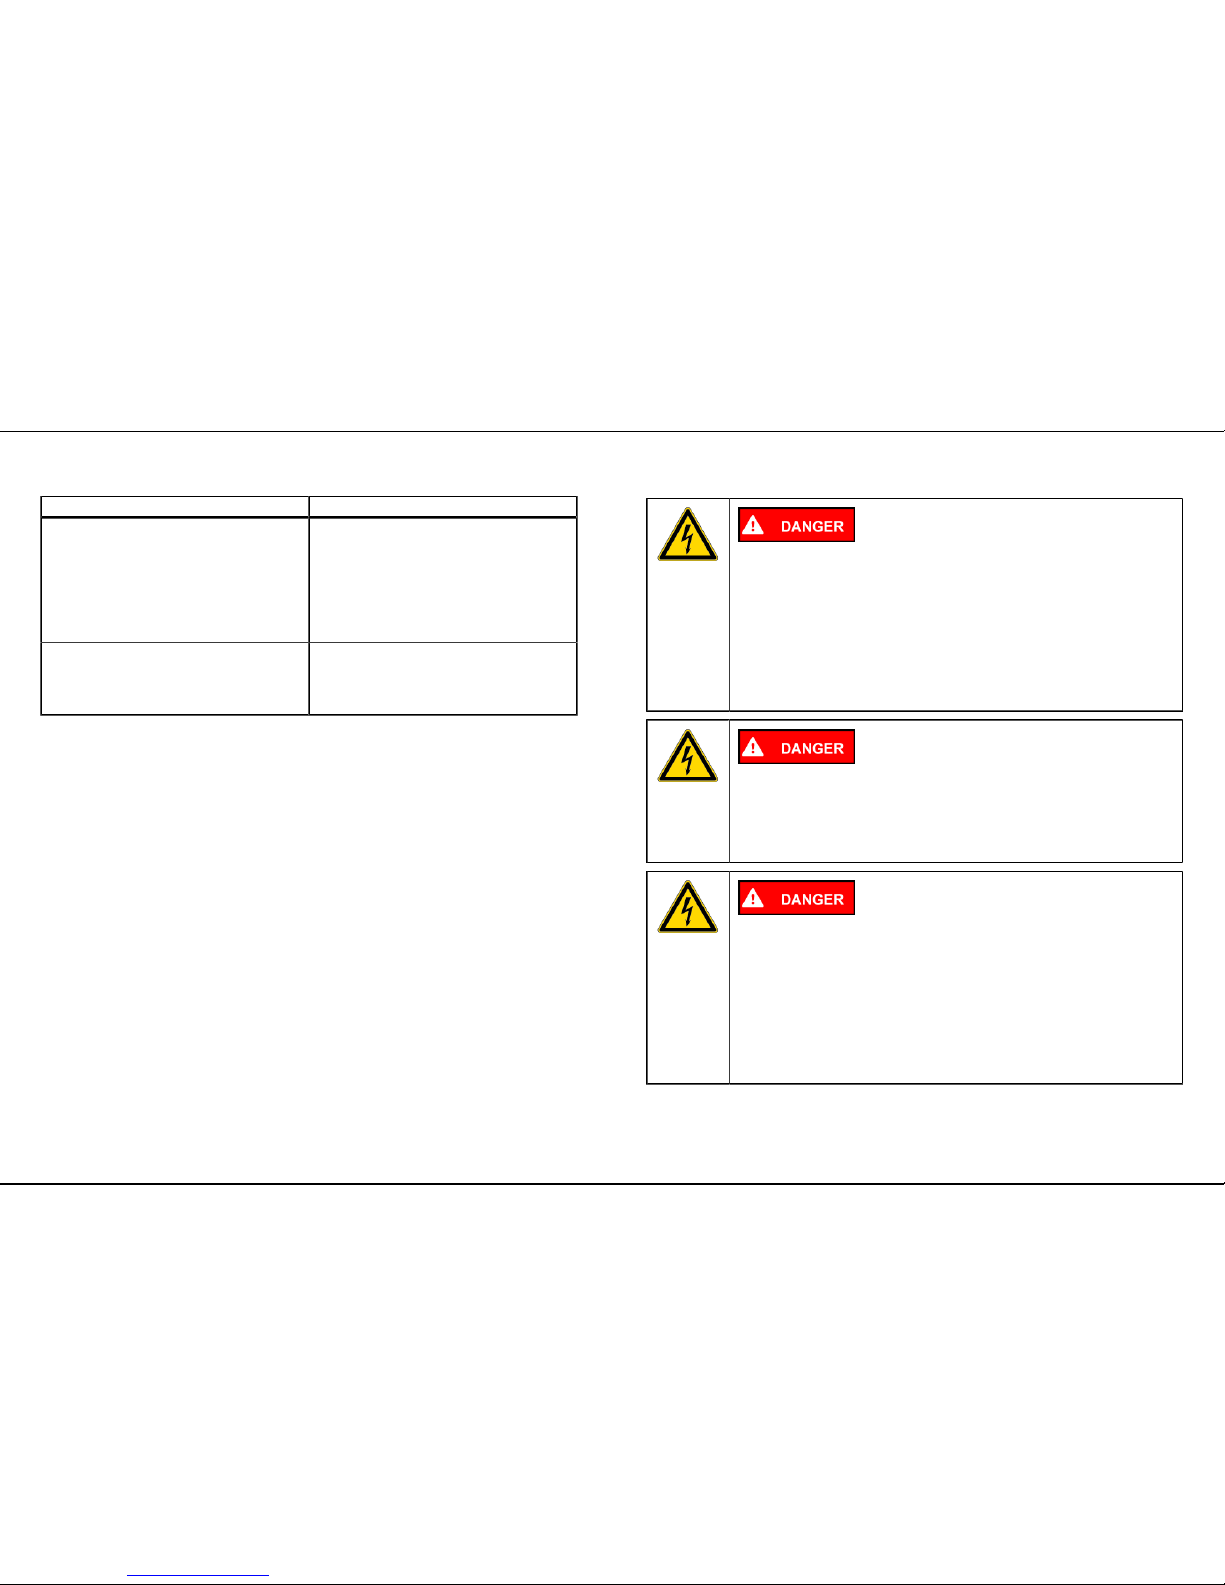
Exposed, live components!
Death from electric shock.
► Disconnect the appliance from the power supply.
► Do not touch housing, frame or components.
► If running tests while the power is on, always use a residual
current circuit-breaker.
► Ensure that the resistance of the protective conductor does not
exceed the standardised value.
Discharge current of charged capacitors!
Death from electric shock. Risk of injury from startle response.
► Disconnect the appliance from the power supply.
► Discharge capacitors.
Exposed, defective components live!
Death from electric shock.
► Disconnect the appliance from the power supply.
► Do not touch housing, frame or components.
► If running tests while the power is on, always use a residual
current circuit-breaker.
► Ensure that the resistance of the protective conductor does not
exceed the standardised value.

Safety
2014-01-27 / DIS 118_58300000157376_ARA_EN_C Repair Instructions Consumer Products BGS5 Page 6 of 34
Sharp edges!
Cut injuries.
► Wear protective gloves.
► Wear personal protective equipment.
Touching electrostatically sensitive components!
Destruction of components.
► Apply electrostatic protection system.
► Observe measures to protect the electrostatically sensitive components.
Unnecessary replacement of sensitive components!
Destruction of components.
► Systematically check components before replacing them.
► Do not replace components without reason.
► Observe technical documentation.

Design and function
2014-01-27 / DIS 118_58300000157376_ARA_EN_C Repair Instructions Consumer Products BGS5 Page 7 of 34
3.1 Overview of appliances, general
• There is no appliance overview for the appliance.

Fault diagnosis
2014-01-27 / DIS 118_58300000157376_ARA_EN_C Repair Instructions Consumer Products BGS5 Page 8 of 34
4.1 Malfunction
Fault Possible cause Troubleshooting
No current. ► Insert mains plug.
► Press On/Off switch several times.
► Appliance does not start
►Check the motor. (Page 15)
Cable reel is defective. ► Check the cable reel. (Page 13)
► Cable reel is defective
►Replace the cable reel. (Page 31)
Appliance does not function
Motor control module is defective. ► Replace the motor control module. (Page 29)

Fault diagnosis
2014-01-27 / DIS 118_58300000157376_ARA_EN_C Repair Instructions Consumer Products BGS5 Page 9 of 34
4.2 Electrical faults
Fault Possible cause Troubleshooting
Knob does not function.
(Motor functional).
► No resistance when rotating
►Replace knob. (Page 21)
► Motor control module defective
►Replace motor control module. (Page 29)
Suction power setting does not function.
Knob jams. ► Check zero position of the knob on the potentiometer.
► Motor control module defective
►Replace motor control module. (Page 29)
Filter blocked. ► Check and clean all filters, if required replace.
► Advise customer:
See operating instructions.
Appliance is not extracting.
Motor is running irregularly. ► Check the motor. (Page 15)
► Motor defective
►Replace motor. (Page 32)
Filter cleaning defective. ► Check filter cleaning. (Page 17)
Low-pressure hose leaking. ► Check that low-pressure hose is positioned correctly.
► Low-pressure hose defective
►Replace low-pressure hose. (Page 24)
Filter cleaning motor defective. ► Check filter cleaning motor. (Page 16)
► Filter cleaning motor defective
►Replace filter cleaning motor. (Page 28)
Filter cleaning unreliable.
Motor control module defective. ► Motor control module defective
►Replace motor control module. (Page 29)

Fault diagnosis
2014-01-27 / DIS 118_58300000157376_ARA_EN_C Repair Instructions Consumer Products BGS5 Page 10 of 34
4.3 Result faults
Fault Possible cause Troubleshooting
Vacuum cleaner tube or floor nozzle
blocked.
► Empty and clean vacuum cleaner tube.
► Advise customer:
See Operating instructions.
Air guide tube blocked ► Empty and clean air guide tube.
► Advise customer:
See Operating instructions.
Suction hose leaking. ► Check suction hose for leaks, if required replace.
► Advise customer:
See Operating instructions.
Telescopic tube not fitted correctly. ► Check that telescopic tube is positioned correctly.
► Advise customer:
See Operating instructions.
Floor nozzle blocked or defective. ► Clean or replace floor nozzle.
► Advise customer:
See Operating instructions.
Floor nozzle set incorrectly. ► Set floor nozzle according to the floor.
► Advise customer:
See Operating instructions.
Setting on the rotary controller wrong. ► Set slide control according to the floor.
► Advise customer:
See Operating instructions.
Dust container full. ► Empty dust container.
► Advise customer:
See Operating instructions.
Suction power too low.
Filter blocked. ► Check and clean all filters, if required replace.
► Advise customer:
See Operating instructions.
Floor scratched. Floor nozzle rollers or housing rollers de-
fective.
► Check and clean rollers, if required replace.
► Advise customer:
See “Advising customer” document.

Fault diagnosis
2014-01-27 / DIS 118_58300000157376_ARA_EN_C Repair Instructions Consumer Products BGS5 Page 11 of 34
4.4 Mechanical faults
Fault Possible cause Troubleshooting
Cleaning cog worn. ► Cleaning cog defective
►Replace cog. (Page 23)
Cog holder on the underside of the dust
container.
► Check and clean cog seat, if required replace filter insert.
► Advise customer:
See operating instructions
Filter cleaning mechanism unreliable
Cog seat under the dust container defec-
tive.
► Check and clean cog seat, if required replace dust container.
► Advise customer:
See operating instructions
Cover lock defective. ► Check lock
► Lock defective
►Replace cover (Page 19)
Cover not locked.
Dust container locking hook defective. ► Check condition of locking hook, if required replace dust container.
► Advise customer:
See operating instructions.

Fault diagnosis
2014-01-27 / DIS 118_58300000157376_ARA_EN_C Repair Instructions Consumer Products BGS5 Page 12 of 34
4.5 Noises
Fault Possible cause Troubleshooting
Whistling noise during operation. Air guide seal defective. ► Advise customer:
Check floor nozzles, accessories, telescopic tube and suction hose for blockage.
Check and clean all filters, if required replace.
Check seal on the housing.
If operation is increased, reduce cleaning interval.
Whistling noise on the vacuum cleaner
cover.
Foreign objects in the air duct cover. ► Advise customer:
Remove foreign objects.
Check seal in the cover, if required replace.
Loud motor noise during operation. Foreign objects in the fan motor. ► Advise customer:
Remove foreign objects.
Check motor protection filter, if required replace.

Test
2014-01-27 / DIS 118_58300000157376_ARA_EN_C Repair Instructions Consumer Products BGS5 Page 13 of 34
5.1 Check cable reel
Prerequisite:
• Appliance is disconnected from the power supply.
• Cable reel is accessible.
5.1.1 Visual inspection
1. Unwind the cable.
2. Visually check cable for damage.
3. IF the cable is damaged,
►replace the cable reel. (Page 31)
4. Visually check cable reel for damage.
5. IF the cable reel is damaged,
►replace the cable reel. (Page 31)
5.1.2 Check electrical function
Required tools:
?Tester
1. Hold test probes to the mains plug and connection contacts.
2. Check current flow.
3. IF current flow cannot be measured,
►replace the cable reel. (Page 31)
5.1.3 Check mechanical function (spring tension)
2 factors are important for the mechanical function of the cable reel:
• Spring tension: the spring must be adequately pretensioned.
• Winding pattern: the cable must be wound up evenly
1. Take cable reel out of the appliance.
2. Visually check spring pretension.
3. IF less than 2 layers of the spring have been wound on to the spindle of the
cable reel,
► hold the cable reel in place and turn the crossmember anti-clockwise until
there are 2 layers.

Test
2014-01-27 / DIS 118_58300000157376_ARA_EN_C Repair Instructions Consumer Products BGS5 Page 14 of 34
5. IF more than 2 layers of the spring have been wound on to the spindle of the
cable reel,
► hold the cable reel in place and turn the crossmember clockwise until there
are only 2 layers.
7. Fully unwind the cable from the cable reel and wind up again.
8. Visually check spring pretension again.
9. IF the spring pretension is correct,
►check the mechanical function (winding pattern). (Page
10. IF the spring tension is not correct,
► check spring tension again (repeat as from Step 3).
11. IF the spring pretension is not correct after checking twice,
►replace the cable reel. (Page 31)
5.1.4 Checking mechanical function (winding pattern)
1. Unwind the cable from the cable reel and wind up again.
2. Visually check winding pattern.
3. IF the winding pattern is even,
►install the cable reel. (Page 31)
4. IF the winding pattern is uneven,
► unwind the cable and wind up evenly.
►Checking mechanical function (spring tension). (Page

Test
2014-01-27 / DIS 118_58300000157376_ARA_EN_C Repair Instructions Consumer Products BGS5 Page 15 of 34
5.2 Check motor
5.2.1 General check
Prerequisite:
• Appliance is disconnected from the power supply.
• Cable drum has been checked.
► Visually check cabling for damage.
5.2.2 Check function manually
Required tools:
?None
1. Connect appliance to power supply.
2. Switch on appliance switch.
3. Motor does not switch on
►Replace motor (Page 32)

Test
2014-01-27 / DIS 118_58300000157376_ARA_EN_C Repair Instructions Consumer Products BGS5 Page 16 of 34
5.3 Check filter cleaning motor
5.3.1 General check
Prerequisite:
• Appliance is disconnected from the power supply.
• Cable drum has been checked.
► Visually check cabling for damage.
5.3.2 Check function manually
Required tools:
?None
1. Connect appliance to power supply.
2. Switch on appliance switch.
3. Press "Clean" button.
4. Filter cleaning motor does not switch on
►Replace control module motor (Page 29)
5. Filter cleaning motor does not always switch on
►Replace filter cleaning motor (Page 28)

Test
2014-01-27 / DIS 118_58300000157376_ARA_EN_C Repair Instructions Consumer Products BGS5 Page 17 of 34
5.4 Check filter cleaning
Required tools:
?Sheet of paper
Prerequisite:
• Appliance is in operating state.
• Set power to "hard floors".
5.4.1 Automatic cleaning
Time values during the procedure:
- Cleaning detection duration is 30 s.
- Cleaning duration is 10 s.
1. Open cover.
2. Place sheet of paper on upper opening of the dust container.
3. Close the cover.
4. Switch on vacuum cleaner and leave running.
Result:
Display flashes red after 30 s.
Vacuum cleaner motor switches off.
Filter cleaning motor switches on.
Filter is being cleaned.
6. After cleaning time,
7. filter cleaning motor switches off.
8. Vacuum cleaner motor switches on.
9. Display lights up blue.
10. Cleaning procedure is repeated,
► leave cleaning procedure running.
11. Cleaning procedure runs > 3 times,
► Safety mode is actuated.
► Display lights up red permanently.
► Minimum power setting is switched on.
12. Switch appliance off and on again.
Result:
Counter for safety mode is reset.
13. Cleaning procedure is not repeated,
► vacuum cleaner ready to use.
5.4.2 Cleaning by means of switch-on button
Do not use sheet of paper.
1. Press the "Clear" button.
Result:
Display flashes red.
Vacuum cleaner motor is switched on at minimum power setting.
Filter cleaning motor switches on.
Cleaning procedure starts.
2. After cleaning time,
Result:
vacuum cleaner motor switches on.
Display lights up blue.
3. Filter cleaning motor switches off.
4. Vacuum cleaner motor switches on.
5. Display lights up blue.
6. Switch off vacuum cleaner with knob.
7. Repeat test procedure up to 2 times.
8. Display lights up red permanently,
► safety mode is actuated.
► Vacuum cleaner motor is switched on at minimum power setting.
9. Switch appliance off and on again.
Result:
Counter for safety mode is reset.
10. Automatic cleaning does not switch on,
► vacuum cleaner ready to use.

Test
2014-01-27 / DIS 118_58300000157376_ARA_EN_C Repair Instructions Consumer Products BGS5 Page 18 of 34
5.4.3 If faults occur
► If faults occur,
► For troubleshooting seeMalfunction (Page 18) andElectrical
faults (Page 18)

Repairs
2014-01-27 / DIS 118_58300000157376_ARA_EN_C Repair Instructions Consumer Products BGS5 Page 19 of 34
6.1 Replace cover
Required tools:
?None
6.1.1 Removal
1. Lift cover up.
2. Remove cover from axle housing with left/right movements.
3. Replace cover.

Repairs
2014-01-27 / DIS 118_58300000157376_ARA_EN_C Repair Instructions Consumer Products BGS5 Page 20 of 34
6.1.2 Installation
► Install in reverse sequence.
Table of contents
Other BSH Vacuum Cleaner manuals
Popular Vacuum Cleaner manuals by other brands

WOLFF
WOLFF UZIN UTZ DC Tromb 400 H Asbest Translation of the original instruction

Numatic
Numatic PPH 320-12 instructions

SEVERIN
SEVERIN CY 7089 Instructions for use

Makita
Makita VC002GL instruction manual

Termozeta
Termozeta NEW POCKET instruction manual

BIG MIKE
BIG MIKE Leapfrog Dry operating instructions