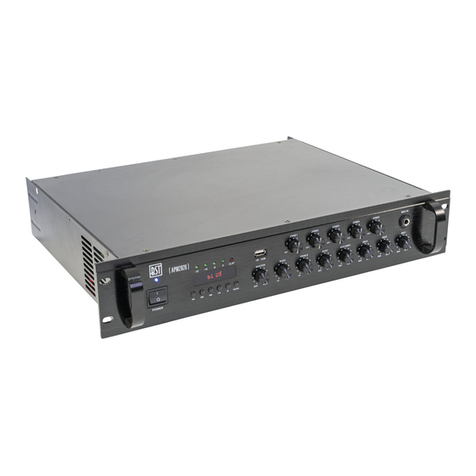
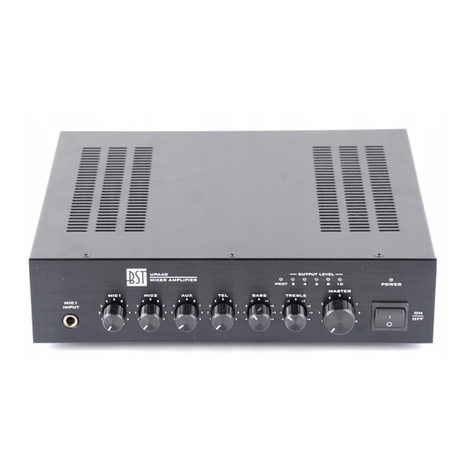
BST APM1060 User manual

[APM1060 ]
COMPACT PA MIXER-AMPLIFIERS
WITH USB, SD, BLUETOOTH, FM & REMOTE CONTROL
AMPLIFICATEURS-MIXAGE PA COMPACTS AVEC USB, SD, BLUETOOTH, FM & TELECOMMANDE
KOMPAKTE MISCHVERSTÄRKER MIT USB, SD, BLUETOOTH, UKW RADIO & FERNBEDIENUNG
COMPACTE PA MENGVERSTERKERS MET USB, SD, BLUETOOTH, FM & AFSTANDSBEDIENING
INSTRUCTION MANUAL • EN • p. 2
MANUEL D‘UTILISATION • FR • p. 8
BEDIENUNGSANLEITUNG • DE • S. 14
HANDLEIDING • NL • p. 20
APM1060 / APM1120
CODE: 95-1005 / 95-1006

INSTRUCTION MANUAL
SAFETY RECOMMENDATIONS
CAUTION
DO NOT OPEN THE HOUSING
SHOCK HAZARD
The exclamation point triangle is used to alert the user to important operating or maintenance instructions
The lightning bolt triangle is used to alert the user to the risk of electric shock
Accordance with the requirements of UK standards
Class I protection: Connect only to an earthed mains outlet
The product is for indoor use only
• Operate the device only after having familiarized yourself with its functions. Do not permit operation by per-
son not quali ed for operating the device. Most damages are the result of unprofessional operation.
• Please use the original packaging if the device is to be transported.
• For safety reasons, please be aware that all modi cations on the device are forbidden. Furthermore, any
other operation may lead to short-circuit, burns, electric shock, crash, etc. If this device will be operated in
any way different to the one described in this manual, the product may suffer damages and the guarantee
becomes void.
• To prevent electric shock, do not remove top or bottom covers.
• No user serviceable parts inside.
• Refer servicing to quali ed servicing personnel.
• Disconnect power cord before removing back panel cover to access gain switch.
• No naked fl ame sources, such as lighted candles, should be placed on the apparatus
• The unit should only be used in moderate climates
• This unit should be cleaned only with a dry cloth. Avoid solvents or other cleaning detergents
• A minimum distance of 0.5m around the unit must be kept to ensure suf cient ventilation and avoid over-
heating
• We strongly recommend the use of high-grade cables and connectors for the transmission of audio signals.
Inferior quality materials cannot supply acceptable audio quality or corrosion protection.
DISCONNECT DEVICE: Where the MAINS plug or an appliance coupler is used as the disconnect device, the
disconnect device shall remain readily operable.
WARNING! To reduce the risk of electric shock, do not expose this equipment to rain or moisture!
FEATURES
This mixer-ampli er is the perfect solution for small PA installations, offering a USB, SD player, Bluetooth and
FM tuner in a compact housing.
• USB, SD, Bluetooth & FM
• Remote control
• 2 balanced mic inputs
• Priority function on MIC1, 48V phantom power on MIC2
• 2 x AUX inputs
• Line output for an extra ampli er
2• APM1060 / APM1120

• High resolution display showing information on the current program
• Separate volume controls for all inputs
• Master volume
• Bass/treble tone controls
• Protections: Overheating, short-circuits, overload and peak current limiter
• Step-up transformer to comply with 70V & 100V line systems
• 4-16 Ohm output
• 100-230V~ & 24Vdc power supply
FRONT PANEL
(1) (2) (3) (4) (5) (6) (7) (8) (9)
(10)
(11)
(12)
(13)
(14) (15) (16) (17) (18)
(
[APM1060 ]
19)
(1) MULTIMEDIA CONTROLS:
OFF/ON: This button shall switch on or off the media player.
/ V-: This button shall return to the previous song.
Or keep pressing to reduce the volume.
▶ǁ: This button shall play or pause the song.
/ V+: This button shall skip to the next song
Or keep pressing to increase the volume.
MODE: Allows to choose the media source among USB, SD, FM, LINE, BLUETOOTH
(2) Display: Shows the working status of playing programmes.
(3) SD Input: Insert your SD card to play the les on your card.
(4) USB Input: Insert your USB stick to play the les on your stick
(5) Line-In: Connect an external audio source.
(6) MIC1 Knob: Allows to control the volume of MIC1 input on the front panel.
(7) MIC2 Knob: Allows to control the volume of MIC2 input on the rear panel.
(8) AUX1 Knob: Allows to control the volume of AUX1 input.
(9) AUX2 Knob: Allows to control the volume of AUX2 input.
(10) SIGNAL Indicator: Lights green when the amplier works.
(11) CLIP Indicator: Lights yellow when amplier is overdriven.
(12) PROT Indicator: Lights red when the amplier switches into protection mode.
(13) POWER Indicator: Lights blue when the amplier is powered on.
(14) MIC1 Connector: Plug in a 6.35mm jack.
APM1060 / APM1120 • 3

(15) MUSIC Knob: Allows to control the volume of the USB/SD/BT/FM media.
(16) BASS Knob: Controls the low frequencies of the amplier output.
(17) TREBLE Knob: Controls the high frequencies of the amplier output.
(18) MASTER Knob: Overall output level control.
(19) POWER: Power switch ON/OFF.
REAR PANEL
POWER IN
100-230V~50Hz/60Hz
⑺
⑻
⑴
⑵ ⑶ ⑷ ⑸ ⑹
WARNING - ATTENTION
RISK OF
ELECTRIC SHOCK
DO NOT OPEN
RISQUE DE
CHOC ELECTRIQUE. NE PAS OUVRIR
ASSEMBLED IN PRC FOR / ASSEMBLÉ EN RPC POUR LOTRONIC SA
AV. ZÉNOBE GRAMME 9 - B-1480 SAINTES
TYP/TYPE ...........................................................................APM1060
CODE .....................................................................................95-1005
SUPPLY- ALIMENT. ................................. AC: 100-230V~50Hz, 0.33A
....................................................................................DC: 24V 3.13A
BT freq. BT.................................................................. 2402-2480MHz
POWER-PUISS. ..........................................................................60W
OUTPUTS-SORTIES........................................................... 70V & 100V
(1) AC Power Inlet: This Switching Mode Power Supply accepts 100-230V~ with a standard 3-pin plug.
(2) AC Fuse compartment: Contains one main T3.15A fuse and one spare T3.15A fuse.
(3) DC Power Inlet: It accepts 24V𝌃power supply.
(4) Speaker Output Terminals: COM, 4~16Ω, 70V, 100V
It’s only possible to use one output at the same time,connecting more than one may damage internal
parts of the amplier. Each of 100V, 70V, 4~16Ω terminals must work with COM. Please refer to sepa-
rate pages in this manual for more details on the connection terminals.
(5) Line Output Connectors: These RCA connectors allow to add an additional amplier.
(6) EMC Input Connectors: These RCA connectors allow to receive the EMC/alarm signal overriding the
other inputs.
(7) AUX Input Connectors: These two groups of connectors accept stereo “L” & “R” RCA connections,
that are converted internally into mono mode.
(8) MIC2 Input: 6.35mm / XLR combo socket.
(9) Phantom Power Switch: Push to switch the MIC2 48V Phantom Power on or off.
(10) FM Antenna Jack: Connect the supplied FM antenna.
REMOTE CONTROL
1
2
3
4
5
6
7
8
9
10
11
1. Power (standby)
2. Mute
3. Volume+
4. Previous
5. Volume -
6. No function
7. Source selection (USB/BT/FM)
8. EQ selection
9. Next
10. Repeat ONE - Repeat ALL - Random
11. Number keys to select the song and radio station
4• APM1060 / APM1120

RECOMMENDATIONS FOR BATTERIES
This symbol indicates that used batteries should not be disposed of with household waste but deposited in separate collection points for recycling.
ATTENTION: Danger of explosion if battery is incorrectly placed. Only replace by the same or equivalent type.
WARNING
Do not swallow the battery. Danger of chemical burns.
Keep new and old batteries out of the reach of children.
If the battery compartment doesn’t close properly, stop using the product and keep it out of the reach of children.
If you are in doubt whether the batteries have been swallowed or introduced into any other part of the body, contact immediately a doctor.
FRONT PANEL CONNECTIONS REAR PANEL CONNECTIONS
SPEAKER CONNECTIONS
Important Notes:
This ampli er has different loudspeakers outputs of 100V, 70V and low impedance 4~16Ω.
It’s only possible to use one output at the same time, connecting more than one may damage internal parts
of the amplifier. Each of the 100V, 70V, 4~16Ω terminals must work with the COM (common) terminal.
100V LINE OUTPUT
This system is most commonly used for PA system. Only use 100 V line loudspeakers with transformers. All
loudspeakers are wired in parallel and the sum of their power must not exceed the rated output power of the
ampli er. It is advisable not to load the amplifier at more than 70% of its rated output power when using music
sources.
Speaker with 100V transforme
r
(-)
(+)
(-)
(+)
(-)
(+)
(
-
)
(+)
100V & COM Terminal
70V LINE OUTPUT
This system is common in the USA, it operates on the same principle as 100 V line except that at rated output
power the ampli er is 70V RMS on its output terminals.
AC
Power
Fuse
!
WARNI NG HIGH V OLTAGE IN SIDE TO PR EVENT E LECTR ICAL SHO CK
DO NOT R EMOVE AN Y COVER OR S CREW RE FER ALL SE RVICIN G
TO QUA LIFIE D SERVIC E PERSO NNEL DO N OTA LLOW TH IS PROD UCT
TO BE EX POSED TO R AIN OR MO ISTUR E DISCO NNECT TH IS MAIN S
PLUG F ROM THE S UPPLY SOC KET WHE N NOT IN USE
AC~
CD Player
CAUTION
RISK O F ELECT RIC SHO CK
DO NOT O PEN
VID EO OUTP UT
AUDIO OUTPUT
Gy Cb/Pb Cr /Pr VI DEO
R-AU DIO- L MR-M IXED -ML
RCA Jack
FM Antenn
a
POWER IN
100-230V~50Hz/60Hz
WARNING - ATTENTION
RISK OF
ELECTRIC SHOCK
DO NOT OPEN
RISQUE DE
CHOC ELECTRIQUE. NE PASOUVRIR
ASSEMBLEDIN PRC FOR / ASSEMBLÉ EN RPC POUR LOTRONIC SA
AV.ZÉNOBE GRAMME 9 - B-1480 SAINTES
TYP/TYPE ...........................................................................APM1060
CODE..................................................................................... 95-1005
SUPPLY- ALIMENT. .................................AC: 100-230V~50Hz, 0.33A
....................................................................................DC: 24V 3.13A
BTfreq. BT.................................................................. 2402-2480MHz
POWER-PUISS. ..........................................................................60W
OUTPUTS-SORTIES...........................................................70V & 100V
APM1060 / APM1120 • 5

70V & COM Terminal
Speaker with 70V transforme
r
(-)
(+)
(-)
(+)
(-)
(+)
(
-
)
(+)
4~16Ω LOW IMPEDANCE OUTPUT
This output allows connection of low impedance loudspeakers without transformers. When two or more loud-
speakers are used, ensure that they are wired in such a way in Series, or in Parallel, or in Series & Parallel
combination that total load impedance remains at 4 to 16Ω.
A. CONNECTION OF SPEAKERS IN PARALLEL: 4Ω & COM TERMINAL
8Ω = 4Ω TOTAL LOAD IMPEDANCE
2
(-)
(+)
(-)
(+)
8Ω
8Ω
B. CONNECTING SPEAKERS IN SERIES & PARALLEL COMBINATION: 8Ω & COM TERMINAL
(-)
(+)
(-)
(+)
(-)
(+)
(-)
(+)
8Ω8Ω
8Ω8Ω
8Ω X 2 = 8Ω
2
TOTAL LOAD IMPEDANCE
6• APM1060 / APM1120

BLUETOOTH PAIRING PROCEDURE
1. In order to enjoy music from a Bluetooth device on this amplier, the Bluetooth device must rst be
paired with this amplier. Once the Bluetooth device has been paired, it does not need to be paired
again. Press the MODE button on the front panel of the amplier to switch the input source to “Bluetoo-
th”.
2. Activate the Bluetooth mode on your mobile phone.
3. Select “APM amplier” in the list of found devices.
Perform the connection with your mobile phone close to the unit (about 1 m).
At the end of the pairing,the name “APM amplier” appears on the paired list of your mobile device.
NOTE: Enter 1688 if a password is required.
SPECIFICATIONS
MODEL APM1060 APM1120
Power 60W 120W
Outputs Low impedance 4-16 Ohms
Line 70V & 100V
Compatible media USB, SD, Bluetooth, FM, AUX
Compatible formats MP3, WMA, WAV, FLAC, APE
Bluetooth name APM amplier
BT freq 2402-2480MHz
Bluetooth E.I.R.P. 12.48dBm
FM freq. 87.5-107.5MHz
Freq. range 60Hz – 15kHz (+/-3dB)
THD <1% @ 1kHz, 1/3 of rated power)
S/N ratio >= 75dB
Tone controls Bass: 100Hz (+/-10dB) / Treble 10kHz (+/-10dB)
Protections Short-circuit, overload, overheating
Power supply AC: 100-230V~50Hz, 0.33A
DC: 24V 3.13A
Power lead 3x 0.75mm² x 1.5m
Dimensions 300 x 191 x 71mm
Weight 4.9kg 5.5kg
APM1060 / APM1120 • 7

MANUEL D’UTILISATION
CONSIGNES DE SÉCURITÉ
ATTENTION
NE PAS OUVRIR LE BOITIER
RISQUE DE CHOC ELECTRIQUE
Le triangle avec le point d’exclamation attire l’attention de l’utilisateur sur des instructions d’utilisation ou
de maintenance importantes.
L’éclair dans le triangle attire l’attention de l’utilisateur sur un risque de choc électrique
En conformité avec les exigences de la norme CE
Appareil de classe I: Brancher uniquement sur une prise avec terre
Utilisation uniquement à l’intérieur
• A n d’éviter un choc électrique, ne pas retirer le couvercle supérieur ou inférieur. Le boîtier ne contient pas
de pièces remplaçables par l’utilisateur. Toutes les réparations doivent être effectuées par du personnel qua-
li é. Débranchez le cordon d’alimentation avant d’ouvrir le panneau arrière pour accéder au contrôle de gain.
• Il convient de conserver une distance minimale de 0.5m autour de l’appareil pour une ventilation suf sante
• Ne pas poser de récipients remplis de liquide tel qu’un vase sur l’appareil
• Aucune source de chaleur ou de fl amme nue, telle que des bougies allumées, ne doit être placé sur l’appareil.
• L’appareil est conçu pour une utilisation dans des climats modérés.
• A n de réduire le risque de choc électrique, ne pas exposer cet appareil à l’humidité ou à la pluie !
• Nous recommandons vivement l’utilisation de câbles et connecteurs de haute qualité pour la transmission
des signaux audio. Un matériel de mauvaise qualité ne peut pas restituer une qualité audio acceptable et
une protection contre la corrosion.
DISPOSITIF DE COUPURE DU SECTEUR: Lorsque le cordon d’alimentation ou un coupleur d’appareil est utilisé
comme dispositif de déconnexion, ce dispositif doit rester facilement accessible.
CARACTERISTIQUES
• USB, SD, Bluetooth et FM
• Télécommande
• 2 entrées micro symétriques
• Entrée MIC1 avec fonction Priorité, MIC2 avec alimentation fantôme 48V
• 2 entrées AUX
• Sortie Ligne permettant de brancher un ampli supplémentaire
• Af cheur haute dé nition qui indique les informations sur le programme en cours
• Contrôles de volume individuels pour toutes les entrées
• Contrôle de volume général
• Réglage des graves et aigus
• Protections : Thermique, contre les courts-circuits, les surcharges et limiteur de courant de crête
• Transformateur-élévateur pour branchement sur des systèmes 70V et 100V
• Sortie 4-16 Ohms
• Alimentation 100-230V~ et 24Vdc
8• APM1060 / APM1120

PANNEAU AVANT
(1) (2) (3) (4) (5) (6) (7) (8) (9)
(10)
(11)
(12)
(13)
(14) (15) (16) (17) (18)
(
[APM1060 ]
19)
(1) CONTROLES MULTIMEDIA:
OFF/ON: Ce bouton allume et éteint le lecteur multimédia.
/ V-: Retour à la chanson précédent.
Ou maintenir appuyé pour réduire le volume.
▶ǁ: Lecture/pause de la chanson.
/ V+: Avance à la chanson suivante
Ou maintenir appuyé pour augmenter le volume.
MODE: Sélectionnez une source parmi USB, SD, FM, LIGNE, BLUETOOTH
(2) Display: Afche des informations sur le programme en cours.
(3) Entrée SD: Branchez votre carte SD pour lire les chiers.
(4) Entrée USB: Insérez votre clé USB pour lire les chiers sur votre clé
(5) Line-In : connectez une source audio externe.
(6) Bouton MIC1 : permet de contrôler le volume de l’entrée MIC1 sur le panneau avant.
(7) Bouton MIC2 : permet de contrôler le volume de l’entrée MIC2 sur le panneau arrière.
(8) Bouton AUX1 : Permet de contrôler le volume de l’entrée AUX1.
(9) Bouton AUX2 : Permet de contrôler le volume de l’entrée AUX2.
(10) Indicateur SIGNAL : S’allume en vert lorsque l’amplicateur fonctionne.
(11) Indicateur CLIP : S’allume en jaune lorsque l’amplicateur est saturé.
(12) Indicateur PROT : S’allume en rouge lorsque l’amplicateur passe en mode de protection.
(13) Indicateur POWER : S’allume en bleu lorsque l’amplicateur est sous tension.
(14) Connecteur MIC1 : Branchez une prise jack 6,35 mm.
(15) Bouton MUSIC : Permet de contrôler le volume du support USB/SD/BT/FM.
(16) Bouton BASS : contrôle les basses fréquences à la sortie de l’amplicateur.
(17) Bouton TREBLE : Contrôle les hautes fréquences à la sortie de l’amplicateur.
(18) Bouton MASTER : Contrôle général du niveau de sortie.
(19) POWER : interrupteur marche/arrêt.
APM1060 / APM1120 • 9

PANNEAU ARRIÈRE
POWER IN
100-230V~50Hz/60Hz
⑺⑻
⑴ ⑵ ⑶ ⑷ ⑸ ⑹
WARNING - ATTENTION
RISK OF
ELECTRIC SHOCK
DO NOT OPEN
RISQUE DE
CHOC ELECTRIQUE. NE PAS OUVRIR
ASSEMBLED IN PRC FOR / ASSEMBLÉ EN RPC POUR LOTRONIC SA
AV. ZÉNOBE GRAMME 9 - B-1480 SAINTES
TYP/TYPE ...........................................................................APM1060
CODE .....................................................................................95-1005
SUPPLY- ALIMENT. ................................. AC: 100-230V~50Hz, 0.33A
....................................................................................DC: 24V 3.13A
BT freq. BT.................................................................. 2402-2480MHz
POWER-PUISS. ..........................................................................60W
OUTPUTS-SORTIES........................................................... 70V & 100V
(1) Entrée d’alimentation CA : cette alimentation à découpage accepte 100-230 V~ avec une prise stan-
dard à 3 broches.
(2) Compartiment à fusibles CA : contient un fusible principal T3.15A et un fusible de rechange T3.15A.
(3) Entrée d’alimentation CC : elle accepte une alimentation 24 V𝌃.
(4) Bornes de sortie haut-parleur : COM, 4~16Ω, 70V, 100V
Il n’est possible d’utiliser qu’une seule sortie à la fois, en connecter plusieurs peut endommager les
pièces internes de l’amplicateur. Chacune des bornes 100V, 70V, 4~16Ω doit fonctionner avec COM.
Veuillez vous référer aux pages dédiées aux bornes de connexion.
(5) Connecteurs de sortie ligne : Pour brancher un amplicateur supplémentaire.
(6) Connecteurs d’entrée EMC : Ces connecteurs RCA permettent de recevoir un signal d’urgence/
d’alarme qui prend la main sur les autres entrées.
(7) Connecteurs d’entrée AUX : ces deux groupes de connecteurs acceptent les connexions RCA stéréo
« L » et « R », qui sont converties en interne en mode mono.
(8) Entrée MIC2 : prise combo 6,35 mm / XLR.
(9) Interrupteur d’alimentation fantôme : appuyez pour allumer ou éteindre l’alimentation fantôme MIC2
48V.
(10) Prise d’antenne FM : Connectez l’antenne FM fournie.
RECOMMENDATIONS POUR LES PILES
Ce pictogramme indique que les piles et batteries usagées ne doivent pas être jetées avec les ordures ménagères, mais déposées dans des points de
collecte séparés pour être recyclées.
AVERTISSEMENT: Danger d’explosion si la pile n’est pas remplacée correctement. Ne remplacer
que par le même type ou un type équivalent.
Conserver les piles neuves et usées hors de portée des enfants.
Si le compartiment pile ne se ferme pas correctement, cesser d’utiliser le produit et tenir hors de
portée des enfants.
En cas de doute concernant le fait que les piles pourraient avoir été avalées ou introduites dans une partie
quelconque du corps, consulter immédiatement un médecin
TÉLÉCOMMANDE
1. Alimentation (veille)
2. Muet
3. Volume+
4. Précédent
5. Le volume -
6. Pas de fonction
7. Sélection de la source (USB/BT/FM)
1
2
3
4
5
6
7
8
9
10
11
10 • APM1060 / APM1120

8. Sélection de l’égaliseur
9. Suivant
10. Répéter UNE FOIS - Répéter TOUT - Lecture Aléatoire
11. Touches numériques pour sélectionner la chanson et la station de radio
BRANCHEMENTS EN FAÇADE BRANCHEMENTS A L’ARRIÈRE
BRANCHEMENTS DES HAUT-PARLEURS
ATTENTION:
Cet ampli cateur possède différentes sorties de haut-parleurs de 100V, 70V et basse impédance 4~16Ω.
Il n’est possible d’utiliser qu’une seule sortie à la fois, en connecter plusieurs peut endommager les par-
ties internes de l’amplificateur. Chacune des bornes 100V, 70V, 4~16Ω doit fonctionner avec la borne COM
(commune).
SORTIE 100V
Ce système est le plus couramment utilisé pour le système de sonorisation. N’utilisez que des haut-parleurs
de ligne 100 V avec des transformateurs. Tous les haut-parleurs sont câblés en parallèle et la somme de
leurs puissances ne doit pas dépasser la puissance de sortie nominale de l’ampli cateur. Il est conseillé de
ne pas charger l’amplificateur à plus de 70 % de sa puissance de sortie nominale lors de l’utilisation de
sources musicales.
Speaker with 100V transforme
r
(-)
(+)
(-)
(+)
(-)
(+)
(
-
)
(+)
100V & COM Terminal
AC
Power
Fuse
!
WARNI NG HIGH V OLTAGE IN SIDE TO PR EVENT E LECTR ICAL SHO CK
DO NOT R EMOVE AN Y COVER OR S CREW RE FER ALL SE RVICIN G
TO QUA LIFIE D SERVIC E PERSO NNEL DO N OTA LLOW TH IS PROD UCT
TO BE EX POSED TO R AIN OR MO ISTUR E DISCO NNECT TH IS MAIN S
PLUG F ROM THE S UPPLY SOC KET WHE N NOT IN USE
AC~
CD Player
CAUTION
RISK O F ELECT RIC SHO CK
DO NOT O PEN
VID EO OUTP UT
AUDIO OUTPUT
Gy Cb/Pb Cr /Pr VI DEO
R-AU DIO- L MR-M IXED -ML
RCA Jack
FM Antenn
a
POWER IN
100-230V~50Hz/60Hz
WARNING - ATTENTION
RISK OF
ELECTRIC SHOCK
DO NOT OPEN
RISQUE DE
CHOC ELECTRIQUE. NE PASOUVRIR
ASSEMBLEDIN PRC FOR / ASSEMBLÉ EN RPC POUR LOTRONIC SA
AV.ZÉNOBE GRAMME 9 - B-1480 SAINTES
TYP/TYPE ...........................................................................APM1060
CODE..................................................................................... 95-1005
SUPPLY- ALIMENT. .................................AC: 100-230V~50Hz, 0.33A
....................................................................................DC: 24V 3.13A
BTfreq. BT.................................................................. 2402-2480MHz
POWER-PUISS. ..........................................................................60W
OUTPUTS-SORTIES...........................................................70V & 100V
APM1060 / APM1120 • 11

SORTIE 70V
Ce système est courant aux USA.
Il fonctionne sur le même principe
qu’une ligne 100 V sauf que la puis-
sance de sortie nominale l’amplica-
teur est de 70V RMS sur ses bornes
de sortie.
SORTIE BASSE IMPÉDANCE 4~16Ω
Cette sortie permet le raccordement d’enceintes basse impédance sans transformateur. Lorsque deux haut-par-
leurs ou plus sont utilisés, assurez-vous qu’ils sont câblés de telle manière en série, ou en parallèle, ou en
combinaison série et parallèle que l’impédance de charge totale reste de 4 à 16 Ω.
A. BRANCHEMENTS DE HAUT-PARLEURS EN PARALLÈLE: BORNES 4Ω & COM
8Ω = 4Ω IMPÉDANCE DE CHARGE TOTALE
2
(-)
(+)
(-)
(+)
8Ω
8Ω
B. BRANCHEMENT COMBINE DE HAUT-PARLEURS EN SÉRIE & EN PARALLÈLE: BORNES 8Ω & COM
(-)
(+)
(-)
(+)
(-)
(+)
(-)
(+)
8Ω8Ω
8Ω8Ω
8Ω X 2 = 8Ω
2
IMPEDANCE DE CHARGE TOTALE
70V & COM Terminal
Speaker with 70V transforme
r
(-)
(+)
(-)
(+)
(-)
(+)
(
-
)
(+)
12 • APM1060 / APM1120

APPAIRAGE BLUETOOTH
1. Pour proter de la musique d’un appareil Bluetooth sur cet amplicateur, l’appareil Bluetooth doit
d’abord être couplé avec cet amplicateur. Une fois que l’appareil Bluetooth a été couplé, il se recon-
nectera automatiquement à chaque nouvelle utilisation. Appuyez sur le bouton MODE sur le panneau
avant de l’amplicateur pour basculer la source d’entrée sur « Bluetooth ».
2. Activez le mode Bluetooth sur votre téléphone portable.
3. Sélectionnez « APM amplier » dans la liste des appareils trouvés.
4. Effectuez la connexion avec votre téléphone portable à proximité de l’appareil (environ 1 m).
5. A la n de l’appairage, le nom « APM amplier » apparaît sur la liste appairée de votre appareil mobile.
NOTE: Si un mot de passe vous est demandé, entrez 1688.
CARACTÉRISTIQUES TECHNIQUES
MODELE APM1060 APM1120
Puissance 60W 120W
Sorties Basse impédance 4-16 Ohms
Ligne 70V & 100V
Fonctions USB, SD, Bluetooth, FM, AUX
Formats compatibles MP3, WMA, WAV, FLAC, APE
Nom Bluetooth APM amplier
Fréq. BT 2402-2480MHz
P.I.R.E. Bluetooth 12.48dBm
Bande FM 87.5-107.5MHz
Bande passante 60Hz – 15kHz (+/-3dB)
THD <1% @ 1kHz, 1/3 de la puissance nom.)
Rapport S/B >= 75dB
Contrôles de tonalité Basses: 100Hz (+/-10dB) / Aigus 10kHz (+/-10dB)
Protections Courts-circuits, surcharges, surchauffes
Alimentation AC: 100-230V~50Hz, 0.33A
DC: 24V 3.13A
Cordon secteur 3x 0.75mm² x 1.5m
Dimensions 300 x 191 x 71mm
Poids 4.9kg 5.5kg
APM1060 / APM1120 • 13

BEDIENUNGSANLEITUNG
SICHERHEITSVORSCHRIFTEN
VORSICHT
NICHT DAS GEHÄUSE ÖFFNEN
STROMSCHLAGGEFAHR
Das Dreieck mit dem Ausrufezeichen lenkt die Aufmerksamkeit des Benutzers auf wichtige Bedienungs-
und Wartungshinweise
Der Blitz im Dreieck lenkt die Aufmerksamkeit des Benutzers auf ein Stromschlagrisiko
Entspricht den Richtlinien der CE
Nur für Innengebrauch
Schutzklasse I: Nur an eine geerdete Netzsteckdose mit Schutzkontakt anschließen
• Die Netzspannung muss der Versorgungsspannung des Geräts entsprechen.
• Benutzen Sie das Gerät nur dann, wenn Sie mit seinen Funktionen vertraut sind. Alle Personen, die mit der
Bedienung, Installation und Wartung des Geräts zu tun haben, müssen ausgebildet und quali ziert sein und
diese Bedienungshinweise beachten.
• Das Gerät vorzugsweise in der Originalverpackung transportieren.
• Aus Sicherheitsgründen sind Veränderungen jeglicher Art verboten. Zudem kann falsche Bedienung zu Kurz-
schluss, Verbrennungen, Stromschlag, usw. führen. Bei unsachgemäßem Gebrauch verfällt der Garantie-
anspruch
• Um Stromschlag zu vermeiden, nicht das Gehäuse öffnen. Es enthält keine vom Benutzer auswechselbaren
Teile.
• Reparaturen dürfen nur von Fachpersonal ausgeführt werden.
• Netzkabel abziehen, bevor Sie die Rückwand öffnen.
• Keine offene Flamme wie brennende Kerzen u.ä. auf das Gerät stellen.
• Nur in gemässtigten Klimazonen benutzen.
• Nur mit einem trockenen Tuch abwischen. Keine Lösungs- oder Scheuermittel verwenden.
• Einen Freiraum von ca. 0,5m um das Gerät lassen, um für ausreichende Kühlung zu sorgen und Überhitzung
zu vermeiden.
• Benutzen Sie nur hochwertige Kabel und Verbinder zur Übertragung der Audiosignale. Minderwertiges Ma-
terial führt zu Qualitätseinbussen und Korrosion.
• Das Netzkabel darf nie gequetscht oder beschädigt werden. Ein defektes Kabel sofort von einem Fachmann
ersetzen lassen.
• Das Gerät vom Netz trennen, wenn es nicht benutzt wird oder bevor Sie es reinigen. Nur am Stecker an-
fassen, niemals am Kabel ziehen.
NETZTRENNUNGSVORRICHTUNGEN
Wenn das Gerät über den Netzstecker ausgeschaltet wird, muss die Steckdose jederzeit leicht zugänglich
bleiben
Wenn das Gerät über einen Schalter ausgeschaltet wird, muss dieser klar gekennzeichnet und leicht zugäng-
lich sein
• WARNUNG! Um Stromschlag zu vermeiden, das Gerät vor Regen und Feuchtigkeit schützen!
14 • APM1060 / APM1120

FEATURES
• USB, SD, Bluetooth & FM
• Fernbedienung
• 2 symmetrische Mikrofoneingänge
• Vorrangschaltung auf MIC1, 48V Phantomspeisung auf MIC2
• 2 AUX Eingänge
• Line Ausgang zum Anschluss eines zusätzlichen Verstärkers
• Informationen über das laufende Programm erscheinen auf dem High Resolution Display
• Separate Lautstärkeregler für alle Eingänge
• Master Lautstärkeregler
• Bass/Treble Regler
• Schutzschaltungen: Überhitzung, Kurschluss, Überlastung und Strombegrenzer
• Step-up Trafo für 70V & 100V Line Anlagen
• 4-16 Ohm Ausgang
• 100-230V~ & 24Vdc Speisung
FRONTSEITE
(1) (2) (3) (4) (5) (6) (7) (8) (9)
(10)
(11)
(12)
(13)
(14) (15) (16) (17) (18)
(
[APM1060 ]
19)
(1) MULTIMEDIA REGLER:
OFF/ON: Ein/Aus Schalter des Mediaplayers.
/ V-: Zurück zum vorigen Titel. Gedrückt halten, um die Lautstärke zu mindern.
▶ǁ: Abspielen/Pause
/ V+: Weiter zum nächsten Titel. Gedrückt halten, um die Lautstärke zu erhöhen.
MODE: Wahl der Betriebsart zwischen USB, SD, FM, LINE, BLUETOOTH
(2) Display: Zeigt Informationen über das laufende Programm an.
(3) SD Slot: Steckplatz für die SD Karte.
(4) USB Slot: Steckplatz für den USB Stick
(5) Line-In: Zum Anschluss einer externen Audioquelle.
(6) MIC1 Regler: Stellt die Lautstärke von MIC1 auf der Frontblende ein.
(7) MIC2 Regler: Stellt die Lautstärke von MIC2 auf der Rückseite ein.
(8) AUX1-Knopf: Lautstärkeregler von AUX1.
(9) AUX2-Knopf: Lautstärkeregler von AUX2.
APM1060 / APM1120 • 15

(10) SIGNAL-Anzeige: Leuchtet grün, wenn der Verstärker arbeitet.
(11) CLIP-Anzeige: Leuchtet gelb, wenn der Verstärker übersteuert ist.
(12) PROT-Anzeige: Leuchtet rot, wenn der Verstärker in den Schutzmodus wechselt.
(13) POWER-Anzeige: Leuchtet blau, wenn der Verstärker eingeschaltet ist.
(14) MIC1-Anschluss: Schließen Sie einen 6,35-mm-Klinkenstecker an.
(15) MUSIC-Knopf: Lautstärkeregler von USB/SD/BT/FM-Medien.
(16) BASS-Regler: Steuert die niedrigen Frequenzen des Verstärkerausgangs.
(17) TREBLE-Regler: Steuert die hohen Frequenzen des Verstärkerausgangs.
(18) MASTER-Regler: Gesamtsteuerung des Ausgangspegels.
(19) POWER: Netzschalter EIN/AUS.
RÜCKSEITE
POWER IN
100-230V~50Hz/60Hz
⑺⑻
⑴ ⑵ ⑶ ⑷ ⑸ ⑹
WARNING - ATTENTION
RISK OF
ELECTRIC SHOCK
DO NOT OPEN
RISQUE DE
CHOC ELECTRIQUE. NE PAS OUVRIR
ASSEMBLED IN PRC FOR / ASSEMBLÉ EN RPC POUR LOTRONIC SA
AV. ZÉNOBE GRAMME 9 - B-1480 SAINTES
TYP/TYPE ...........................................................................APM1060
CODE .....................................................................................95-1005
SUPPLY- ALIMENT. ................................. AC: 100-230V~50Hz, 0.33A
....................................................................................DC: 24V 3.13A
BT freq. BT.................................................................. 2402-2480MHz
POWER-PUISS. ..........................................................................60W
OUTPUTS-SORTIES........................................................... 70V & 100V
1. Wechselstromeingang: Dieses Schaltnetzteil akzeptiert 100-230 V~ mit einem 3-poligen Standardstecker.
2. Wechselstrom-Sicherungsfach: Enthält eine Hauptsicherung T3.15A und eine Ersatzsicherung T3.15A.
3. DC-Stromeingang: Akzeptiert eine 24-V𝌃-Stromversorgung.
4. Lautsprecherausgangsanschlüsse: COM, 4~16Ω, 70V, 100V
Es ist nur möglich, einen Ausgang gleichzeitig zu verwenden, der Anschluss von mehr als einem kann
interne Teile des Verstärkers beschädigen. Jeder der 100V, 70V, 4~16Ω Anschlüsse muss mit COM funk-
tionieren. Weitere Einzelheiten zu den Anschlussklemmen entnehmen Sie bitte den separaten Seiten in
diesem Handbuch.
5. Line-Ausgänge: Diese Cinch-Anschlüsse ermöglichen das Hinzufügen eines zusätzlichen Verstärkers.
6. EMC-Eingangsanschlüsse: Diese RCA-Anschlüsse ermöglichen den Empfang des EMC-/Alarmsignals,
das vor allen anderen Eingängen Vorrang hat.
7. AUX-Eingangsanschlüsse: Diese beiden Gruppen von Anschlüssen akzeptieren Stereo „L“- und „R“-
Cinch-Anschlüsse, die intern in den Mono-Modus umgewandelt werden.
8. MIC2-Eingang: 6,35 mm / XLR-Kombibuchse.
9. Phantomspeisungsschalter: Drücken, um die 48V Phantomspeisung von MIC2 ein- oder auszuschalten.
10. UKW-Antennenbuchse: Schließen Sie die mitgelieferte UKW-Antenne an.
BENUTZUNG DER FERNBEDIENUNG
Die Fernbedienung hat eine Reichweite von 2m in einem Winkel von 30° zum Sensor. Richten Sie sie immer
genau auf den Sensor. Der Sensor bendet sich auf dem Display. Stellen Sie keine Hindernisse zwischen die
Fernbedienung und den Sensor. Wenn sich die Fernbedienung oder der Sensor unter einer starken Lichtquelle
benden, kann die Übertragung gestört sein.
Wenn die Fernbedienung nicht mehr einwandfrei funktioniert, wechseln Sie die Batterie.
16 • APM1060 / APM1120

FERNBEDIENUNG
1
2
3
4
5
6
7
8
9
10
11
1. Ein/Aus (Standby)
2. Stummschaltung
3. Lautstärke+
4. Zurück
5. Lautstärke -
6. Keine Funktion
7. Quellenauswahl (USB/BT/FM)
8. EQ-Auswahl
9. Weiter
10. EINEN Titel wiederholen - ALLE Titel wiederholen - Zufallsgenerator
11. Zifferntasten zur direkten Wahl eines Songs bzw. Radiosenders
HINWEISE FÜR BATTERIEN
Dieses Zeichen weist darauf hin, dass verbrauchte Batterien und Akkus nicht mit dem Hausmüll entsorgt werden dürfen, sondern zu separaten
Sammelstellen für das Recycling gebracht werden müssen.
WARNUNG
Bei falsch eingesetzter Batterie besteht Explosionsgefahr. Batterie nur durch eine gleichwertige ersetzen.
Nicht die Batterie verschlucken. Es besteht die Gefahr von chemischen Verbrennungen.
Alte und neue Batterie von Kindern fernhalten. Wenn das Batteriefach nicht richtig schließt, darf das Gerät nicht mehr benutzt und muss außerhalb
der Reichweite von Kindern aufbewahrt werden. Wenn Sie Zweifel haben, ob die Batterie verschluckt oder in irgendein anderes Körperteil eingeführt
wurde, rufen Sie sofort ärztliche Hilfe.
ANSCHLÜSSE AN DER FRONTBLENDE ANSCHLÜSSE AUF DER RÜCKSEITE
LAUTSPRECHERANSCHLÛSSE
Wichtige Hinweise:
Dieser Verstärker besitzt verschiedene Lautsprecherausgänge von 100V, 70V sowie einen niederohmigen
von 4~16Ω.
Es darf nur ein Ausgang zurzeit benutzt werden. Der Anschluss mehrerer Ausgänge kann interne Teile des
Verstärkers beschädigen. Jeder der 100V, 70V, 4~16Ω Anschlüsse muss auch an den COM (Common) An-
schluss angeschlossen werden.
100V LINE-AUSGANG
Dieses System wird am häu gsten für PA-Systeme verwendet. Verwenden Sie nur 100-V-Line-Laut-
sprecher mit Trafos. Alle Lautsprecher sind parallel geschaltet und die Summe ihrer Leistung darf
AC
Power
Fuse
!
WARNI NG HIGH V OLTAGE IN SIDE TO PR EVENT E LECTR ICAL SHO CK
DO NOT R EMOVE AN Y COVER OR S CREW RE FER ALL SE RVICIN G
TO QUA LIFIE D SERVIC E PERSO NNEL DO N OTA LLOW TH IS PROD UCT
TO BE EX POSED TO R AIN OR MO ISTUR E DISCO NNECT TH IS MAIN S
PLUG F ROM THE S UPPLY SOC KET WHE N NOT IN USE
AC~
CD Player
CAUTION
RISK O F ELECT RIC SHO CK
DO NOT O PEN
VID EO OUTP UT
AUDIO OUTPUT
Gy Cb/Pb Cr /Pr VI DEO
R-AU DIO- L MR-M IXED -ML
RCA Jack
FM Antenn
a
POWER IN
100-230V~50Hz/60Hz
WARNING - ATTENTION
RISK OF
ELECTRIC SHOCK
DO NOT OPEN
RISQUE DE
CHOC ELECTRIQUE. NE PASOUVRIR
ASSEMBLEDIN PRC FOR / ASSEMBLÉ EN RPC POUR LOTRONIC SA
AV.ZÉNOBE GRAMME 9 - B-1480 SAINTES
TYP/TYPE ...........................................................................APM1060
CODE..................................................................................... 95-1005
SUPPLY- ALIMENT. .................................AC: 100-230V~50Hz, 0.33A
....................................................................................DC: 24V 3.13A
BTfreq. BT.................................................................. 2402-2480MHz
POWER-PUISS. ..........................................................................60W
OUTPUTS-SORTIES...........................................................70V & 100V
APM1060 / APM1120 • 17

die Nennausgangsleistung des Verstärkers nicht überschreiten. Es wird empfohlen, den Verstärker
bei Verwendung von Musikquellen nicht mit mehr als 70 % seiner Nennausgangsleistung zu belasten.
Speaker with 100V transforme
r
(-)
(+)
(-)
(+)
(-)
(+)
(
-
)
(+)
100V & COM Terminal
70V LINE AUSGANG
Dieses System ist in den USA verbreitet und funktioniert nach dem gleichen Prinzip wie 100 V-Technik, außer
dass bei Nennausgangsleistung 70V RMS an den Ausgangsklemmen anliegen.
70V & COM Terminal
Speaker with 70V transforme
r
(-)
(+)
(-)
(+)
(-)
(+)
(
-
)
(+)
NIEDEROHMIGER 4~16Ω AUSGANG
Dieser Ausgang ermöglicht den Anschluss von niederohmigen Lautsprechern ohne Trafo. Wenn zwei oder mehr
Lautsprecher verwendet werden, müssen diese so in Serie, parallel oder in einer Kombination aus Serie und
Parallel verdrahtet werden, dass die Gesamtlastimpedanz zwischen 4 und 16 bleibt.
A. PARALLEL GESCHLOSSENEN LAUTSPRECHER: 4Ω & COM TERMINAL
8Ω = 4Ω GESAMTE LASTIMPEDANZ
2
(-)
(+)
(-)
(+)
8Ω
8Ω
18 • APM1060 / APM1120

B. KOMBINATION AUS PARALLEL UND SERIELL GESCHLOSSENEN LAUTSPRECHERN: 8Ω & COM TERMINAL
(-)
(+)
(-)
(+)
(-)
(+)
(-)
(+)
8Ω8Ω
8Ω8Ω
BLUETOOTH VERBINDUNG HERSTELLEN
1. Um Musik von einem Bluetooth-Gerät auf diesem Verstärker genießen zu können, muss das Bluetooth-
Gerät zuerst mit diesem Verstärker gekoppelt werden. Nachdem das Bluetooth-Gerät gekoppelt wurde,
muss es nicht erneut gekoppelt werden. Drücken Sie die MODE-Taste auf der Vorderseite des Verstär-
kers, um die Eingangsquelle auf „Bluetooth“ umzuschalten.
2. Aktivieren Sie den Bluetooth-Modus Ihres Mobiltelefons. Wählen Sie in der Liste der gefundenen Geräte
„APM-Verstärker“.
3. Stellen Sie die Verbindung mit Ihrem Mobiltelefon in der Nähe des Geräts her (ca. 1 m).
HINWEIS: Geben Sie 1688 ein, wenn ein Passwort angefordert wird.
TECHNISCHE DATEN
MODELL APM1060 APM1120
Leistung 60W 120W
Ausgänge Niederohmig 4-16 Ohm
Line 70V & 100V
Musikquellen USB, SD, Bluetooth, FM, AUX
Compatible formats MP3, WMA, WAV, FLAC, APE
Bluetooth Name APM amplier
BT Frequenz 2402-2480MHz
Bluetooth E.I.R.P. 2dBm
FM Band 87.5-107.5MHz
Frequenzbereich 60Hz – 15kHz (+/-3dB)
Klirrfaktor THD <1% @ 1kHz, 1/3 der Nennleistung)
S/R Abstand >= 75dB
Klangregler Bass: 100Hz (+/-10dB) / Treble 10kHz (+/-10dB)
Schutzschaltungen Kurzschluss, Überlast, Überhitzung
Versorgung AC: 100-230V~50Hz, 0.33A
DC: 24V 3.13A
Netzkabel 3x 0.75mm² x 1.5m
Abmessungen 300 x 191 x 71mm
Gewicht 4.9kg 5.5kg
8Ω X 2 = 8Ω
2
GESAMTE LASTIMPEDANZ
APM1060 / APM1120 • 19

HANDLEIDING
VEILIGHEIDSINSTRUCTIES
LET OP
NIET DE BEHUIZING OPENEN
GEVAAR VOOR ELECTRISCHE SCHOKKEN
De driehoek met het uitroepteken vestigt de aandacht van de gebruiker op belangrijke gebruik- of onder-
houdsinstructies.
De bliksem in de driehoek vestigt de aandacht van de gebruiker op een elektrisch schokrisico
Voldoet aan de europese CE richtlijnen
Alléén voor gebruik binnenshuis
Elektrische veiligheidsklasse I - alleen op een stopcontact met randaarde aansluiten
• Gebruik het apparaat alleen nadat u zichzelf vertrouwd hebt gemaakt met de functies ervan. Sta niet toe
dat onbevoegde personen het apparaat gebruiken. De meeste schade vloeit voort uit een verkeerd gebruik.
• Gebruik de originele verpakking als het apparaat moet worden vervoerd.
• Om veiligheidsredenen zijn alle wijzigingen aan het apparaat verboden. Bovendien kan elk ander gebruik
leiden tot kortsluitingen, elektrische schokken, ongelukken, enz. Als dit apparaat op een andere manier
wordt gebruikt dan beschreven in deze gebruiksaanwijzing kan het product beschadigd raken en de garantie
vervallen.
• Om elektrische schokken te voorkomen, niet de boven of onderafdekking verwijderen.
• Het toestel bevat geen van de gebruiker vervangbare onderdelen.
• Laat alle reparatie van een ervarene technicus uitvoeren.
• Ontkoppel het toestel van het lichtnet alvorens u het achterpaneel verwijdert om toegang toe de gain scha-
kelaar te hebben.
• Plaats geen open vuurbronnen, zoals brandende kaarsen, op het apparaat
• Het apparaat mag alleen worden gebruikt in gematigde klimaten
• Dit apparaat mag alleen worden schoongemaakt met een droge doek. Vermijd oplosmiddelen of andere
schoonmaakmiddelen
• Er moet een minimale afstand van 0,5 m rond de unit worden aangehouden om voor voldoende ventilatie te
zorgen en oververhitting te voorkomen
• WAARSCHUWING! Om gevaar van elektrische schokken te vermijden stel het toestel niet bloot aan regen
of vochtigheid.
Het is aanbevolen alleen hoogwaardige kabels en connectoren voor de transmissie van audio signalen te gebruiken.
Materialen van slechte kwaliteit leveren geen voldoende audio kwaliteit en bescherming tegen corrosie.
ONTKOPPELINGSAPPARAAT: Wanneer de netstekker of een apparaatkoppeling wordt gebruikt als ontkoppe-
lapparaat, moet het ontkoppelapparaat gemakkelijk te bedienen blijven.
FEATURES
Deze mixer-versterker is de perfecte oplossing voor kleine PA-installaties met een USB, SD-player, Bluetooth
en FM-tuner in een compacte behuizing.
• USB, SD, Bluetooth & FM
20 • APM1060 / APM1120
This manual suits for next models
3
Table of contents
Languages:
Other BST Amplifier manuals
Popular Amplifier manuals by other brands
NEOHIPO
NEOHIPO AM02 user manual
Tabor Electronics
Tabor Electronics 9250 user manual

Rotel
Rotel RTC-950AX owner's manual

Marshall Amplification
Marshall Amplification ORIGIN 20 user manual

NAD
NAD 3130 Instructions for installation and operation
Ampetronic
Ampetronic ILD20 Installation & Commissioning Handbook
