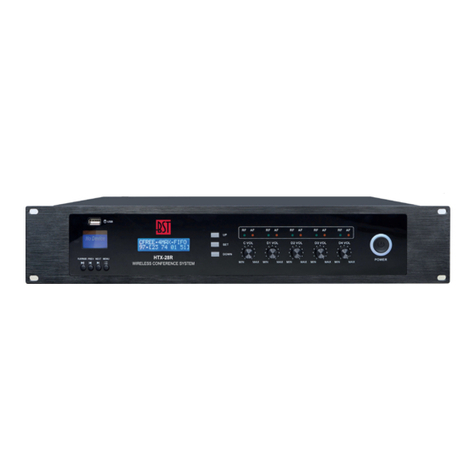
BST HTX-38R User manual

UHF CONFERENCE SYSTEM WITH INTEGRATED SPEAKER
SYSTEME DE CONFERENCE UHF AVEC HAUT-PARLEUR INTEGRE
INSTRUCTION MANUAL • EN • p. 2
MANUEL D‘UTILISATION • FR • p. 17
HTX-38R/C/D/B
CODE: 95-3048 / 95-3045 / 95-3046 / 95-3044

SAFETY RECOMMENDATIONS
CAUTION
DO NOT OPEN THE HOUSING
SHOCK HAZARD
The exclamation point triangle is used to alert the user to important operating or maintenance instruc-
tions
The lightning bolt triangle is used to alert the user to the risk of electric shock
Accordance with the requirements of UK standards
Class I protection: Connect only to an earthed mains outlet
The product is for indoor use only
• This device is only allowed to be operated with an alternating current of max. 110-240V~ 50/60Hz and was
designed for indoor use only.
• This is a wireless communication system, use UHF band carrier frequency. We recommend that users
consult local radio management committee to choose the appropriate and legally available frequency, in
order to avoid RF interference
• If the units demonstrate any problems, such as abnormal sound, smoke, heat from or damage to power
cables, disconnect the power plug from the outlet and contact your sales representative.
• Operate the device only after having familiarized yourself with its functions. Do not permit operation by
person not qualied for operating the device. Most damages are the result of unprofessional operation.
• Please use the original packaging if the device is to be transported.
• For safety reasons, please be aware that all modications on the device are forbidden. Furthermore, any
other operation may lead to short-circuit, burns, electric shock, crash, etc. If this device will be operated in
any way different to the one described in this manual, the product may suffer damages and the guarantee
becomes void.
• To prevent electric shock, do not remove top or bottom covers.
• No user serviceable parts inside.
• Refer servicing to qualied servicing personnel.
• Disconnect power cord before removing back panel cover to access gain switch.
• Uncoil the power cables before use, Do not bundle the cables during use, or e with nails. (Receiver unit,
Battery charger)
• Do not pull on the cable. Hold the plug section and insert/remove it in a straight line, damaged cables may
result in electric shock, malfunction, or re. (Receiver unit, Battery charger)
• No naked ame sources, such as lighted candles, should be placed on the apparatus
• The unit should only be used in moderate climates
• This unit should be cleaned only with a dry cloth. Avoid solvents or other cleaning detergents
• A minimum distance of 0.5m around the unit must be kept to ensure sufcient ventilation and avoid over-
heating
• We strongly recommend the use of high-grade cables and connectors for the transmission of audio sig-
nals. Inferior quality materials cannot supply acceptable audio quality or corrosion protection.
2• HTX-38R

DISCONNECT DEVICE: Where the MAINS plug or an appliance coupler is used as the disconnect device,
the disconnect device shall remain readily operable.
WARNING! To reduce the risk of electric shock, do not expose this equipment to rain or moisture!
Usage restrictions
The product uses a UHF transmission system, that is exclusively reserved for professional use. An ofcial
user license or authorization from local authorities may be required in some countries. Consult the competent
authorities for its use, which remains the sole responsibility of its user (UK – BE – PT – D – NL – LU – GR –
SP – RO).
Overview
With high exibility and reliability, our UHF wireless conference system is an ideal choice for mobile confe-
rence systems. It offers simple operation, compact structures. The wireless conference system can be
perfectly integrated into any meeting rooms, without additional wiring. It’s the best wireless conference
solution for small-scale conferences.
1. System Configuration and description
Wireless meeting system receiver unit, wireless chairman microphone, wireless delegate microphone, bat-
tery charger, etc.
1.1 System features
• Supported Modes: Limit (1/2/3/4), FIFO (1/2/3/4), Chairman Only, microphones in one system up to 999 units
for discussion, 256 unit for video camera tracking, 5 microphones can be turned on at the same time.
• Microphones can be operated on either their built-in rechargeable batteries. Battery life approx. 8 hours
during speech and approx. 30 hours when standby.
• Wireless communication system eliminates the need of connecting the conference units. Installation can
be done quick and smart without cumbersome arrangements.
• Adopt multi-channel high band and intermediate band frequency selective ltering, fully eliminate inter-
ference signal
• Built-in feedback eliminating technology which can decrease the feedback and noise effectively
• Built-in multiple noise detecting circuit and TONE-LOCK system to make sure the system has strong an-
ti-jamming function
• Operation distance up to 100 meters with the best condition, 60 meters in normal condition.
• Support video camera auto-track function with video processor
• Built-in recording module to record and play audio
1.2 Wireless meeting system receiver unit
• Support Mode: Limit (1/2/3/4), FIFO (1/2/3/4), Chairman Only
• Support video camera auto-track with video processor
HTX-38R • 3

• 160x32 dot matrix LCD display system information
• Receiver can control the microphone status when powered off, such as clear or shutting off all micro-
phones.
• Designed accordance to UL and CE standards
• Built-in USB recording module
• Installation: 19-inch frame
1.2.3 Schematic diagram of wireless meeting system receiver unit
1. Power switch
2. RF/Audio Level indicator ( First channel only for chairman mic, the last four channels for delegate mic)
3. Volume knob of chairman microphone (Channel 1)
4. Volume knob of delegate microphone (Channel 2)
5. Volume knob of delegate microphone (Channel 3)
6. Volume knob of delegate microphone (Channel 4)
7. Volume knob of delegate microphone (Channel 5)
8. Setting key/check channel frequency
9. Menu
10. Setting key/check channel frequency
11. LCD (Display current mode, frequency point of each channel)
12. Function Key of Recording Module: Four function key of recording module: PLAY/STOP, PREVIOUS,
NEXT, MENU
13. LCD display: To display current work mode of the recording module
14. USB slot: Connect a USB drive to record and display audio
15. ANT DATA: System data control antenna interface
16. DATA: External video processor connection interface
17. DC Power input
18. MIX OUT: Mixed audio output
4• HTX-38R

19. MIX BAL: Mixed audio balance output
20. ANT B: Delegate mic RF antenna interface
21. ANT B: Delegate mic RF antenna interface
22. ANT A: Chairman mic RF antenna interface
23. Microphone Speaker on/off switch
24. Audio in connector
25. ANT: Microphone speaker audio RF antenna connector
Specifications of the Main Unit
Power supply........................................................ 12-15V𝌃1A via 110-240V~50/60Hz mains adaptor
Consumption...........................................................................................................................................7W
Audio channel
Transmission method...................................................................................... UHF Wireless (one way)
Audio channel ................................................................................................ 5 (1 chairman,4 delegate)
Carrier frequency band................................................................................................610MHz~665MHz
Modulation method................................................................................................................................FM
Receiving sensitivity................................................................................................................... -100dBM
Audio gain .............................................................................................................................................. ≤20
Frequency response...............................................................................................................50Hz-15KHz
S/N Ratio............................................................................................................................................ >85dB
T.H.D....................................................................................................................................................<0.8%
Data channel
Transmission method.............................................................................................. Wireless (two-way)
Data channel.............................................................................................................................................16
Frequency Range..................................................................................................422.4MHz ~ 438.4MHz
Modulation method...............................................................................................................................FSK
Receiving sensitivity................................................................................................................... -100dBM
Transmission consumption ........................................................................................................... ≤6dBm
Communication rate ................................................................................................................... 100KBPS
Frequency deviation........................................................................................................................ <0.002
Range............................................................................................................ 100m in optimal conditions,
............................................................................................................................60m in normal conditions
Dimensions..................................................................................................................... 485 x 355 x 85mm
Weight.................................................................................................................................................. 7.2kg
CAUTION on handling of the microphones
• Do not grasp the microphone to lift or pull on the microphone unit: pick up the unit by its base
• Slowly bend and straighten the exible part of the microphone. Do not bend it with excessive force
• Do not drop the unit
• If you do not use the unit for long periods of time, remove the battery
• The dedicated lithium-ion battery should be used
HTX-38R • 5

• Do not place any obstructions around the microphone units
• When the microphone units are too close together, high sound volume may cause acoustic feedback, In
this case, increase the space between the conference units or turn down the volume
• After the battery has been removed and replaced, conrm that the power LED turns off
MICROPHONES
Features of wireless delegate microphone HTX-38D
• Electret condenser microphone tted with windshield cover
• LCD display microphone ID, battery level, microphone state, control channel, etc.
• Equipped with microphone on/off key and indicator.
• Equipped with 3 function keys to set microphone id, control channel, volume level and battery status.
• Built-in speaker and volume control
• Microphone will shut off the power or in standby if receiver powered off.
Features of wireless chairman microphone HTX-38C
Including the functions of the delegate unit, chairman unit has other following functions:
• Chairman microphone can turn on any time.
• If the system support video camera auto-track function, chairman microphone ID number should be 1
• Priority function: chairman can turn off delegate microphones by clear key any time
• Chairman only mode: Delegate microphone can not be turned on again after chairman microphone press
priority button. The chairman need quit this mode rst, and then delegate microphone can be turned on
again
SCHEMATIC DIAGRAM OF THE MICROPHONES
1. Unidirectional electret MIC
2. Annular red indicator lamp to show the microphone state.
3. Mic volume +/ up key
4. Mic volume up -/down key
5. Mute/Set key
6. MIC ON/OFF key
7. Chairman Priority
8. LCD
9. Microphone power switch
10. Microphone speaker
6• HTX-38R

11. DC Power input jack
12. Phone 3.5mm input jack
13. Built-in speaker volume control
SPECIFICATIONS OF THE MICROPHONES
Audio channel
Transmission method...................................................................................... UHF Wireless (two way)
Audio channel .............................................................................................. 5 ( 1 chairman, 4 delegate)
Carrier frequency band................................................................................................610MHz~665MHz
Modulation method................................................................................................................................FM
Maximum modulation.......................................................................................................................60KHz
Radiant power ...............................................................................................................................≤+9dBm
Frequency deviation........................................................................................................................ <0.002
Frequency response...............................................................................................................50Hz-15KHz
S/N Ratio............................................................................................................................................ >85dB
T.H.D....................................................................................................................................................<0.8%
Data Channel
Transmission method.............................................................................................. Wireless (two-way)
Data channel.............................................................................................................................................16
Frequency Range..................................................................................................422.4MHz ~ 438.4MHz
Modulation method...............................................................................................................................FSK
Receiving sensitivity................................................................................................................... -100dBM
Transmission consumption ........................................................................................................... ≤6dBm
Communication rate ................................................................................................................... 100KBPS
Frequency deviation........................................................................................................................ <0.002
Power supply......................................................................................................................................12V𝌃
Signal covering range..................................................................................................Radius 60 meters
Consumption Rating.................................................................................................... Standby: ≤360mW
...................................................................................................................................... Speaking: ≤630mW
Operating temperature range.................................................................................................... -10-40°C
Dimensions..................................................................................................................... 210 x 54 x 127mm
N.W ...................................................................................................................................................... 0.9kg
BATTERY CHARGER HTX-38B
CAUTION on battery charger handling
• If the charging terminal is dirty, poor contact will prevent the battery from being charged properly. Perio-
dically clean the charging terminals
• The battery charger may become hot during charging. Use it in a well-ventilated area
• After the battery is fully charged, turn off the battery charger or remove the batteries
Features of battery charger
1. Input Voltage: AC 110V~220V
HTX-38R • 7

2. Charges 16 PCS of lithium battery per charging
3. Intelligent charging management electro circuit to protect the LIP battery
4. Equipped with extendable handle and wheels, easy to move
Schematic diagram of battery charger
1. Wheels
2. Extendable handle
3. Charging status indicator LED
4. Battery holder
5. Power indicator
6. Power on/off switch
7. AC adapter jack (110V-220V~ 50Hz-60Hz)
SPECIFICATIONS OF THE BATTERY CHARGER
Power supply.........................................................................................................110V-240V/50Hz~60Hz
Consumption Rating...........................................................................................................................200W
Charge quantity........................................................................................................................................16
MAX charging current of each unit..............................................................................................700mA
Charging time................................................................................................................ About 8~10 hours
Charging status ........................................... Red LED ashing –Charging, Green LED –Full Charged
Operating temperature range.............................................................................................. 0-40 degree
Dimensions................................................................................................................... 620 x 370 x 175mm
N.W.......................................................................................................................................................... 9kg
WIRELESS MEETING SYSTEM LITHIUM BATTERY
Features of Lithium battery
a. Excellent safety performance, light weight & High capacity ratio.
b. Improved safety: more resistant to overcharge; less change for electrolyte leakage.
c. The battery life is usually approximately 300 charge cycles.
d. Easy to install
Schematic diagram of LIP battery
1. Battery detach button
2. Lock mecanism
3. Negative
4. Positive
CAUTION on battery handling
• The battery is dedicated to the microphone unit. Do not use it for other applications
• Use only the designated battery charger
• If the battery leaks and the liquid contacts your skin or clothing, immediately ush with clean water
• If the battery leaks and the liquid contacts your eyes, immediately wash thoroughly with clean water and
seek medical assistance
8• HTX-38R

• Do not throw the battery into re or overheat it, Doing so may result in a re
• Do not disassemble or modify the battery
• Do not short-circuit the + and – terminals with any metal or wire. Do not carry or store the battery with
metal products such as a necklace.
• If you discover battery leaks, discoloration, distortion, or the other problems, do not use the battery
• Dispose of used batteries properly as industrial waste or contact our business ofce in your neighborhood
SPECIFICATIONS
Rated voltage......................................................................................................................................12V𝌃
Discharge current......................................................................................................................... <500mA
Charging current........................................................................................................................... <700mA
Time of speaking.......................................................................................................................... >8 hours
Time of standby.......................................................................................................................... >25 hours
Charging voltage................................................................................................................................15V𝌃
Dimensions....................................................................................................................... 130 x 75 x 20mm
N.W........................................................................................................................................................ 250g
Receiver unit installation
a. Put on the table or install in an 19 inch frame
b. Please keep away from high-power and strong radiation equipment, or it may inuence the equipment
performance.
c. Use it in a well-ventilated area
Antenna connection
There are 5 antennas on a receiver unit: 1 data control antenna (426MHz), 1 chairman microphone audio
control/RF antenna (A: 627.50MHz) and 2 delegate microphone audio control/RF antennae (B: 652.50MHz)
and 1 microphone speaker audio RF antenna (560MHz)
Please note: Receiver antennas should be connected correct position, or system can not work properly.
Receiver unit to sound system
a. Mono output: Please connect MIX OUT interface of receiver unit to input interface of sound equipment by
6.3 audio cable (for short distance)
HTX-38R • 9

b. Balance output: Please connect MIX-BAL interface of receiver unit to input interface of sound equipment
by XLR-M balance audio cable ( for long distance)
Receiver unit to video processor
Please connect DATA interface of receiver unit to DATA interface of video processor by RJ45 network cable.
Please read the user manual of video processor.
10 • HTX-38R

Receiver unit to external antenna
If the distance between receiver and microphone is not far, and there does not have any obstruct, antenna
can be connect to the “ANT” interface of receiver unit rear panel directly. If the distance is far or have some
obstruct between them, please connect external antenna to receiver unit.
Please note: coaxial cable should be 50Ω.
INSTALLATION OF WIRELESS MICROPHONE
Mounting the battery
a. Installation of the battery: Put the battery on the bottom side of the microphone unit; slide the battery in the
direction of the arrow to fasten it. Listen for the click sound and make sure the battery is securely inserted.
b. Dismount battery: Slide the battery in the direction of the arrow and pull it out by pushing the battery
removal button
Mounting and dismounting the microphone
Mounting microphone: Insert the microphone into the microphone mounting socket in a straight line, and
then rotate the microphone clockwise to fasten it securely.
Unmounting microphone: Rotate the microphone counterclockwise, then pull the microphone upward to
dismounting
* Please contact us if you need more detailed information during your installation.
SYSTEM SETTING
Receiver unit setting
a. POWER ON/POWER OFF
• POWER ON: Hold the “POWER” button on the left front panel of receiver till LCD displays “ “
and then release it. LCD will display “ “, after system self-detecting LCD will display “ “
• POWER OFF: Hold the “POWER” button on the left front panel of receiver till LCD displays “ “.
The receiver will power off and all microphones switch into standby status when the button is released.
If you keep the button pressed, LCD will display “ “. Both receiver and microphones will power
off at the same time.
b. System function key: There are 3 function keys on receiver unit
DOWN SET UP
c. System mode setting:
System default mode: CFREE-4MAX-FIFO
The system supports 10 mode settings via the receiver (FIFO 1/2/3/4, LIMIT 1/2/3/4, CONLY, CFREE). The user
can set these modes via the UP & DOWN keys. The system will save and keep the last set mode automatically
after 3 seconds or press SET key to save the mode immediately.
• C.ONLY: When the chairman’s microphone priority button is pressed, the chairman’s microphone is turned
on while the delegate’s microphone is turned off until the priority button has been released. Otherwise the
delegate microphone can not turn on again.
• Mode setting method: Press SET key once or several times till “CFREE” is ashing. Press DOWN, the
HTX-38R • 11

ashing character will change to CONLY (press UP the ashing character will change to CFREE), and
then press SET to save it or wait about 3 seconds until the system saves the mode automatically. The
characters will stop ashing.
• C.FREE: When the chairman’s microphone priority button is pressed, the chairman’s microphone is turned
on while the delegate’s microphone is turned off. However, the delegate’s microphone can be turned on
again even if the Priority button on the chairman microphone has not been released.
Mode setting method: please see C.ONLY setting method
• 1MAX-LIMIT: The system allows only 1 delegate microphone to be turned on at the same time. If other
delegate microphones want to turn on, the active delegate microphone must rst be turned off.
Number setting method: Press SET key one or several times till “4MAX” is ashing. Press DOWN or UP key
till the ashing message changes to 1MAX. Press SET to save or wait about 3 seconds until the system saves
the setting automatically. The characters will stop ashing.
Mode setting method: Press SET key one or several times till “FIFO” is ashing. Press UP key, the ashing
characters change to LIMIT (press DOWN and the ashing characters will change back to FIFO). Press SET
to save or wait about 3 seconds until the system saves the setting automatically. The characters will stop
ashing.
• 2MAX-LIMIT: The system allows only 2 delegate microphones to be turned on at the same time. If other
delegate microphones want to turn on, the user should turn off 1 or 2 microphones rst.
Setting method: please see 1MAX-LIMIT setting method
• 3MAX-LIMIT: The system allows only 3 delegate microphones to be turned on at the same time. If other
delegate microphones want to turn on, the user should turn off 1, 2 or 3 microphones rst.
Setting method: please see 1MAX-LIMIT setting method
• 4MAX-LIMIT: The system allows only 4 delegate microphones to be turned on at the same time. If other
delegate microphones want to turn on, the user should turn off 1, 2, 3 or 4 microphones rst.
Setting method: please see 1MAX-LIMIT setting method
• 1MAX-FIFO: The system allows only 1 delegate microphone to be turned on at the same time. If another de-
legate microphone turns on, the system will turn off the rst on microphone automatically. First in, rst out.
Setting method: please see 1MAX-LIMIT setting method
• 2MAX-FIFO: The system allows only 2 delegate microphones to be turned on at the same time. If another
delegate microphone turns on, the system will turn off the rst on microphone automatically.
Setting method: please see 1MAX-LIMIT setting method
• 3MAX-FIFO: The system allows only 3 delegate microphones to be turned on at the same time. If another
delegate microphone turns on, the system will turn off the rst on microphone automatically.
Setting method: please see 1MAX-LIMIT setting method
• 4MAX-FIFO: The system allows only 4 delegate microphones to be turned on at the same time. If another
delegate microphone turns on, the system will turn off the rst on microphone automatically.
Setting method: please see 1MAX-LIMIT setting method
Please note: The Chairman microphone is not limited in these modes, the chairman microphone can be turned on and off independently any time.
d. System audio channel setting
System default audio channel: 40[05-35-65-95]
• Chairman microphone audio channel
• Manual setting: Press the SET key once or several times till “40” character is ashing. Press DOWN
or UP key to select the channel. Press SET to save the setting or wait about 3 seconds until the system
12 • HTX-38R

saves the setting automatically. The characters will stop ashing.
• Auto-scan setting: Press the SET key once or several times till “40” character is ashing. Press and hold
the SET key till LCD displays the symbol ---. Release the key. The system will scan all audio channels
(00-99) automatically and select the best one.
• Chairman microphone audio description: Bandwidth of chairman microphone is 25M; default setting is
610.00MHz -- 634.75MHz (Please contact your agent to get more information if you want choose another
frequency for the chairman microphone). There are 100 channels available in this bandwidth, frequency
interval is 250 KHz.
• Delegate microphone (D1, D2, D3, D4) audio channel
• Channel setting method: please see chairman microphone audio channel setting method.
• Delegate microphone audio description: Bandwidth of delegate microphone is 25M, default setting is
640.00MHz -- 664.75MHz (Please contact your agent to get more information if you want choose other
frequency for delegate microphone). There are 100 channels available in this bandwidth, frequency
interval is 250 KHz.
Please note there are 4 audio channel of the delegate microphone in the system, so the channel number can not be same.
e. System project setting
Press the SET and the POWER keys at the same time to switch the receiver on.
The LCD will display . There are 4 setting menus in this part.
• Receiver data (room) channel setting (Default channel is «ROOM 1»).
You can choose among 16 data (room) channels (0-1-2-3-4-5-6-7-8-9-A-B-C-D-E-F). Select the channel
via the UP and DOWN keys. Press SET to save the setting. The receiver will switch to the next setting
part automatically. This system uses room numbers to show the data control channel. If there are more
than 1 system used in the same place or building, we suggest to set different room numbers (data chan-
nels) in order to avoid interference. If other equipments use the same frequency of data channel, the
user must change the frequency of the data channel.
• Delegate microphone audio channel: the receiver will switch to delegate microphone audio channel set-
ting automatically after the user has saved the setting of receiver data channel.
• 0---Audio channel not available, 1---Audio channel available.
• Setting method of Channel 1: Press DOWN key to close this channel and press UP key to open this
channel. Press SET key to save the setting and receiver will switch to next setting part automatically.
• Setting method of channel 2, 3, 4: Please see the setting of channel 1.
• Description of this setting: The receiver uses 4 channel LNB to support the FM high frequency signals
for 4 delegate microphones. Default sort order is D1, D2, D3, D4. If D1 has a problem, the system micro-
phone can not turn on/off properly. The user can set this channel as being not available. Then the recei-
ver LNB default sort order is D2, D3, D4, and only maximum 3 delegate microphones can be working at
the same time. This setting just for urgent situations. Please contact your local dealer to get the solution.
• Hold and press SET key/press POWER key till LCD display to exit the project setting.
f. System lock & unlock
• Lock setting method: Press and hold the SET key rst, and press UP key at the same time, system LCD
will display
• Unlock setting method: Press and hold the SET key rst, and press DOWN key at the same time, system
LCD will display
Please note if the system locked, the function keys on the receiver panel are not available to used for setting.
HTX-38R • 13

g. Checking system audio and data channel
User can check the system audio and data (Room) channel by UP and DOWN key
• User can check the chairman microphone (C) and delegate microphones ( D1, D2, D3, D4) audio channel,
data (room) channel, frequency point even if the system is locked.
• We recommend the user to use auto-scan function if there is interference in the channels.
• System will shut off all microphones (including chairman microphone) if the user saves the setting.
• If the system works properly after testing, we strongly recommend the user to lock the system setting.
MICROPHONE SETTING & OPERATION
There are 3 function keys on the microphone (Including chairman microphone):
POWER, ON/OFF, PRIOR, VOL-, VOL +, MUTE
a. Microphone function key description:
• POWER: Press this key to power on or power off the microphone
• ON/OFF: Microphone will on/off in correct communication mode. If the microphone data channel is diffe-
rent from receiver data channel, the user can not turn on the microphone.
• PRIOR: Chairman microphone priority key that can turn off all delegate microphones.
• VOL-: Decrease the volume level of microphone
• VOL+: Increase the volume level of microphone
• MUTE: Prevention of unwanted noise such as cough
b. Microphone project setting
Press MUTE key and turn on the microphone with POWER key at the same time, microphone will enter project
setting. There are four setting in this part.
• Microphone data (room) channel setting (Default channel is «ROOM 0»), there are 16 data (room) channel
for option (0-1-2-3-4-5-6-7-8-9-A-B-C-D-E-F), user can select the channel by VOL - and VOL + key, and
press MUTE to save the setting, Microphone will switch to next setting part automatically. User can see
receiver data channel setting for reference.
• Microphone ID setting: Chairman microphone ID number can be set from 0-9, A-F total 16 ID for option,
delegate microphone ID number can be set from 0-255, total 156 ID for option. User can select the ID by
VOL - and VOL + key, and press MUTE to save the setting, Microphone will switch to next setting part
automatically.
Please note: All microphone ID in one system should be different, if any units have the same ID number, the system will not work properly. If system
connect video processor to support video camera auto-track function, chairman microphone ID should be 1.
• Chime of chairman microphone: When chairman microphone turned on, system will give a chime indicative
sound. User can press VOL - to close this function and press VOL + to open this function.
• Microphone working mode: Default mode is LINK. User can press VOL - switch to FREE mode and press
VOL + switch to LINK mode. In Free mode, microphone can be turned on/off any time with communicate
with receiver unit, and user can set the microphone audio channel (when microphone is off, press MUTE
key, audio channel number will ash, user can press VOL - and VOL + key to select the audio channel),
FREE mode just used for testing. In LINK mode, microphone must work and communicate with receiver
unit, or microphone can not turn on, microphone audio channel was distributed by receiver unit.
• Exit microphone project setting: Press microphone on or POWER key to exit, if there is no action of the
microphone microphone will exit the setting in 9 secs.
USB RECORDING MODULE
USB recording module menu include 5 sub-menus
14 • HTX-38R

Operation method:
• Press “ ׀◀ / ▶׀ ” to select the sub-menu.
• Press “ ” to enter the sub-menu.
• Press “≡” to exit current menu and back to previous
menu.
• Hold and press “≡” 3 seconds to go back to the main
menu
Music: The device will play the audio le (mp3 format) automatically when a USB ash disk is connected to
the USB interface. The user can select the audio le by pressing key “ ׀◀ / ▶׀”
Function key instruction:
Function Key Instruction
PLAY/PAUSE ▶ǁ Short press: Play/Pause
Long press: Sub-menu switch interface (MSC/REC/BT/SYS/UDI)
PREV ׀◀ PREV / V-: Short press for previous audio le, long press to decrease volume
NEXT ▶׀NEXT/ V+: Short press for next audio le, long press to increase volume
MENU ≡Built-in sub-menu: U-disk folder/EQ/Play mode
Long press: Enter recording mode
Recorder: In this interface the record module can record the audio of the system,
press key “▶ǁ” to start recording, please key “▶ǁ” again to pause recording,
press “ ≡” to exit recording and play the record le automatically.
The recorded le will be saved in a folder named “ Record”, the le format is *.mp3
Bluetooth: In this interface, the user can use another Bluetooth device ( such as a mobile phone) to connect
it and play the audio, system Bluetooth device name “NLJ-BT
In Bluetooth interface, user can enter the Bluetooth function by press key “≡” and check all information
with key “ ׀◀ / ▶׀”
USB Device: User can connect computer or other devices to USB interface to play the audio le
Settings: User can set the system function by press key “ ׀◀ / ▶׀” in this interface
• Back-light time: To set LCD back-light time (00-240 Seconds)
• Language: To set display language
• Contrast: The set LCD display contrast
• Version: To display device version
• Exit
HTX-38R • 15

Trouble-shooting
Problem Possible Cause Solutions
The microphone unit shut off
automatically
Check the battery capacity • The batteries must be charged
before initial use
• Charge before use
The receiver unit is not turn on. Is power plug inserted into the out-
let?
Insert power plug into the outlet
Microphone can not turned on
properly
• Is the correct data channel nu-
mber set
• Is the receiver antenna installed
correct
• Is there any obstruction between
the microphone unit and recei-
ver, or the distance between the
microphone and receiver is too
far.
• Is any inference of the frequency
• Receiver and microphone data
channel should be same
• Install the antenna in correct po-
sition
• Install extended antenna or an-
tenna amplier
• Set the new data channel and
audio channel.
More than 1 microphone turned
on/off at the same time
Is the microphone ID number same Set the ID number again
Operating time of the micro-
phone unit battery is short.
• The battery is dying (*1)
• Purchase a new battery
The microphone unit battery
can not be charged
• The charging lamp does not
light
• The charging lamp is ashing
• Charging does not complete
after 12 hours
• Are the charging terminals dirty?
• Has the battery been left for a
long time after charging?
• Can other batteries be charged?
• Clean the charging terminals
• Replace it with new one
• The battery life is usually approximately 300 charge cycles.
• If battery capacity display in microphone LCD is ash ,it means that battery capacity is low, user should
turn off that mic and charge the battery.
• Take out the battery if the microphone will not use for a long time.
This marking indicates that this product should not be disposed with other household wastes throughout the EU. To prevent possible harm to the
environment or human health from uncontrolled waste disposal, recycle it responsibly to promote the sustainable reuse of material resources. To
return your used device, please use the return and collection systems or contact the retailer where the product was purchased. They can take
this product for environmental safe recycling.
16 • HTX-38R

MANUEL D’UTILISATION
ATTENTION
NE PAS OUVRIR LE BOITIER
RISQUE DE CHOC ELECTRIQUE
Le triangle avec le point d’exclamation attire l’attention de l’utilisateur sur des instructions d’utilisation
ou de maintenance importantes.
L’éclair dans le triangle attire l’attention de l’utilisateur sur un risque de choc électrique
En conformité avec les exigences de la norme CE
Appareil de classe I: Brancher uniquement sur une prise avec terre
Utilisation uniquement à l’intérieur
• Cet appareil ne doit être utilisé qu’avec un courant alternatif de max. 110-240V~ 50/60Hz.
• Ceci est un système de communication sans l, utilise la fréquence porteuse de la bande UHF. Nous re-
commandons aux utilisateurs de consulter le comité local de gestion de la radio pour choisir la fréquence
appropriée et légalement disponible, an d’éviter les interférences RF
• Si les appareils présentent des problèmes, tels qu’un son anormal, de la fumée, de la chaleur ou des
dommages aux câbles d’alimentation, débranchez la che d’alimentation de la prise et contactez votre
revendeur.
• N’utilisez l’appareil qu’après vous être familiarisé avec ses fonctions. Ne pas autoriser l’utilisation par une
personne non qualiée pour faire fonctionner l’appareil. La plupart des dommages sont le résultat d’une
utilisation non professionnelle.
• Veuillez utiliser l’emballage d’origine si l’appareil doit être transporté.
• Pour des raisons de sécurité, sachez que toute modication sur l’appareil est interdite. De plus, toute autre
opération peut entraîner un court-circuit, des brûlures, un choc électrique, un accident, etc. Si cet appareil
est utilisé d’une manière différente de celle décrite dans ce manuel, le produit peut subir des dommages
et la garantie devient caduque.
• An d’éviter un choc électrique, ne pas retirer le couvercle supérieur ou inférieur. Le boîtier ne contient
pas de pièces remplaçables par l’utilisateur. Toutes les réparations doivent être effectuées par du per-
sonnel qualié. Débranchez le cordon d’alimentation avant d’ouvrir le panneau arrière pour accéder au
contrôle de gain.
• Il convient de conserver une distance minimale de 0.5m autour de l’appareil pour une ventilation sufsante
• Ne pas poser de récipients remplis de liquide tel qu’un vase sur l’appareil
• Aucune source de chaleur ou de amme nue, telle que des bougies allumées, ne doit être placé sur l’ap-
pareil.
• L’appareil est conçu pour une utilisation dans des climats modérés.
• Nous recommandons vivement l’utilisation de câbles et connecteurs de haute qualité pour la transmission
des signaux audio. Un matériel de mauvaise qualité ne peut pas restituer une qualité audio acceptable et
une protection contre la corrosion.
DISPOSITIF DE COUPURE DU SECTEUR: Lorsque le cordon d’alimentation ou un coupleur d’appareil est utilisé
comme dispositif de déconnexion, ce dispositif doit rester facilement accessible.
AVERTISSEMENT! An de réduire le risque de choc électrique, ne pas exposer cet appareil à l’humidité ou
à la pluie !
HTX-38R • 17

Restrictions d’usage
Le produit intègre un système de transmission UHF, son usage est exclusivement réservé à un usage pro-
fessionnel. Une licence ofcielle d’utilisation ou autorisation des autorités locales peut être requise dans
certains pays. Consulter les autorités compétentes pour son usage qui demeure sous la seule responsabilité
de son utilisateur (UK– BE – PT – D – NL – LU – GR – SP – RO).
Présentation
De par sa exibilité et sa abilité, notre système de conférence sans l UHF est le choix idéal pour les sys-
tèmes de conférence mobiles. Il est simple et compact. Le système de conférence sans l s’intègre parfai-
tement dans n’importe quelle salle de réunion, sans câblage supplémentaire. C’est la meilleure solution pour
les conférences à petite échelle.
1. Configuration et description
Le système comporte une unité centrale, un microphone président, des microphones délégué, un chargeur
de batteries, etc.
1.1 Fonctionnalités
• Modes de fonctionnement: Limit (1/2/3/4), FIFO (1/2/3/4), Président uniquement. Le système accepte jusqu’à
256 micros, 5 micros activables en même temps, et tracking vidéo en option.
• Les microphones sont alimentés par leurs batteries rechargeables intégrées. Env. 8 heures d’autonomie
en utilisation active et env. 30 heures en veille.
• Installation facile et rapide sans câblage entre les appareils
• Le ltrage sélectif multicanal à bande haute et intermédiaire élimine complètement les interférences
• La technologie anti-larsen intégrée réduit efcacement le bruit
• Le circuit de détection de bruit intégré et le système TONE-LOCK éliminent le brouillage
• Distance de fonctionnement jusqu’à 100 mètres dans les conditions optimales, 60 mètres dans des condi-
tions normales.
• Prise en charge de la fonction de suivi automatique de la caméra vidéo avec processeur vidéo
• Module d’enregistrement intégré pour enregistrer et écouter les débats
1.2 Unité centrale de réception sans fil
• Modes de fonctionnement: Limit (1/2/3/4), FIFO (1/2/3/4), Chairman Only
• Prise en charge de la fonction de suivi automatique de la caméra vidéo avec processeur vidéo
• Afchage des informations du système sur un écran matriciel de 160x32 points
• Lors de l’extinction du récepteur, il peut contrôler l’état des microphones et les désactiver ou les éteindre.
• Conçu conformément aux normes UL et CE
• Module d’enregistrement USB intégré
• Installation : châssis 19"
18 • HTX-38R

1.2.3 Schéma du récepteur sans fil
1. Interrupteur M/A
2. Indicateur de niveau AF/RF ( 1er canal uniquement pour le micro Président, les 4 derniers canaux pour
les micros délégué)
3. Contrôle de volume du micro Présendient (Canal 1)
4. Contrôle de volume du micro Délégué (Canal 2)
5. Contrôle de volume du micro Délégué (Canal 3)
6. Contrôle de volume du micro Délégué (Canal 4)
7. Contrôle de volume du micro Délégué (Canal 5)
8. Touche de conguration/vérication de la fréquence canal
9. Menu
10. Touche de conguration/vérication de la fréquence canal
11. LCD (Afchage du mode en cours, fréquence de chaque canal)
12. Touches de commande du module d’enregistrement: LECTURE/STOP, PRECEDENT, SUIVANT, MENU
13. Afcheur LCD: Afche de mode de fonctionnement actuel du module d’enregistrement
14. FICHE USB: A brancher sur une clé USB pour enregistrer et afcher l’enregistrement audio
15. ANT DATA: Connecteur d’antenne pour la transmission des datas
16. DATA: Connecteur pour un processeur vidéo externe
17. Fiche d’entrée d’alimentation DC
18. MIX OUT: Sortie audio générale
19. MIX BAL: Sortie audio symétrique générale
20. ANT B: Connecteur d’antenne RF pour micro Délégué
21. ANT B: Connecteur d’antenne RF pour micro Délégué
22. ANT A: Connecteur d’antenne RF pour micro Président
23. Interrupteur M/A du haut-parleur du micro
24. Connecteur d'entrée Audio
HTX-38R • 19

25. ANT: Antenne RF du haut-parleur du micro
Caractéristiques techniques du récepteur
Alimentation.................................................12-15V𝌃1A par adaptateur secteur 110-240V~50/60Hz
Consommation........................................................................................................................................7W
Canal Audio
Méthode de transmission............................................................................ UHF sans l (sens unique)
Canal Audio .................................................................................................. 5 (1 Président, 4 délégués)
Bande de fréquence porteuse....................................................................................610MHz~665MHz
Modulation..............................................................................................................................................FM
Sensibilité de réception............................................................................................................. -100dBM
Gain Audio.............................................................................................................................................. ≤20
Bande passante ......................................................................................................................50Hz-15KHz
Rapport S/B....................................................................................................................................... >85dB
T.H.D....................................................................................................................................................<0.8%
Canal Data
Méthode de transmission.............................................................................................. Sans l (2 sens)
Canal Data.................................................................................................................................................16
Bande de fréquence.............................................................................................422.4MHz ~ 438.4MHz
Modulation.............................................................................................................................................FSK
Sensibilité de réception............................................................................................................. -100dBM
Consommation de Transmission .................................................................................................. ≤6dBm
Vitesse de Communication........................................................................................................ 100KBPS
Déviation............................................................................................................................................ <0.002
Portée...........................................................................................100m dans des conditions optimales,
...........................................................................................................60m dans des conditions normales
Dimensions..................................................................................................................... 485 x 355 x 85mm
Poids..................................................................................................................................................... 7,2kg
PRECAUTIONS lors de la manipulation des microphones
• Ne soulevez pas le bloc en tirant sur le microphone : saisissez le bloc par sa base
• Pliez et dépliez lentement la partie exible du microphone. Ne le pliez pas avec une force excessive
• Ne laissez pas tomber l’appareil
• Si vous n’utilisez pas l’appareil pendant de longues périodes, retirez la batterie
• Utilisez uniquement le pack de batteries lithium-ion fourni
• Ne placez aucun obstacle autour des microphones
• Lorsque les microphone sont trop proches les uns des autres, un volume sonore élevé peut provoquer un
retour acoustique. Dans ce cas, augmentez la distance entre les microphone ou baissez le volume
• Une fois la batterie retirée et remplacée, vériez que le voyant d’alimentation s’éteint
20 • HTX-38R
This manual suits for next models
7
Table of contents
Languages:
Other BST Conference System manuals
Popular Conference System manuals by other brands
RACOM
RACOM RAy3 user manual
Polycom
Polycom realpresence group 550 Administrator's guide
AT&T
AT&T MERLIN LEGEND Communications System Key System Planning Forms... Key system planning

Cisco
Cisco TelePresence SX10 user guide
Polycom
Polycom QDX 6000 System Administrator's guide
SMART
SMART SRS-LYNC-L-G5 quick start guide
Lucent Technologies
Lucent Technologies MERLIN LEGEND Release 6.1 Maintenance and troubleshooting
Rath
Rath Command Center Installation & operation manual
Cisco
Cisco TelePresence Touch 10 user guide

AT&T
AT&T SPIRIT 308 Product information guide
Shure
Shure MXCW Getting started
Crestron
Crestron 4K DigitalMedia DMPS3-4K-150-C Do guide
