Set up Directory Back E-mail Calls Letters
Delete
Enter
Shift
Home
Send/
Receive
Print
Camera TV/AV
Shift
Caps Lock
Tab/Aux WQERT
YUI OP
AS DF GHJKL
ZXCVBN
M
‘
~
!
1’
2£
3$
4%
56&
7*
8(
9)
0––
-+
=
v
<
, >
. ?
/
@
#
$
}
]
{
[
:
;
䊴
䊱
䊲
䊳
䊴
|
\
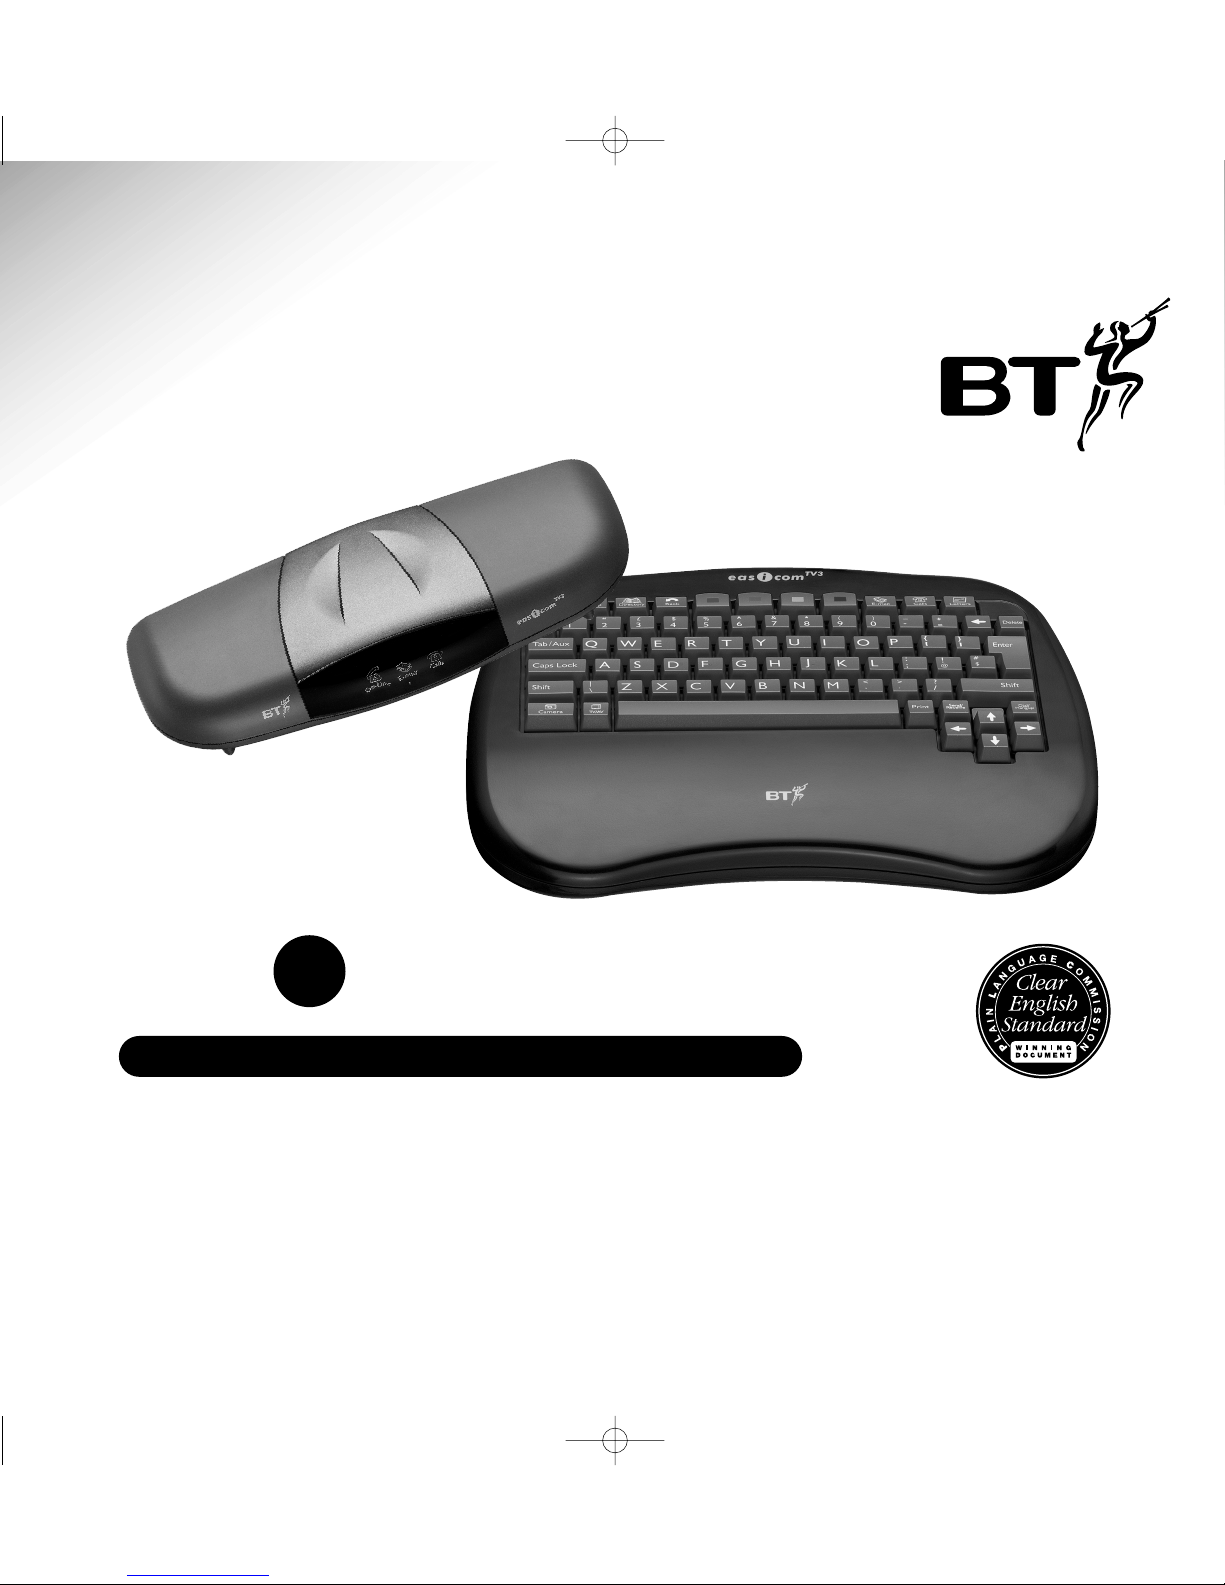
At a glance
1
Keyboard
TV/AV
Switches between your normal
TV channels (BBC, ITV etc.) and
AV video channel.
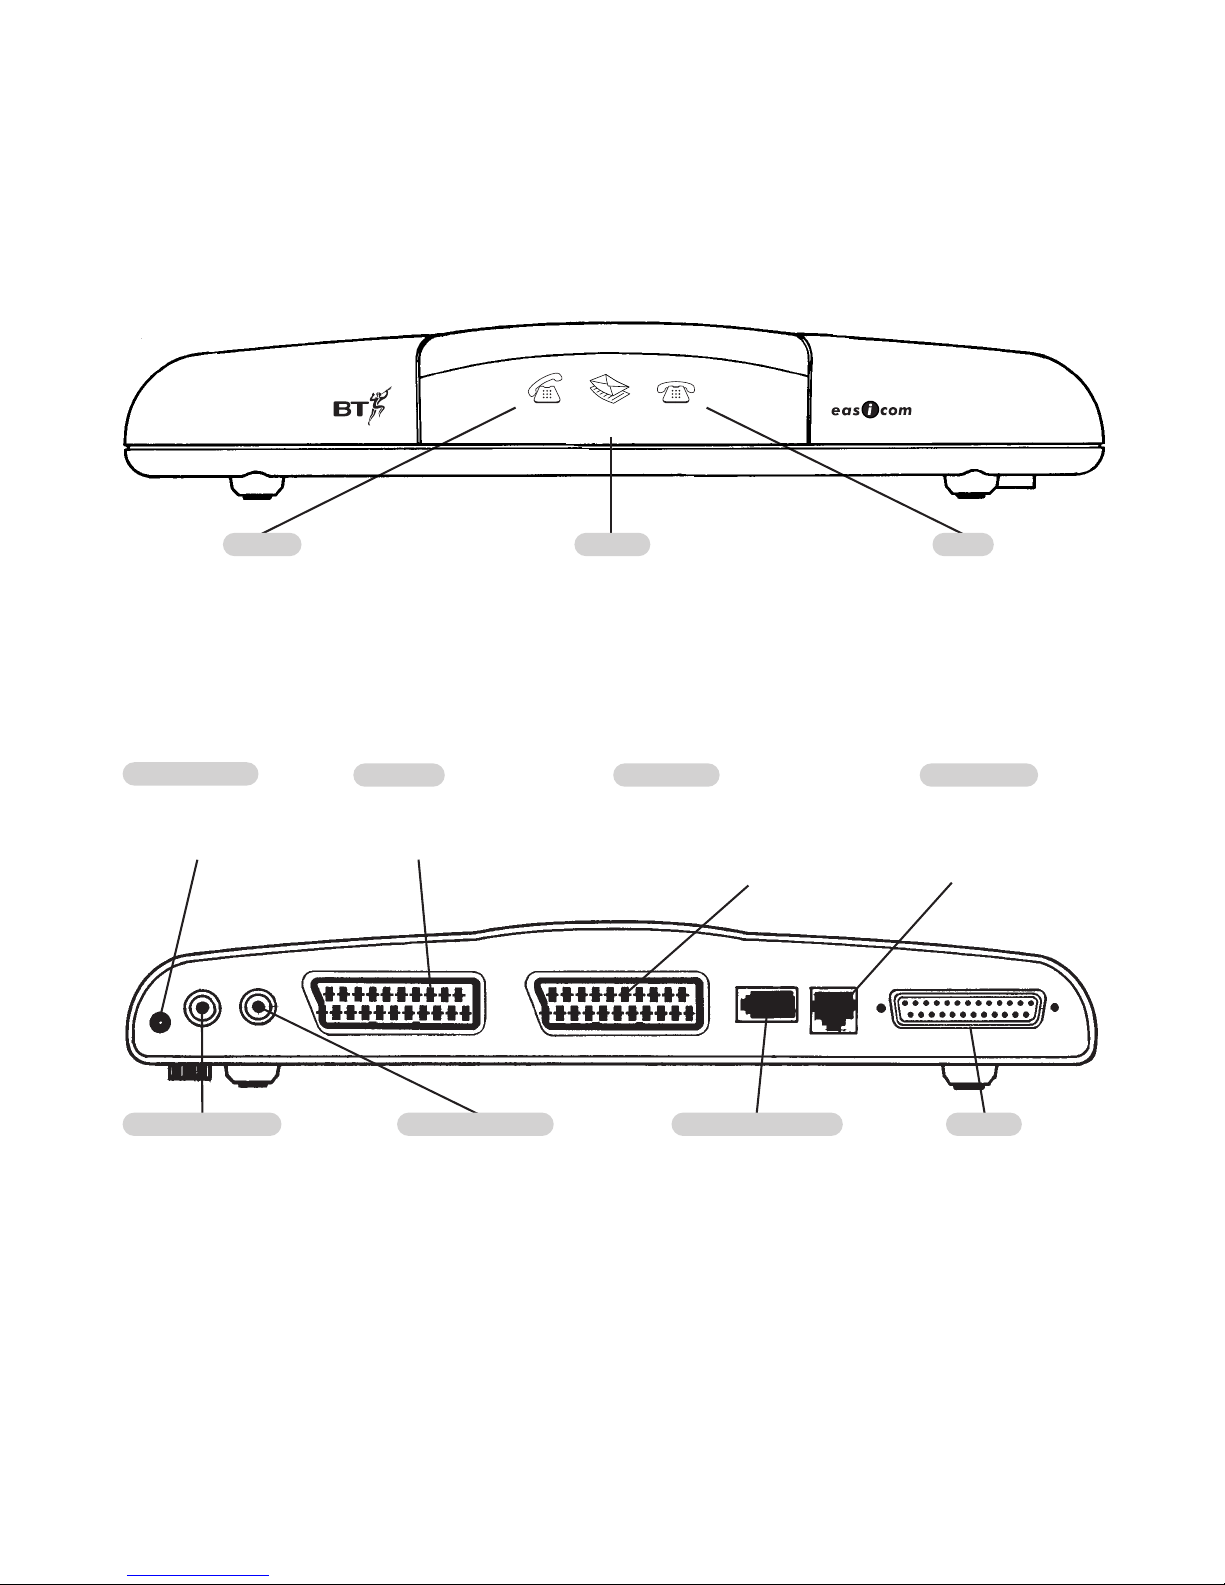
Calls
Displays the Calls List so you can see who has
been trying to contact you. Press again to exit.
See page 28.
Shift
Hold down to temporarily switch
between capital and lower case
letters.
Hold down to type the top letter on
the dual symbol keys, e.g. the +sign
on the += key.
Shift
Hold down to temporarily switch
between capital and lower case
letters.
Hold down to type the top letter on
the dual symbol keys.
Caps Lock
All typed letters will be capitals.
TAB/AUX
Press to move the cursor to the
next optional setting displayed.
Press (at the same time press and
hold the SHIFT KEY) to manually
switch to the equipment connected
to your AUX port e.g., video,
satellite, games console. Repeat to
switch back.
Letters
Lets you write a letter. Printing
requires an optional printer. Press
again to exit. See page 26.
E-mail
Lets you access e-mail folders
to send and receive your mail.
Press again to exit. See page 17.
Camera
Press and hold to switch the
camera picture on. Press and
hold again to switch the
camera off. (Optional extra,
see page 34.)
Colour buttons
Used to select options from the
on-screen display.
Arrows
Lets you move the cursor. Scroll through the
calls list, e-mail list and directory.
Highlight options from the on-screen menus.
Home
Moves the cursor to the start of
your e-mail or letter text.
Send/Receive
Dials your e-mail service
provider to send and
receive e-mail.
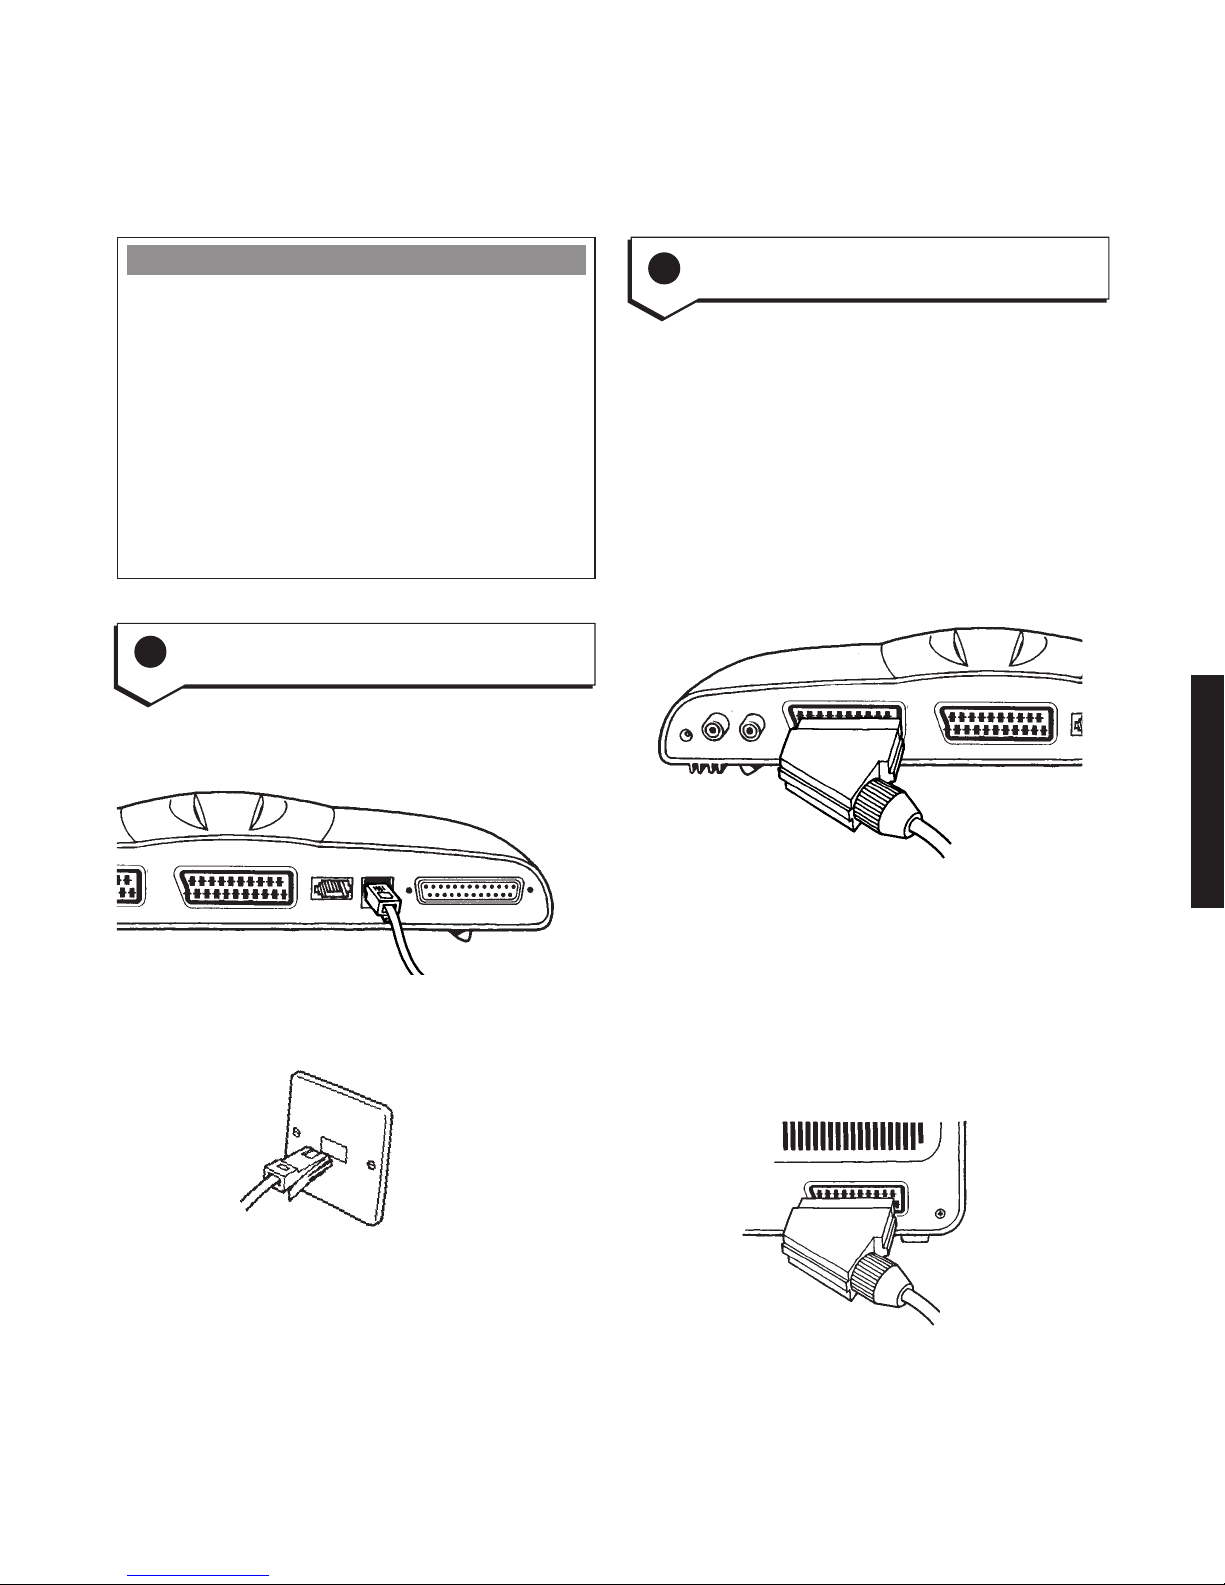
Print
Prints your letters and e-mails via
an attached printer (not supplied).
Enter
Moves the cursor to the next line.
Used to select a highlighted option
from the menu.
Delete
Deletes the character highlighted by
the cursor.
Directory
Lets you access the directory menu
to add, change and delete entries.
Press again to exit. See page 31.
Back
Takes you back through the
menu until you return to the
normal TV picture.
Set Up
Opens the Set Up menu.
To set up e-mail, users, system
and printers, etc. (See page 9)
Press again to exit.
Backspace
Deletes the character to the left of
the cursor.