4.5 Inch Metal Cutting Bandsaw Assembly & Operating Instructions 7
Ensure all guards, pulley covers etc are securely attached and properly assembled.
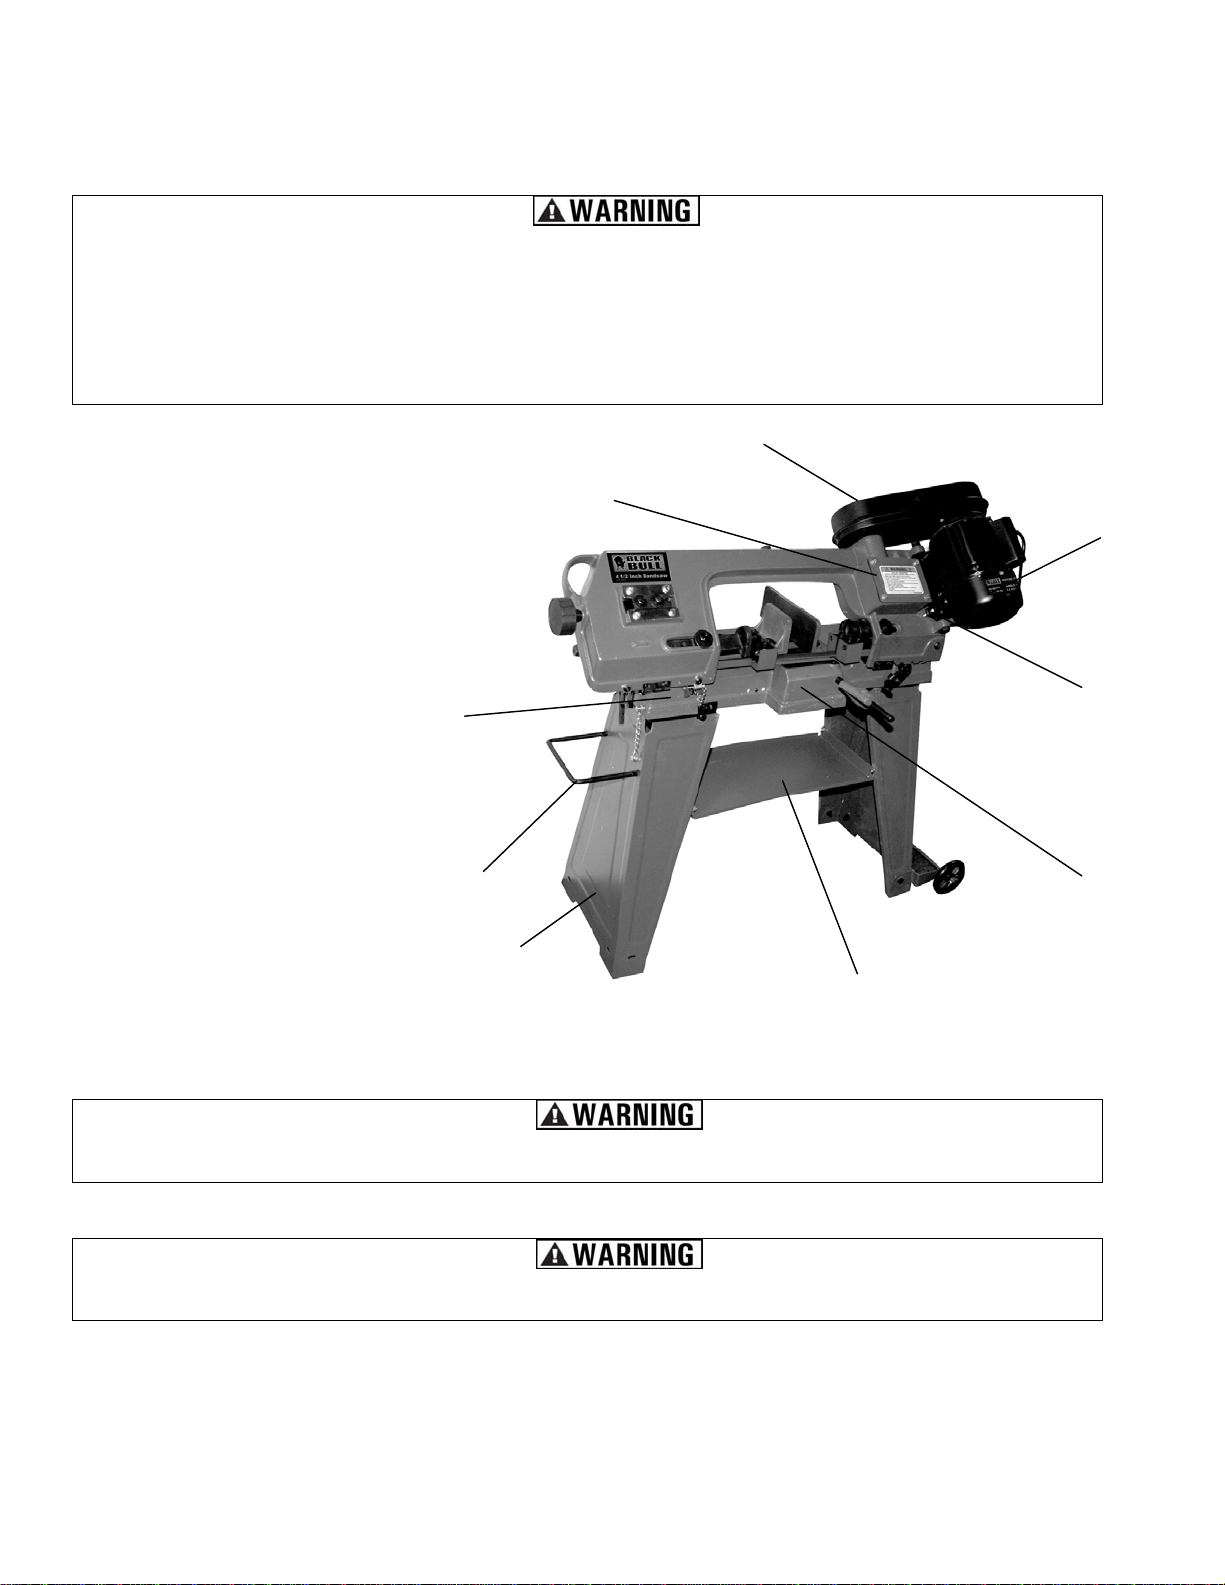
Legs And Tray Assembly
The legs are a three-sided section, one side of which is hinged. Lay the legs on their sides, with
the open ends facing each other and approx. 18" apart.
Locate the tray and attach between the legs, using the four nuts, bolts and washers supplied.
Leave the nuts finger tight at this stage.
Important: Ensure the washer is inside the leg, next to the nut. Stand the assembly upright to
form a rough "A" frame. With assistance, gently lower the main body on to the legs. Firmly
secure the main body to the legs, using the three nuts and bolts at the top of each leg, ensuring
there is no distortion and that the assembly is completely stable.
Note that the legs may fit either way around.
Tighten the tray nuts and bolts, checking for distortion and stability.
Work Stop Assembly
A work stop is provided, which is used to allow stock pieces of equal length to be cut without
having to measure each piece individually. It comprises two parts, the work stop and the
mounting rod. Push the rod into the hole in the edge of the vise, and secure with the grubscrew
provided.
Mount the work stop on to the rod, with the flat face towards the saw blade, and temporarily
secure with the grubscrew supplied, ensuring it is not pushed on too far, as it may interfere with
the saw blade when it is lowered.
Miscellaneous
A handle is provided at the left end of the machine, connected to the left leg. When the machine
is lifted using this handle, it will automatically pivot on to the wheels, mounted on the bottom of
the right leg, allowing the machine to be maneuvered easily and quickly around a workshop.
The handle and wheel assemblies are attached a follows. Thread the ends of the handle through
the corresponding holes in the left leg, and locate on the inside of the leg using the split pins
provided.
The wheel assembly comprises a bracket, axle and wheels. Attach the bracket to the base of the
right leg using the nuts and bolts supplied. Thread the axle through the holes at the ends of the
bracket, and insert the split pins in the holes provided in the axle, which will prevent any lateral
movement. Mount the wheels at each end of the axle, and locate by inserting the split pins
provided in the holes at the ends of the axle.
Before use, carry out a thorough check to ensure that all parts are completely secure and
properly assembled.