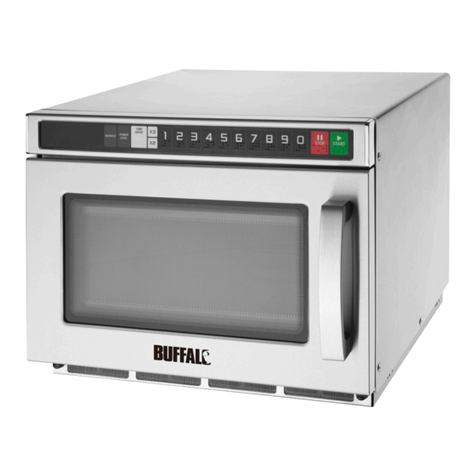
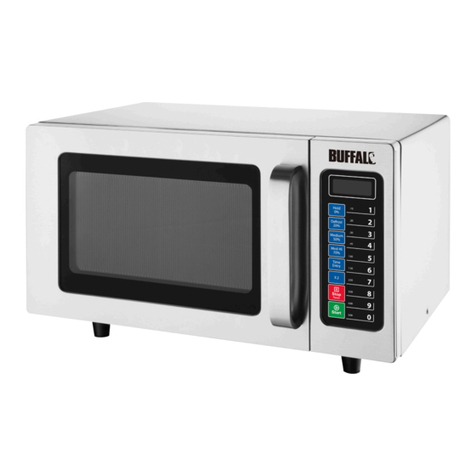
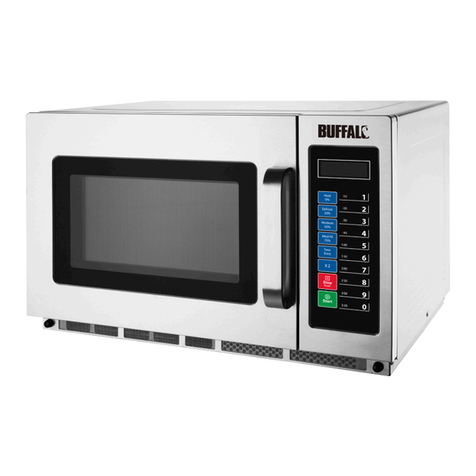
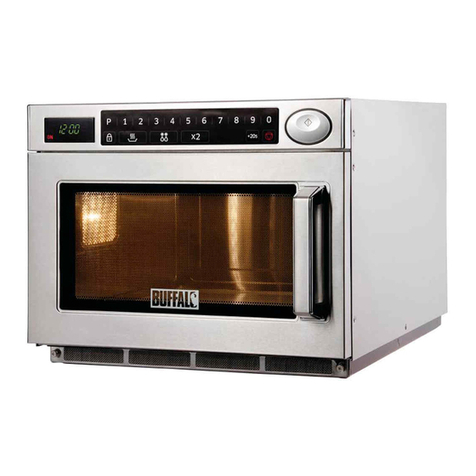
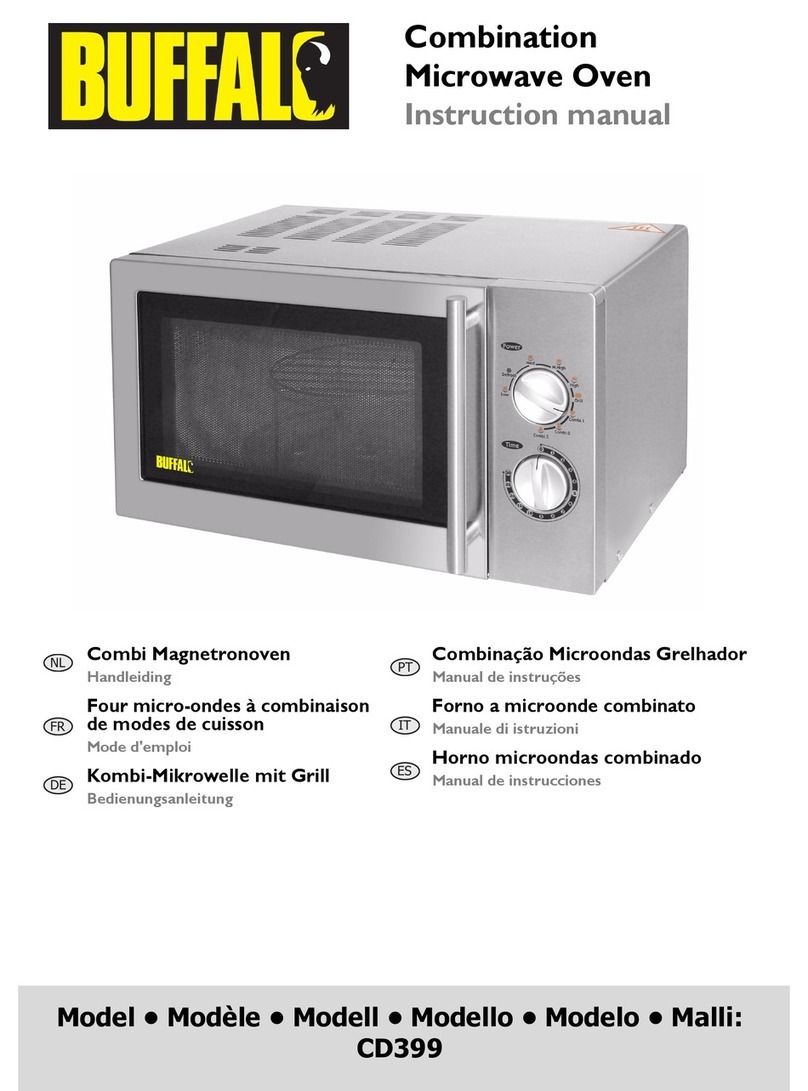
Buffalo CF764 User manual

Microondas comercial
Manual de instruções
PT
Model • Modèle • Modell • Modello • Modelo • Malli:
CF764 CF765
Commercial Microwave
Oven
Instruction manual

1
UK
PRECAUTIONS TO AVOID POSSIBLE EXPOSURE TO MICROWAVE ENERGY
DO NOT ATTEMPT TO OPERATE THIS OVEN WITH THE DOOR OPEN, SINCE OPEN DOOR OPERATION CAN RESULT IN HARMFUL EXPOSURE TO MICROWAVE
ENERGY. IT IS IMPORTANT NOT TO DEFEAT OR TAMPER WITH THE SAFETY INTERLOCKS.
DO NOT PLACE ANY OBJECT BETWEEN THE OVEN FRONT FACE AND THE DOOR OR ALLOW SOIL OR CLEANER RESIDUE TO ACCUMULATE ON SEALING
SURFACES.
DO NOT OPERATE THE OVEN IF IT IS DAMAGED. IT IS PARTICULARLY IMPORTANT THAT THE OVEN DOOR CLOSES PROPERLY AND THAT THERE IS NO
DAMAGE TO THE:
1. DOOR (BENT)
2. HINGES AND LATCHES (BROKEN OR LOOSENED)
3. DOOR SEALS AND SEALING SURFACES
WARNING - IF THE DOOR OR DOOR SEALS ARE DAMAGED, THE OVEN MUST NOT BE OPERATED UNTIL IT HAS BEEN REPAIRED BY A COMPETENT PERSON
WARNING -WARNING -IT IS HAZARDOUS FOR ANYONE OTHER THAN A COMPETENT PERSON TO CARRY OUT ANY SERVICE OR REPAIR OPERATION THAT
INVOLVES THE REMOVAL OF ANY COVER WHICH GIVES PROTECTION AGAINST EXPOSURE TO MICROWAVE ENERGY
WARNING - LIQUIDS OR OTHER FOODS MUST NOT BE HEATED IN SEALED CONTAINERS SINCE THEY ARE LIKELY TO EXPLODE
WARNING - MICROWAVE HEATING OF BEVERAGES CAN RESULT IN DELAYED ERUPTIVE BOILING, THERFORE CARE MUST BE TAKEN WHEN HANDLING THE
CONTAINERS
WARNING -THE CONTENTS OF FEEDING BOTTLES AND BABY FOOD JARS MUST BE STIRRED OR SHAKEN AND THE TEMPERATURE CHECKED BEFORE
CONSUMPTION, IN ORDER TO AVOID BURNS
WARNING - FAILURE TO MAINTAIN THE OVEN IN A CLEAN CONDITION COULD LEAD TO DETERIORATION OF THE SURFACE THAT COULD ADVERSELY
AFFECT THE LIFE OF THE APPLIANCE AND POSSIBLE RESULT IN A HAZARDOUS SITUATION
Safety Tips
Note: This product is Group 2 Class B ISM equipment. Group 2 equipment contains all ISM (Industrial, Scientific and Medical) equipment
in which radio-frequency energy is intentionally generated and/or used in the form of electromagnetic radiation for the treatment of
material,and spark erosion equipment.
Class B equipment is suitable for use in domestic establishments and establishments directly connected to a low voltage power supply
network
• Read all instructions before using the appliance.
• Position on a flat, stable surface.
• A service agent/qualified technician should carry out installation and
any repairs if required. Do not remove any components or service
panels on this product.
• Consult Local and National Standards to comply with the following:
• Health and Safety at Work Legislation
• BS EN Codes of Practice
• Fire Precautions
• IEE Wiring Regulations
• Building Regulations
• This oven is only designed to cook, heat or dry food. It is not suitable
for laboratory or industrial use.
• DO NOT operate the oven when empty.
• DO NOT use jet/pressure washers to clean the appliance.
• DO NOT use the appliance outside.
• DO NOT allow oil or fat to come into contact with the plastic
components or door seal. Clean immediately if contact occurs.
• DO NOT use this appliance to dry fabric.
• DO NOT fry food in the oven.
• DO NOT store anything on top of the appliance during operation.
• DO NOT heat food/liquid in sealed containers.
• DO NOT heat water and oil together.
• DO clean the oven regularly and remove any food deposits
• This appliance is not intended for use by persons (including children)
with reduced physical, sensory or mental capabilities, or lack of
experience and knowledge, unless they have been given supervision or
instruction concerning use of the appliance by a person responsible for
their safety.
• Children should be supervised to ensure that they do not play with the
appliance
• Always switch off and disconnect the power supply to the unit before
cleaning.
• Keep all packaging away from children. Dispose of the packaging in
accordance with the regulations of local authorities.
• If the power cord is damaged, it must be replaced by a BUFFALO agent
or a recommended qualified technician in order to avoid a hazard.
Reduce the risk of fire inside the oven
• Never leave the oven when using combustible materials such as plastic
or paper to aid cooking.
• Never use recycled paper within the oven. This can contain small metal
fragments.
• Remove wire twist ties from paper or plastic bags before placing in the
oven.
• Always ensure utensils are suitable for use in a microwave oven.
• If materials ignite or smoke os observed within the oven:
• Keep door closed
• Turn oven OFF
• Do not use the oven for storage purposes. Paper products, food and
cooking utensils must be removed when not in use.
Reduce the risk of injury
• Liquids such as water, coffee and tea can overheat beyond boiling point
without appearing to be boiling.
• Eggs in their shell and hard-boiled eggs should not be heated in
microwave ovens since they may explode even after microwave heating
has ended
• Do not use narrow necked containers to boil or reheat liquids.
• Liquids may splash out during or after heating or when adding
ingredients, resulting in possible harm or injury.

2
Pack Contents
The following is included:
• BUFFALO Commercial Microwave
• Instruction Manual
BUFFALO prides itself on quality and service, ensuring that at the time of packaging the contents are supplied fully functional and free of damage.
Should you find any damage as a result of transit, please contact your BUFFALO dealer immediately.
Installation
1. Remove all packaging materials. Ensure the inside of the door is completely free from any packaging.
2. Position the oven away from any sources of heat, moisture, high humidity or combustible materials.
3. For sufficient ventilation, allow 20cm of space above the oven, 10cm at the back and 5cm at the sides.
Stacking your Microwave Oven
1. Place one microwave oven on top of the other one, and remove the plate which are each secured by a single screw to the bottom-right corner at the
rear of both microwaves. Secure the above hole of the two microwaves.
2. Remove the two screws which are securing at both end of the cabinet of the lower microwave oven. Remove the two screws which is securing the
bottom corner of the upper micowave oven.
3. Use the upper and lower plate screw holes to secure the upper and lower microwave ovens with the four screws.
4. Ensure the top oven is at a safe and workable height.
WARNING: Check the oven for any of the following damage that may have occurred:
Misaligned or bent door, Damaged door seals/sealing surface, Broken/loose door hinges, Dents in the oven interior.
DO NOT operate the oven if any damages is found. Call a BUFFALO agent or qualified Technician.
Note: Do not cover or block any openings on the appliance, or remove the feet.

3
Features Diagram
Safety Interlock System Door Seal
Door Viewing Screen Plate Tray
Door Hook Ceiling Cover
Oven Cavity Air Filter

4
MICROWAVE indicator - Indicates MICROWAVE cooking in
progress
POWER LEVEL pad - Used to set a varible POWER LEVEL
DOUBLE QUANTITY indicator - Indicates DOUBLE QUANTITY
function is active
NUMBER pads - NUMBER pads are used to set the manual
cooking time / start preprogrammed cooking cycle
STAGE indicator - Indicates which STAGE of mult-stage
cooking is in progress
DOUBLE QUANTITY pad - increases a preprogrammed cooking
time by a percentage of the original cooking time. Can be user
specified and changed for individual cooking sequences. Useful
for cooking multiple servings of food
CLEAN FILTER indicator - Indicates Filter requires cleaning
(Note:Message is reminder only and will clear after 24
hours.)
STOP pad - Stops a cooking sequence in progress, clears out any
remaining time, ends programming or user option cycle. When
STOP pad is used to end a progamme or option change ,
changes are discarded
POWER LEVEL indicator - Turns on when POWER LEVEL pad
is pressed
START/20SEC+ pad - used to begin a manual cooking cycle,
save any changes to programming sequences or user options.
Can be used as speedy cooking pad, pressing 20sec+ pad allows
you to reheat for 20 seconds at full power, repeated pressing of
pad allows extension of the reheating time upto 5 minutes in 20
second increments

5
Operation
1. Plug power supply cord into power outlet.
2. After placing the food in a suitable container, open the oven door and put it in the oven.
3. Shut the door. Make sure that it is firmly closed.
Controls
Manual Cooking
To cook food manually using a specific entered cook time and power level
1. Open the door and put food in the oven. Close the door. ‘HELLO’ will show on the display
2. Press POWER LEVEL pad.
• If ‘HI’ shows in display, the power level is set to full power
• The % indicator will light if a lower power level is set
• You can change the power level to the desired setting by pressing POWER LEVEL pad repeatedly
3. Press number pads to enter the cooking time
• Maximum cooking time is factory set to 60 minutes. To Change maximum cooking time see User Options
4. If multi stage cooking is required, repeat step 2 and 3.
• Display changes to cook time and power level for the next stage
• Up to three different stages can be programmed
5. Press START pad
• The oven lamp will turn on and cooking will start
• The first STAGE indicator will start to blink and heating time will count down
Note - The user can repeat the last MANUAL COOKING sequence by pressing the START pad within the keypad activating time. After
MANUAL COOKING has ended, opening and closing the door will make the display show cook time and power level setting for the previous
MANUAL COOKING sequence.
Note - The cooling fan may automatically run for a while after cooking to cool the oven.
Preprogrammed Pads
To cook food using number pads preprogrammed with cooking sequences
1. Open the door and put food in the oven. Close the door. ‘HELLO’ will show on the display
2. Press a desired number pad
• For single digit entry, press only one number pad
• For multiple digit entry, press from one to three pads one by one
• Factory setting allows for single digit entry (0-9). To change to multiple digit entry option (0-199) , see user options
3. Oven begins to cook
• The oven lamp will turn on and cooking will start
• The first STAGE indicator will start to blink and heating time will count down
Factory Settings
Note - The cooling fan may automatically run for a while after cooking to cool the oven.
Pad Cooking Time Power Level
1 10 sec 100%
2 20 sec 100%
3 30 sec 100%
4 45 sec 100%
5 1 min 100%
6 1 min 30 sec 100%
7 2 min 100%
8 3 min 100%
9 4 min 100%
0 5 min 100%

6
Double Quantity
To increase cooking time when cooking more than one serving.
1. Open the door and put food in the oven. Close the door. ‘HELLO’ will show on the display
2. Press X2 pad.
• Amount of time added is a percentage of the original preprogrammed cooking time (Factory setting +80% of time)
• The percentage of time added can be changed. See Programming Cook Factor
3. Press desired preprogrammed pad
4. Oven begins to cook
• The oven lamp will turn on and cooking will start
• The first STAGE indicator will start to blink and heating time will count down
Note - The cooling fan may automatically run for a while after cooking to cool the oven.
Programming Pads
To change the amount of time or the power level for a preprogrammed pad
1. Open the door
• Display turns off
2. Press and hold number 1 pad.
• Oven will enter programming mode and will show PROGRAM in the display
3. Press number pad to be programmed
• Program number will show in the display
• For single digit entry, press only one number pad
• For multiple digit entry, press from one to three pads one by one
4. Press POWER LEVEL pad to select a desired power level
• If ‘HI’ shows in display, the power level is set to full power
• The % indicator will light if a lower power level is set
• You can change the power level to the desired setting by pressing POWER LEVEL pad repeatedly
5. Enter desired cooking time using the number pads
6. If multi stage cooking is required, repeat step 4 and 5.
• Display changes to cook time and power level for the next stage
• Up to three different stages can be programmed
7. Press START pad to save the program changes.
•To discard changes, press STOP pad.
20 sec.+ Pad
This function allows you to reheat for 20 seconds at full power by simply touching the 20 sec.+ pad. By repeatedly touching the 20 sec.+ pad you can extend
reheating time to 5 minutes in 20 second increments
1. Open the door and put food in the oven. Close the door. ‘HELLO’ will show on the display
2. Press 20sec.+ pad.
• When you press 20 sec.+ pad, “:20” shows in the display
• The oven will start immediately. It will add 20 seconds to the time counting down each time the pad is pressed
Note - The cooling fan may automatically run for a while after cooking to cool the oven.

7
Programming Cook Factor
To change cook factor for a preset pad
1. Open the door
• Display turns off
2. Press and hold number 1 pad.
• Oven enters Programming mode and will show PROGRAM in the display
3. Press number pad to be programmed
• Program number will show in the display
• For single digit entry, press only one number pad
• For multiple digit entry, press from one to three pads one by one
4. Press X2 pad to change cooking factor
• Current cook factor will be displayed
• Factory setting for cook factor is 80%. (CF:80 in the display)
5. Enter desired cook factor by using number pads (0-9)
• Number 1 pad for 10% of cook factor through number 0 pad for 100% of cook factor
6. Press START pad to save the cook factor changes
•To discard changes, press STOP pad
Wattage Output Chart
A power level is selected by pressing the POWER LEVEL pad. The chart shows the number of POWER LEVEL pad presses, the power level display and the
percentage of power
Power Level pad
(no. of presses)
Power Level
(Display)
1HI
270%
350%
420%
50%

8
Changing User Options
User options can be changed to suit individual preferences
1. Open the door
• Display turns off
2. Press and hold number 2 pad
• Oven enters Options mode and will show OP:-- in the display
3. Press number pad to be programmed (0-9)
• Program number will show in the display
4. Press the number pad again to change the option.
• Each time the number pad is pressed the option will change
5. Press START pad to save changes
• To change additional options, repeat steps 3 and 4
Pads Display User Options (Factory Settings in Bold)
1
Cook Ending Signal
OP:10
OP:11
OP:12
OP:13
OP:14
3 long beeps for 3 seconds
1 short, 1 long beeps for 3 seconds
3 seond beep
3 quick beeps for 3 seconds
5 quick beeps for 3 seconds
2
Repeat Feature
OP:20
OP:21
Repeat feature not allowed
Repeat feature allowed
3
Key Beep On/Off
OP:30
OP:31
Prevents beep when a pad is pressed
Allows beep when pad is pressed
4
Keypad Activating Time
OP:40
OP:41
OP:42
OP:43
Keypad time entry window is 1 minute
Keypad time entry window is 2 minutes
Keypad time entry window is 3 minutes
Keypad time entry window is 4 minutes
5
On-the-fly Feature
OP:50
OP:51
On the fly disabled
On the fly enabled
6
Reset on Door Opening
OP:60
OP:61
Opening oven door does not reset oven back to ready
Opeing the oven door resets the oven back to ready mode
7
Maximun Cooking Time
OP:70
OP:71
Allows 60 minute maximum cooking time
Allows 10 minute maximum cooking time
8
Manual Programming
OP:80
OP:81
Manual cooking not allowed
Manual cooking allowed
9
Multiple Digit Entry
OP:90
OP:91
Single digit entry allows 10 preprogrammed pads (0-9)
Multiple digit entry allows 200 preprogrammed pads (0-199)
0
Clean Filter Message
(Note:Message is
reminder only and will
clear after 24 hours.)
OP:00
OP:01
OP:02
OP:03
Oven will not display Clean Filter message
Oven will display Clean Filter message every 7 days
Oven will display Clean Filter message every 30 days
Oven will display Clean Filter message every 90 days

9
Microwaveable Materials
Non-microwaveable Materials
Cooking Tips
Defrosting
• Do not completely defrost foods within the oven. Partial cooking may occur.
• Always turn/move food during defrosting for more even results.
• Remove any formations of ice before defrosting foodstuffs.
• For fatty meat; defrost intermittently until defrosted.
Cooking
• When determining cooking time, always start with a shorter time to avoid overcooking.
• If cooking eggs in the shell, pierce the shell beforehand to avoid the risk of the egg exploding.
• Always turn the food during cooking to achieve even cooking.
• Baked goods such as bread and pastries should only be heated until the crust is warm, as the inside will heat considerably faster.
• Foodstuffs with a high sugar or fat content should only be cooked in high temperature resistant containers.
• Always stir liquids before heating in the oven.
• Always follow any instructions supplied on foodstuff packaging.
Cooking Accessories
(Not Included) Remarks
Crockery Microwave-safe only. Follow manufacturer’s instructions. Do not use cracked or chipped dishes.
Glass Jars Always remove lid. Use only to heat food until just warm. Most glass jars are not heat resistant and may break.
Glassware Heat-resistant oven glassware only. Make sure there is no metallic trim. Do not use cracked or chipped dishes.
Oven Cooking Bags Follow manufacturer’s instructions. Do not close with metal tie. Make slits to allow steam to escape.
Paper Plates Use microwave-safe plates only for short-term cooking/warming only. Do not leave oven unattended while cooking.
Paper Towels Use microwave-safe paper towels only to cover food for reheating and absorbing fat. Use with supervision for short-
term cooking only.
Parchment Use as a cover to prevent spattering or a wrap paper for steaming.
Plastic Containers
Use microwave-safe containers only. Follow the manufacturer’s instructions. Containers should be labeled “Microwave-
Safe.” Some plastic containers soften as the food inside gets hot. “Boiling bags” and tightly closed plastic bags should
be slit, pierced, or vented as directed by package.
Cling Film Microwave-safe only. Use to cover food during cooking to retain moisture. Do not allow plastic wrap to touch food.
Wax Paper Use a cover to prevent splattering and to help retain moisture.
Cooking Accessories
(Not Included) Remarks
Aluminium Pan/Tray/Metal/Metal
Handles/Metal Lined Materials/Tin Foil Metal shields the food from microwave energy. May cause arcing. Transfer food into microwave-safe dish.
Metal Bag-Ties May cause arcing and could cause a fire in the oven.
Plastic Foam Plastic foam may melt or contaminate the liquid inside when exposed to high temperature.
Wood Wood will dry out and may split. Avoid using wooden containers or utensils in the oven.
Note: Thin parts of irregular shaped food may defrost quicker than other parts.

10
Cleaning, Care & Maintenance
• Switch off and disconnect from the power supply before cleaning.
• Clean the interior of the appliance as often as possible.
• Do not use abrasive cleaning agents. These can leave harmful residues.
• Clean the door seal with water only.
• Always wipe dry after cleaning.
• Do not allow the control panel to become wet.
• Remove any odours in the oven interior by microwaving a cup of water with the juice of 1 lemon for 5 minutes. Dry with a soft cloth.
• A BUFFALO agent or qualified technician must carry out repairs if required.
Cleaning the Ceiling Cover
1. Push left side of catch in centre of ceiling cover and seperate it from cavity
2. Hold side catches of ceiling cover with both hands and pull down. Remove ceiling cover from oven cavity
3. Wash ceiling cover in soapy water or food sanitiser solution
4. Replace the ceiling cover
NOTE - the ceiling cover must be securely in place before operting the oven
Cleaning the Air Filter
Clean the Air Filter regularly according to the following instructions
1. Remove the bolts at both ends of the Air Filter
2. Take the Air Filter off carefully
3. Wash the Air Filter in warm soapy water
4. Replace the Air Filter before operating the oven
NOTE - if the air filter becomes clogged the oven may fail to work correctly

11
Tro u b l e s h o o t i n g
If your BUFFALO appliance develops a fault, please check the following table before making a call to the Helpline or your BUFFALO dealer
Electrical Wiring
BUFFALO appliances are supplied with a 3 pin, moulded, BS1363 plug and lead, with a 13 amp fuse as standard.
The plug is to be connected to a suitable mains socket.
BUFFALO appliances are wired as follows:
• Live wire (coloured brown) to terminal marked L
• Neutral wire (coloured blue) to terminal marked N
• Earth wire (coloured green/yellow) to terminal marked E
All BUFFALO appliances must be earthed, using a dedicated earthing circuit.
If in doubt consult a qualified electrician.
Electrical isolation points must be kept clear of any obstructions. In the event of any emergency disconnection being required they must be readily accessible.
Technical Specifications
Compliance
The WEEE logo on this product or its documentation indicates that the product must not be disposed of as household waste. To help prevent
possible harm to human health and/or the environment, the product must be disposed of in an approved and environmentally safe recycling
process. For further information on how to dispose of this product correctly, contact the product supplier, or the local authority responsible
for waste disposal in your area.
BUFFALO parts have undergone strict product testing in order to comply with regulatory standards and specifications set by
international, independent, and federal authorities.
BUFFALO products have been approved to carry the following symbol:
All rights reserved. No part of these instructions may be produced or transmitted in any form or by any means, electronic, mechanical, photocopying, recording or
otherwise, without the prior written permission of BUFFALO.
Every effort is made to ensure all details are correct at the time of going to press, however, BUFFALO reserve the right to change specifications without notice.
Fault Probable Cause Action
The appliance is not working
The unit is not switched on Check the unit is plugged in correctly and switched on
Plug and lead are damaged Call BUFFALO agent or qualified Technician
Fuse in the plug has blown Replace the fuse
Power supply Check power supply
Internal wiring fault Call BUFFALO agent or qualified Technician
Door is not closed properly Close door securely
Arcing/Sparking
Metallic or other inappropriate materials are being
used
Remove metal objects. Use microwave-safe utensils only
The oven is operated when empty Do not operate the oven when empty
Spilled food remains inside the oven Clean the interior of the oven
Unevenly cooked foods and/or
undercooked foods
Metallic or other inappropriate
materials are being used
Remove metal objects. Use microwave-safe utensils only
Cooking time or power level is not suitable Use correct power level and cooking time.
Food is not turned or stirred Turn food over, break apart, or stir as appropriate
halfway through cooking time
Food was not completely defrosted Defrost food completely before cooking
Uneven, incomplete defrosting
Metallic or other inappropriate materials are being
used
Remove metal objects. Use microwave-safe utensils only
Cooking time or power level is not suitable Use correct power level and cooking time.
Model Voltage Power Current Microwave
Output
Operation
Frequency
Oven
Capacity
Oven Cavity Dimensions
H x W x D (mm)
Dimensions
H x W x D (mm)
Weight
(Kg)
CF764 230V 50Hz 2600w 11.3A 1400w 2450Mhz 27 Litre 198.5 x 371 x 372 370 x 465 x 595 31
CF765 230V 50Hz 3000w 13A 1800w 2450Mhz 27 Litre 198.5 x 371 x 372 370 x 465 x 595 34

DECLARATION OF CONFORMITY
• Conformiteitsverklaring • Déclaration de conformité • Konformitätserklärung • Dichiarazione di conformità •
• Declaración de conformidad • Declaração de conformidade
I, the undersigned, hereby declare that the equipment specified above conforms to the above Directive(s) and Standard(s).
Ik, de ondergetekende, verklaar hierbij dat de hierboven gespecificeerde uitrusting goedgekeurd is volgens de bovenstaande Richtlijn(en) en
Standaard(en).
Je soussigné, confirme la conformité de l'équipement cité dans la présente à la / aux Directive(s) et Norme(s) ci-dessus
Ich, der/die Unterzeichnende, erkläre hiermit, dass das oben angegebene Gerät der/den oben angeführten Richtlinie(n) und Norm(en) entspricht.
Il sottoscritto dichiara che l'apparecchiatura di sopra specificata è conforme alle Direttive e agli Standard sopra riportati.
El abajo firmante declara por la presente que el equipo arriba especificado está en conformidad con la(s) directiva(s) y estándar(es) arriba
mencionadas.
Eu, o abaixo-assinado, declaro que o equipamento anteriormente especificado está em conformidade com a(s) anterior(es) Directiva(s) e
Norma(s)
Equipment Type • Uitrustingstype • Type d'équipement • Gerätetyp •
Tipo di apparecchiatura • Tipo de equipo • Tipo de equipamento
Microwave
Model • Modèle • Modell • Modello • Modelo • Malli CF764, CF765
Application of Council Directives(s)
Toepassing van Europese Richtlijn(en) • Application de la/des directive(s) du Conseil •
Anwendbare EU-Richtlinie(n) • Applicazione delle Direttive • Aplicación de la(s)
directiva(s) del consejo • Aplicação de directiva(s) do Conselho
EMC Directive 2004/108/EC,
Low Voltage Directive 2006/95/EC
Standards
Standaarden • Normes • Normen • Standard • Estándares • Normas
EN60335-1:2002+A11+A1
+A12+A2+A13+A14
EN 60335-2-90:2006+A1
EN 62233:2008
EN 55011: (2007), Group 2, Class
B
EN 55014-2 (1997) and
Amendment2 (2008)
EN 61000-3-2 :2006
EN 61000-3-3 :2008
Producer Name • Naam fabrikant • Nom du producteur • Name des Herstellers •
Nome del produttore • Nombre del fabricante • Nome do fabricante
Buffalo
Producer Address • Adres fabrikant • Adresse du producteur • Anschrift des
Herstellers • Indirizzo del produttore • Dirección del fabricante • Endereço do
fabricante
Fourth Way,
Avonmouth,
Bristol,
BS11 8TB
United Kingdom
Date • Data • Date • Datum • Data • Fecha • Data 28/07/11
Signature • Handtekening • Signature • Unterschrift
Firma • Firma • Assinatura
Full Name • Volledige naam • Nom et prénom • Vollständiger Name •
Nome completo • Nombre completo • Nome por extenso
Richard Cromwell
Position • Functie • Fonction • Position • Qualifica • Posición • Função Marketing Director
This manual suits for next models
1
Table of contents
Other Buffalo Microwave Oven manuals

Buffalo
Buffalo FB865 User manual

Buffalo
Buffalo GK643 User manual

Buffalo
Buffalo FB863 User manual

Buffalo
Buffalo CD399 User manual

Buffalo
Buffalo FB863 User manual

Buffalo
Buffalo GK642-E User manual

Buffalo
Buffalo FB864 User manual

Buffalo
Buffalo GK640GK641 User manual

Buffalo
Buffalo CM1929 Series User manual

Buffalo
Buffalo GK643-E User manual