Cactus AF45 User manual

AF45 Auto Electronic Flash
Instruction Manual
Harvest One Limited
9D On Shing Ind. Bldg.,
2-16 Wo Liu Hang Road,
Fotan, Hong Kong
www.cactus-image.com
Printed in Hong Kong © Harvest One Limited

Type P
Type N, O, S
Type C
Type O
Mounting
foot
Type S
Mounting
foot
1
2
3
4
5
6
7
8
25
26 27
28
910 11 12 13
14
15
16
17
18
19
20
21 22
23
24
29

1
NOMENCLATURE
Reflecting Plate
Diffuser
Flash Head
Battery Compartment Cover
Slave Sensor
AF Red Light
Lock Ring
Mounting Foot
LC Display
Auto Check Indicator
Mode Indicator
Beeper Indicator
Power Level Setting
Flash Range Distance Bar
Power Off Indicator
Zoom Position
Film Speed Indicator
F-Stop Indicator
Mode Selector
Film Speed Selector
F/Stop Selector
Beeper On/Off
Zoom Selector
Back Light
Ready / Test
Power On/Off Switch
Slave Mode Switch
Auto OK
Mode Indicator (Type N only)
1.
2.
3.
4.
5.
6.
7.
8.
9.
10
11.
12.
13.
14.
15.
16.
17.
18.
19.
20.
21.
22.
23.
24.
25.
26.
27.
28.
29.

2
IMPORTANT SAFEGUARDS
!
When using your photographic equipment,
follow the following basic safety precautions:
Do not fire flashes from a short distance
directly into the eyes of a person or animal.
This can cause damage to the retina and
may even lead to blindness.
Use only the power sources specified in the
operation instructions.
Never attempt to open or short-circuit
batteries.
Never expose dry or rechargeable batteries
to excessive temperature such as intensive
sunlight or fire.
Always switch off the flashgun before
changing batteries.
Do not attempt to open the flashgun
because the electronic circuit contains high
voltage.
In case the flashgun is so badly damaged
that the internal components are exposed,
the flashgun may not be used until it has
been repaired. Remove the batteries to
prevent inadvertent use.
Never try to repair the flashgun by yourself.
If there are any problems, contact the
customer service.
1.
2.
3.
4.
5.
6.
7.
8.

3
TABLE OF CONTENTS
Introduction 4
Inserting Batteries
4
Attaching the Flash to the Camera 5
Removing the Flashgun from the Camera 5
On/Off Switch and Flash Test Operation 6
Automatic Flash Sync Speed Control
Auto-focus "AF" Measuring Flash
Shooting 6
TTL Flash Control
Manual Flash Mode at Full Light Output
Illumination of LC Display 6
Front and Rear-curtain Synchronization 8
Power Zooming 10
Bounce and Swivel Flash 9
Reflecting Plate and Diffuser
Off Camera Direct and Bounce Flash
Automatic Motor-zoom Control
Slave Function 11
Manual Motor-zoom Control
Power Saving Function 12
Troubleshooting 12
Specifications 13
Warranty 14
Optional Accessories 16

4
Introduction
Thank you for purchasing Cactus AF45. This is an
innovative electronic flashgun for both digital cameras and
film cameras. Advanced technology is used in the flashgun
to control the correct amount of light output. Please take
few minutes to read the instruction manual before using.
The Cactus AF45 flash comes in 5 versions for different
camera brands:
C -
N -
O -
P -
S -
Canon Digital E-TTL, E-TTL II cameras & E-TTL film
cameras
Nikon Digital TTL, i-TTL cameras & TTL, i-TTL film
cameras
Olympus & Panasonic Digital TTL cameras
Pentax P-TTL Digital & film cameras
Sony Alpha & Minolta Digital ADI, D Lenses cameras &
TTL film cameras
Inserting Batteries
Make sure the power switch is at "OFF" position.
Slide the battery compartment cover forward to open.
Insert batteries according to the indicated polarity.
Close the compartment cover and slide it back to lock in
place.
Ensure all batteries be of same make with the same
charge level, alkaline batteries are preferable.
1.
2.
3.
4.
5.
5
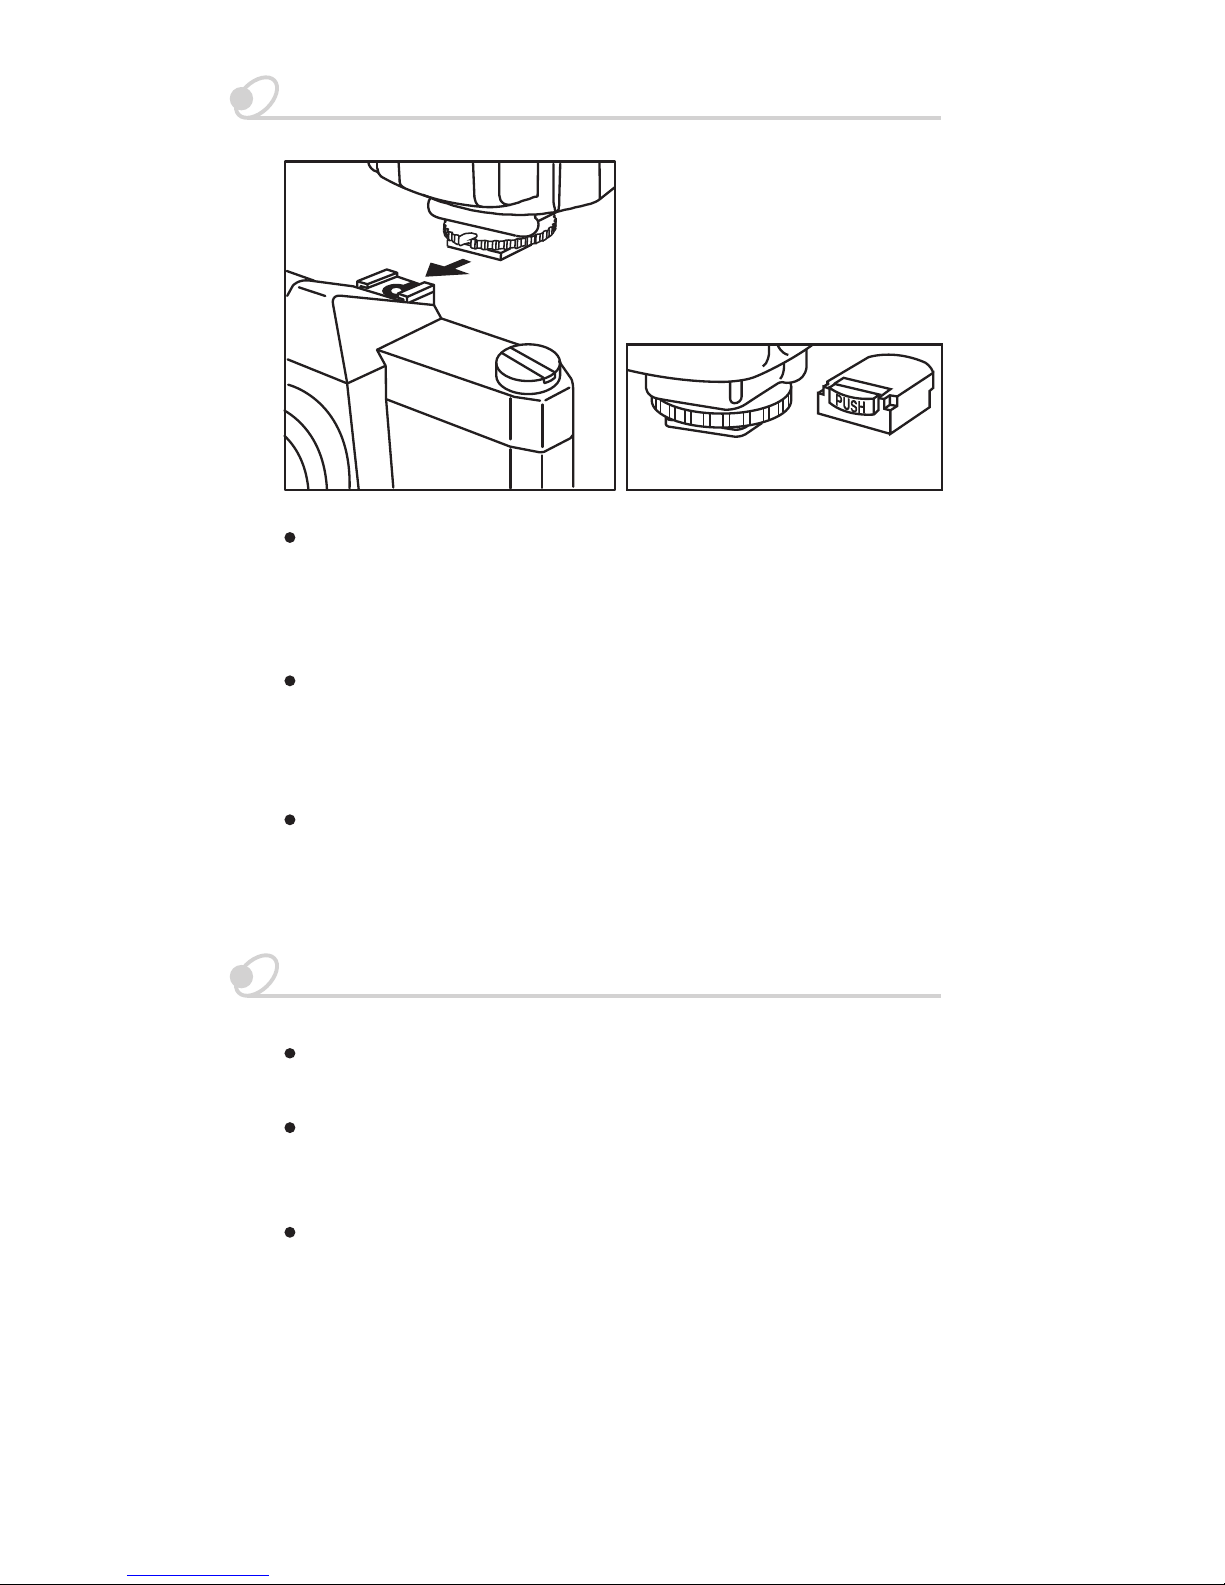
Attaching the Flash to the Camera
Removing the Flashgun from the Camera
For Type C, N & P:
(for - S)
Loosen the lock ring.
Slide the flash into camera accessory shoe.
Tighten the flash with the lock ring.
1.
2.
3.
For Type O:
Insert the mounting foot of the flash to the camera
accessory shoe.
Press "LOCK" to lock the flash in place.
1.
2.
For Type S:
Insert the mounting foot of the flash to the camera
accessory shoe. The flash is then locked in place.
1.
For Type C, N & P: Loosen the lock ring and remove
the flash off backward.
For Type O: Press both sides of the Lock/Release
button towards the directions indicated then pull the
flashgun off backward.
For Type S: Push the Shoe Release button and pull the
flashgun off backward.

6
On/Off Switch and Flash Test Operation
To switch on the flashgun, slide the power switch to "ON"
position. The "READY" indicator will light up as soon as
the flash is ready for shooting. Press the Test button to
ensure the flashgun works properly.
If the flashgun discharges completely, wait until the
"READY" indicator glows again. To switch off, slide the
power switch to "OFF" position.
Illumination of LC Display
LC display is used to show general information of the
camera and current status of the flashgun. LC display will
be illuminated for about 5 seconds every time the "LIGHT"
key is lightly tapped.
Shooting
Automatic Flash Sync Speed Control
When the flashgun is ready, the camera will automatically
adjust flash sync speed from program mode or
aperture-priority mode selected. The sync speed depends
on camera model and usually ranges from 1/30 sec to
1/250 sec. When a shot has been taken, "OK" symbol
flashes shortly on the LC display to confirm correct
exposure.

7
TTL Flash Control
When the flashgun is switched on, it will automatically set
at TTL mode and the LC display will indicate "TTL". When
"Ready" indicator lights up, press the shutter release firmly
to shoot.
The advanced programming and computerized circuitry of
the flashgun provide correct amount of flash light output
according to the camera’s exposure measurement through
the lens (TTL). If you need to change mode, simply press
the mode selector.
For Type C flash: The ETTL indicator will light while
connected with ETTL cameras.
For Type N flash: The LC Display will show TTL, I-TTL or
BL in different way while connected to different camera
models. Please refer to the camera’s manual.
Manual Flash Mode at Full Light Output
Auto-focus "AF" Measuring Flash
The integrated "AF" red light beam of the flashgun
supports automatic focusing of auto-focus TTL cameras.
When prevailing light is insufficient for automatic focusing,
the flashgun will project a red light beam onto the object as
soon as the camera’s shutter is lightly touched. The
camera’s auto-focus system then focuses the object by
this spot of red light beam.
To use the flashgun at full light output in manual mode, the
mode selector must be set to M (Manual). A full-power
flash will be fired each time the flashgun is triggered. The
LC display automatically shows the flash-to-subject
distance required for a correct exposure. An adaptation to
individual shooting situation can be achieved by changing
the lens aperture or focal length (on the camera).
5 level "Power Ratio" of 1/1, 1/2, 1/4, 1/8 and 1/16 could
be selected by slightly tapping the Mode selector when it is
at the manual position.

8
Front and Rear-curtain Synchronization
Some
cameras offer the option of rear curtain synchronization
(Rear mode) that triggers the flash unit at the end of the
exposure time. Rear curtain synchronization is particularly
advantageous when using slow shutter speed (slower than
1/30 sec.) or when shooting moving objects that has their
own source of light. Rear curtain synchronization gives a
more realistic impression of movement because the light
streaks behind the light source instead of building up in
front of it, as is the case when the flash is synchronized
with the front shutter curtain.
For Type P: Select the synchronization mode as front
curtain or rear curtain at the back of the flash. The flash
will fire according to the mode selected to match with the
camera shutter.
For Type C, N, O and S: The camera controls front or
rear-curtain synchronization, therefore no setting is
required to be done on the flash.
Note: Rear curtain synchronization is only possible on
cameras with this feature. See your camera’s
instruction manual for details.
Table of contents
Other Cactus Camera Flash manuals


