Cadco CPG-10 Owner's manual

Glass-Ceramic
Panini & Clamshell Grills
Use and Care Guidelines
Panini Models (with Ribbed Top Plate(s) )
CPG-10, CPG-15, CPG-20
Clamshell Models (with Flat Top Plate(s) )
CPG-10F, CPG-10FC(120), CPG-10FC(220)
CPG-15F, CPG-15FC
CPG-20F, CPG-20FC

2
The following important safeguards are recommended by
most portable appliance manufacturers.
IMPORTANT SAFEGUARDS
To reduce the risk of personal injury or property damage when using electrical appliances, basic safety
precautions should always be followed, including the following:
1. READ ALL INSTRUCTIONS.
2. Do not touch hot surfaces. Use handles. Use hot mitts or potholders.
3. To protect against electrical shock, do not immerse unit base, cord or plug in water or other liquid.
4. Close supervision is necessary when any appliance is used by or near children.
5. Unplug from outlet when not in use and before cleaning. Allow to cool before putting on or taking off
parts, and before cleaning the appliance.
6. Do not operate any appliance with a damaged cord or plug or after the appliance malfunctions or has
been damaged in any manner. Contact the Cadco Factory Service Department at (860) 738-2500 for
examination, repair or adjustment. In Canada call (905) 825-9665.
7. The use of accessory attachments not recommended by the appliance manufacturer may cause
injuries.
8. Do not use outdoors.
9. Do not let cord hang over edge of table or counter or touch hot surfaces.
10. Do not place on or near a hot gas or electric burner or in a heated oven.
11. It is recommended that this appliance not be moved when it contains hot oil or other hot liquid.
12. ALLOW GREASE TRAY TO COOL COMPLETELY BEFORE REMOVING.
13. To disconnect, turn heat control to "OFF", then remove plug from wall outlet.
14. Do not use appliance for other than intended use.
SAVE THESE INSTRUCTIONS
NOTE: A short power supply cord (or cord set) has been provided to reduce the hazards resulting from
becoming entangled in or tripping over a longer cord. Longer cord sets or extension cords may be used if
care is properly exercised in their use. If a long cord set or extension cord is used, the marked electrical
rating of the cord set or extension cord should be at least as great as the electrical rating of the appliance.
The longer cord should be arranged so that it will not drape over the counter top or table top where it can
be pulled on by children or tripped over accidentally.

3
Before You Use Your Grill
Remove the protective film
Carefully remove all the protective film from the external walls of your new
Panini / Clamshell Grill. Be sure not to leave any residue on the stainless steel
surface. If there should be any residue, it may be removed with any stainless
steel cleaner. Do not use tools, abrasive detergents, or acids, that could ruin the
surface.
Insert Grease tray
Insert the grease tray into its slot underneath the center of the grill. Grease tray
should always be in place before grilling.
Location/ Positioning
1. Position the grill with minimum clearances as shown.
2. Do not install the grill near inflammable or heat sensitive
materials, walls, or furniture. Otherwise, protect them with
appropriate non-inflammable materials in compliance with
local fire prevention regulations.
3. Do not install the grill near other appliances that reach
high temperatures, in order to avoid damaging electrical
parts.
4. Grill location should be:
- dedicated & conforming to commercial food preparation
- adequately ventilated
- in compliance with local fire & health department laws &
recommendations
- protected against the weather
- with temperatures between +41 - +95F maximum
- with maximum humidity of 70%
5. Ventilation hood requirements vary according to local codes. Be sure to check your local codes before
placing your Grill.
6. These Panini/Clamshell Grills are not designed for built-in applications.
Electrical Connection - These units are equipped with a grounded, 3-pronged commercial plug. For
safety, this plug MUST be connected to a 3-pronged outlet. Before connecting power, make sure the
outlet’s voltage and frequency correspond to the data plate on the unit (CPG-10/ CPG-10F/ CPG-
10FC(120) = 120V/ 60hz/1500W/12.5A; CPG-10FC(220) = 208/240V/ 60hz/1750W/7.9A; CPG-15FC
= 120V/ 60hz/1800W/ 15A; CPG-15/ CPG-15F = 208/240V/ 60hz/3100W/14A; CPG-20/ CPG-20F/

4
CPG-20FC = 208/240V/ 60hz/ 3200W/ 14.5 amps.
Before turning your grill on,be sure to check your entire circuit to verify that the total amps being
drawn by all the appliances, lights, etc. on that circuit do not exceed the amps available on that circuit.
Notes For Use
Before using the Grill for the first time it should be “Burned In”. This will eliminate any odors caused by
protective grease used in the factory. First, with grill unplugged, wash the ceramic surface with soap and
water, then dry it thoroughly. To “Burn In” your Grill, simply set the temperature to 450ºF and let it run
for approximately 1 hour with the top open and no food on the cooking surface. Now you are ready to
start cooking.
DO NOT use these grills to heat pots or pans. The grill surface was designed to cook food, not to heat
pots.
DO NOT put aluminum foil or plastic containers on the cooking surface.
Warning! The Cadco Grills are capable of reaching very high temperatures.
Follow all safety procedures to avoid injury.
Never touch the grilling surface while the power is on or the cooking surface is
hot. (With our Safety Touch design, when the cooking surface is 740ºF, the
exterior of the Grill is only 167ºF.)
Use only heat-resistant utensils on your Panini / Clamshell Grill.
Use the handle to raise and lower the top of the Panini / Clamshell Grill to avoid injury.
You have a one-year parts and labor warranty on your new glass-ceramic appliance; keep it valid. Your
Panini / Clamshell Grill was designed to prepare food; don’t abuse it by using it for any other purpose.
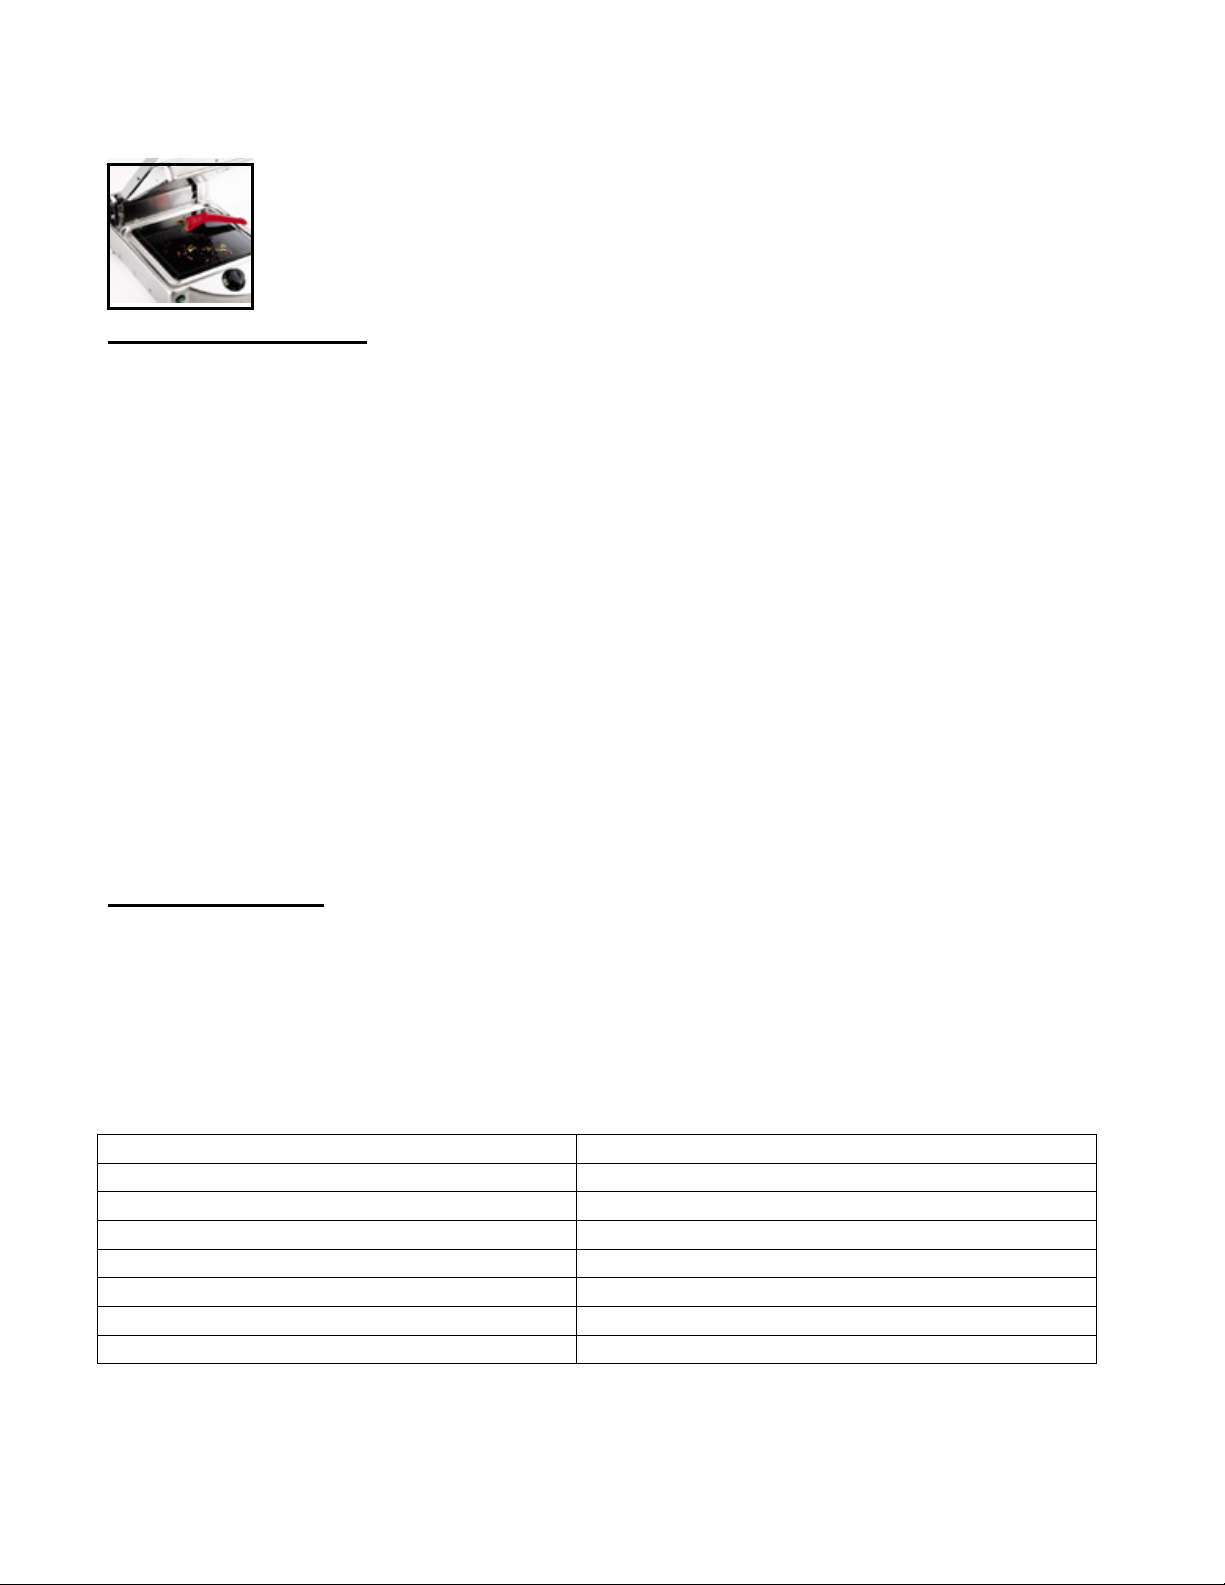
Cooking Function Symbols
Power Button (A) – When the power button on the front of the
Grill is depressed, the Grill is heating and in a cooking mode.
When the button is not depressed, there will not be any heat
going to the grill.
Temperature Control Dial (B) – Turn the dial clockwise to set
the desired grilling temperature. The Panini Grill temperature
range is 250ºF - 740ºF.
Temperature Light (C) – When the light is on, the grill is
generating heat. When the light goes off, the set temperature has
been reached. You will notice the light cycling on and off during the cooking process. When the light is
on, the grill is sending more heat to the grilling surface. When it is off, the grill has been heated to the set
temperature.
Cooking Sandwiches
Flavor Transfer – Ceramic glass is not porous like metal grills and will not absorb or transfer flavors.
The grill preheats in just minutes. To preheat the grill, simply set the desired cooking temperature and
close the top. You will notice the power light illuminates, indicating that power is going to the grill. Your
grill will be preheated and ready to start cooking in about 2 or 3 minutes. When the power light is no
longer illuminated, the grill is ready to use.
Cooking time - Sandwiches will usually take between 2 – 5 minutes to heat throughout. The cooking
time depends upon the bread you use and the ingredients you have chosen for your sandwich. Your Deli
supervisor can determine the proper times and temperatures.
Cooking temperature - Most of your sandwiches will be grilled at temperatures between 475ºF and
525ºF

5
Light pressure is all you need when lowering the top grill to assure a perfectly cooked sandwich.
Excessive pressure will not speed up the cooking process, and product quality may be compromised.
To keep your grill clean between sandwiches, simply wipe the grill surfaces with a
clean oiled paper towel. Use an insulated mitt to avoid being burned by the hot surface!
Rapid Preheat – The Glass-Ceramic Panini / Clamshell Grills preheat very quickly. It is
not necessary to leave your Panini Grill on throughout the service period.
Cleaning Instructions
Always disconnect the plug from outlet before cleaning.
Wait for the outer and inner surfaces of the grill to cool off before attempting to clean the grill.
Clean the grill daily to maintain proper levels of hygiene.
The grill may be “Quick Cleaned” with the scraper. The residue may be emptied into the drip tray under
the grill through the opening at the front of the grill.
Be sure to clean the drip tray regularly to avoid spills.
For hard to clean spots use the scraper or the brass scouring pad included. There are many nonabrasive
cleaners specifically made for ceramic cooking tops on the market today. We suggest using your choice
of nonabrasive cleaner at the end of each day or service period to keep your grill in top condition.
NEVER use:
- Abrasive or powder detergents
- Aggressive or corrosive detergents (i.e. hydrochloric/ muriatic or sulphuric acid
- Abrasive or sharp tools (i.e. abrasive sponges, scrapers, steel bristled brushes, etc.)
- Water jet
Never use a spray of water or immerse the grill in water. This will damage the electrical
components and might create a hazardous condition.
If Trouble Occurs
If there is any unusual change in the operation of your grill, turn it off and disconnect the power
immediately. Have a qualified electrician perform any necessary repairs before using the grill again. If
there are any cracks in the ceramic glass top do not use the grill. The Cadco Glass-Ceramic Panini /
Clamshell Grills are designed to allow the operator to place frozen foods directly on the heated grill
surface without causing damage.
Cadco Grills are manufactured to Cadco Ltd. Specifications by Spidocook S.r.l.
Model Nos. Cross Reference:
PANINI GRILLS (Ribbed top plate) CLAMSHELL GRILLS (Flat top plate)
Cadco CPG-10 = Spidocook SAP010R Cadco CPG-10F = Spi
d
ocook SAP010
R
Cadco CPG-15 = Spidocook SAP015P
R
Cadco CPG-10FC(120) = Spidocook SAP010T
Cadco CPG-20 = Spidocook SAP020P
R
Cadco CPG-10FC(220) = Spidocook SAP010PT
Cadco CPG-15F = Spidocook SAP015P
Cadco CPG-15FC = Spidocook SAP015T
Ca
d
co CPG-20F = Spidocook SAP020P
Cadco CPG-20FC = Spidocook SAP020PT

6
We recommend that you record the following information for warranty purposes:
Purchase Date:_____________ Dealer:_____________________________________
Model Number: ______________________
To expedite all warranty claims please keep your dated sales receipt from place of purchase.
WARRANTY
Cadco warrants that this Grill be free from defects in material and workmanship for a period of one
year from date of purchase. (Warranty provides repair of unit.) A copy of your original purchase receipt is
required for proof of purchase date. This warranty does not cover consequential damage of any kind or
damages resulting from accident, misuse, abuse, or external service or repair attempts by unauthorized
personnel. Inquiries concerning this warranty and the use and maintenance of this unit should be directed
to Cadco, Ltd.
Please note: This appliance is a carry-in service item; customer is responsible for packaging the
unit securely and returning it to Cadco for service, along with a copy of your original purchase receipt,
a description of the problem, and your name, shipping address and phone number. If shipping to: Cadco,
Ltd., Attn: REPAIR, 200 International Way, Winsted, CT 06098. If shipping the unit for service, we
recommend that you insure it for its original purchase price. Cadco is not responsible for damage or loss of
unit in transit to us or to any other service location.
Call Cadco at 860-738-2500 for Return Authorization Number BEFORE returning any item to
us for repair. Return Authorization Number MUST be written on outside of carton to track the
unit and avoid service delays. Warranty covers repairing the unit and returning it to customer.
Warranty is applicable only in USA and Canada*. (*Canadian customers contact Tarrison Products
Ltd. in Ontario, Tel. (905) 825-9665.)
Cadco, Ltd., 200 International Way, Winsted, CT 06098
Tel. 860-738-2500, FAX 860-738-9772,
E-mail: [email protected], Website: www.cadco-ltd.com
7/19/2019 RV08
This manual suits for next models
8
Table of contents
Other Cadco Grill manuals
Popular Grill manuals by other brands

Broil King
Broil King INDEPENDENCE C3 Series manual

Woodson
Woodson W.GTQI8S.10 Specification, installation and operation manual

Tasty Trotter
Tasty Trotter KYQ-BFT402 Assembly instructions

Lenoir
Lenoir LHC650 instruction manual

Weber
Weber ONE-TOUCH 30791_042911 owner's guide

Napoleon
Napoleon BIP500RB manual