Cake Kalk User manual

Kalk manual
Limited edition

We are extremely flattered that you have chose to ride a CAKE electric
motorbike. It’s our obligation to do the best we can to serve you with
product, information, service and spare parts for an eortless experience.
Our ambition is to develop uncompromising high performance o-road
motorbikes. CAKE´s mission is to inspire people, contributing to speeding
up the journey towards a zero emission society, combining excitement
with responsibility.
To optimise the performance and benefits for an o-road motorbike with
an electric drivetrain, establishing a new category, we needed to start from
scratch. Every little detail, hard and software has been engineered,
designed and chiselled for perfection, while considering the perspectives
of sustainability.
This manual should be your tool and guidance for general maintenance,
safety precautions, service matters - stretching from what may be dealt
with by yourself and what needs to be handed over to professional
mechanics, tuning, warranty aspects, handling and trouble shooting.
Explore with Respect
Stefan Ytterborn Founder & CEO
Hello &
Welcome!
1. Introduction and getting started
1.1 Introduction
1.2 Unpacking
1.3 Getting started
2. General information
2.1 Safety Advice
2.2 Controls & Ridemodes
2.3 Starting procedure
2.4 Charging
2.5 Specifications
3. Regular inspection and maintenance
3.1 Before each ride
3.2 Service table and Service Intervals
3.3 Wheels & Tires
3.4 Handlebar and cockpit
3.5 Suspension
3.6 Drivetrain & Chain
4. Remove and Installation
4.1 Battery & seat
5. Owning and Operation
5.1 Maintenance
5.2 Cleaning
5.3 Storing
5.4 Transport
5.5 Crash
5.6 Troubleshooting
5.7 Tools
6. Contact and support
Table of contents

1. Introduction and getting started
1.1 Introduction
Please read the manual to it’s entirety to ensure that you understand
the functions and operation of this vehicle before you drive.
To get the most out of you Kalk, electric motorcycle, and to ensure safe
operation, it’s critical that you fully understand the features of this bike.
This manual includes important information that every rider needs to fully
understand. Please study this manual cautiously in it’s entirety before your
first ride on your new CAKE, Kalk. Do not ride the motorcycle until you’ve
attained enough understanding of its controls and features.
1.2 Unpacking
Yow will receive your CAKE Kalk in a wooden box.
Once you have the box in front of you, you will be able to unpack it and
make the final assembly before your first ride.
You will need:
• Screw driver (Electric screw gun is preferred)
• 5mm Hex key
To disassemble the box and unpack the bike, please follow the
following steps:
1. Remove the lid. Remove the lid with the help of a screw driver or electric
screw gun by removing the screws securing the lid. When the last screw
is removed, remove the lid.
2. Remove one of the long side walls by the help of your choice. Make sure
that the wall don’t fall on the bike as you remove the last screws.
Remove when done.
3. Take out the wooden box which is equipped with your charger and
additional information. SAVE FOR LATER The bike is secured by the help of
straps to ensure a safe delivery. The suspension is therefore pressed
down, this will make the bike jump up like a spring when removed.
Please be careful not to injure yourself or to damage the bike.
4. Start with assembling the handlebar so you have something to grab
before removing the straps. If you have enough room to get inside the
box and start with the assembly of the handlebar and stem. Please do
so, otherwise remove more walls (as step 2) until you feel confident.
Use the 5mm Hex key to attach the handlebar on the Stem and
dashboard. If you are unsure about this step. Please see the
Chapter “Remove and Installation”
under “Handlebar and cockpit”.
Be carful on this step to avoid unnecessary scratches on the handlebar
or bodywork.
5. Now you are ready to remove the straps to bring the motorcycle outside.
Make sure that release one strap at a time and that you are able to hold
the bike as you are removing the strap so it doesn’t fall down. If you are
unable to do this by yourself, take help of a friend.
6. When all the straps are removed. Roll the bike down from the floor and
lean it towards a wall securely or place it on a motorcycle stand.
1.3 Getting started
Before you are ready to take your first ride on the KALK. Please follow the
steps below to make sure to not make any damage to the vehicle, property
or injure yourself or others. During transportation the bike might have beco-
me damaged. We can’t guarantee the bikes drivability as it’s been strapped
down for up to several weeks before you receive it. During this time, some
components might have become loose or even damaged.
• Read the manual and understand the information. If anything is unclear,
please get in touch with us.
• Charge the battery
• Make sure that handlebar is tightened firmly and in a comfortable driving
position.
• Check the suspension.
• Make sure that the headset is tightened correctly.
• Go through the chapter “Regular Inspection and Maintenance” and go
through the checklist on “Before each ride”

2. General information
2.1 Safety Advice
Riding
When riding a CAKE bike for the first time, there are a few things to consi-
der. The bike has an electric motor with instant torque and a primary drive
with no gears which means you have all the power available at all times in
the throttle. It’s very sensitive and it’s highly recommended to start riding in
the 1st riding mode to get used to this kind of vehicle.
There is no clutch on the CAKE Kalk, instead you have the rear brake posi-
tioned on the left side of the handlebar. This means that there are neither
rear brake or gear shifter to be found by the rider’s feet. This can feel very
unnatural for experienced combustion motorcyclists.
• Never ride the bike under the influence of alcohol or drugs
•Never ride the bike on public roads
• Never ride 2 persons on the bike
• Always check your local laws and regulations where to ride.
• Only for o-road/racing purposes only. Not for highway use.
2.2 Controls & Ridemode
Rider controls and components
• Grips
• Throttle
• Killswitch
• Rear brake
• Front brake
• Stem
• Dashboard
Brakes
Please note that, unlike a regular petrol motorcycle, both the rear and front
brake is located on the handlebar and there are no footbrake. The rear bra-
ke is located on the left side of the handlebar and the front brake is located
on the right side of the handlebar.
Killswitch
The kill switch is located on the right side of the handlebar.
When the kill switch is connected with the magnet, the bike is turned on.
When you are done riding or in case of an emergency, pull the kill switch to
turn o the bike.
ALWAYS
wear the kill switch strap around your wrist when riding. This is
to prevent further damage to the rider, the vehicle or other property. When
falling, losing control or feeling unsafe, release your right hand from the
handlebar and pull it back, this will disconnect the kill switch and turn the
bike o.
ALWAYS
disconnect the kill switch when not riding. As the bike makes no
noise when on standby mode, it’s impossible for bystanders to know if the
bike is on or not. This can cause accidents if people are pulling the throttle
while expecting a turned o bike.
Dashboard
The dashboard on the stem is the bikes control panel.
Here you can see the bikes SOC (state of charge), Ride mode, Brake mode
and over temperature.
KillswitchStem
Rear brake Dashboard Front brake ThrottleGrip

Brake mode, knob to the left.
On the know to the right you can put the bike into 3 dierent braking
modes. This ranges from a free wheel experience, much of what you feel on
an MTB, which is suited for mellow riding on flats, to a hard engine brake,
which reminds the rider of the engine break on a 4-stroke motorcycle,
which is suited for technical race tracks or in the woods. All the energy from
the braking goes back into the battery for extended range.
Brake mode 1
No motor brakes. Gives the same sensation as riding a bike, perfect for mel-
low riding and the ultimate freedom experience.
Brake mode 2
Moderate engine brake. As you release the throttle you feel the bike slowing
down at a slow pace. This can boost your confidence when riding a bit
more technical terrain as you get better control over the bike. The braking
power is regenerated to the battery for extra range.
Brake mode 3
Hard engine break. When releasing the throttle, the bike will slow down
significantly. This could be uncomfortable for novice riders as the braking
is quite hard. This brake mode is best suited for technical tracks where full
control for the bike is needed. All the braking power is regenerated to back
to charge the battery for extended range.
Power mode, to the right
There are 3 dierent power modes to choose from when riding the bikes.
Never ride the bike above your comfort level and always ride according to
your personal riding skills. We always recommend a new CAKE-rider to start
on the first mode to get used to the bike and the dierences between an
electric motor and an Internal combustion engine. The 3 dierent ride
modes have dierent attributes in terms of top speed, acceleration and
torque to suit riders of all riding levels, from beginners to professionals.
Power mode 1 - Explore
This mode is
ALWAYS
recommended when riding a CAKE bike for the first
time. It has a limited top speed of 45kmh (28mph) and soft acceleration.
This mode still has a high torque for ridability oroad as well as something
for new riders to progress with. This Mode is perfect for tracks where
control is more valued than power.
Power mode 2 - Excite
With a top speed of 70kmh and a good acceleration, this mode is perfect
for enduro riding out in the woods.
Warning LED
Battery indication on Dashboard
Battery SOC
Brake mode Drive mode

Power mode 3 - Exceed
With no restrictions when it comes to the performance, this mode is perfect
when you need all power available. This mode is highly recommended for
highly skilled riders only.
Charging
When charging the bike, do the following steps.
ALWAYS
read the charging manual before charging.
1. Make sure that the battery is connected to the bike (both connectors
from battery, both the big red one and the small yellow one)
2. Disconnect the killswitch
3. Turn on the master switch (pointing upwards)
4. Plug the charger into the outlet (220V)
5. Plug the charger into the bike (charger connector can be found under the
bike, close to the triple clamps)
When the charger is connected, it will show a red light. When the charging
is done, it will light in green. When the charging is finished, don’t forget to
put the rubber cap on the connector, not to break it during riding.
• Never charge the bike without supervision.
• Never let the bike charge unattended.
• Never use the charger in any other application than with the CAKE bike.
• Never use any other charger than the original CAKE charger.
• Never have the kill switch on the handlebar connected as the bike can be
turned on and ridden while the charger is connected. This can cause seve
re injuries to people or properties.
2.3 Starting procedure
Before you start the vehicle, please remember that this is an all-electric
vehicle which is completely silent when it’s on.
Battery connected
To see if the battery is connected properly. Remove the saddle by uns-
crewing the 2 screws found under the saddle with a 5MM Allen key. When
the saddle is removed, check that the big red contact is undamaged and
connected tightly. You can leave the battery connected to the bike during
longer periods of time (such as storage) as long as you turn o the master
switch.
The master switch
After you are certain that the battery is properly connected you move on to
the master switch. The master switch is located on the front of the battery
cover (see picture below). When the master switch is turned o (pointing
down), all of the electricity in the bike is turned o as the battery is
electrically disconnected from the rest of the system. The master switch
needs to be turned on, pointing upwards, in order to ride or charge the
bike. When the bike is not in use for longer periods of time (a week or
longer), the master switch should be turned o in order for the bikes
standby mode not to drain the battery slowly.
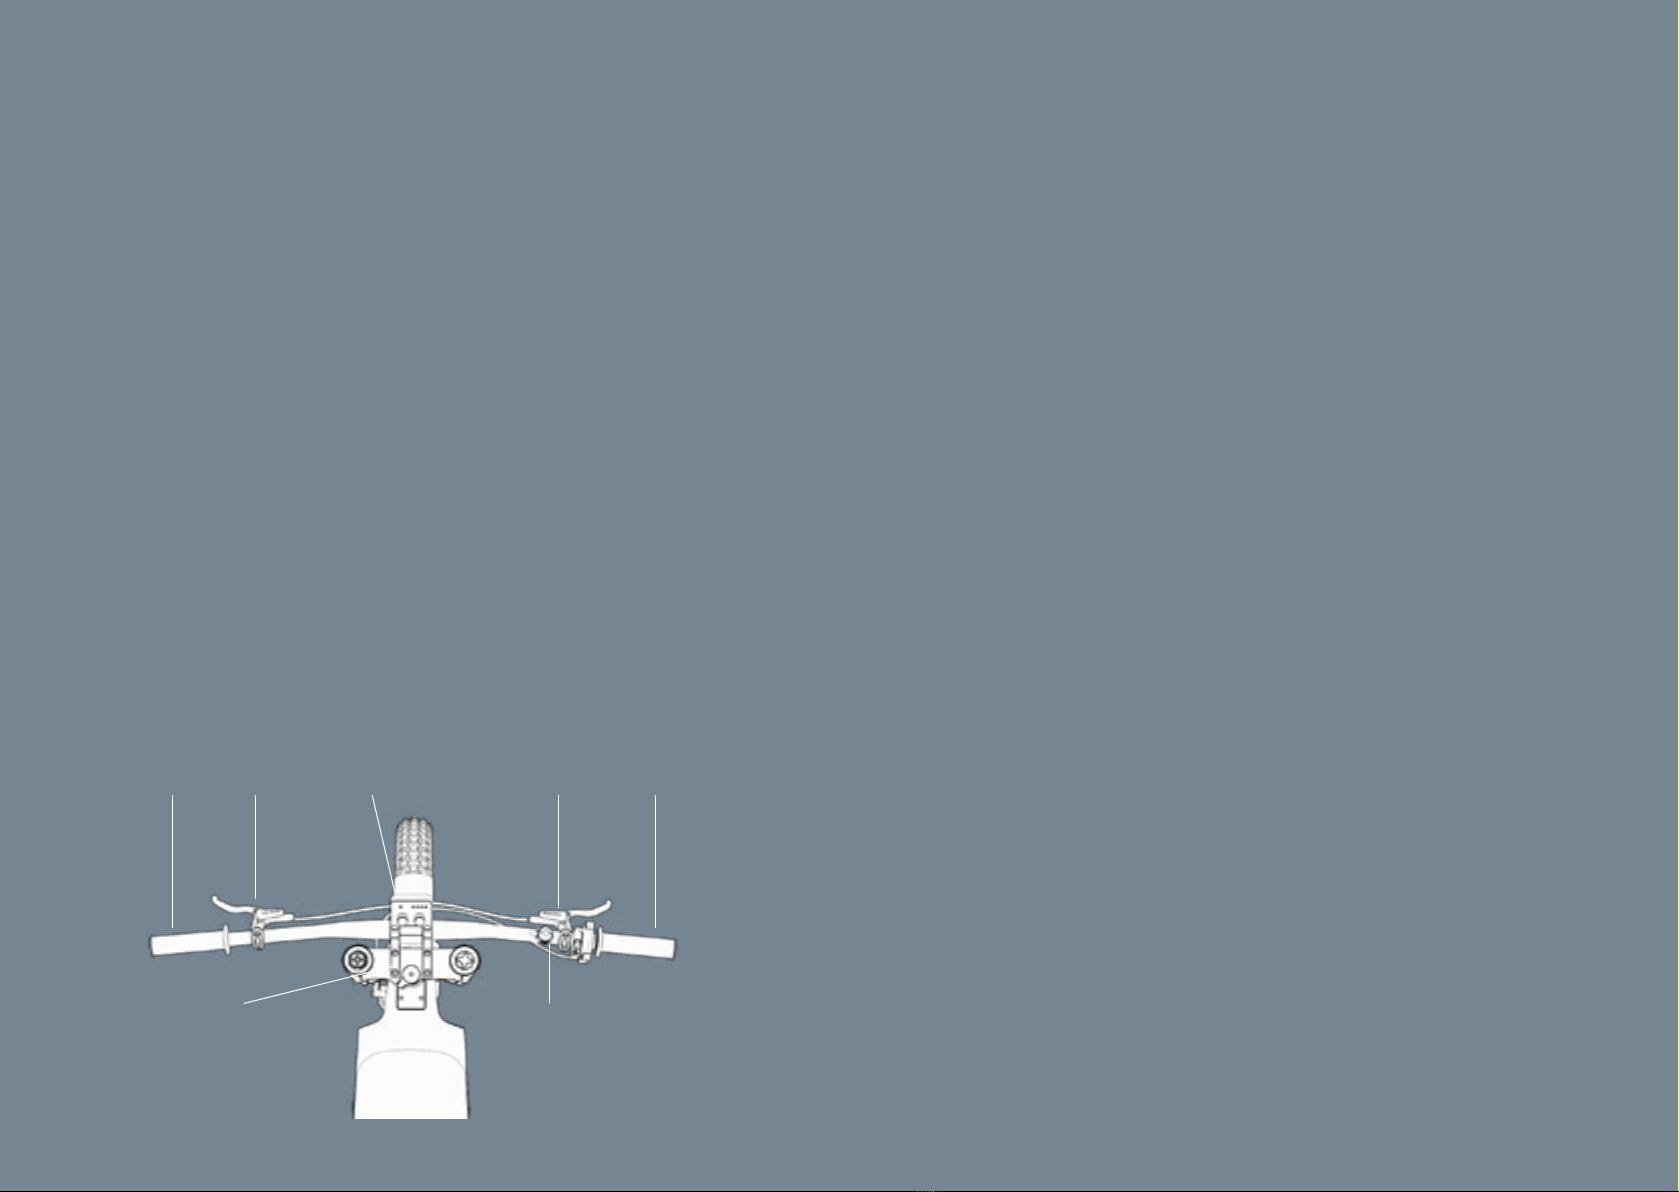
Kill switch
The kill switch is located on the right side of the handlebar.
When the kill switch is connected with the magnet, the bike is turned on.
When you are done riding or in case of an emergency, pull the kill switch to
turn o the bike.
ALWAYS
wear the kill switch strap around your wrist when
riding. This is to prevent further damage to the rider, the vehicle or other
property. When falling, losing control or feeling unsafe, release your right
hand from the handlebar and pull it back, this will disconnect the kill switch
and turn the bike o.
Always
disconnect the kill switch when not riding. As
the bike makes no noise when on standby mode, it’s impossible for bystan-
ders to know if the bike is on or not. This can cause accidents if people are
pulling the throttle while expecting a turned o bike.

2.4 Charging
Charging
When charging the bike, do the following steps.
ALWAYS read the charging manual before charging.
1. Make sure that the battery is connected to the bike (both connectors
from battery, both the big red one and the small yellow one)
2. Disconnect the killswitch
3. Turn on the master switch (pointing upwards)
4. Plug the charger into the outlet (220V)
5. Plug the charger into the bike (charger connector can be found under the
bike, close to the triple clamps)
When the charger is connected, it will show a red light. When the charging
is done, it will light in green. When the charging is finished, don’t forget to
put the rubber cap on the connector, not to break it during riding.
• Never charge the bike without supervision.
• Never let the bike charge unattended.
• Never use the charger in any other application than with the CAKE bike.
• Never use any other charger than the original CAKE charger.
• Never have the kill switch on the handlebar connected as the bike can be
turned on and ridden while the charger is connected. This can cause seve
re injuries to people or properties.
2.5 Specifications
Kalk, Limited edition
Top speed: 80 Km/h
Torque: 42Nm
Power:
Ratio: 12/80 direct drive
Battery capacity: 50 Ah
Wheel size: 24” Bicycle
Fork: 38mm Öhlins, CAKE specific
Travel: 203mm
3. Regular inspection and maintenance
3.1 Before & after each ride
To make sure that your bike is always in good condition and avoid injury or
damage, please make sure to always take care of your CAKE Kalk bike by
the following steps.
• Check the wheels
• Check the chain
• Clean your bike
(see Chapter 5.2 - Cleaning)
• Check suspension
• Check that the headset is properly tightened

3.2 Service table and Service Intervals 3.3 Wheels & Tires
Wheels
• Check that the tires are inflated with the correct pressure.
• Check the tires tread pattern is at least 3mm deep.
•Check for bent spokes.
• Check that all spokes have the correct tension.
• Check that the brake discs are straight.
• Check that the front wheels axle is tightened correctly.
• Check that the rear axle is tightened correctly.
•Check that the rear wheels axle is adjusted correctly and evenly on both
sides, according to the swing arm markings.
3.4 Handlebar and cockpit
Headset
Make sure that the headset bolt is tightened firmly and that there is no play
between the head tube and triple clamps when suspending the forks.
3.5 Suspension
Linkage
Make sure that the linkage has no damage.
Make sure that all bolts on the linkage is firmly tightened.
3.6 Drivetrain & Chain
Chain
Make sure that the chain tension is correctly adjusted.
Make sure that the chain is in good condition

3.7 Brakes
•Look at the front and rear callipers to see that they or the brake brackets
are not damaged.
•Look at the front and rear brake pads to see that they are not worn out.
• Look in the window to see that there is enough brake fluid in the brake
housings on the handlebar.
• Make a brake test to check that both the front and rear brake
works properly.
4. Remove and Installation
4.1 Battery & seat
In order to remove the battery please follow the steps below.
Make sure that the bike is standing securely before removing either the seat
and/or the battery pack.
Removing the seat.
Use a 5mm Hex key and unscrew the screws under the seat. Then pull the
seat upwards and backwards in order to remove the saddle.
Removing the battery pack.
Start with disconnect the red power connector and the yellow charging
connector.When all connectors from the battery has been disconnected,
unscrew the two bolts securing the battery with the help of a 7mm socket
wrench. Please note that the battery is guided by 2 metal rods to help the
battery stay in place, when pulling out the battery, make sure you are
pulling straight up and that no cables or connectors are in the way or can
get stuck.
Note that the battery pack is very heavy, and you might
want the help of a friend to assist.
When putting in the battery, make sure that all the cables and connectors
are put to the side, so it won’t get stuck when pushing down the battery.
Make sure that the battery is aligned with the guiding rods before
attempting to push down the battery. When in place, slide the battery down
slowly and make sure that the cables are put to the side and can move
freely. Make sure that the battery has full contact to the battery floor and
that nothing is stuck before screwing on the two bolts to secure the battery.
Before sliding on the seat. Connect the red power connector and the yellow
charging connector. Then tuck the power connector down on the side
between the frame and the battery in order to make sure that the seat can
slide on correctly. Slide the seat on and make sure that the metal tongue
gets full contact with the pin without any cables getting in the way.
Before screwing on the 2 bolts in the rear seat, make sure that the seat has
good contact with the carbon frame, both in the front and on the side.

5. Owning and Operation
5.1 Maintenance
It’s important to keep the bike in good condition in order to get the full
performance of the bike and increase it’s lifetime. When you are done
riding, always clean the bike and follow the “regular inspection” check list.
Charge the bike to a minimum of 30% State Of Charge. Turn the bike o
with the main switch if it will not be used for more than a week.
5.2 Cleaning
Always be cautious when cleaning the bike. The bikes electrical components
can be damaged if cleaned improperly which can damage the bike,
property or persons.
• Always make sure that the bike is standing firmly before washing and
don’t forget to turn the bike o.
• Never use a pressure washer or a water hose in order to clean the bike.
It’s recommended to use pressurised air, a bucket of water together with
a cloth and brush.
• When cleaning the chain, use chain cleaner and scrub the chain with a
brush. Repeat the cleaning before drying the chain and apply chain lube.
5.3 Storing
Follow these following steps to ensure that your CAKE Kalk is always in a
good condition and to extend the life of the bike. We recommend you to
ride the bike at least once every month as some the bikes components
needs to be used in order for them to be in the best condition.
Store the bike indoors away from sunshine to avoid unnecessary ageing or
discolouration.Make sure to turn the bike o with the main switch (pointing
down) as it’s otherwise in standby and will drain the battery to an
unhealthy level which will shorten the lifespan of the battery. Never store
a bike with an empty battery. The optimal SOC is 30% (1-2 green LEDS on
the dashboard). If the bike will be stored for a longer period of time, charge
the bike to 30% SOC (see under dashboard) to maximise the lifespan of the
battery. Never store your bike in below 10° C, if you are unable to store the
bike in temperature above that, remove the battery and bring it inside.
If the bike is unused for too long. The oil inside of the forks can start to leak.
5.4 Crash
In the case of a crash, please go through the bike for any visual or structural
damage. If you find any damage eecting the handling of the vehicle, stop
riding to prevent further damage to the vehicle, yourself or the environment
around you.
For inspection, please go through the procedures under the chapter
3 “Regular Inspection and Maintenance”.
In case of of a broken or damaged
component, visit
www.rideCAKE.com/spareparts
to order spare components.
If you can’t find what you are looking for or have any questions, please get
in contact with CAKE directly.
5.5 Troubleshooting
If your bike isn’t working properly, please read the following user cases to
find the solution. If you can’t find the problem you are experiencing or a
solution that works for you, contact CAKE directly.
My bike won’t turn on.
• Start with checking that both the main switch and killswitch is turned
on properly.
• Remove the seat to check that the battery is properly connected to
the bike.
• Carefully try to give the bike some throttle to climate the possibility of
a malfunctioning Dashboard.
• Get in contact with CAKE directly for further instructions and
troubleshooting to solve the issue.
My bike doesn’t give me full power.
• Check the Dashboard temp signal. The bike will protect itself and can
under certain circumstances limit the performance. This happens at if any
of the drivetrain components gets overheated, under voltage,
over voltage etc.

• Start with making sure that the bike is properly charged through the LEDs
on the dashboard. As the battery gets close empty, the battery cells inside
loose the ability to have a high discharge (full power).
• Please be careful, when checking if the controller or motor is overheated
as you could get burned. This will be showed by the Dashboard Temp LED
glowing in RED. If it does, please let the vehicle cool down suciently to
avoid permanent damages to either the motor, controller or battery.
The dashboard is blinking in weird colours.
• The Dashboard is blinking in dierent colours when driving. Check if this
problem occurs more regularly when you are on brake mode #3.
This can be caused by high current between the battery and controller
as the current is switching between being discharged (when driving) and
charging (motor brake regenerating and charging the battery). This is
then caused by electrical interference and can happen from time to time.
• If you have questions, get in contact with us directly.
My charger doesn’t work.
• Follow the instructions and functions of the charger under
chapter 2 “Charging”.
• Check the small fuse on the charger. Change to a new one if necessary.
• If the charger does not work as usual. Get in contact directly with CAKE,
describing the issue in detail.
My motor is sounding strange or won’t spin.
• If the motor sounds strange when giving throttle and does not run pro
perly. Please turn the bike o and do not give the bike any throttle as the
motor can still be overheated by the battery current. This could
potentially happen if the sensors in the motor gets humid/water.
The issue is temporary, please put the bike inside to let it dry for 24 hours.
Get in touch with CAKE directly regardless if the issue disappears or not.
Oil has started leaking from the fork
• This can happen if the bike is stored for too long without being ridden.
When the suspension is static for too long, the gasket in-between the
moving pipes can dry out. If this happens, wipe the oil o, test the
suspension to see if it works normally and see if the leaking disappears.
If it doesn’t, get in contact with CAKE directly.
Theres play between the front suspension and the frame.
• This is due to the that the headset is not tightened properly/has
become loose.
• Put the bike on a stand.
• Start with unscrewing the 4 screws on the upper tripple clamp so they
become loose (don’t unscrew completely).
• Push the lower tripple clamp upwards so the head tube get full contact
with the frame. The loose the headset bolt just a bit before tightening
it hard.
• Tighten the screws on the upper tripple clamp and test the suspension
to see if the play is still there.
• Repeat if necessary.
• Get in contact with CAKE if the issue doesn’t resolve after the
actions above.

5.6 Tools
To properly maintain and to keep you KALK in mint condition, we always
recommend you to use quality tools and to handle the bike with care.
If you feel unable to do needed maintenance, please get in touch with
someone who has the proper experience.
For the Kalk, CAKE recommend you to buy and use the following tools
• Hex keys in mm, 1-10mm
• Screw driver
• Torx keys, T7-T45
• Rubber hammer
• Wrench kit in mm
• Tire iron
• Pressurised air pump
• Air pump, forks
• Multimeter
• Spoke wrench
• Bleeding kit for brake fluids
6. Contact and support
For questions or information
Get in contact with us at
hello@rideCAKE.com
www.rideCAKE.com
CAKE 0 Emission AB
Hammarbyfabriksväg 43
12033 Stockholm
Sweden
This manual is constantly being updated.
Please make sure that you have the latest one on
www.rideCAKE.com/manual
Other manuals for Kalk
2
This manual suits for next models
1
Table of contents
Other Cake Motorcycle manuals