ENGLISH
ENGLISH
6
Set Favourite Program/s
You can create a shortlist of favourite programs that you can easily
access.Set Favourite TV or Radio program:
1.Select the preferred program then press the PAVOURITE button.
A heart-shaped symbol will appear and the program is marked as a
favourite.
2.Repeat the previous step to select more Favourite programs.
3.To confirm and exit the Menu,press the EXIT key.
Disable Favourite TV or Radio Program:
Press the FAV buton on the Remote Control with the heart-shaped
symbol.
View Favourite Programs:
1.Press the Fav button and the Favourite Menu will appear.
2.Press UP/DOWN to selest your Favourite Programs.
3.Press OK to select your favourite program.
Delete a TV or Radio Program/s
1.Select the Program and then press the BLUE button A message
will appear.Press OK to delete the program.
2.Repeat the previous step to select more programs to delete.
Skip TV or Radio Program/s
1.Select the program you would like to skip and press the GREEN
button A skip symbol is displayed. The program is marked as a
skip.
2.Repeat the previous step to select more programs.
3.To confirm and exit themenu,press EXIT key.
Disable a skip TV or Radio Program:
Press the GREEN button on the skip program with the skip symbol.
Move a TV or Radio Program/s
1. Select the preferred program then press the RED button. A
move symbolwill appear.
2. Press UP/DOWN to move the program.
3. Press OK to confirm.
4. Repeat the above steps to move more channels .
Lock Program/s
You can lock selected programs for restricted view.
Lock a TV or Radio Program:
1.Select the preferred program then press the YELLOW button. A
lock-shaped symbol is displayed. The program is now marked as
locked.
2. Repeat the previous step to select more programs .
3. To confirm and exit the menu, press the EXIT button.
4. Press the YELLOW button to disable the locked program.
5. To view the locked program, you will be require to enter either
the default.
First Time Installation
EPG (Electronic program guide)
The EPG is an on-screen TV guide that shows scheduled programs
seven days in advance for every tuned channel. Press the EPG
button on the Remote Control to access guide.
You can use the UP/DOWN key to select the preferred program. If
there is more than one page of information, use the BLUE button
for page up and the YELLOW button for page down.
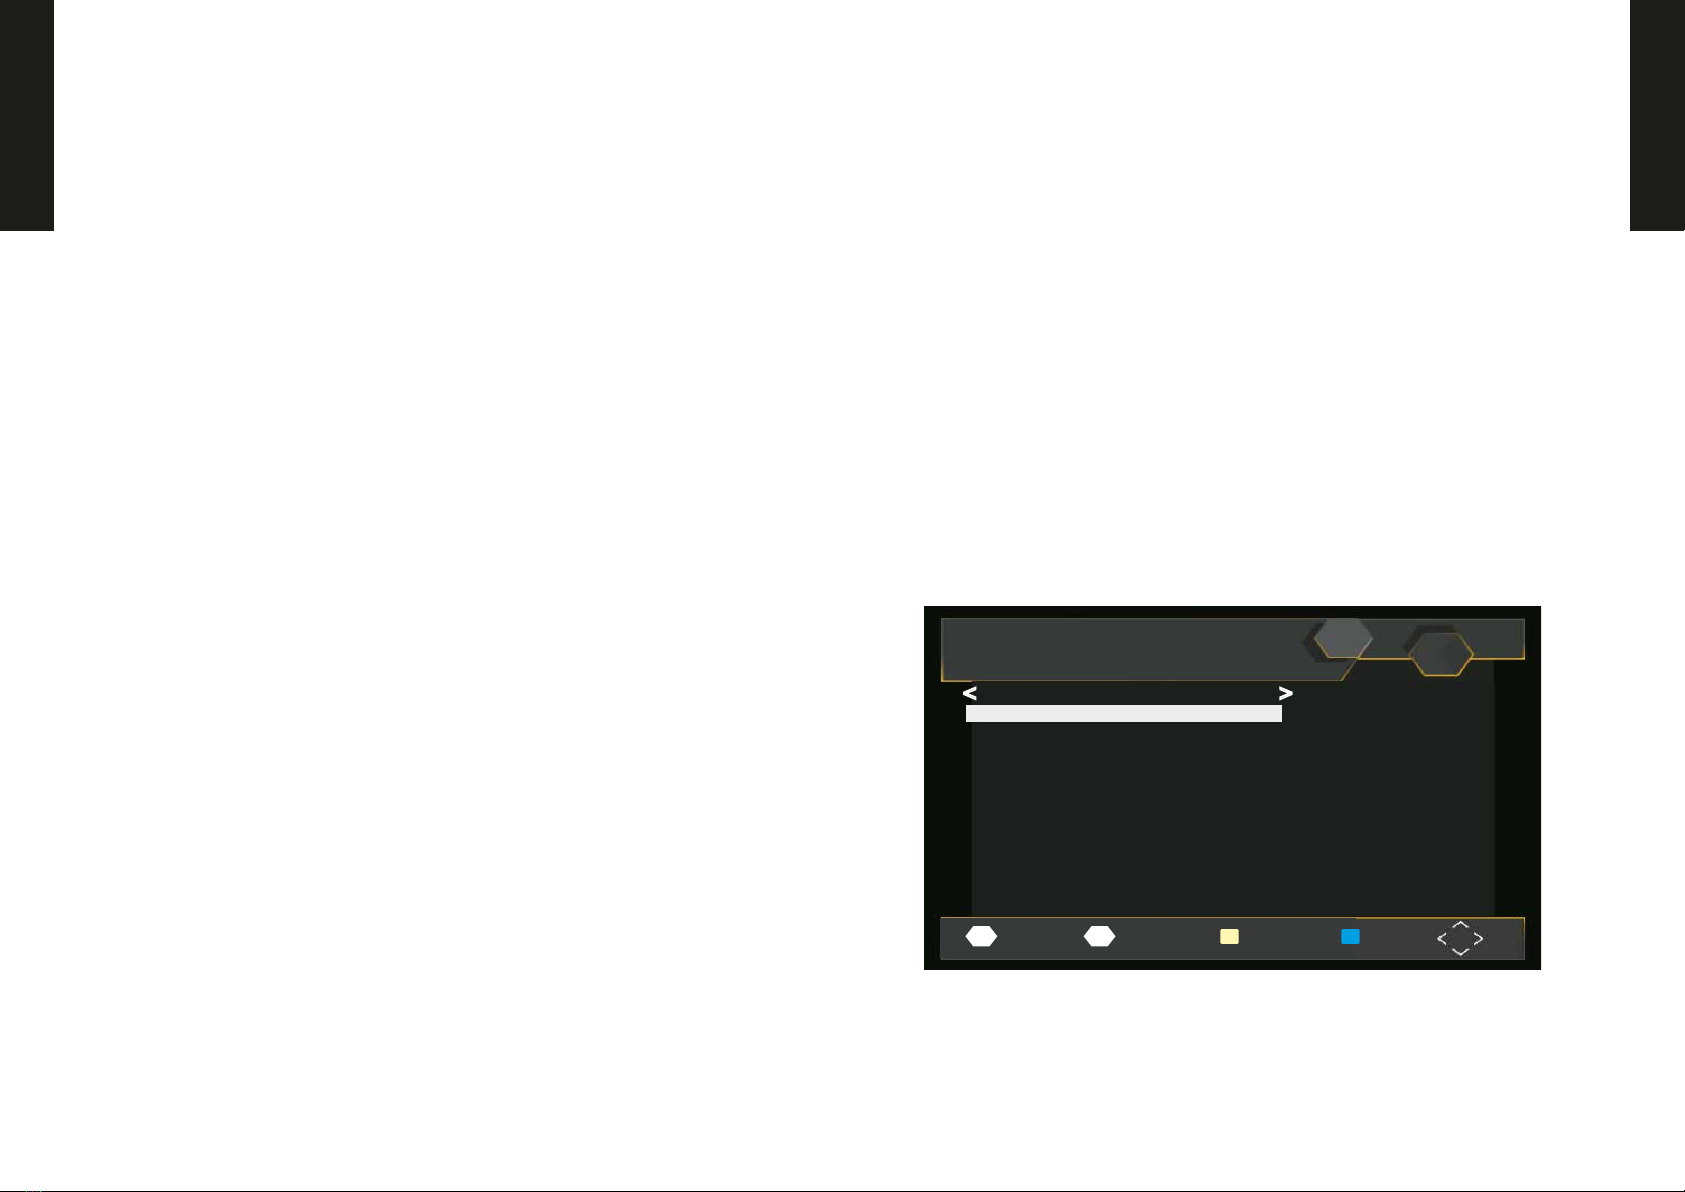
Program Guide
002 UKTV Br’tldeas Fri. 19 Nov 2004 16:59
Street Café
< >
19 Nov 16:30-17:00 Street Cafe
19 Nov 17:30-18:00 Gardens Unplugged
19 Nov 18:00-18:30 Water Gardens
19 Nov 18:30-18:59 Garden ER
19 Nov 18:59-19:01 UK Bright Ideas
19 Nov 19:01-00:59 UK Bright Ideas
20 Nov 00:59-06:59 UK Bright Ideas
20 Nov 06:59-07:01 UKTV Bright Ideas
20 Nov 07:01-07:25 Style Street
20 Nov 07:25-07:30 Too Good to Eat
19 Nov 17:00-17:30 Good Food Bites
Amusement
Salvador: Series in which
Dan Roland travels the world
sampling the best authentic
street food. This edition
comes from Salvador.
Page: 1 / 1
Page Down Page Up
Book Book LIST
OK INFO
First time installation
Set favourite programs
You can create a shortlist of favourite programs that you can easily access. Set
favourite TV or radio program:
1. Select the preferred program then press the FAVOURITE button. A heart-sha-
ped symbol will appear and the program is marked as a favourite.
2. Repeat the previous step to select more Favourite programs.
3. To conrm and exit the Menu,press the EXIT key.
Disable Favourite TV or Radio Program:
Press the FAV buton on the Remote Control with the heart-shaped symbol.
View Favourite Programs:
1. Press the Fav button and the Favourite Menu will appear.
2. Press UP/DOWN to selest your Favourite Programs.
3. Press OK to select your favourite program.
Delete a TV or radio program
1. Select the Program and then press the BLUE button A message will appear.
Press OK to delete the program.
2. Repeat the previous step to select more programs to delete.
Skip TV or Radio Program/s
1. Select the program you would like to skip and press the GREEN button A skip
symbol is displayed. The program is marked as a skip.
2. Repeat the previous step to select more programs.
3. To conrm and exit themenu,press EXIT key.
Disable a skip TV or Radio Program:
Press the GREEN button on the skip program with the skip symbol.
Move a TV or Radio Program/s
1. Select the preferred program then press the RED button. A move symbolwill
appear.
2. Press UP/DOWN to move the program.
3. Press OK to conrm.
4. Repeat the above steps to move more channels.
Lock Program/s
You can lock selected programs for restricted view.
Lock a TV or Radio Program:
1. Select the preferred program then press the YELLOW button. A
lock-shaped symbol is displayed. The program is now marked as
locked.
2. Repeat the previous step to select more programs .
3. To conrm and exit the menu, press the EXIT button.
4. Press the YELLOW button to disable the locked program.
5. To view the locked program, you will be required to enter the
password.
EPG (Electronic program guide)
The EPG is an on-screen TV guide that shows scheduled programs
seven days in advance for every tuned channel. Press the EPG
button on the Remote Control to access guide.
You can use the UP/DOWN key to select the preferred program. If
there is more than one page of information, use the BLUE button
for page up and the YELLOW button for page down.