Caloric CVWSV30F-SS Technical specifications

8"--.06/53"/(&)00%
6TFBOE*OTUBMMBUJPO.BOVBM
,03257$17127,&(
Read and save these instructions.
Installer: Leave this guide with the homeowner.
Homeowner: Keep this guide for future reference.
$7847'44

*NQPSUBOU4BGFUZ/PUJDF
3&"%"--*/4536$5*0/4#&'03&*/45"--*/("/%01&3"5*/(5)*4"11-*"/$&
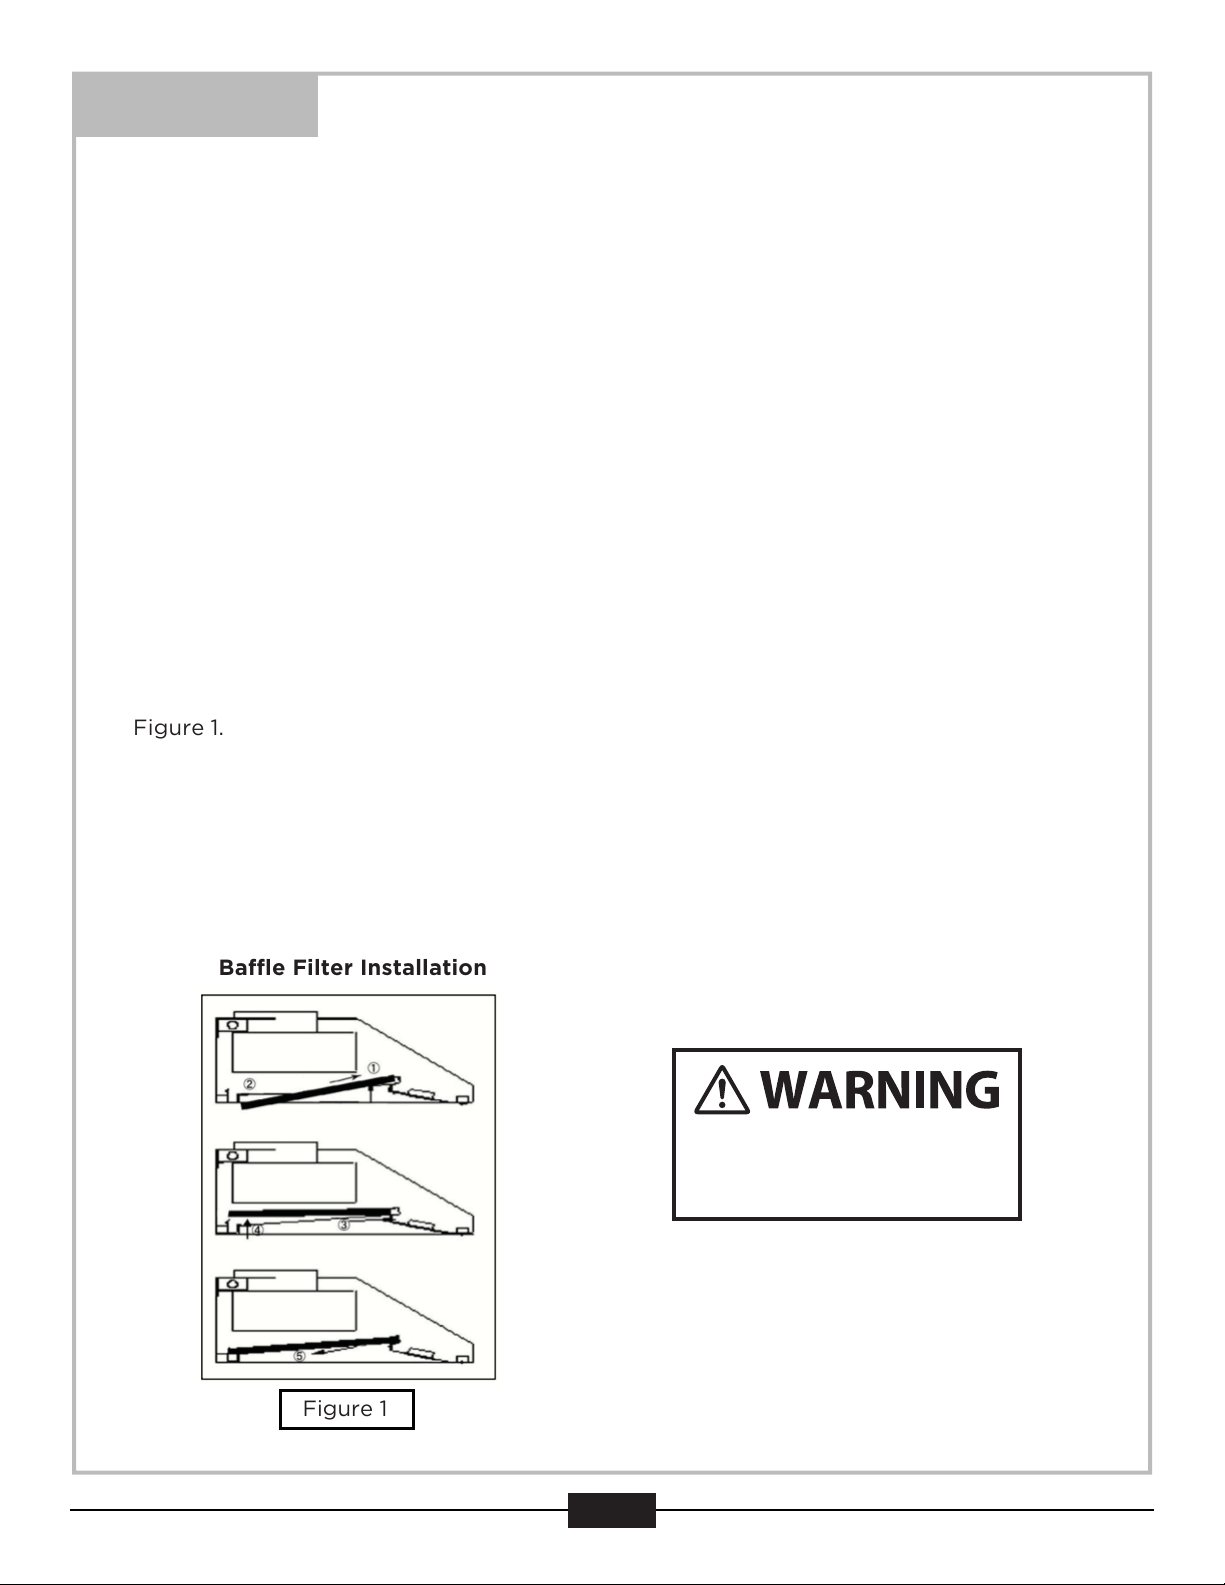
1H
This is the safety alert symbol. This symbol alerts you to potential hazards that can hurt you and
others. All safety messages will follow the safety alert symbol “ ” and the word “WARNING”.
The manufacturer and/or distributor/reseller declines all responsibility in the event of failure to observe the
instructions given here for installation, maintenance and suitable use of the product. The manufacturer and/
or distributor/reseller further declines all responsibility for injury due to negligence and the warranty
of the unit automatically expires due to improper maintenance. The manufacturer and/or
distributor/reseller will not be held responsible for any damages to personal property or real estate or any
bodily injuries whether caused directly or indirectly by the range hood.
xThe installation in this manual is intended for qualified installers, service technicians or persons
with similar qualified background. Installation and electrical wiring must be done by qualified
professionals and in accordance with all applicable codes and standards, including fire-rated
construction.
x'2127 attempt to install this appliance yourself. Damage or Injury could result from
installing the unit due to lack of appropriate electrical and technical background.
xDue to the size and weight of this range hood, at least two people are recommended for
installation to reduce the risk of fire, electric shock, or injury to persons.
xRange hood may have very sharp edges; wear protective gloves if it is necessary to remove any
parts for installing, cleaning or servicing.
xEnsure any nearby electrical service are OFF and stay OFF until the completion of installation
to reduce the risk of electrical shock, short-circuit, electrical spark which may cause injury or
damage.For general ventilating use only.
x'2127 use to exhaust hazardous or explosive materials and vapors.
xIn order to ensure the safe operation of fuel-burning heating equipment, it's air flow needs to
be to be considered for proper combustion. Follow the heating equipment manufacturer’s
guideline and safety standards such as those published by the National Fire Protection
Association (NFPA), and the American Society of Heating, Refrigeration and Air Conditioning
Engineers (ASHRAE), and the local code authorities.
xTo reduce the risk of fire and to disperse air properly, make sure to vent air outside. Sufficient
household air flow is required for the proper combustion of fuel-burning heating equipment,
and the exhaustion of their gases.
&YDFTTJWF8FJHIU
5HTXLUHWKUHHRUPRUHSHUVRQVWR
PRYHDQGLQVWDOOWKLVUDQJHKRRG
6SLQDORURWKHUERGLO\LQMXULHV
FRXOGRFFXULILWLVQRWIROORZHG
%XUQ+D]DUG
/LJKWEXOEPD\EHFRPHH[WUHPHO\KRWZKHQWXUQHG21'2127WRXFKEXOEXQWLO
VZLWFKHG2))DQGFRROHG7RXFKLQJKRWEXOEVFRXOGFDXVHVHULRXVEXUQV
4FWFSF*OKVSZ
5RWDWLQJIDQFDQFDXVHVHYHUH
LQMXU\6WD\FOHDURIIDQZKHQ
SRZHULVSUHVHQW
(OHFWULFDO6KRFN+D]DUG
Do not perform service on an electrically live
system. Disconnect the main electrical supply
before servicing this device. Touching
electrical connectors or other exposed
electrical circuitry inside this range hood when
they are energized could result in death,
serious bodily injury, or property damage.
Your safety and the safety of others is very important. We have provided many important safety
messages in this manual and on your appliance. Always read and obey all safety messages. All
safety messages will tell you what the potential hazard is, tell you how to reduce the chance of
injury, and tell you what can happen if the instructions are not followed.

*NQPSUBOU4BGFUZ/PUJDF
1H
725('8&(7+(5,6.2)$6729(723*5($6(),5(
725('8&(7+(5,6.2),1-85<723(56216,17+((9(172)$6729(723*5($6(),5(
725('8&(7+(5,6.2),1-85<723(56216,17+((9(172)$*$6/($.6
v'XFWHGIDQV0867DOZD\VEHYHQWHGWRWKHRXWGRRUV
v'2127YHQWH[KDXVWLQWRVSDFHVEHWZHHQZDOOVFUDZOVSDFHVFHLOLQJDWWLFVRUJDUDJHV
v$Q\ROGGXFWZRUNVKRXOGEHFOHDQHGRUUHSODFHGLIQHFHVVDU\WRDYRLGWKHSRVVLELOLW\RIDJUHDVHILUH
v&KHFNDOOMRLQWVRQGXFWZRUNWRLQVXUHSURSHUFRQQHFWLRQDQGDOOMRLQWVVKRXOGEHSURSHUO\WDSHG
v8VHRQO\PHWDOGXFWZRUNDQGWKLVXQLW0867EHJURXQGHG
v%HIRUHVHUYLFLQJRUFOHDQLQJXQLWWXUQ2))FLUFXLWEUHDNHURUIXVHDWWKHVHUYLFHSDQHO/RFNWKH
VHUYLFHSDQHOWRSUHYHQWSRZHUIURPEHLQJVZLWFKHG21DFFLGHQWDOO\
v:KHQFXWWLQJRUGULOOLQJLQWRZDOORUFHLOLQJEHFDUHIXOQRWWRGDPDJHHOHFWULFDOZLULQJRURWKHU
KLGGHQXWLOLWLHV
v$OOHOHFWULFDOZLULQJPXVWEHSURSHUO\LQVWDOOHGLQVXODWHGDQGJURXQGHG
v8VHWKLVXQLWRQO\LQWKHPDQQHULQWHQGHGE\WKHPDQXIDFWXUHU,I\RXKDYHTXHVWLRQVFRQWDFW
WKHYHQGRU
v'2127WRXFKWKHERWWRPVLGHRIWKHUDQJHKRRGGLUHFWO\DIWHUXVDJHEHFDXVHLWPD\EHKRW:DLW
XQWLOLWKDVFRROHG
v0DNHVXUHWRLQVSHFWVKLSPHQWDQGLWVFRQWHQWVDVVRRQVKLSPHQWLVUHFHLYHG
v3OXJLQDQGWHVWUDQJHKRRGDQGDOOLWVIXQFWLRQVUHIHUWR5DQJH+RRG2SHUDWLRQV3DJH
GLUHFWO\DIWHUUHFHLYLQJVKLSPHQWDQGEHIRUHVFKHGXOLQJDQLQVWDOOHU
v&OHDQJUHDVHODGHQVXUIDFHVIUHTXHQWO\
v&OHDQWKHUDQJHKRRGIUHTXHQWO\
v.HHSDOOVXUIDFHVFOHDQIURPJUHDVHRURLOEXLOGXS
v*UHDVHVKRXOGQRWEHDOORZHGWRDFFXPXODWHRQIDQEDI³HVSDFHV²OWHUDQ\VXUIDFHVRIWKHUDQJH
KRRGRUVXUURXQGLQJDUHD
v$OZD\VWXUQUDQJHKRRG21ZKHQFRRNLQJDWKLJKKHDWRUZKHQFRRNLQJ³DPLQJIRRGV8VHKLJK
VHWWLQJVRQFRRNLQJUDQJHRQO\ZKHQQHFHVVDU\
v1HYHUOHDYHEXUQHUVRUFRRNWRSDWKLJKVHWWLQJVXQDWWHQGHG%RLORYHUVFDXVHVPRNLQJDQGJUHDV\
VSLOORYHUVWKDWPD\LJQLWH+HDWRLOVVORZO\RQORZRUPHGLXPVHWWLQJV
v$OZD\VXVHDSSURSULDWHFRRNZDUHDQGXWHQVLOVVL]H
v$OZD\VXVHFRRNZDUHDSSURSULDWHIRUWKHVL]HRIWKHVXUIDFHHOHPHQW
vSMOTHER FLAMES with a close-fitting lid, cookie sheet, or metal tray, then turn OFF the burner.
BE CAREFUL TO PREVENT BURNS. NEVER PICK UP A FLAMING PAN—you may be burned.
vKEEP FLAMMABLE OR COMBUSTIBLE MATERIAL AWAY FROM FLAMES. If the flames DO NOT
go out immediately, EVACUATE AND CALL THE FIRE DEPARTMENT or dial your local emergency
service immediately.
vDO NOT USE WATER, including wet dishcloths or towels — a violent steam explosion may result.
Use an extinguisher ONLY if:
• You know you have a Class A, B, C extinguisher, and you already know how to operate it.
• The fire is small and contained in the area where it is started.
• The fire department is being called.
• You can fight the fire while maintaining a safe exit path.
vExtinguish any open flame.
vDO NOT turn on the range hood fan or any type of ventilator.
vDO NOT turn on the lights or any type of appliance.
vOpen all doors and windows to disperse the gas. If you still smell gas, call the gas company and
fire department, or dial your local emergency service immediately.

1H
/HYHO
3RZHUHG
'ULOO )ODW3KLOOLSV
6FUHZGULYHUV
0HDVXULQJ
7DSH
8WLOLW\.QLIH
0DUNHU
RU3HQFLO
7DEOHRI&RQWHQWV
7RROV1HHGHG
*/45"--"5*0/
7RROV1HHGHG
3DUWV6XSSOLHG
9HQWLQJ5HTXLUHPHQWV
+HLJKW&OHDUDQFH
'XFW6L]H8SJUDGH&DOFXODWRU
9HQWLQJ0HWKRGV
(OHFWULFDO5HTXLUHPHQWV
$GYDQFHG3UHSDUDWLRQ
,QVWDOODWLRQ2YHUYLHZ
,QVWDOODWLRQ
64&"/%$"3&
5DQJH+RRG2SHUDWLRQV
7URXEOHVKRRWLQJ
8VHDQG&DUH,QIRUPDWLRQ
(OHFWULF6FKHPDWLF
."*/5&/"/$&
&OHDQLQJ5HSODFLQJ)LOWHU/LJKW%XOE
8"33"/5:
&RYHUDJH([FOXVLR
'LVFODLPHU
QV

5DQJH+RRG
Pg 4
3DUWV6XSSOLHG
/RZHU&KLPQH\
8SSHU&KLPQH\
8SSHU&KLPQH\
0RXQWLQJ%UDFNHW
4W\3&6
4W\3&6
4W\3&6
)RUGU\ZDOORU
VKHHWURFNRQO\
D
'XFW&RQQHFWRU
'UDIW'DPSHUV
'XFW$GDSWHU
$GDSWHU*DVNHW 4W\3&6

vVent system must terminate to the outside
(roof or side wall).
vDO NOT terminate the vent system in an
attic or other enclosed area.
vDO NOT use 4” (10.2 cm) laundry-type
wall caps.
vUse metal/aluminum ducting only. Rigid
metal/aluminum ducting is recommended.
vAlways keep the duct clean to ensure
proper airflow.
vCalculate the following figures before
installation:
%JTUBODFGSPNUIFGMPPSUPUIFDFJMJOH
MFTTUIBO
Distance between the floor to the
countertop/stove. (Recommend* 28” to
about 36”).
Distance between the countertop/stove
to the range hood. (Recommended 28"
to ~31").
Height of range hood body and chimney
covers combined. (Extension available*)
vA distance of 28” to 31” is recommended
between stove top and the bottom of
range hood.
v28" is the lowest recommended for safe
operation; 31" is only recommended for
efficient operation, but can be mounted
higher.
vIt is recommended that the range hood
be vented vertically through the roof
through 6” (15.24 cm) or larger round
metal/aluminum vent work.
vThe size of the vent should be uniform.
vUse no more than three 90° elbows.
vFor best results, attempt to make a
minimum of 24" (61 cm) of straight vent
between the elbows if more than one
elbow is used.
vDO NOT install two elbows together.
vThe length of vent system and number of
elbows should be kept to a minimum to
provide efficient performance.
vThe vent system must have a damper.
If roof or wall cap already has a damper,
DO NOT use the supplied damper
(if applicable).
)RUWKHPRVWHIILFLHQWTXLHWRSHUDWLRQ
Pg 5
9HQWLQJ5HTXLUHPHQWV +HLJKW&OHDUDQFH
Standard
Upper
Chimney
([WHQVLRQDYDLODEOH
Range Hood
Upper
Chimney
Mounting
Bracket
Standard
Lower
Chimney
([WHQVLRQDYDLODEOH
Min: 28”
Max: ~31”
36” Base
Max: 108”
Countertop/Stove
* Higher ceiling requires
chimney extension.
Available at your local
resellers.
Maximum* ceiling
clearance 108” at 31”
hood mounting height
above countertop/stove
(may vary with different
model). Chimney
extensions available for
higher ceiling.
vUse DOXPLQXPIRLOWDSH or equivalent to seal
all joints in the vent system.
vUse caulking to seal exterior wall or roof
opening around the cap.
'XHWRGLIIHUHQWFHLOLQJKHLJKWFRQ²JXUDWLRQV
UHFRPPHQGHGKHLJKWPD\QRWEHDSSOLFDEOH

'XFW'HGXFWLRQV
Each 90° bend 9 ft
Each 45° bend 5 ft
Each 6” to 3 ” x 10” transition 7 ft
Side wall cap with damper 1 ft
Roof Cap (with factory Damper) 1 ft
'XFW'HGXFWLRQ&DOFXODWLRQ([DPSOH
v$PLQLPXPRIªURXQGVWDQGDUGIRUWKLVUDQJHKRRGRUª[ªUHFWDQJXODUGXFW
QRWVXSSOLHGPXVWEHXVHGWRPDLQWDLQPD[LPXPDLU³RZHI²FLHQF\
v$/:$<6ZKHQSRVVLEOHUHGXFHWKHQXPEHURUWUDQVLWLRQVDQGWXUQV,IORQJGXFWUXQLV
UHTXLUHGLQFUHDVHGXFWVL]HWRªRUª,IDUHGXFHULVXVHGLQVWDOODORQJUHGXFHULQVWHDG
RIDSDQFDNHUHGXFHU$Q\UHGXFWLRQVRIGXFWVL]HZLOOUHVWULFWDQGGHFUHDVHDLUIORZWR
PD[LPL]HDLUIORZIORZHIILFLHQF\SODFHDQ\UHGXFHUVIXUWKHVWDZD\IURPDQ\EHQGVRU
WUDQVLWLRQV
v,IWXUQVRUWUDQVLWLRQVDUHUHTXLUHGLQVWDOOWKHPDVHYHQO\GLVWDQFHGDVSRVVLEOHDQGDVIDU
DZD\IURPWKHUDQJHKRRGDVSRVVLEOH
v3OHDVHXVHWKH'XFW6L]H8SJUDGH&DOFXODWRUEHORZWRFRPSXWHWKHWRWDODYDLODEOHGXFW
UXQZKHQXVLQJHOERZVWUDQVLWLRQVDQGFDSV
v,WLVLPSRUWDQWWRLQVWDOOWKHKRRGDWWKHSURSHUPRXQWLQJKHLJKW+RRGVPRXQWHGWRRORZ
DUHFRQVLGHUHGXQVDIHDQGFRXOGUHVXOWLQKHDWGDPDJHDQG²UHKD]DUGZKLOHKRRGV
PRXQWHGWRRKLJKDUHKDUGHUWRUHDFKDQGZLOOORVHJHQHUDOHIIHFWLYHQHVV
v0LQLPXPPRXQWKHLJKWEHWZHHQVWRYHWRSWRKRRGERWWRPVKRXOGEHQROHVVWKDQ©
$Q\OHVVLVFRQVLGHUHGXQVDIHDQGQRWUHFRPPHQGHG
v0D[LPXPPRXQWKHLJKWEHWZHHQVWRYHWRSWRKRRGERWWRPFDQEHKLJKHUWKDQLQFK
EXWLWLVQRWUHFRPPHQGHGGXHWRWKHORVVLQHIILFLHQF\([WHQVLRQDYDLODEOH
v,IDYDLODEOHUHIHUWR\RXUVWRYHWRSPDQXIDFWXUHU¬VKHLJKWFOHDUDQFHUHTXLUHPHQWVDQG
UHFRPPHQGHGKRRGPRXQWLQJKHLJKWDERYHUDQJH
'XHWRGLIIHUHQWFHLOLQJKHLJKWFRQ²JXUDWLRQVUHFRPPHQGHGKHLJKWPD\QRWEHDSSOLFDEOH
.JOJNVN%VDU4J[F
v5RXQGªPLQLPXP
v5HFWDQJXODUª[ªPLQLPXPUHTXLUHVDªWRª[ªDGDSWRUQRWVXSSOLHG
,03257$17
1H
+HLJKW&OHDUDQFH
'XFW6L]H8SJUDGH&DOFXODWRU
x0LQimum duct size recommended is 6” round (or 3 ” x 10” rectangular). Maximumduct
length recommend is 50 ft. Any duct length over 50 ft is recommended to use alarger
diameter duct size.
x6XUvey the installation application and record the estimated length of ductingrequired or
used for that application. Record the number of bends, angle of bends,and/or any
transitional pieces used. Each bend or transition will reduce air flow andreduce the
recommended duct length.
(1) 90° bend, (1) 3” x 10” transition, (2) 45°
bends, (1) sidewall cap with damper (with
factory damper not installed)
-9ft + -7ft + -5ft + -5ft + -1ft = -27ft
Deduct 27 ft from 50 ft, giving you 23 ft of
available straight ducting before it is
recommended to upgrade your ducting size.

v7KLVUDQJHKRRGLVIDFWRU\VHWIRUYHQWLQJWKURXJKWKHURRIRUZDOO
v9HQWZRUNFDQWHUPLQDWHHLWKHUWKURXJKWKHURRIRUZDOO7RYHQWWKURXJKDZDOOD
HOERZLVQHHGHG
v1(9(5H[KDXVWDLURUWHUPLQDWHGXFWZRUNLQWRVSDFHVEHWZHHQZDOOVFUDZOVSDFHV
FHLOLQJDWWLFVRUJDUDJHV$OOH[KDXVWPXVWEHGXFWHGWRWKHRXWVLGH
v8VHPHWDODOXPLQXPGXFWZRUNRQO\
v)DVWHQDOOFRQQHFWLRQVZLWKVKHHWPHWDOVFUHZVDQGWDSHDOOMRLQWVZLWKDOXPLQXPIRLO
WDSHRUHTXLYDOHQW
v8VHFDXONLQJWRVHDOH[WHULRUZDOORUURRIRSHQLQJDURXQGWKHFDS
2SWLRQ
Vertical Roof VentingHorizontal Wall Venting
2SWLRQ
IMPORTANT:
1H
Venting Methods
6LGH:DOO&DS
5RRI&DS

IMPORTANT:2EVHUYHDOOJRYHUQLQJRUGLQDQFHVDQGORFDOFRGHV
3OHDVHFRQVXOWZLWKDTXDOLILHGHOHFWULFLDQIRUDQ\HOHFWULFDOZLULQJ
*UJTUIFDVTUPNFSTSFTQPOTJCJMJUZ
v7RFRQWDFWDTXDOLILHGHOHFWULFDOLQVWDOOHU
v7RDVVXUHWKDWWKHHOHFWULFDOLQVWDOODWLRQLVDGHTXDWHDQGLQFRQIRUPDQFHZLWK1DWLRQDO
(OHFWULFDO&RGH$16,1)3$¨ODWHVWHGLWLRQRU&6$6WDQGDUGV&&DQDGLDQ
(OHFWULFDO&RGH3DUWDQG&1R0ODWHVWHGLWLRQ,WLV\RXUUHVSRQVLELOLW\WR
EHDZDUHRIDQGDGKHUHWRDOOEXLOGLQJILUHHOHFWULFDOVDIHW\DQGDQ\RWKHUDSSOLFDEOH
FRGHVZLWKUHJDUGVWRWKHLQVWDOODWLRQDQGXVHRIWKLVUDQJHKRRG
v3URYLGHDFLUFXLWSURWHFWHGSRZHUVHUYLFHSUHIHUDEO\D*URXQG)DXOW&LUFXLW,QWHUUXSWHU
*)&,YROW+]$&ZLWKDWOHDVWDPSVRIDYDLODEOHVHUYLFH
v(QOLVWDTXDOLILHGHOHFWULFLDQWRHQVXUHWKHUDQJHKRRGDQGHOHFWULFDOOLQHVDUHDGHTXDWHO\
JURXQGHGDQGSURSHUO\SURWHFWHGNEVERHOHFWULFDOO\JURXQGWRDJDVSLSH
vIMPORTANT:6DYHWKLV,QVWDOODWLRQ*XLGHIRUIXWXUHUHIHUHQFHDQGRUHOHFWULFDOLQVSHFWRU
XVH
v7KHUDQJHKRRGVKRXOGEHFRQQHFWHGZLWKDFLUFXLWEUHDNHUSURWHFWHGSRZHUVHUYLFH
v:LUHVL]HVFRSSHUZLUHRQO\DQGFRQQHFWLRQVPXVWFRQIRUPZLWKWKHUDWLQJRIWKH
DSSOLDQFHDVVSHFLILHGRQWKHPRGHOVHULDOUDWLQJODEHO:LUHVL]HVPXVWFRQIRUPWR
WKHUHTXLUHPHQWVRIWKH1DWLRQDO(OHFWULFDO&RGHDQGDQ\DQGDOOORFDOFRGHVDQG
RUGLQDQFHV$8/RU&6$OLVWHGFRQGXLWFRQQHFWRUPXVWEHSURYLGHGDW
HDFKHQGRIWKHSRZHUVXSSO\FDEOHDWWKHUDQJHKRRGDQGDWWKHMXQFWLRQER[
Pg 8
Electrical Requirements
$GYDQFHGPreparation
3ODFHDOOVXSSOLHGSDUWVDQGUHTXLUHGKDUGZDUHRQDIODWVWDEOHVXUIDFHDQGYHULI\WKH
SUHVHQFHRIDOOVXSSOLHGSDUWVOLVWHGRQ3DJH
&DUHIXOO\ UHPRYH WKH ZKLWH SODVWLF SURWHFWLYH FRDW IURP WKH FKLPQH\ FRYHUV DQG UDQJH
KRRG
"EWBODFE1SFQBSBUJPOT
)DPLOLDUL]H\RXUVHOIZLWKWKHFRQWUROVRIWKHUDQJHKRRG
E\UHDGLQJWKURXJK5DQJH+RRG2SHUDWLRQV3DJH
3ODFHWKHUDQJHKRRGRQDIODWVWDEOHVXUIDFH&RQQHFW
WKHUDQJHKRRGWRDGHVLJQDWHGVWDQGDUGRXWOHWSOHDVH
UHIHUWKHSURGXFWODEHOIRUWKHVXLWDEOHYROWDJHRIWKLV
XQLWDQGWXUQRQWKHUDQJHKRRG9HULI\DOORSHUDWLRQV
RIWKHUDQJHE\UHIHUULQJWR5DQJH+RRG2SHUDWLRQV
3DJH
Excessive Weight
Require three or more persons to
move and install this range hood.
Spinal or other bodily injuries
could occur if it is not followed.

)LJXUH
/05&5PBWPJEEBNBHFUPZPVSIPPEQSFWFOUEFCSJTGSPNFOUFSJOHUIFWFOUPQFOJOH
'HWHUPLQHDQGPDUNWKHFHQWHUOLQHRQWKHZDOOZKHUHWKHUDQJHKRRGZLOOEHLQVWDOOHG
0DNHVXUH WKHUHLVSURSHUFOHDUDQFHZLWKLQWKHFHLOLQJRUZDOOIRUH[KDXVWYHQW
'XHWRWKHZHLJKWDQGVL]HRIWKLVXQLWSOHDVHPDNHVXUHWKDW WKH VXSSRUWV\VWHPRU
IUDPHZRUN EHLQJXVHG LVVWDEOHDQGVHFXUHLQWKH ZDOORUFHLOLQJ
3XWDWKLFNSURWHFWLYHFRYHULQJRYHUFRXQWHUWRSFRRN WRSRUUDQJHWRSURWHFWIURP
GDPDJHRU GLUW5HPRYHDQ\KD]DUGRXVREMHFWVDURXQG WKHDUHDZKHQLQVWDOOLQJ
0DUNWKHORFDWLRQVRIWKHVXSSRUWPRXQWLQJEUDFNHWKROHVGXFWLQJ FXWRXWLIXVHGDQG
SRZHU VXSSO\ FDEOH FXWRXW RQ WKH ZDOO RU FHLOLQJ EHKLQG WKH FKLPQH\ FRYHUV 8VH GULOO
DQG VDEHU VDZ RU NH\KROH VDZ WR FXW RSHQLQJ IRU SRZHU VXSSO\ FDEOH DQG GXFWLQJ VHH
9HQWLQJ 5HTXLUHPHQW DQG (OHFWULFDO 5HTXLUHPHQWV SDJHV
,I YHQWLQJ WR WKH RXWVLGH LQVWDOO YHQW V\VWHP VHH 9HQWLQJ 0HWKRGVSDJH 8VH FDXONLQJ
WR VHDO WKH H[WHULRU ZDOO RU URRI RSHQLQJV
'LVFRQQHFW PDLQ HOHFWULFDO VXSSO\ SUHSDUH DQG UXQ HOHFWULFDO ZLULQJ WKURXJK FHLOLQJ RU
ZDOO ,QVWDOO D SRZHU RXWOHW ZLWKLQ UHDFKLQJ GLVWDQFH RI WKH UDQJH KRRG DVVHPEO\ '2
127 UHVWRUH SRZHU XQWLO LQVWDOODWLRQ LV FRPSOHWHG
'LVFRQQHFW WKH SRZHU FRUG DQG UHPRYH WKH VWDLQOHVV VWHHO EDIIOH ILOWHUV DV VKRZQ RQ
)LJXUH
6HW DVLGH WKH VWDLQOHVV VWHHO EDIIOH ILOWHUV XQWLO WKH UDQJH KRRG LV LQVWDOOHG
$VVHPEOH WKH GXFW DGDSWHU RQWR WKH UDQJH KRRG ERG\ 3ODFH WKH GXFW DGDSWHU JDVNHW
LQWR WKH KROORZ SHULPHWHU RI WKH UHFWDQJXODU VLGH RI WKH GXFW DGDSWHUSODFHWKH
UHFWDQJXODUVLGHRIWKH GXFWDGDSWHU RYHU WKH UDQJH KRRG GXFW DOLJQLQJ VFUHZ KROHV
IDVWHQ WKH GXFW DGDSWHU RQWR WKH UDQJH KRRG ERG\ XVLQJ WKH VXSSOLHG KDUGZDUH '
VFUHZV
Pg 9
3UHSDUDWLRQ
Severe Injury
5RWDWLQJIDQFDQFDXVHVHYHUH
LQMXU\6WD\FOHDURIIDQZKHQ
SRZHULVSUHVHQW
#BGGMF'JMUFS*OTUBMMBUJPO

Pg 10
Installation
&RQILUPZKHUH\RXZDQW\RXUUDQJHKRRGLQVWDOOHG
Confirm your centerline and side measurements of
each piece of hardware. Measure the distance
between stove top and the bottom of range hood and
confirm a *recommended distance of 28” to 31”.
1.
2.
*Due to different ceiling height configurations,
recommended height may not be applicable. Use removable tape, pencil or erasable marker
to mark your ideal installation.
0DUNWKHPRXQWLQJORFDWLRQVIRUWKHUDQJHKRRGERG\
Make sure the range hood is level, not tilted, and not colliding against other objects.
(
(OHFWULFDO6KRFN+D]DUG
Do not perform service on an electrically
live system. Disconnect the main
electrical supply before servicing this
device. Touching electrical connectors or
other exposed electrical circuitry inside
this range hood when they are energized
could result in death, serious bodily injury,
or property damage.
Installation Overview
Upper &himney
Wall 0ount
5ange +ood
Lower &himney
Motor +ousing
Electric &ircuit %ox
6” Round 'uct (exhaust)
Duct work and electric
wiring region
Upper Chimney
Mounting Bracket
Note: Type “A” anchors are
designed for for dry wall or
sheet rock. Not to be used
with any other types of walls.
Qty: 4 PCS
Qty: 6 PCS
Qty: 6 PCS
(For dry wall or
sheet rock only)

1H
,QVWDOODWLRQ&RQWLQXHG
Figure 3A
Secure upper
support frame
Figure 3B
Figure 4
Mark the locations of the keyhole shaped
hanging bracket holes onto the wall as
shown in Figure 3A and Figure 3B.
.BSLUIFNPVOUJOHMPDBUJPOTGPSUIFVQQFS
DIJNOFZNPVOUJOHCSBDLFU
Inspect how this bracket installs into the
upper chimney cover, use that as reference
to where you want your upper chimney
installed and where the bracket should be
installed onto your wall.
Place the mounting bracket squarely
above the range hood, level it and mark
the locations of the mounting bracket
KROHVRQWKHZDOO
1SFESJMMIPMFTGPSNPVOUJOHIBSEXBSF
Safely place aside all equipment and
review all marked regions and drill holes.
Review fastening hardware to be used.
Recommended for your type of wall:
3.
4.
•4IFFUSPDLESZXBMMPSXPPEXBMMT where
the structural studs or solid structural
support BSFBDDFTTJCMF screw directlyinto
the structural studs or structuralsupport,
with hardware that meets areexceeds the
factory hardware, with atleast 1” of thread
engagement.
•4IFFUSPDLESZXBMMPSXPPEXBMMT where
the structural studs or solid structural
support are OPU BDDFTTJCMF Affixing the
range hood to into structural studs is
highlyrecommended. If stud blockings are
notavailable, it is recommended to build a
support structure behind the sheet rock for
the best weight support. If wall anchors
areused, ensure their hanging capacity
exceeds the weight of the range hood,
hardware, and estimated usage load.
•$PODSFUF XBMM Use designated concrete
screws and/or anchors (not provided) that
meet or exceed the factory hardware
specifications. Ensure proper load ratings.
Follow instructions of concrete screw
manufactureU.
*OTUBMM UIF SBOHF IPPE CPEZ (if using
factory hardware)
Fasten (2) two Type “A” anchors flush into
the wall as shown in Figure 4, over your
previously marked locations for mounting
the range hood body. Loosely fasten (2)
two Type “B” screws into the
5.
Figure 3

anchors – DO NOT fasten screws all the
way down; leave approximately 3/32” of
gap from the wall to the screw head. Hang
the range hood body onto the Type “B”
screws. Ensure the range hood is level and
then fasten the screws completely.
Note: for wall mounted range hoods (not
island mounted), the rear panel of the range
hood body (against the installation wall) is
plain sheet metal and can be drilled and
screwed into the wall for additional
stabilization. DO NOT drill into or screw
through any wires, any wire harnesses, or
any critical fixtures.
*OTUBMMUIFVQQFSDIJNOFZNPVOUJOH
CSBDLFU(if using factory hardware)
Reference steps "4" & "5" to complete this
step "6", at the locations previously marked
in step "3".
*OTUBMMUIFGMFYJCMFEVDUUVCF
First install the flexible duct tube onto your
household ducting and then extend the
ducting downward, allowing about 6 inches
of extra ducting; cut off excess ducting.
Install the ducting onto the range hood
(body) duct DGDSWHU. Use certified ducting
tape or fastening devices.
*OTUBMMQPXFSQMVH
Plug in the power cord into your power
socket. DO NOT turn on main power
supply until installation is complete; or if a
function test is desired (should be done
before starting installation); clear
workspace; ensure workspace is safe, and
then temporarily supply power to unit and
then test functions. Please ensure to
completely SHUT OFF POWER SUPPLY
after testing and before continuing
installation.
Pg 12
Installation (Continued)
Hold in position and
secure lower chimney
to range hood
Fasten mounting
bracket
Slide up and secure
upper chimney to
mounting bracket
Figure 5
Figure 4A
BACK SUPPORT
DRYWALL
6.
7.
8.

Pg 13
Installation (Continued)
*OTUBMMUIFVQQFSDIJNOFZDPWFS
+DYLQJWKHLQVWDOODWLRQKDUGZDUHUHDGLO\
DYDLODEOHDOLJQWKHXSSHUFKLPQH\FRYHU
ZLWKWKHSUHLQVWDOOHGXSSHUFKLPQH\
PRXQWLQJEUDFNHWDQGWKHQVFUHZWKH
KDUGZDUHWKURXJKWKHFKLPQH\LQWRWKH
PRXQWLQJEUDFNHW5HPRYHDQ\ILQLVK
SURWHFWLRQZUDSSLQJ
7RDYRLGDQ\VFUDWFKLQJLQVWDOORQH
FKLPQH\SLHFHDWDWLPHVWDUWLQJZLWKWKH
XSSHUFKLPQH\(QVXUHWKHFKLPQH\SLHFHV
DUHIXOO\IDVWHQHGEHIRUHPRYLQJRQWRDQ\
RWKHUVWHS
*OTUBMMUIFMPXFSDIJNOFZDPWFS
&RQILUPWKHRULHQWDWLRQRIWKHORZHU
FKLPQH\FRYHUSXOOVWUHWFKRUIOH[WKHUHDU
RSHQLQJRIWKHFKLPQH\VRLWLVWHPSRUDULO\
ODUJHUWKDQWKHXSSHUFKLPQH\FRYHU
FDUHIXOO\LQVWDOORUZUDSWKHORZHUFKLPQH\
RYHUWKHXSSHUFKLPQH\FRYHUDQGUDQJH
KRRGERG\6FUHZLQWKHPRXQWLQJ
KDUGZDUHWKURXJKWKHORZHUFKLPQH\
FRYHULQWRWKHUDQJHKRRGERG\5HPRYH
DQ\ILQLVKSURWHFWLRQZUDSSLQJ
*OTUBMMSFNBJOJOHBDDFTTPSJFTBOE
PQFSBUJPODIFDL
,QVWDOOVWDLQOHVVVWHHOEDIIOHILOWHUVWKHQ
FKHFNWKHRSHUDWLRQRIWKHUDQJHKRRG
5HPRYHDQ\RWKHUILQLVKSURWHFWLRQ
ZUDSSLQJ8VHVWDLQOHVVVWHHOFOHDQHUWR
UHPRYHDQ\ILQJHUSULQWVRUPDUNV
)LJXUH
)LJXUH

Pg 14
Control Panel, Display and Functions:
Power Button
Decrease Button
Light Button
Increase Button
Range Hood Operations
Digital Display
General Note: For the best results, turn on the vent prior to any cooking and keep vent
running while cooking. Adjust the vent power as needed.
Power ON / OFF
Press the Power Button to turn ON the range hood. To turn it OFF, press the
Power Button again, and the system will automatically delay the shutoff for 3-minutes,
displaying a countdown timer. If you want the vent to turn off immediately, press the
Power Button again.
Three-Minute Power Off Delay
While the vent is on, press the Power Button once to enter the Delayed Shutoff
Mode. The Digital Display will then flash and the vent function will turn off after
3-minutes. To cancel the Delayed Shutoff Mode, press the Power Button again and the
vent will shut off immediately. When the Delayed Shutoff Mode is entered, changing
the vent speed level will not affect the countdown.
Speed Control
While the vent is on, press the Increase Button to increase the speed level. Press
the Decrease Button to decrease the vent speed level. The highest speed setting is
indicated by an “F3”, and the lowest by “F1”.
Light Control
Press the Light Button to turn the lights㻻㻺㻧press it again to turn the lights㻻㻲㻲㻚

1RWH)RUDOORWKHULQTXLULHVSOHDVHFRQWDFWXVDWH[WRUVHUYLFH#FDORULFDSSOLDQFHVFD
Troubleshooting
If the range hood or light
does not operate after
installation:
vCheck if the range hood has been plugged in, make
sure that all power has been turned back ON, and
all electrical wiring are properly connected.
vSwap out light bulb to working ones to determine
whether it is caused by defective bulbs. See
Replacing the light bulbs on Page .
The suction or fan seems
weak:
vCheck that the duct sized used is at least 6” or 3 ”
x 10”. Range hood WILL NOT function efficiently
with insufficient duct size. For example: 7” duct
over 6” hole and loosely secured.
vCheck if duct is clogged or if damper unit
(half-circular flapper) is not installed correctly or
opening properly. A tight mesh on a side wall cap
unit might also cause restriction to the air flow.
The hood is not venting out
properly:
vMake sure the distance between the stove top and
the bottom of the hood is within 28” and 31” in
distance. *Due to different ceiling height
configurations, recommended height may not be
applicable.
vReduce the number of elbows and length of duct
work. Check if all joints are properly connected,
sealed, and taped.
vMake sure the power is on high speed for heavy
cooking.
The range hood vibrates
when the suction is on:
vThe range hood might not have been secured
properly on to the ceiling or wall. Check with your
installer
The lights work but the
suction is not spinning, is
stuck or is rattling.
vThe blower might be jammed or scraping the
bottom due to shipping damage. Please contact
us immediately.
Purpose of the
slots/holes/openings near the
top of the upper chimney:
vThese slots/holes/openings are used to exhaust
filtered air.
Pg 15

Pg 16
6XEMHFWWRFKDQJHZLWKRXWQRWLFH
v5HDGDQGXQGHUVWDQGDOOLQVWUXFWLRQVDQGZDUQLQJVLQWKLVPDQXDOEHIRUHRSHUDWLQJWKH
DSSOLDQFH6DYHWKHVHLQVWUXFWLRQVIRUIXWXUHUHIHUHQFH
v$OZD\VOHDYHVDIHW\JULOOVDQGILOWHUVLQSODFH:LWKRXWWKHVHFRPSRQHQWVRSHUDWLQJ
EORZHUVFRXOGFDWFKRQWRKDLUILQJHUVDQGORRVHFORWKLQJ
v1(9(5GLVSRVHFLJDUHWWHDVKHVLJQLWDEOHVXEVWDQFHVRUDQ\IRUHLJQREMHFWVLQWREORZHUV
v1(9(5OHDYHFRRNLQJXQDWWHQGHG:KHQIU\LQJRLOLQWKHSDQFDQHDVLO\RYHUKHDWDQG
FDWFKILUH7KHULVNRIVHOIFRPEXVWLRQLVKLJKHUZKHQWKHRLOKDVEHHQXVHGVHYHUDOWLPHV
v1(9(5FRRNXVLQJ©RSHQªIODPHVXQGHUWKHUDQJHKRRG&KHFNGHHSIU\HUVGXULQJXVH
6XSHUKHDWHGRLOPD\EHIODPPDEOH
v7KHVDWXUDWLRQRIJUHDV\UHVLGXHLQWKHEORZHUDQGILOWHUVPD\FDXVHLQFUHDVHG
LQIODPPDELOLW\.HHSXQLWFOHDQDQGIUHHRIJUHDVHDQGUHVLGXHEXLOGXSDWDOOWLPHVWR
SUHYHQWSRVVLEOHILUHV
v)LOWHUVPXVWEHFOHDQHGSHULRGLFDOO\DQGIUHHIURPDFFXPXODWLRQRIFRRNLQJUHVLGXHVHH
&OHDQLQJ,QVWUXFWLRQVRQ3DJH2OGDQGZRUQILOWHUVPXVWEHUHSODFHGLPPHGLDWHO\
v'2127RSHUDWHEORZHUVZKHQILOWHUVDUHUHPRYHG1HYHUGLVDVVHPEOHSDUWVWRFOHDQ
ZLWKRXWSURSHULQVWUXFWLRQV'LVDVVHPEO\LVUHFRPPHQGHGWREHSHUIRUPHGE\TXDOLILHG
SHUVRQQHORQO\5HDGDQGXQGHUVWDQGDOOLQVWUXFWLRQVDQGZDUQLQJVLQWKLVPDQXDOEHIRUH
SURFHHGLQJ
Operations:
Cleaning:
Use and Care Information

Pg 17
Electric Schematic
6XEMHFWWRFKDQJHZLWKRXWQRWLFH
Black
MOTOR
Blue
White
Pink
Red Fan 3
Fan 2
Fan 1
Fan (-)
Neutral
Live
Green
Yellow
12uf/250v (110v)
MO_1
MO_2
MO_3
Lamp (-)
Lamp (+)
AC_L
AC_N
MO_n
White
White
Black

vClean periodically with hot soapy water and clean cotton cloth. DO NOT use corrosive
or abrasive detergent (e.g. Comet Power Scruv®, EZ-Off® oven cleaner), or steel wool/
scoring pads, which will scratch and damage the stainless steel surface. For heavier soil
use liquid degrease such as “)RUPXOD®” or “Fantastic®” brand cleaaner.
vIf the finish looks splotchy (stainless steel hood), use a stainless steel cleaner to clean
thesurface of the hood. Use a dry soft towel to dry the hood. CAUTION: Do not leave
thecleaning solution on the surface too long as this may damage the finish. Avoid
gettingcleaning solutions into or onto the control panel, HOHFWULFDO components, wiresor
wiredplugs.
vAlways wipe/clean/polish in the same direction as the brushed stainless steel finish.
Never wipe against the grain.
vAfter cleaning, you may use non abrasive stainless steel polish such as 3M® or ZEP®, to
polish and buff out the stainless luster and grain. Always scrub lightly, with clean cotton
cloth, and with the grain.
vDO NOT allow deposits to accumulate or remain on the hood, as they will become
harderto clean, and may cause scratching of the finish.
vDO NOT use ordinary steel wool or steel brushes. Small bits of steel may adhere to the
surface and cause rusting.
vDO NOT allow salt solutions, disinfectants, bleaches, or cleaning compounds to remainin
contact with stainless steel for extended periods. Many compounds containchemicals,
which may be damaging. Rinse with water after exposure and wipe dry witha clean
cloth.
vThe metal filters are intended to help filter grease, residue and moisture from cooking.
They are required to be kept clean for performance and safety concerns, and may
require replacement if neglected.
vFilters should be cleaned after every 30 hours of use or sooner depending on usage
conditions.
vRemove and clean by hand or dishwasher. NOTE: Some newer dish detergents may
cause marking or blackening of aluminum metals, such as the mesh aluminum filters.
Spray“Formula 409®” or equivalent degreasing detergent and allow to soak if heavily
soiled. Rinse with warm water, allow the filters to dry and then and re-install before
using hood.
v6KRXOG²OWHUVZHDURXWGXHWRDJHDQGSURORQJHGXVHSOHDVHFRQWDFW&DORULF70IRU
UHSODFHPHQW²OWHUV&RQVLGHUSUHHPSWLYHO\SXUFKDVLQJDQH[WUDVHWRIILOWHUVWRVWRUHRQ
KDQG
v1RWH5HSODFHGDPDJHGILOWHUVWKDWKDYHEHHQSXQFWXUHGEHQWRUEURNHQ
SAFETY WARNING: Never put your hand into area housing the fan while the fan is operating!
For optimal operation, clean range hood and all baffle/spacer/filterregularly. Regular care will
help preserve the appearance of the range hood.
$MFBOJOH&YUFSJPS4VSGBDFT
$MFBOJOH4UBJOMFTT4UFFM#BGGMF'JMUFST
*.1035"/5
Replacing Filters:
Maintenance
Pg 18

3FQMBDJOH5IF-JHIU#VMC
([XTHazard!
/LJKWEXOEEHFRPHH[WUHPHO\KRWZKHQWXUQHGRQ'2127WRXFKEXOEXQWLO
VZLWFKHGRIIDQGFRROHG7RXFKLQJKRWEXOEVFRXOGFDXVHVHULRXVEXUQV
Maintenance (Continued)
v&KHFNWKHUDQJHKRRGWDJIRUODPSVSHFLILFDWLRQV+DORJHQEXOEVZLOOQRWZRUNRQ/('
PRGHOVWKH\ZLOOOLJKWO\SXOVHRUIODVK
v%HIRUHSHUIRUPLQJDQ\WDVNRXWVLGHRIEDVLFRSHUDWLRQWXUQRIIWKHSRZHUVXSSO\DQGRU
XQSOXJWKHXQLW
v%HIRUHDWWHPSWLQJWRKDQGOHWKHOLJKWEXOEVHQVXUHWKHEXOEVDUHFRROWRWKHWRXFK
LQFOXGLQJDQ\DGMDFHQWZRUNLQJVXUIDFHV
3FQMBDJOH-&%-JHIU'JYUVSF
v7KLVUDQJHKRRGXVHV/('OLJKWIL[WXUH:0D[9/('
v0DNHVXUHWKHUDQJHKRRGLVXQSOXJJHGRUWXUQ2))EUHDNHUDQGWKHOLJKWVDUHFRROWR
WRXFK
v3ODFHDIODWKHDGVFUHZGULYHUEHWZHHQOLJKWKRXVLQJDQGKRRGERG\JHQWO\SU\XSWKHOLJKW
KRXVLQJDQGVHDUFKIRUWKHPHWDOFOLS5HFRPPHQGHGXVHPXOWLSOHOD\HUVRIWDSHRYHUWKH
VFUHZGULYHUKHDGWRSUHYHQWDQ\VFUDWFKLQJRIWKHILQLVK
v$SSO\IRUFHWRWKHPHWDOFOLSDQGSXOORXWWKHOLJKWIL[WXUH'LVFRQQHFWWKHSRZHUFDEOHDQG
GLVFDUGWKHROGOLJKWIL[WXUH
v5HYHUVHWKHVWHSVWRLQVWDOODQHZKDORJHQOLJKWIL[WXUH7XUQ21EUHDNHUDQGUDQJHKRRGWR
WHVWIRURSHUDWLRQ
Pg 19
Table of contents
Languages:
Other Caloric Ventilation Hood manuals

Caloric
Caloric CVWSV30Z-SS Technical specifications

Caloric
Caloric CVU306C-SS Technical specifications

Caloric
Caloric CVP1030-SS User manual

Caloric
Caloric CVW502 User manual

Caloric
Caloric CVI28-SS User manual

Caloric
Caloric CVU306C-SS User manual

Caloric
Caloric CVW206 User manual

Caloric
Caloric CVW102 User manual