Caltta AH300 User manual

AH300 PTT蓝牙遥控器说明书
感谢您购买本公司的AH300 PTT蓝牙遥控器。希望您能喜欢!本说明手册将帮助您充分了解
和使用您的蓝牙遥控器。
安全注意事项
禁止跌落以及冲击等有害本产品的行为发生,否则会造成机器故障的发生。
请勿长时间将本产品放置在近火或阳光直射的地方。
否则会引起火灾等故障的发生。
请勿将本产品放入口中,避免伤害事故的发生。
家里有儿童的使用者需要特别的注意存放。远离儿童。
本产品可在-15℃--50℃的温度环境中使用,超过此温度范围,
本公司无法保证产品可以正常使用。
本公司产品所附配件均经过认证检验,如使用非本公司认证的配件可能影响
产品正常使用。
充电注意事项
请必须使用本公司附带的 USB 线充电,否则会引起冒烟、起火等情况的发生。
如长时间不使用本产品时,至少半年充电一次,以免过度放电而导致电池损坏。
充电请使用 PC 的USB 端子或者附带的 USB 端子输出电源适配器,并在常温下
进行。请避免在近火处进行充电,以免引起冒烟和起火等情况的发生。
充电完成后,请不要使其长时间处于充电状态,以免引起冒烟和起火等情况的发生。
充电过程中,如果发生异臭、发烫等异常情况,请立即切断电源,停止充电,
以免引起冒烟和起火等情况的发生。
禁止在骑乘摩托车的同时,进行本产品的设定变更、手机通话等操作,以免引起交通事故的
发生。万一,因骑乘过程中操作本产品或不当使用本产品而产生的任何伤害,本公司概不负
责,敬请谅解。
避免骑乘中的通话行为。养成在路边安全停车之后再进行通话的习惯。
发生冒烟、发烫、异臭等异常时,请立即切断电源,并停止使用。
如果继续使用可能会引起触电、火灾等事故的发生。
请勿拆卸、改装本产品,否则会造成产品破损或者触电、火灾等事故发生。

产品描述及使用场景
产品功能
1.LED指示灯:
2.PTT键:
3.充电孔:
4.开/关机:
关机状态下,长按PTT按键3秒,蓝灯慢闪为开机。
开机状态下,蓝牙适配器关机,遥控器待机5分钟之自动关机,或用USB给AH300遥控器充一
下电,使其复位自动关机。

遥控器与蓝牙适配器配对
1 使遥控器进入配对模式
关机充电状态下,长按遥控器PTT按键8秒至红蓝
灯交替闪烁进入配对模式;或在遥控器与蓝牙适
配器断开连接(待机)的情况下,长按遥控器PTT
按键16秒,直至红蓝灯交替闪烁进入配对模式。
2 使蓝牙适配器进入配对模式
把您的适配器安装在对讲机上后打开对讲机的开关
,同时打开蓝牙适配器的开关,并且长按10秒,直
到红蓝灯交替快闪烁进入配对模式,然后再短按一
下接受配对,红蓝灯交替快闪变成慢闪进入配对。遥控器会在完成配对时进行确认,指示灯
将从红蓝快闪状态切换为蓝灯慢闪状态,配对成功。
注意: 遥控器与蓝牙适配器仅在首次配合使用时需要配对。当遥控器与蓝牙适配器完成首
次配对之后,只要遥控器开启且蓝牙适配器已激活蓝牙功能,它们就会自动连接。如果遥
控器与蓝牙适配器已配对但没有立即连接,请轻按“PTT”按钮链接即可。
遥控器与蓝牙耳机或蓝牙手咪配对
1 使遥控器进入配对模式
关机充电状态下,长按遥控器PTT按键8秒至红蓝灯交替闪烁
进入配对模式;或在遥控器与蓝牙耳机或蓝牙手咪断开连接
(待机)的情况下,长按遥控器PTT按键16秒,直至红蓝灯

交替闪烁进入配对模式。
2 使蓝牙耳机或蓝牙手咪进入配对模式
关机状态下,打开蓝牙耳机或蓝牙手咪开机键,并且长按10秒,直到红蓝灯交替快闪烁
进入配对模式。遥控器会在完成配对时进行确认,指示灯将从红蓝快闪状态切换为蓝灯慢闪
状态,配对成功。
注意:遥控器与蓝牙耳机或蓝牙手咪仅在首次配合使用时需要配对。当遥控器与蓝牙耳机
或蓝牙手咪完成首次配对之后,只要遥控器开启且蓝牙耳机或蓝牙手咪已激活蓝牙功能,
它们就会自动连接。如果遥控器与蓝牙耳机或蓝牙手咪已配对但没有立即连接,请轻按
“PTT”按钮链接即可。
遥控器与手机配对
1 使遥控器进入配对模式
关机充电状态下,长按遥控器PTT按键8秒至红蓝灯交替闪烁
进入配对模式;或在遥控器与手机断开连接(待机)的情况
下,长按遥控器PTT按键16秒,直至红蓝灯交替闪烁进入配对
模式。
2 您的手机将找到 AH300
手机将找到名为“AH300”的遥控器,然后,手机将询问您是否希望与该设备配对。按手机
上的“是”或“确定”接受配对。如果手机要求您输入密码或 pin 码确认,则输入“0000”。
手机会在完成配对时进行确认,指示灯将从红蓝快闪状态切换为蓝灯慢闪状态。
注意:
1. 有些手机是不需要输入配对密码的。
2. 遥控器与手机仅在首次配合使用时需要配对。当遥控器与手机完成首次配对之后,只要
遥控器开启且手机已激活蓝牙功能,它们就会自动连接。如果遥控器与手机已配对但没有
立即连接,请轻按“PTT”按钮,或进入手机的蓝牙设置界面,选中配对的“AH300”相关
设备名,点击链接即可。

操作
PTT(Push To Talk)按住说话功能
配对完成后,即可使用蓝牙遥控器 AH300 控制手机里的对讲软件的 PTT 控制功能,如 app
有特殊设置,请在 app 设置处选择"AH300C"相关设备名蓝牙设备,同时确保 app 对讲模式是
在蓝牙模式下进行,即 app 某个特定的地方显示的对讲模式(一般有扩音免提模式、手机听
筒模式、蓝牙模式)。
型号:AH300
芯片:CSR BC4
蓝牙标准:Bluetooth 2.1
支持蓝牙功能:SPP
蓝牙射频等级:Class 2
发射功率:4dB
灵敏度:-75db
频率范围:2.402GHZ-2.480GHZ
使用距离:5米
电池容量:200mA
充电时间:3小时
使用时间:25H
待机时间:40H
外观颜色:黑色
操作温度: -15℃~50 ℃
存储温度: -25℃~60℃

LED 状态及充电指示
故障排除和常见问题解答
遥控器PTT控制不正常
- 作为一种无线电技术,蓝牙遥控器对与所连接设备之间的物体很敏感。根据设计规格,通
过蓝牙所连接的设备,使用间距应保持在 5 米之内,而且二者之间不应存在大型物体(如墙
壁等)。
配对不成功,怎么办?
- 可能是蓝牙适配器配对设备过多或遥控器死机了,请先关闭遥控器蓝牙,再关闭蓝牙适配
器,然后重新启动。再重新请按照配对说明操作重新配对。
无法开机,怎么办?
- 把遥控器插上 USB 充电线充电 3小时直至红等长亮再次重新开机。
充电指示不正常,怎么办?
- 请确认用充输入电源是否 5V,电流是否有 100mA 以上,两端接触是否良好。
制造商:北京中兴高达通信技术有限公司
地址:深圳市南山区中山园路 1001 号国际 E城G2 栋12 楼
网址:www.caltta.com
LED 指示灯闪烁模式
状态指示
蓝灯每 6秒闪烁一次 待机状态
红蓝灯交替快闪 配对状态
红灯每 1分闪烁 2次低电量报警
红灯每 1秒闪烁一次 正在充电
红灯长亮 充电完成
PTT 按下蓝灯常亮 连接上蓝牙适配器,且 PTT 指令发送正常
PTT 按下红蓝同时灯常亮 连接上蓝牙适配器,且 PTT 指令发送正常,但电池处于低电状态
PTT 按下仅仅红灯常亮 电池处于低电状态,可用于检查遥控器电池是否低电

AH300 Remote Controller User Manual
Please read below content carefully before using
Thanks for purchasing AH300 remote controller, may you will enjoy it. Please read the “Safety
Instructions”before using the product for your safety and correct use.
Caution
Do not immerse in water to avoid damaging the product as well as shortening its lifetime.
DO NOT drop or apply shock to the product. Such act may cause irreparable damage to the
product.
DO NOT expose the product to open flame or under the direct sunlight for a prolonged period of
the time. Such environment may cause malfunction or fire.
Please do not change the setting or talk on the cell phone while driving. It may cause an accident.
Please note: in no event our product shall be liable for any special, indirect, punitive, incidental,
exemplary or consequential damages, or any damages whatsoever resulting from the usage of
this product.
Conversation on the cell phone when driving is extremely dangerous. Please go out of the road
for doing the telephone call.
If anything unusual such as smoke, heat or bad smell is detected, please disconnect immediately
the power and stop the usage. Continuing the use may cause electric shock or fire.
DO NOT lick, bite or put the product into the mouth. Such act may result in serious
injuries/accidents. Take utmost caution around children.
DO NOT change the mic when it gets wet. With water exposure, it may cause fire, electrification
or failure.
Temperature range of use: -15℃-50℃
Please use only qualified accessories which have been authenticated by us, in order to guarantee
the product correct functioning.
Note on battery charge
For battery charge, use USB terminal or USB adapter at normal temperature.
Use regulation USB terminal only. Otherwise it may cause smoke generation or fire.
When charging the battery, if any strange odor or high heat should broken out, please
immediately pull the plug from the body. It may cause smoke generation or fire.
Do not leave the product in a state of charge long after the charging is completed. Such condition
may cause smoking/ignition.
Charge battery at least once every six months even if the product is not use for an extended
period of time. Over discharge may require battery replacement.
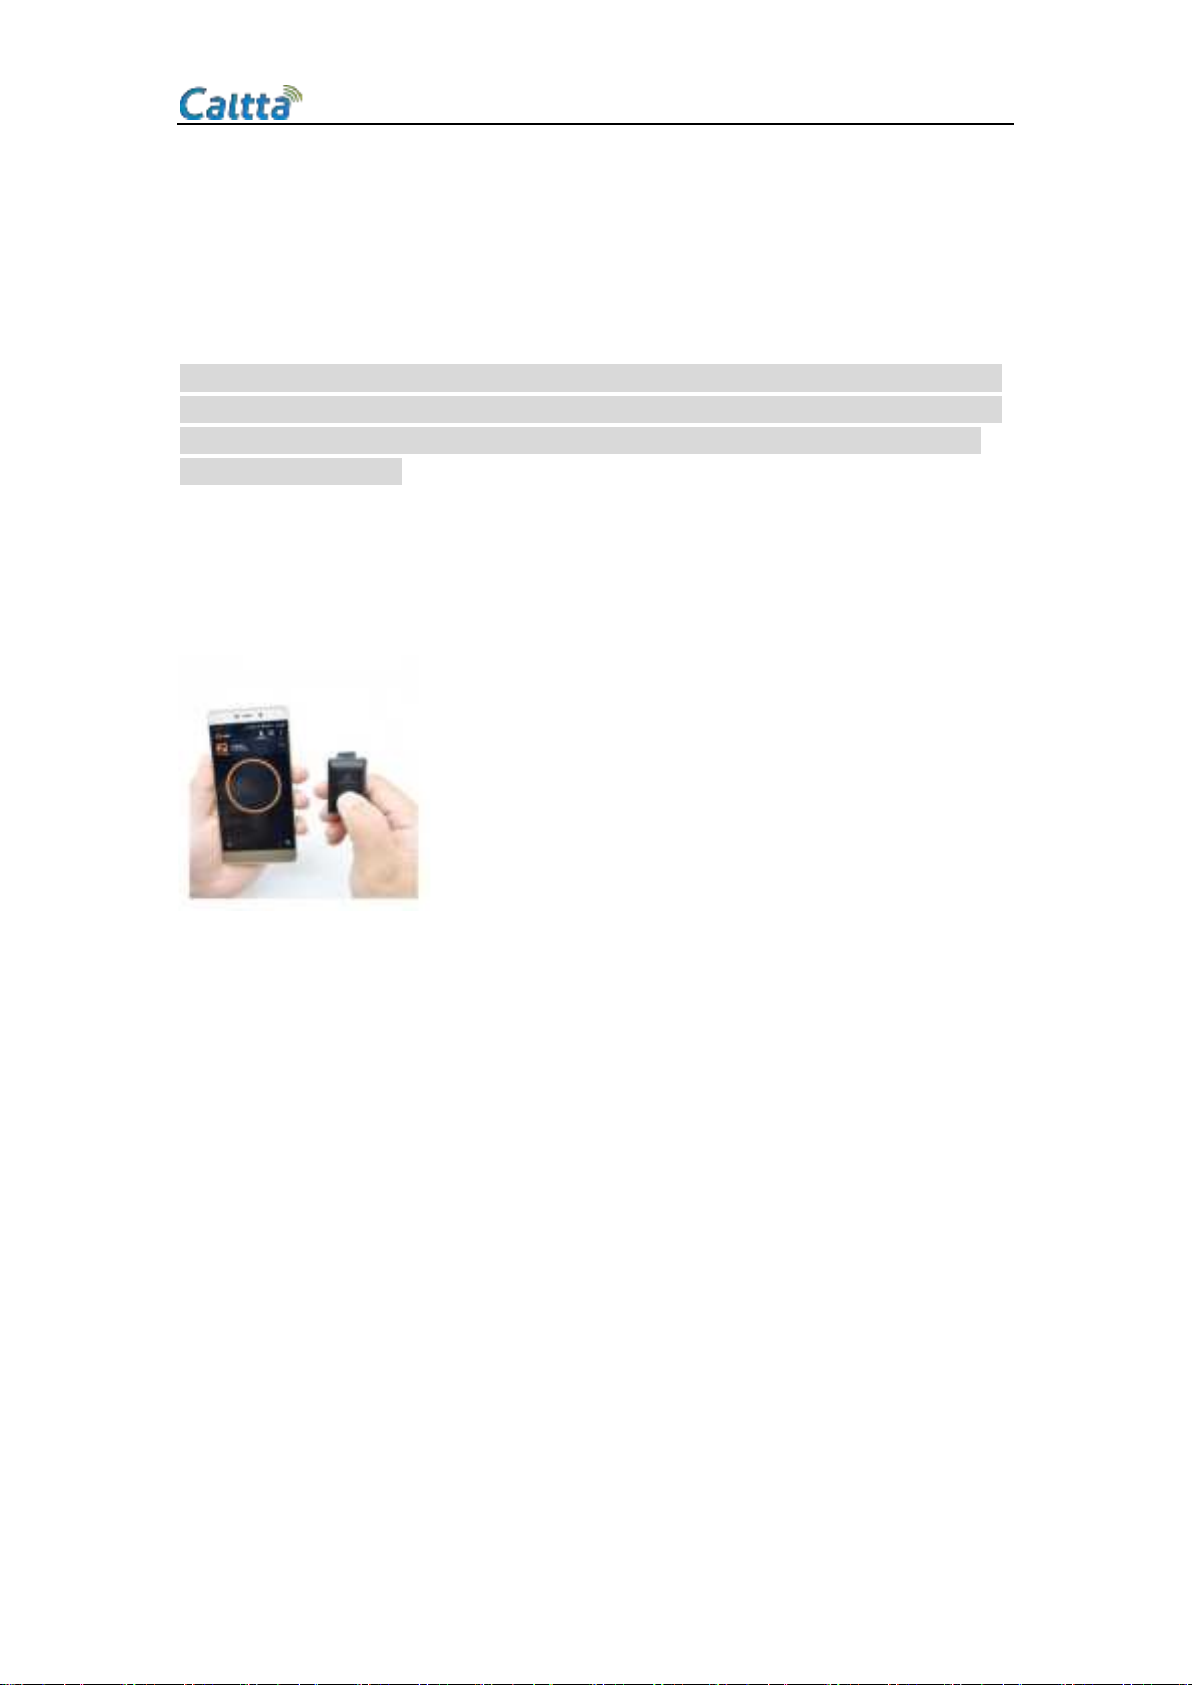
Product description:

Function:
-PTT function
Operation
Power on
In power off state, press PTT button and hold it for about3 seconds, release the button, blue
indicator will flash slowly to indicate power on successfully.
Power off
There are two methods for power off operation.
1. The remote controller will automatically power off after Bluetooth adapter switched off 5mins
latter.
2. Use the USB charging cable connect with power, charging the remote controller, the remote
controller will reset and power off.
Remote control matching
Pairing with Bluetooth adapter
①Place the AH300 remote controller and the Bluetooth
adapter in a visible area within 1 meter range.
②Make sure the Bluetooth remote controller is in power
off state.
③In USB charging power off state press and hold PTT Button for about 8 seconds or in power on
idle state press and hold PTT Button for 16 seconds, when the Blue LED and the Red LED flashing
alternately, release the button then the AH300 remote controller is in pairing state.
④On the power off state of radio, press Bluetooth adapter “on/off”button until the LED light
flash red and blue alternately quickly, then short press the “power on/off”button once ,after

doing that, the LED light of Bluetooth adapter will flash red and blue alternately slowly, indicating
the Bluetooth adapter and Bluetooth remote controller are pairing with each other.
⑤When the light of both Bluetooth remote controller and Bluetooth adapter flash blue slowly ,
pairing is finished.
Note: The pairing will be remembered after the first pair, so when you second or next time
use the device, Just power on and press the PTT button to reconnect the Adapter /dongle.
Pairing with Bluetooth headset or speaker mic
①Place the AH300 remote controller and the Bluetooth
headset or mic in a visible area within 1 meter range.
②Make sure the Bluetooth remote controller is in power
off state.
③In USB charging power off state press and hold PTT
Button for about 8 seconds or in power on idle state
press and hold PTT Button for 16 seconds, when the Blue
LED and the Red LED flashing alternately, release the button
then the AH300 remote controller is in pairing state.
④Long press the Power on/off Button of Bluetooth helmet headset or speaker mic for about 8s,
release the button when the LED indicator becomes flash red and blue alternately, at this
moment, Bluetooth headset or mic is in pairing state;
When both indicators of the headset or mic and remote control shift to flash blue slowly,
indicating pairing successfully.
⑤Adapter paired successfully, the Power on/off button of the remote control act as a
multi-functional button, now you can control calls and music by remote control.
Note: The pairing will be remembered after the first pair, so when you second or next time
use the device, do not need to pair again. Just power on and press the PTT button to
re-establish the link.
Pairing with mobile phone
①Place the AH300 remote controller and the mobile phone

in a visible area within 1 meter range.
②Make sure the Bluetooth remote controller is in power off
state.
③In USB charging power off state press and hold PTT Button
for about 8 seconds or in power on idle state press and hold
PTT Button for 16 seconds, when the Blue LED and the Red LED flashing alternately, release the
button then the AH300 remote controller is in pairing state.
④Follow the user manual of your mobile phone, turn on the Bluetooth function, and searching
the PTT remote controller devices
⑤From the found devices in your mobile phone, select the device with “AH300”related name
and thentry to pair with it, when it prompts to enter password, enter pin code <0000>. Once
paired successful, LED Indicator will exit Blue/Red alternately state to indicate the Bluetooth
remote controller has connected with your mobile phone. Now you can use the remote
controller to push to talk.
Note: 1. Password code may be not necessary for some mobile phones.
2. The pairing will be remembered after the first pair, so when you second or next time
use the device, do not need to pair again.You need to lightly click the PTT Button once if the
device haven’t connect immediately.
Push To Talk Function
After connected to your Bluetooth adapter, just push the PTT button to remote control the PTT
function.
①After connected to your cell phone Poc(Ptt Over Cellphone) app, just push the PTT button to
remote control the PTT function. Some Poc app may need some setting change to Bluetooth
before use. Details please refer to the user guide of Poc App.
Note: Poc means PTT Over Cell Phone.

Technical Specification:
About LedIndicator and Charging
Model No.:AH300
Bluetooth Chip: CSR BC4
Bluetooth Version: Bluetooth 2.1
Supported Bluetooth Profiles: SPP
Bluetooth RF Spec: Class 2
RF Power: 4dB
RF Sensitivity: -75db
RF Frequency: 2.402GHZ-2.480GHZ
Operation Range With Dongle: 5 Meters
Battery Capacity:280mA
Charging Time:3 Hours
Working Time:25H
Stand by Time:40H
Appearance Color: Black
Operating temperature: -15℃~50 ℃
Storage Temperature: -25℃~60℃
LED indicator flash mode
State of indication
LED indicator flashes blue every 6s
Standby State
LED indicator flashes red/blue alternately
and quickly
Pairing Sate
LED indicator flashes red twice every 1 min Battery low
LED indicator flashes red every 1s
Charging
LED indicator keeps red
Charging completed
Press PTT button with blue on
Connect with Bluetooth adapter, PTT function normal
Press PTT button with red&Blue on
Connect with Bluetooth adapter, PTT function normal,
Battery low
Press PTT button with only red on
Battery Low, Not connected with adapter,used for
Battery low checking.

FAQ:
1,Can not power on
It might low battery, please try again after charging for 3 hours, then power on again.
2,Disconnect with Bluetooth Adapter/dongle.
Make sure if it is low battery, if not, the distance between the Bluetooth Adapter and remote
controller within 5m? Or between them exist obstacles that absorb frequency signals like metals
or water?
3,Fail to re-connect or automatically re-connect with Bluetooth Adapter/dongle.
First make sure your Bluetooth adapter have been turned on, then remove all the paired
Bluetooth devicein you Bluetooth Adapter . Turn off the Bluetooth adapter, restart remote
controller, turn on Bluetooth adapter again,and pair with Bluetooth remote controller again.
4,System halted
Use USB cable to charge the remote controller once then the remote controller will reset itself..
5,Abnormal instruction of Charging indicator
1)When the remote controller haven’t been used for long time or overused, it need to be
pre-charge for an hour, then pull out and in the charger, it will indicate normal charging. Please
don’t count the pre-charging time into normal charging time.
2)Try another charging cable or charge r.
6,Please send back your Bluetooth remote controller to our after-sales service department for
help if above 1 to 5suggestions fail to solve your problem.
FCC Caution:
Any Changes or modifications not expressly approved by the party responsible for compliance
could void the user's authority to operate the equipment.
This device complies with part 15 of the FCC Rules. Operation is subject to the following two
conditions: (1) This device may not cause harmful interference, and (2) this device must
accept any interference received, including interference that may cause undesired operation.
IMPORTANT NOTE:
Note: This equipment has been tested and found to comply with the limits for a Class B digital
device, pursuant to part 15 of the FCC Rules. These limits are designed to provide reasonable
protection against harmful interference in a residential installation. This equipment generates,
uses and can radiate radio frequency energy and, if not installed and used in accordance with the
instructions, may cause harmful interference to radio communications. However, there is no
guarantee that interference will not occur in a particular installation. If this equipment does
cause harmful interference to radio or television reception, which can be determined by turning
the equipment off and on, the user is encouraged to try to correct the interference by one or

more of the following measures:
—Reorient or relocate the receiving antenna.
—Increase the separation between the equipment and receiver.
—Connect the equipment into an outlet on a circuit different from that to which the receiver is
connected.
—Consult the dealer or an experienced radio/TV technician for help.
FCC Radiation Exposure Statement:
This equipment complies with FCC radiation exposure limits set forth for an uncontrolled
environment .
CALTTA TECHNOLOGIES CO., LTD.
Address:12F,Building G2,International E-City,Nanshan,Shenzhen,China,518052
Tel: +86-755-26774767
Website: www.caltta.com
Privacy statement: CALTTA TECHNOLOGIES CO., LTD. is a leading provider of compre- hensive
critical communication solutions, the company is committed to protecting personal data by the
use of appropriate technical and organizational measures.
FCC ID:2AQV7AH300
Table of contents
Popular Remote Control manuals by other brands

Hello Kitty
Hello Kitty ShutterBall KT4610 user manual

Radio Shack
Radio Shack Kameleon 4-in-1 owner's manual

Broadcast Tools
Broadcast Tools WVRC-4 Installation and operation manual

Targus
Targus LASER user guide

Fusion
Fusion MS-WR600 User & installation manual

JVC
JVC KS-RC111EU Installation & connection manual