Camp Easy Road Chef 2.0 User manual

THE SMARTER WAY TO COOK
INSTRUCTIONS
DIGITAL
12 VOLT OVEN
12 months warranty*
FULLY INSULATED OUTER TANK
DOUBLE INSuLATED DOOR
EXTRA STRONG DOOR LATCH
50-180°C
ADJUSTABLE IN 1°C INCREMENTS
180 MIN timer
AJUSTABLE DURING COOK
2 REMOVEABLE s/s wire racks
TELESCOPIC
x-long powered cord
WEEP HOLES FOR FLAKY PASTRY
2x tie down brackets
easy to clean
THREE POWER SUPPLY OPTIONS
ANDERSON, CIGARETTE & MERIT PLUG

2
Thank you and Congratulations on your purchase of the Digital Road Chef 12 volt oven. We hope you
really enjoy using your oven and that it brings you many great meals in some of the most awesome
places on earth! Please read this operating manual carefully before starting the device. Keep it in a
safe place for future reference. If the device is handed over to another person, this operating manual
must be handed over along with the device.
POWER SUPPLY
The Digital Road Chef Oven runs from a 12 volt power supply. The oven will draw 8.3 Amps / 100 Watts
when it is operating fully.
You have three options of how to plug your oven in. Via:
1. Anderson Plug,
2. Cigarette Lighter Plug &
3. Merit Plug.
Most vehicles cigarette lighter plugs are designed to take a maximum of 10 Amp, so while the oven is
only drawing 8.3 Amp, this is close to its limit so we suggest you hardwire it directly to your battery us-
ing the Anderson plug. If you are using the oven regularly or if the cigarette lighter socket is old, worn
or loose then there is a higher chance of failure, especially when driving on rough or uneven ground.
The Anderson plug provides a superior connection and will reduce the chance of a poor connection
heating up and potentially melting the cigarette/merit plugs. If you do choose to use thee the Ciga-
rette/Merrit plug please ensure it is pushed very hard into the socket to achieve full connection. If it
melts it is usually because it is not pushed in far enough.
The oven cord is fitted with an inline 15A fuse as well as a secondary 15A fuse within the cigarette/
merit plug. If either fuse does blow then there is most likely a problem that you should diagnose and
rectify before replacing the fuse.
The Digital Road Chef Oven has a number of settings making it the Smarter Way To Cook.
When the oven first receives power it goes into Standby Mode for 10 seconds. When in Standby
Mode the light is Red. After 10 Seconds the light will turn green indicating the oven has automatically
turned to Cooking Mode with the start-up settings at 180ºC for 20 minutes.
Once in Cooking Mode the user can Press either the Temperature or Timer button causing the LCD
screen to change to show the ovens current settings. Through using the + or – buttons adjustments
the user can adjust either settings at the start or at any point during the cook. The temperature can
be set in 1ºC increments between 50 and 180ºC. The timer can be adjusted in 1 minute lots to a max-
imum of 180 minutes, showing the time left as it counts down. When the timer is up the oven auto-
matically switches into Standby Mode with the light changing from Green to Red. During a cook the
ovens thermostat will turn the element on and off to regulate the internal temperature of the oven
while remaining in Cooking Mode.
At any point in either Cooking or Standby Mode , by long pressing the Power button, the oven will go
into Off Mode and the light will turn off. When in Off Mode by long pressing the Power button the
oven will enter Standby Mode and then automatically Cooking Mode after 10 seconds
As the oven turns from Standby to Cooking Mode when it first receives power, it allows the Digital
Road Chef Oven to be turned on remotely using relevant 12V Management systems. The 20 minute
period is great for preheating before cooking.
WARNING!
The oven, its outer surfaces and contents that have
been in the oven may be hot. Ensure that appropriate
precautions are taken before handling the oven, its
outer surfaces or contents.

3
SET UP
Setting up and installation of your Digital Road Chef oven is simple.
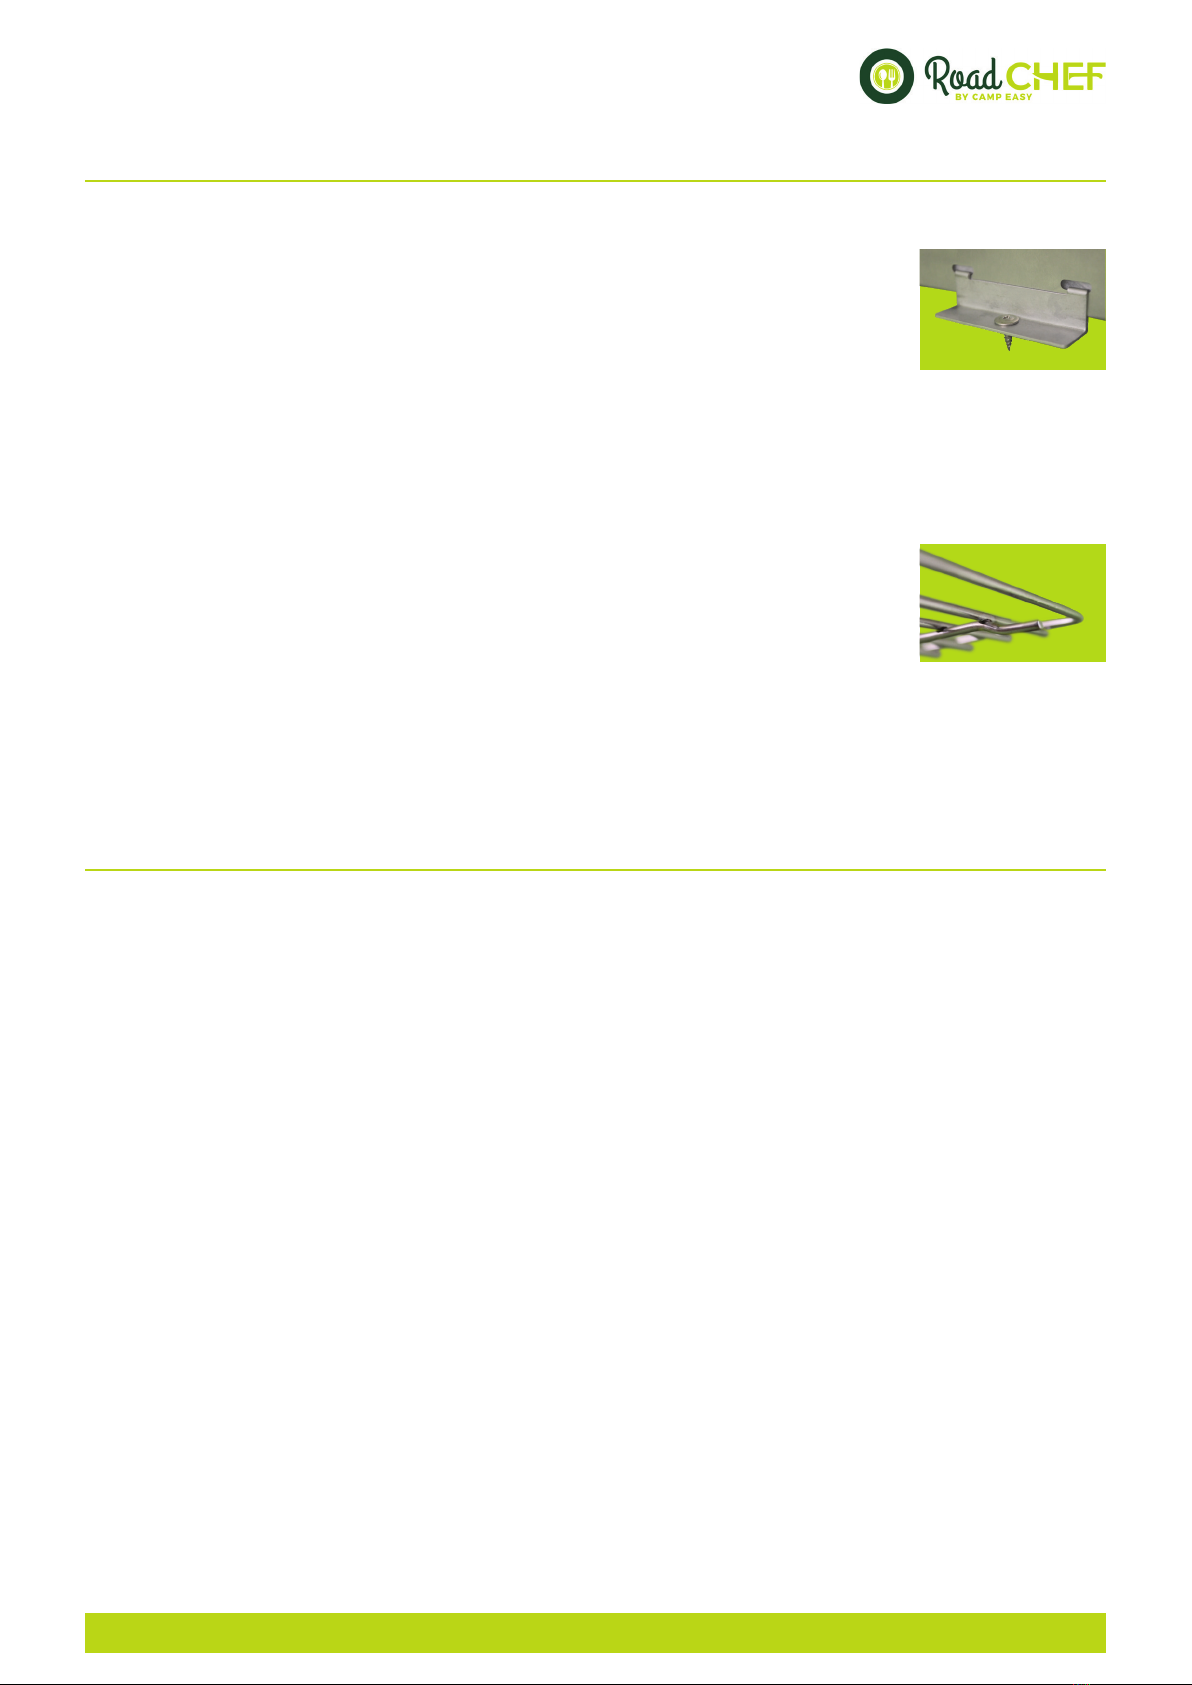
1. Your oven comes with a set of ‘tie down’ clamps that can be used to se-
curely attach it in your vehicle or the like. There are slots at the top and
bottom of the oven allowing you to secure it to a shelf or roof of your vehi-
cle. Simply insert the two prongs into the slots in the side of the oven and
screw the brackets down. Periodically check the attachment to ensure it
has not become loose.
2. The baking racks can slide in and out of the oven making it easier for you to reach your food.
Be aware that the baking racks get very hot and appropriate hand protection should be used
when handling them. The trays do not have a stopper on them, however they should ONLY be
extended so that 1/3rd of the rack is out of the oven. If you extend it further than this the tray may
buckle and/or fall out causing injury.
3. If the oven is ‘rattling’ when you are driving, when the oven and racks are
cool, you can gently pinch down the arms on the sides of the racks so that
they hold tightly onto the arms inside the oven.
4. The Digital Road Chef Oven requires some level of ventilation around the
front half of the oven due to the heat susceptibility of the LCD Screen and
controls. The oven can be recessed but it the front of the oven must have good ventilation at all
tiems when ON
5. The oven is insulated on 5 sides using fibreglass insulation. This should keep the outside tem-
perature below 40°C although this can vary depending on the ambient temperature. The door
is insulated through a double wall which only allows convection to heat it up.
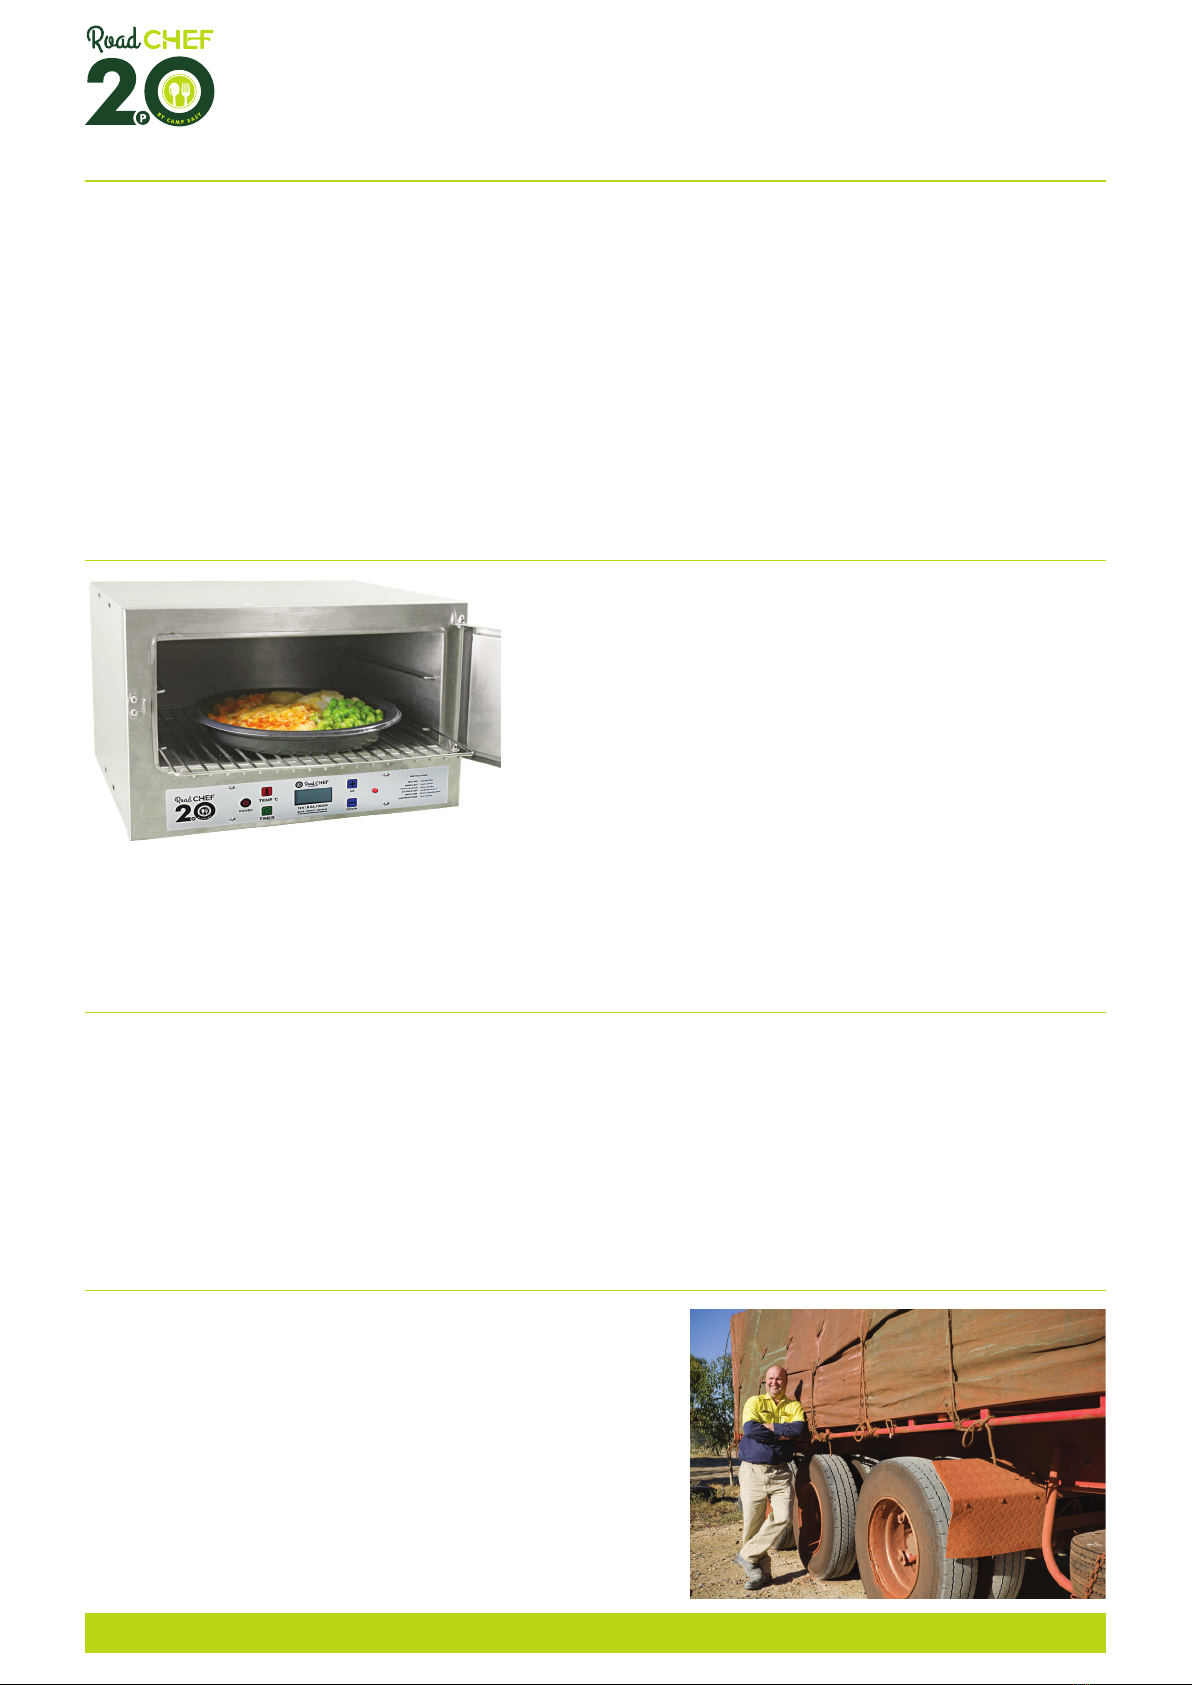
COOKING
To turn your oven on either turn the power supply on or long press the Power button, that will iniate the
Standby and then Cooking mode for 20 minutes at 180oC. Most modern recipes and instructions pro-
vide cooking time for a fan forced oven. As the Digital Road Chef is not fan forced it will take longer to
create similar results. To achieve the best results, we suggest you preheat the oven for 20-30 minutes,
especially if you are cooking with fresh ingredients. To give you a rough idea it will take you about 30
minutes preheating for the oven to get to 150 degrees. The Digital Road Chef oven’s heat source is on
the bottom of the inside of the oven and heat is transferred throughout the oven through conduction
of the metal and convection in the air.
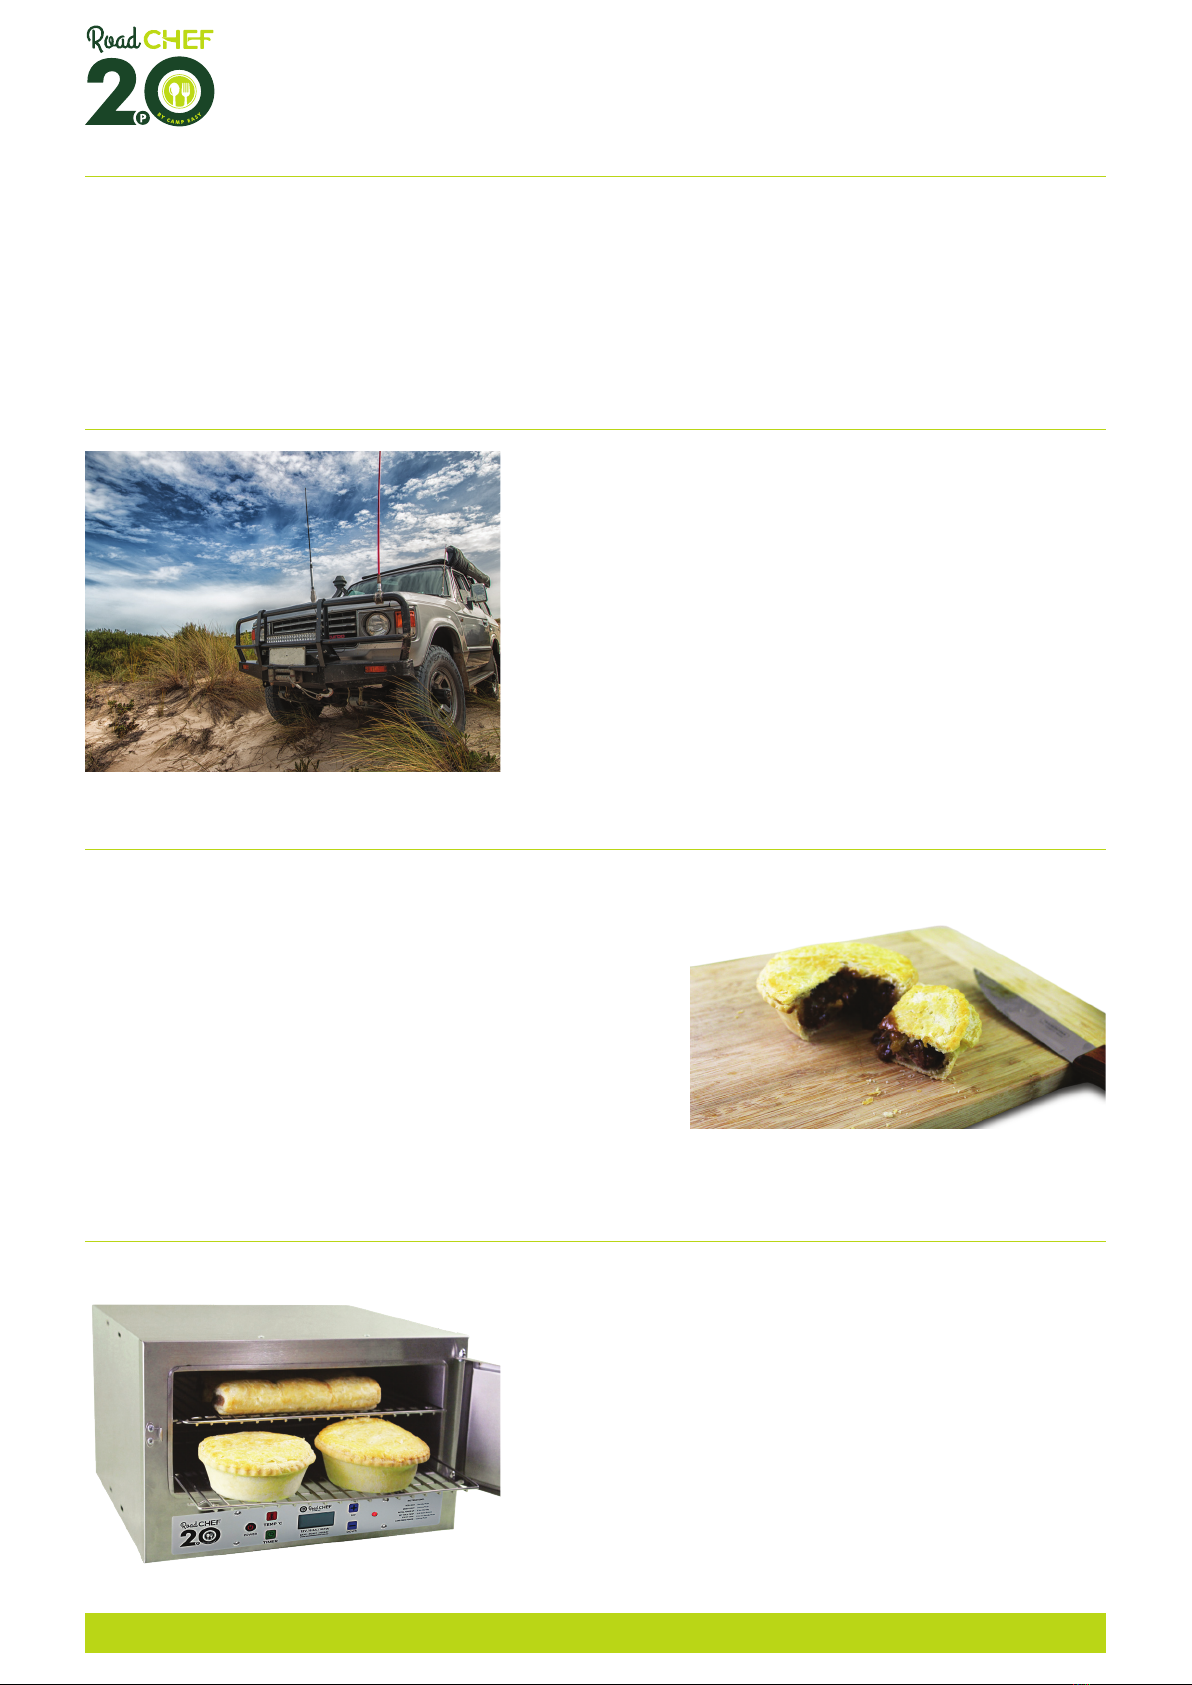
During cooking at high temperatures, it is natural for the bottom of the oven to ‘bow’ up. Your oven’s
heating element is attached directly to the base of the oven and with a high amount of heat required
the base metal naturally expands. As the four corners of the base are turned at 90 degrees the expan-
sion is restricted focusing the expansion, with the height of the racks designed to take into account the
bowing. Over time the metal will temper and harden reducing the bowing effect. Like all ovens there
are hot and cool spots, so we recommend moving the items being cooked around during the cook for
optimal results. Tips include: Place a silicone baking mat (approximately 170 x 170mm) in the centre of
the oven base. Or place the top rack (or similar rack) on top of the bottom rack to help the heat circulate
around the oven more evenly.
We recommend that you do not over fill the oven, which reduces air flow and to rotate your food be-
tween shelves and on the shelves through out the cook to avoid hot spots. Food in baking trays and
alfoil or similar coverings can be placed directly onto the bottom of the oven however you should check
it regularly as it is easy to burn food using this method. If you are reheating or cooking frozen food we
suggest that you rotate your food between shelves and on the shelves throughout the cook to avoid
the outside burning before the middle is defrosted.

4
12 VOLT TIPS AND TRICKS
Operating the Digital Road Chef 12 volt oven is very different from using your 240 volt oven you have at
home. One of the biggest differences is that many people are willing to ‘have a go’ at wiring up a 12 volt
system, where as, unless you are a qualified electrician, you shouldn’t even think about tinkering with
your 240 volt wiring. 12 volt isn’t as simple as it used to be, with alternators moving from fixed voltage
to smart alternators to reduce emissions, people using secondary batteries with an array of in vehicle
battery chargers and battery chemistries changing regularly as we chase the ideal energy storage unit.
There are a lot of factors that will affect the Digital Road Chef oven and its ability to produce heat over
an extended period of time that aren’t obvious to people ‘having a go’. While we encourage you to
‘have a go‘ we have attempted to list some of the main issues you may experience below to help you to
understand them using layman’s terms and what you might be able to do to rectify the problem.
Voltage Of Your Battery
What voltage is your battery at when you start using your
Digital Road Chef oven? Traditionally 12 v batteries at full
charge sit around the 12.6v mark indicating they are ‘full’ as
the energy drains out of them their voltage drops lower un-
til when they are really flat they are sitting around the 10.5-
11 volts – or lower! If you are starting from a lower voltage
point then this will significantly affect the ability of the oven
to get to its top temperature as the battery is struggling to
pump out enough energy to allow it to heat up.
A good analogy is if a dam is 100% full then when you low-
er the flood gates then the maximum amount of water is flowing out when the gates are at a certain
level. If the dam is only 80% full then when the gates are at the same point less water will flow out even
though the gate is in the same place.
Ongoing charge of battery
Many people use the Digital Road Chef oven when they are driving, others use it while their engine isn’t
running relying on the energy stored in a battery bank or something similar. Whilst your battery is con-
nected to a (traditional) running vehicle it is being continuously recharged and will sit around 13.7-14.7
volts, while a battery bank is not. When a battery is being recharged it is (usually) able to pass on the
highest amount of energy to appliances like the Digital Road Chef so it can operate at its full potential.
If the battery isn’t receiving charge then its ability to continuously operate at its full potential decreases
over time, especially if more than one appliance is being used, like a fridge or lights, at the same time.
Size/type of battery
The ‘size’ or Amp hour and battery type or chemistry also
influence the ability of the battery to store energy and re-
lease it over an extended period of time. We suggest a min-
imum of a fully charged 120 Ah deep cell battery to ensure
a consistent 2+ hour cook.

5
Age of battery
Like most things in life, the older something gets the harder it finds it to perform at its optimum. An
AGM glassbatterywill last anywhere from four to seven years, while adeep cyclegelcell batterycan
last from two to five years.
Connection quality
The quality of connections is a much under rated element in the transfer of energy in a 12v system. The
optimum connection for a Digital Road Chef Oven is through the supplied Anderson Plug connection.
However, we understand that not everyone has access to
this in their vehicle, so we have included a cigarette style
plug. The challenge with using the cigarette style plug to
run your Digital Road Chef is the quality and age of the fe-
male part of the cigarette plug is variable. In older vehicles
it is likely the plug has become loose due to having phone,
DVD and other kinds of plugs put in and out of them nu-
merous times. As it becomes loose the connection between
the metal parts isn’t as ‘tight’ so this reduces the ability of
the connection to efficiently transfer the required amount
of energy. When the unit is only drawing 1 or 2 Amps like a
phone charger this is no problem, however when using the
Digital Road Chef you are looking at 8+ Amps so it starts to really test the connection. Any poor connec-
tion results in the connection heating up, rather than your oven! Many cars, especially later model ones
have reduced the size of the wiring running to the plugs, as they are only expecting people to run their
phones not ovens through them. As such this has reduced the ability of the plug to provide the required
energy to run the Digital Road Chef. The plug you use should have a minimum 10A.
Length of cable from Battery to Digital Road Chef
All cables used to transfer voltage have resistance, or friction,
so some of the energy that you started with at the start of the
cable is used up before it gets to the end of the cable. The lon-
ger the cable the more ‘voltage drop’ there is per metre. So if
your battery is under the bonnet of your vehicle and the con-
nection to the Digital Road Chef is at the back of the vehicle
then you may have 3-5m+ of cable that is lowering the amount
of voltage and as such the amount of Amps that can be used
by the oven to create heat.
Size of cable from Battery to Digital Road Chef
Carrying on from above, using the wrong size cable can
also influence the voltage drop. If the wire is too thin, or
made from the wrong material (copper is best), then this
can lower the voltage at the connection to the oven. Simi-
larly, if the wire size is too big, then this can also cause volt-
age drop. Your 12 Volt expert or auto electrician should be
able to help you select the right size wire to get optimal
results.

6
Running multiple appliances
When you are running multiple appliances you again need to consider the cabling that you are using.
Using an analogy, if you have a 10cm pipe that can supply your pump 100l per minute you can not then
go and add another pump that also requires 100l per minute. To do this you will need to increase the
size of the pipe or you will have 2 pumps only getting 50l per minute. So, if you want to run your phone,
a fridge, UHF, maybe a dashcam or GPS and then try and add the Digital Road Chef to it you will need
to increase the size of the wiring, or the pipe, from the battery.
What you put into the oven
What you put in the Digital Road Chef significantly affects
the amount of time it takes to cook it. The time required to
cook a roast isn’t always the same! Even in your home oven
it will take 1.5 hrs to do a 1kg pork roast but it will take 3.5 hrs
to do a 3 kg roast. So, if you put 2 frozen pies into the Digital
Road Chef it will take longer than 2 defrosted pies. Similarly,
if you put in 4 frozen pies it will also take longer than the
2 frozen ones. A few good rules of thumb are to try not to
‘overload’ the oven, if you are ‘loading it up’ then try defrost
the items before putting them into the oven and also rotate
them between the top and bottom shelves and the front
and back throughout the cook.
Oven temperature
While the Digital Road Chef is an oven, it is a 12 volt oven,
not a 240 volt oven like you have in your house. While it is
very efficient at turning 12 volts of energy into heat so that
you can bake, roast and reheat, on the road, it isn’t a 240
volt oven so it is important not to expect the same perfor-
mance. It will take about 30 minutes to preheat your oven
to 150 degrees C. After the first 30 minutes the incremental
increase in temperature reduces to about 10 degrees per
10 minutes with the maximum temperature achieved after
about 50—60 minutes. The more food you put in your oven,
and the lower the temperature (if its frozen or room temperature) the longer the cooking time will be.
How you measure temperature
There are lots of different methods people will use to mea-
sure the temperature of an oven. What you are looking to
measure is the air temperature, not the surface tempera-
ture inside the oven. The oven does have a thermostat that
will turn the oven on and off when it reaches/falls below
temperatures. This cannot be accurately used as a tem-
perature gauge. If you are keen to check the temperature,
we recommend using one of the small gauges that come
with a stand that can be purchased at most camping, hard-
ware, BBQ and kitchen shops. Get a smaller one and place
it on the bottom tray of the oven.

7
12 MONTH OVEN GUARANTEE
Please take the time to read about what your guarantee offers you.
The Digital Road Chef oven comes with a guarantee designed to protect you as our valued customer.
RPM Innovations Pty Ltd; will repair or replace the oven, at their discretion should it fail due to faulty
materials or manufacture for a period of 1 year from the date of sale.
1. The Guarantee is subject to the following conditions:
2. The Guarantee only applies to the original purchaser who purchased the oven from an approved
retailer in Australia or New Zealand.
3. The Guarantee does not apply if the oven has been used for anything other than reasonable
personal cooking. Commercial or continuous use are expressly excluded.
4. Damage due to normal wear and tear, accidents, acts of God, negligence or failure by the pur-
chaser to ensure that instructions for use and care are observed, and any other cause reasonably
beyond the control of RPM Innovations Pty Ltd are not covered.
5. If redress is sought under the terms of this Guarantee, then the oven and all of its associated
parts must be returned by the purchaser to the outlet from where it was purchased, within the
Guarantee period, in a clean and acceptable manner and with proof of purchase.
6. All transport costs and any other indirect costs are excluded from the Guarantee.
7. RPM Innovations Pty Ltd; reserves the right to make a reasonable charge for repairs which it
determines are not within the scope of the Guarantee.
8. The Guarantee does not limit, modify or exclude any rights under any law if doing so would con-
travene that law or make any part of this Guarantee invalid. However, RPM Innovations:
a. Excludes (to the extent permitted by applicable law) all conditions and warranties that might
otherwise be implied; and
b. Limits its liability for breach of any such condition or Guarantee that it cannot exclude together
with its liability under the Guarantee, to repairing or replacing the Goods, or paying the cost of
having the Goods repaired or replaced (at RPM Innovations Pty Ltd option).
This oven has been made with meticulous care and attention to detail. Providing it is properly looked
after, it will bring you many great meals in some of the most amazing places on earth!

RPM Innovations Pty Ltd
PO Box 416
Carina Queensland 4152
Phone: 07 3114 2003
Fax: 07 3177 7897
Email: luke@rpminnovations.com.au
Web: www.rpminnovations.com.au
Table of contents
Other Camp Easy Oven manuals