17
Wellbeing call system function set-up
16
Alarm set-up procedure
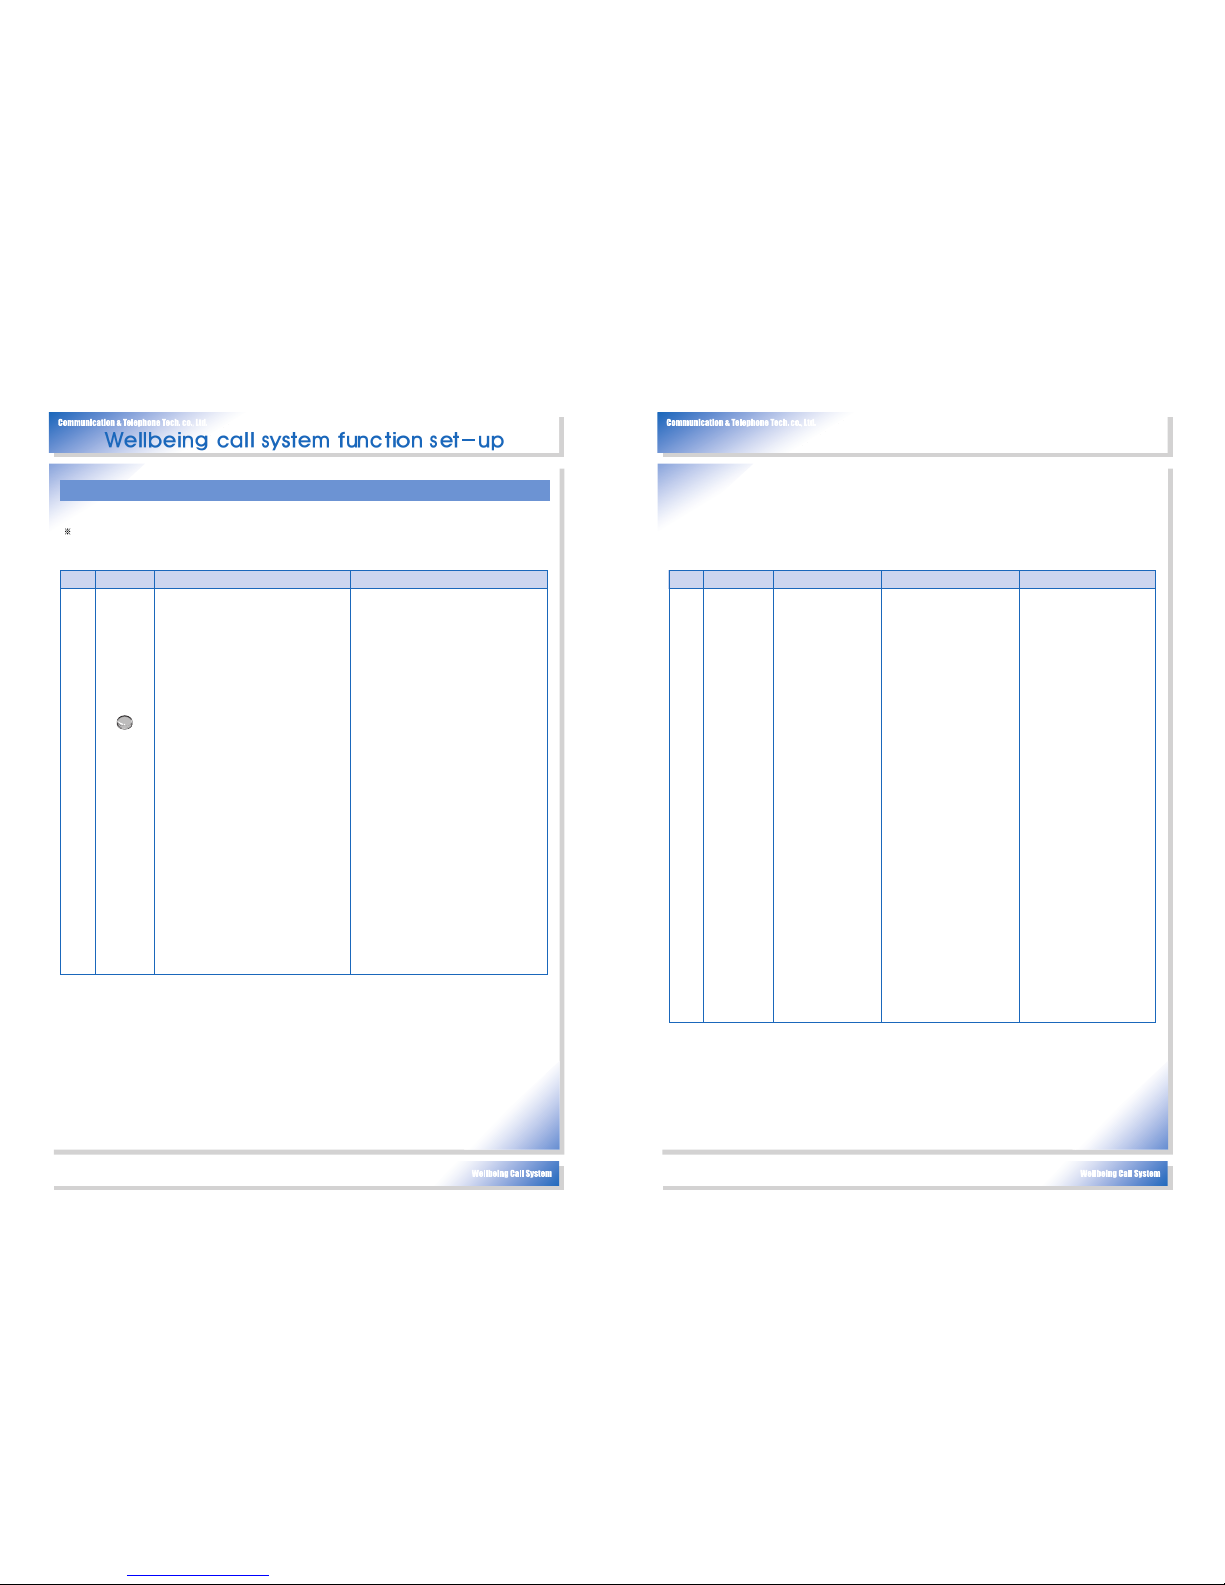
■Activities before and after alarm set-up
Waiting time: It is the minimum required for the user to escape movement activities after setting up the
alarm. During this time, the self-system checking function is working and it notifies and
checks each sensor’s condition and the condition of rechargeable batteries, etc.
Contents
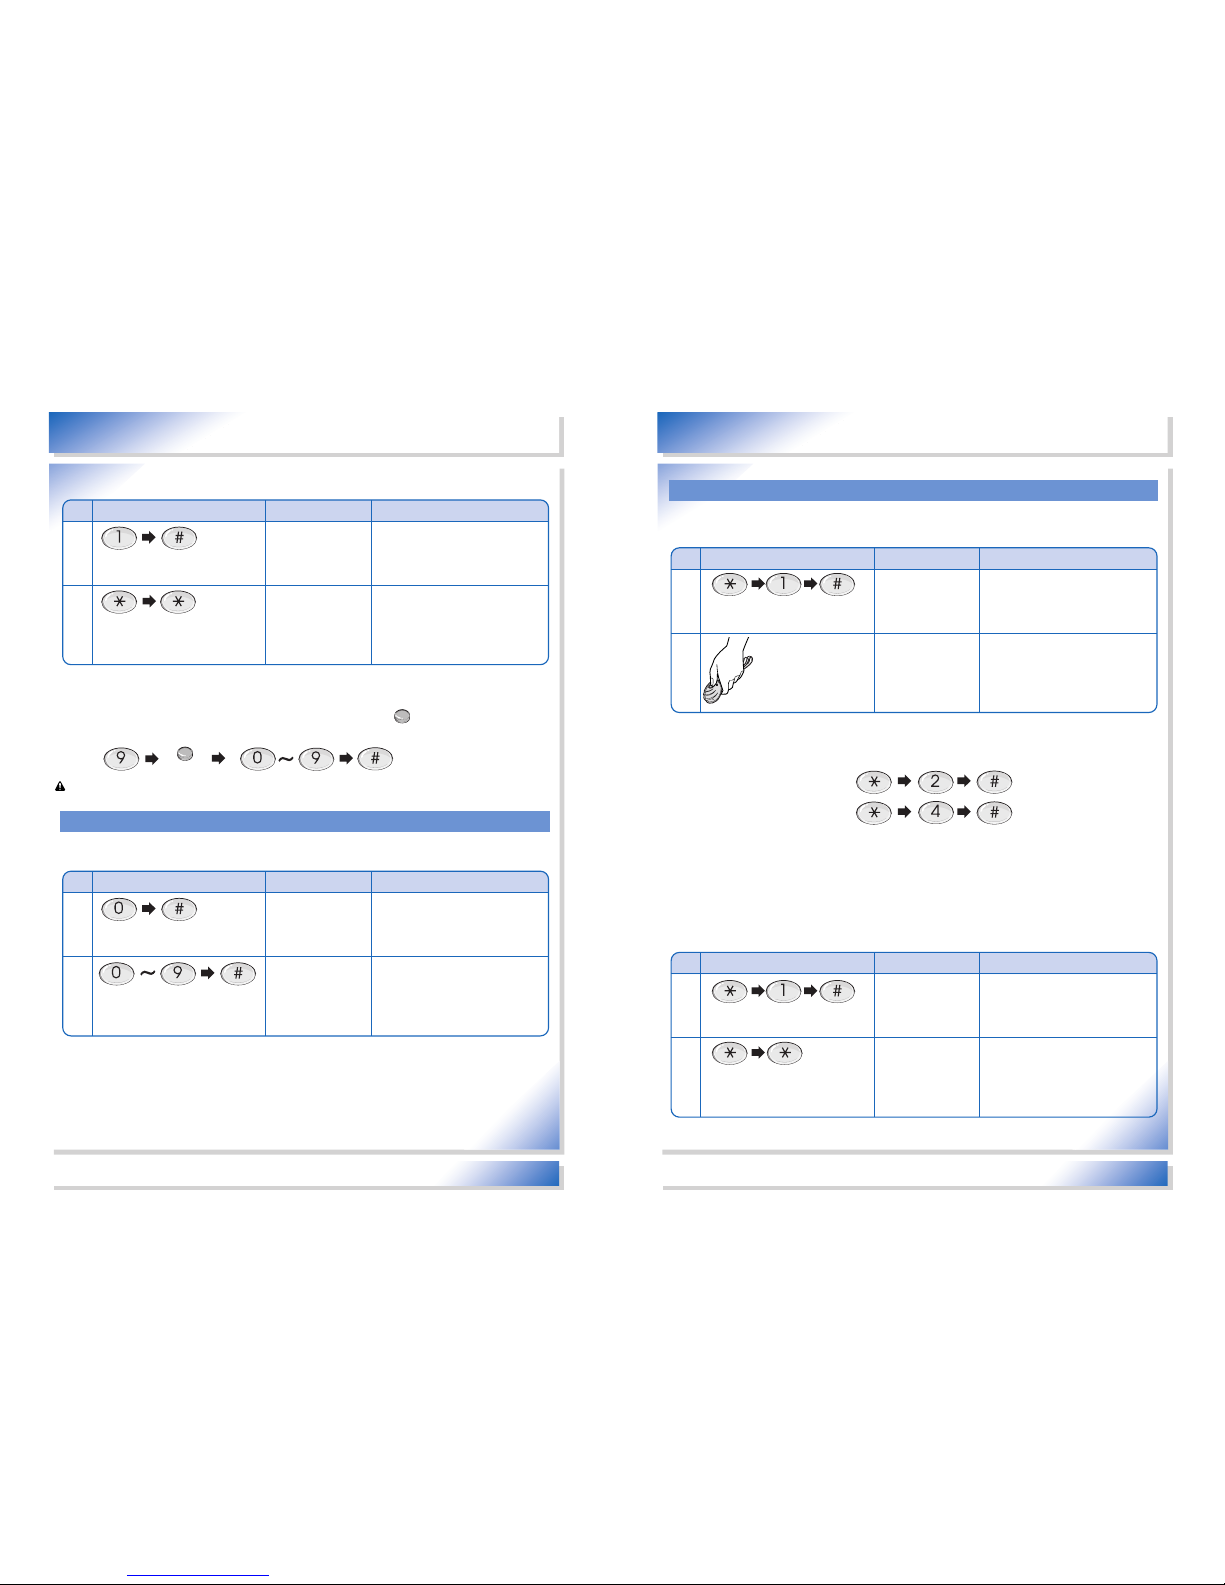
Alarm set-up
Waiting time (70 seconds) After 70 seconds
Explanation
Press once
•Dial Back Light LED turns ON.
•LCD Back Light Lamp turns ON.
•Self-diagnosis for each sensor. If there
is a problem in a sensor, the following
voice message appears 5 times
signaling the problem.
- door open sensor (OPTION
SENSOR): There is a problem in the
door open sensor.
- Housebreaking sensor: There is a
problem in the housebreaking sensor.
Fire sensor: There is a problem in the
fire sensor.
•If the sensor is not restored and
continues to have a problem, it ignore
the sensor activities and if it is restored,
it automatically returns to normal.
•If there is a problem in rechargeable
batteries, voice messages sound 3
times saying “Replace a new battery”.
Please replace a new battery
accordingly.
- Purchase rechargeable batteries from
the product seller
•Dial Back Light LED turns OFF.
•LCD Back Light Lamp turns OFF.
•After sensing each sensor’s activity,
calls the registered phone number and
reports the following voice messages.
- door open sensor (OPTION SENSOR):
Door has been open.
- Housebreaking sensor:
Housebreaking has been detected.
- Fire sensor: Danger of fire is detected.
Fire breakout is detected. This is an
emergency.
•If the sensor continues its activity
instead of returning to the system,
- Normal activities until the 2nd time
- After then, it ignores sensing
movement before returning to normal
(ignores from the 3rd)
- Sensor returns to normal activities
automatically for normal state.
■Report when automatically connecting to the phone from the sensor
•The sensor is detected at the alarm set-up mode and then it automatically connects to the registered
telephone number.
Contents
Sensor movement
Connect to the phone
Activities after connecting to the phoneMotions while connecting to the phone
Explanation
•Sensor
detection
- Human
detecting
sensor
- Fire
detecting
sensor
- OPTION
SENSOR
(door open
sensor)
•Emergency
remote
control
movement
•Connect to the
registered telephone
number. (max. 9)
- If no one answers
the phone, it
connects to the next
telephone number
after 40 seconds,
and it automatically
finishes after
repeating this for 3
times.
- If the line is busy, it
hangs up the phone
and automatically
connects to the next
phone.
- If any one receives
the phone and the
voice comes out
from the handset, it
stops to connect to
the phone.
•After calling the registered
number, “Sending
Wellbeing call voice
message”Press *.
The voice message
appears every 4 seconds.
➲Press * after the voice
message.
- If you hear the same voice
message, press *.
- Press * after the voice
message in case it does
not recognize * if you press
the button while the voice
message is on.
•It senses that the phone is
connected when * is
pressed after the voice
message. If there is no *
pressed, it automatically
connects to the next phone
after 40 seconds.
•When “*”is pressed, the
voice message about
sensor activities
immediately.
- Open door sensor
(OPTION SENSOR) has
been detected.
- Housebreaking sensor:
Housebreaking has been
detected.
- Fire sensor: Danger of fire
is detected. Fire breakout
is detected.
-This is an emergency.
- Emergency remote control:
Please help me. This is an
emergency.
•Hang up the phone
automatically after 60
seconds of both
speakerphones being one
line.
•To stay on line, press “*”
before 60 seconds.
Additionally stays on line
for 60 seconds
•If you want to hang up
before 60 secs, press “#”
button or hang up the
phone.