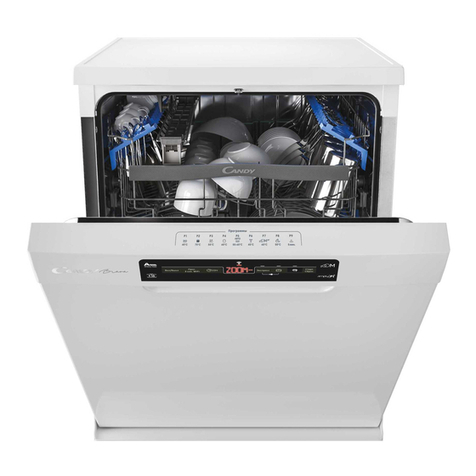
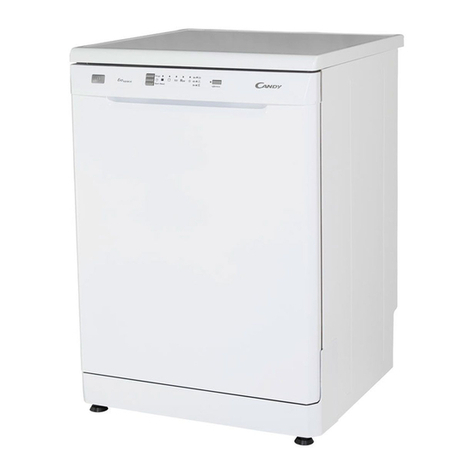
Candy CDCF6 User manual

Instruction ManualInstruction Manual
DishwasherDishwasher
CDCF 6/CDCF6S

Read this Manual
Before Calling for Service
This manual containssections of Safety
Instructions,Operating Instructions,
Installation Instructions andTroubleshooting
Tips etc. Carefully reading itbefore using the
dishwasher will helpyou to useand maintain
the dishwasher properly.
SafetyInformation
Operating Instructions
Troubleshooting Tips
Installation instruction

1
IMPORTANT SAFETY INFORMATION
READ ALL INSTRUCTIONS BEFORE USING
WARNING!
GROUNDING INSTRUCTIONS
This appliance must be grounded. In the event
of a malfunction or breakdown, grounding will
reduce the risk of electric shock by providing a
path of least resistance of electric current. This
appliance is equipped with a cord having an
equipment-grounding conductor and a grounding
plug. The plug must be plugged into an appropriate
outlet that is installed and grounded in accordance
with all local codes and ordinances.
WARNING!
Improper connection of the equipment-
grounding conductor can result in a risk
of electric shock. Check with a qualified
electrician or service representative if you
are in doubt whether the appliance is
properly grounded. Do not modify the plug
provided with the appliance ;If it is not fit
for the outlet .have a proper outlet installed
by a qualified electrician.
n
n
SAVE THESE INSTRUCTIONS
When using your dishwasher, follow the below basic precautions including the following:
READAND FOLLOW THIS SAFETY INFORMATION CAREFULLY
WARNING! PROPER USE
nKeep child away from detergent and rinse aid, keep
child away from the open door of the dishwasher,
there could still be some detergent left inside.
nDo not abuse, sit on, or stand on the door or dish
rack of the dishwasher.
nDo not touch the heating element during or
immediately after use.
nDo not wash plastic items unless they are marked
dishwasher safe or the equivalent. For plastic
items notso marked,check themanufactures
recommendations.
Use only detergent and rinseadditives designed
for an automaticdishwasher. Neveruse soap ,
laundry detergent,or hand washingdetergent
in your dishwasher. Keep theseproducts out of
children.
n
n
n
n
n
Do not operate your dishwasher unless all
enclosure panels are properly inplace. Open the
door very carefully if the dishwasher is operating,
there is a risk of water squirting out.
nDo not place any heavy objects of stand on the door
when it is open. The appliance could tip forward.
When loading itemsto be washed:
1) Locate sharpitems so thatthey are notlikely to
damage the doorseal;
2) Load sharpknives with thehandles up toreduce
the risk ofcut-type injuries.
n
When using yourdishwasher, youshould prevent
plastic item fromcontacting with heatingelement.
n
n
n
n
n
n
n
n
n
2
ControlPanel
IMPORTANT!
1
2
3
4
9
6
7
8
5
2
13
4
5
6
7
8
9
10
10
2
1
3
4
5
6
78
910
10

3
TurningontheAppliance
At end ofwashing, the timedisplay will flashfor 8
seconds while thebuzzer sound. Butat the endof
delayed washing, nosound of thebuzzer, only
the flash ofthe time display.
1
2
3
4
5
6
Press the Start/ button
to stop washing.
7
Draw out thelower and upperbasket, load thedishes and pushthem
back. It iscommended that loadingthe lower basketfirst, then the
upper one.The expensive andfiner chinaware shouldnot be putin.
With alittle force toensure the dooris properly closed.
Note: a soundof click couldbe heard whenthe door isclosed
perfectly.
Insert the pluginto the socket.
The power supplyis 230V50HZ, the specificationof the socketis
250V 10A.
Press the ON/OFFbutton
According to thesoil level tochoose the desiredprogram by
pressing program selectionbutton.
Press this buttonto start automaticwashing.
Press the ON/OFFbutton at theend of washing.Open the doorof
dishwasher after waiting30 minutes.
For lightly soiled loads,such
as plates,glasses,bowls and
lightly soiled pans.
15 gr.
15 gr.
Economy
(*EN 50242)
Glass
Rapid
3in1
For the heaviest soiled loads,
such as pots, pans, casserole
dishes and dishes that have
been sitting withdried food
on them for a while.
Intensive
For normally soiled loads,
such as , plates, glasses
and lightly soiled pans.
standard daily cycle.
pots
Normal
For lightly soiled loads,
such as glasses, crystal and
fine china.
Ashorterwashforlightly
soiled loads (max 4 plate settings).
Pre-wash(50℃)
Wash (70 ℃)
Rinse
Rinse
Rinse (70 ℃)
Drying
3/15 gr.
3/15 gr.
3/15 gr.
Pre-wash
Wash (60 ℃)
Rinse
Rinse (70 ℃)
Drying
Pre-wash
Wash (60 ℃)
Rinse
Rinse (70 ℃)
Drying
Wash (45 ℃)
Rinse
Rinse (60 ℃)
Drying
3in1(1pcs)
Pre-wash
Wash (55 ℃)
Rinse
Rinse (70 ℃)
Drying
Wash (40 ℃)
Rinse
Rinse
Drying
For normally soiled loads,
uch as plates, glasses, and
lightly soiled pans. Standard
daily cycle.

4
Remove the lowerbasket and thenunscrew and removethe cap fromthe salt
container.
If you arefilling the containerfor the firsttime ,fill water .
Place the endof the funnel(supplied)into the holeand introduce about of
salt .It isnormal for asmall amount ofwater to comeout of thesalt container
1kg
Carefully screw thecap back on.
1
2
4
3
The hardness ofthe water variesfrom place toplace. If hardwater is usedin the dishwasher, deposits willform on thedishes
and utensils.
The appliances isequipped with aspecial softener thatuses a saltspecifically designed toeliminate lime andminerals from the
water.
If your model havenot watersoftener,you mayskip thissection.

5
Proper Use of Detergent
WARNING!
YOU MAY NOT ADD TOO MUCH DETERGENT TO PREVENT THE FORMATION OF DEPOSITS BECAUSE YOUR DISHWASHERS
HAVE SPECIALLY-DESIGNED WATER SOFTENERS.
The dispenser must be refilled before the start of each wash cycle following the instructions provided in the" Wash Cycle
Table".Your dishwashers use less detergent and rinse aid than conventional dishwashers. Generally, only one tablespoon
of detergent is needed for a normal wash load. Also,more heavily soiled items need more detergent. Always add the
detergent just before starting dishwasher, otherwise it could get damp and will not dissolve properly.
DETERGENT DISPENSER
In accorancewith En50242standard, thedispenser shouldbe seton themaximum lever
when doing the performance.

6
LoadingtheDishwasherRacks.
For best performance of the dishwasher, follow these loading guidelines. Features and appearance of racks and
silverware baskets may vary from your model.
IN
66
99
33
11
11
8877
22
44
333
3
33551010
It is preferableto place servingdishes and lidson the sideof the racksin order toavoid blocking therotation of the
top spray arm.
Pots, serving bowls,etc, must alwaysbe placed topdown.
Deep pots should be slanted to allow water to flow out.
The rack feature fold down tine rows so that larger or more pots and pans can be loaded.

7
SILVERWAREBASKET
Silverware should beplaced in thesilverware basket withhandles at thebottom: If therack has sidebaskets, the spoonshould
be loaded individuallyinto the appropriateslots, Especially longutensils should beplaced in thehorizontal position atthe
front of theupper rack.
TurningontheAppliance
When the washingcycle has finished,an 8 secondbuzzer will sound.Turn offthe appliance usingthe ON/OFF button,openthe door
of the dishwasher. Wait a fewminutes before unloadingthe dishwasher toavoid handling thedishes and utensilswhile they are
still hot andmore susceptible tobreakage. Theywill also drybetter.
Forget to Add a Dish?
A forgotten dish can be added any time before the detergent cup opens.
Open the door a little to stop the washing.
After the spray arms stop working,you can open the door
completely.
Add forgotten dishes.
Close the door, the dishwasherwill resume afterten seconds.
4
3
2
1
Cancelling ormodifying awash setting. . .
Make sure thatthe plug ofthe appliance isinserted into thewall socket.
Make sure that the water supply is turned on to full pressure.
Load the dishwasher(see the section entitled, "Loading the Dishwasher " ).
Pour in the detergent(see the section entitled, "Salt, Detergent and RinseAid ").
2
3
4
5
6
1
It is dangerousto open thedoor when washing,as the watermay scald you.
WARNING!
Press the "progkey-press" to selectthe "wash cycle".(seethe section entitled."washcycle table"
WARNING!
4
2
1
6
5
37
Do notleave anyitem extendthrough bottom.
Knives andother utensilswith sharppoints
must beloaded in the basketwith their points
down orplaced in an horizontalposition.
IN
512
2
2
2
2
2
1
1
5
51
1
1
5
6
5
54
4
8
4
4
4
4
3
3
3
3
3
7
3
Press theStart/Reset key, thewashing willstart afterfew seconds.
Press thekey toset thedelay starttime. Thisdishwasher canbe delayamong 3,6,9and 12hours.
If youwant tocancel thedelay start,just changedelay timeup tono hoursselected.
).
8

8
CaringfortheDishwasher
To clean the control panel use a lightly dampened cloth then dry thoroughly. To clean the dishwasher outside, do
not use solvents (degreasing action) neither abrasives, but only a cloth soaked with water.
Never use sharp objects, scouring pads or harsh cleaners on any part of the dishwasher.
ProtectAgainstFreezing
If your dishwasher is left in an unheated place during the winter, ask a service technician to:
Cut off electrical power to the dishwasher. Remove
fuses or trip circuit breaker.
Turn off the water supply and disconnect the water
inlet pipe from the water valve.
Drain water from the inlet pipe and water valve.
(Use a pan to catch the water.)
Reconnect the water inlet pipe to the
water valve.
Remove the plastic sump cover in the
tub the bottom and use a sponge to
soak up water in rubber boot.
5
4
3
2
1
WARNING!
The filter prevent larger remnants of food or other objects from getting inside the pump. This residue can
occasionally clog up the filters.
The filter system consists of a filter cylinder(Coarse filter),
Aflat (Main filter) and a microfilter(fine filter).
Main filter
Food and soil particles trapped by this filter are pulverized by a
special jet on the lower spray arm and washed down the
drain.
Coarse filter
Larger items, such as pieces of bone or glass, that could clog
the drain are trapped in the coarse filter. To remove an item
caught in this filter, gently squeeze the taps on the top of this
filter and lift it out.
Fine filter
This filter holds soil and food residue in the sump area and
prevents it from being redeposit on the dishes during a cycle.
1
2
3
2
3
1

9
WARNING!

10
AboutElectricityConnecting
.
Insure proper ground
exists before use
CAUTION,forpersonalsafety:
DONOTUSEANEXTENSIONCORDORANADAPTERPLUGWITHTHISAPPLIANCE.
DONOT,UNDERANYCIRCUMSTANCES,CUTORREMOVETHETHIRDGROUNDINGPRONGFROMTHEPOWERCORD.
Electrical Requirements
This dishwasher isdesigned for operationon an adequatelywired individual 220~240VAC,50~60HZ. Use requiredfuse 10 amp.
Fused electrical supplyis required-copper wireonly.Time delayfuse or circuitbreaker recommended andprovide separate
circuit serving onlythis appliance. Outletshould be placedin adjacent cabinet.Makesure that plugon the applianceremains
eccessible after installation.
Remove the power cord plug from the wall receptacle.
Disconnect Unicouple from faucet adapter.
NOTE: When motor stops at the end of the final rinse, the Unicouple can be disconnected and returned to storage.
2
1
How to Disconnect the Dishwasher
WARNING!
How to Connect the safety supply hose
Pull The supply hoses completely out from storage compartment located at rear of dishwasher.
Turn water fully on before starting the dishwasher.
1
Tighter the screws of the safety supply hose to the faucet with thread 3/4inch.
Turn off the water.
Release the water pressure by depressing the pressure release button. This relieves water pressure and protects you, and the
room, from severe splashing.
Unscrew The safety supply hose from the faucet..
3
2
1
How to Disconnect the safety supply hose
2
3
The appliance mustbe connected tothe water mainsusing new hose-sets.
The oldhose-sets shouldnot bereused.
Waterpressure must bebetween 0,04 MPaand 1 MPa.If the pressureis below theminimum
consult our ServiceDepartment for advice.

11
How to Drain Excess Water
From Unicouple Hoses
If the sink is 34 or higher from the floor, the excesswater in Unicouple hoses
cannot be drained directly into the sink. It will be necessary to drain excess
water from hoses into a bowl or suitable container that is heldoutside and lower
than the sink.
Positioning the Appliance
Position the appliancein the desiredlocation. Theback should restagainst the wallbehind it, andthe sides, alongthe adjacent
cabinets or wall.The dishwasheris equipped withwater supply anddrain hoses thatcan be positionedto the rightor the leftto
facilitate proper installation.
COLD WATER CONNECTION
HOT WATER CONNECTION
Connect the coldwater supply hoseto a threaded3/4(inch) connector andmake sure thatit is fastenedtightly in place.
If the waterpipes are newor have notbeen used foran extended periodof time, letthe water runto make surethat the
water is clearand free ofimpurities. If thisprecaution is nottaken, there isa risk thatthe water inletcan get blockedand
damage the appliance.
The water supplyto the appliancecan also beconnected to thehouse hot waterline (centralized system,heating system),
as long as it does notexceed a temperatureof 60 C.In this case,the wash cycletime will beshortened by about15 minutes
and the wash efficiency slightlyreduced.
The connection mustbe made tothe hot waterline following thesame procedures asthose for theconnection to the
cold water line.

12
Problem PossibleCauses WhatToDo
Fuse blown, or the
circuit breaker acted Replace fuse or reset circuit breaker. Remove any other
appliances sharing the same circuit with the dishwasher
Noise
Sound from soft food shredding action and detergent cup
opening.
Utensils are not secure
in the baskets or something
small has dropped into
the basket
To ensure everything is secured in the dishwasher.
Motor hums Dishwasher has not been used regularly. If you do not use it
often, remember to set it to fill and pump out every week,
which will help keep the seal moist.
Before Calling for service...
Troubleshooting Tips
Review the charts on the following pages may make you be free of calling for service.
Sudsinthetub
Improper detergent
Add 4 litres of cold water to the tub. Close and latch the
dishwasher, then drain out the water by slowly turning the
Dial until a drain period is reached. Repeat if necessary.
Spilled rinse agent Always wipe up rinse agent
spills immediately.
Stainedtubinterior
Detergent with
colorant was used Make sure that the detergent is the one without colorant.
Rinse agent dispenser
is empty Make sure that the rinse agent dispense is filled.
Dishesandflatware
notclean
Improper program
Improper rack loading Make sure that the action of the detergent dispenser and
spray arms are not blocked by large dishware.
Spotsandfilming
onglassesand
flatware
Extremely hard water
Low inlet
temperature
Overloading the
dishwasher
Improper loading
Old or damp powder
detergent
Empty rinse agent
dispenser
Incorrect dosage of
detergent
To remove spots from glassware:
1
Take out all metal utensils out of the dishwasher.
Do not add detergent.
Choose the longest cycle.
Start the dishwasher and allow it to run for about
18 to 22 minutes, then it will be in the main wash.
Open the door to pour 2 cups of white vinegar
into the bottom of the dishwasher.
Close the door and let the dishwasher complete
the cycle. If the vinegar does not work: Repeat
as above, except use 1/4 cup (60 ml)of citric acid
crystals instead of vinegar.
2
3
4
5
6
Some audible sounds are
normal
Dishwasherdoesnt
run
Dishesarenotdried
Drainpumpdoesnt
stop
Select stronger program
1
2
3
4
5
6
7
Use only the special dishwasher detergent to avoid suds.
If this occurs, open the dishwasher and let suds evaporate.

13
Before calling for service...
Problem PossibleCauses WhatToDo
Cloudinesson
glassware
Combination of soft
water and too much
detergent
Use less detergent if you have soft water and select a
shortest cycle to wash the glassware and to get them clean.
Yelloworbrownfilm
oninsidesurfaces
Tea or coffee stains using a solution of 1/2 cup of bleach and 3 cups warm water
to remove the stains by hand.
WARNING
You have to wait for 20 minutes after a cycle to let the heating
elements cool down before cleaning interior; otherwise, burns
will happen.
Iron deposits in water
can cause an overall film You have to call a water softener company for a special filter.
Whitefilmoninside
surface
Hard water minerals To clean the interior, use a damp sponge with dishwasher
detergent and wear rubber gloves. Never use any other cleaner
than dishwasher detergent for the risk of foaming or suds.
Dial is not in the OFF
position Turn the Dial to OFF position and slide the door latch to the
left.
Detergentleftin
dispensercups
Dishes block detergent
cups Re-loading the dishes properly.
Steam
Normal phenomenon There is some steam coming through the vent by the door
latch during drying and water draining.
Blackorgray
marksondishes
Aluminum utensils have
rubbed against dishes Use a mild abrasive cleaner to eliminate those marks.
Detergentcuplid
wontlatch
Waterstandingin
This is normal A small amount of clean water around the outlet on
the tub bottom at the back of the tub keeps the water
seal lubricated.
thebottomofthetub
Dishwasherleaks
Overfill dispenser or rinse
aid spills
This manual suits for next models
1
Table of contents
Other Candy Dishwasher manuals

Candy
Candy CSD 68-80 User manual

Candy
Candy CDPM 75553 User manual

Candy
Candy CDPN D Series User manual

Candy
Candy CD 622 User manual

Candy
Candy CD 700 User manual

Candy
Candy CDCP 6/E User manual

Candy
Candy CDI 3515 User manual

Candy
Candy CDI 1010 User manual

Candy
Candy H CF 3C7LFW User manual

Candy
Candy CDS 2D35B User manual

Candy
Candy CDI 2012 User manual

Candy
Candy CSF457E User manual

Candy
Candy A 9002 Operation manual

Candy
Candy DFI 85 Specification sheet

Candy
Candy 1L350PS User manual

Candy
Candy CDI 5012 E10 User manual

Candy
Candy CDCP 6 S User manual

Candy
Candy CDF8 615 X User manual

Candy
Candy CDIM 3DS62D User manual

Candy
Candy CI 7850 User manual