manuals.online logo
Brands
  1. Home
  2. •
  3. Brands
  4. •
  5. Canon
  6. •
  7. Digital Camera
  8. •
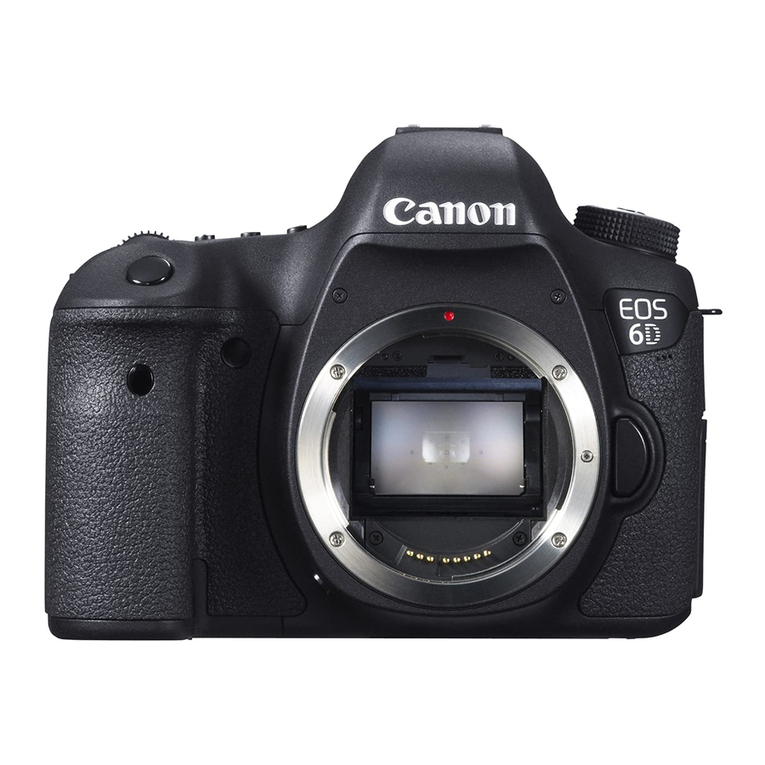
  9. Canon EOS 550D User manual

Canon EOS 550D User manual

0
_.~ Customizing a Picture Style _
You can customize a Picture Style by adjusting individual parameters
like [Sharpness] and [Contrast]. To see the resulting effects, take test
shots. To customize [Monochrome], see page 93.
Select [Picture Style].
® Under the [t_:] tab, select [Picture
Sty[el, then press <_>.
_y,,The Picture Style selection screen will
appear.
2Select a Picture Style.
® Select a Picture Style, then press the
<D[SR> button.
_y,,The Detail set. screen will appear.
Select aparameter.
_y,,Select a parameter such as
[Sharpness], then press <_>.
,Set the parameter.
® Press the <_> key to adjust the
parameter as desired, then press
® Press the <MENU> button to save
the adjusted parameters. The Picture
Style selection screen will reappear.
_y,,Any parameter settings different from
the default will be displayed in blue.
91
_;_ Customizing a Picture Style*
Parameter Settings and Effects
Sharpness
Adjusts the sharpness of the image.
To make it less sharp, set it toward the t_l end. The closer it is to t_l
the softer the image wiii look.
To make it sharper, set it toward the _! end. The closer it is to _! the
sharper the image wiii look.
_) Contrast
Adjusts the image contrast and the vividness of coJors.
To decrease the contrast, set it toward the minus end. The closer it is
to 5, the blander the image wiii look.
To increase the contrast, set it toward the plus end. The closer it is to
5, the crisper the image will look.
_½Saturation
The image's color saturation can be adjusted.
To decrease the color saturation, set it toward the minus end.
The closer it is to 5, the more diluted the colors will look.
To increase the color saturation, set it toward the plus end. The
closer it is to _1, the bolder the colors will look.
_;) Color tone
The skin tones can be adjusted.
To make the skin tone redder, set it toward the minus end. The closer
it is to 5, the redder the skin tone will look.
To make the skin tone less red, set it toward the plus end. The closer
it is to _1, the more yellow the skin tone will look.
_ By Selecting [Befault set.] in step 3, You Can revert the respective
Picture Style to its default parameter settings,
¢_ "The above adjustments wiii net be applied t° the Picture Styles used !n
the <_}> (Creative Auto) mode,
92
_[._ Customizing a Picture Style*
Monochrome Aejustment
For Monochrome, you can also set [Filter effect] and [Toning effect] in
addition to [Sharpness] and [Contrast] explained on the preceding
page.
_) FHter Effect
With a filter effect applied to a
monochrome image, you can make
white clouds or green trees stand out
more.
N: None Normal black-and-white image with no filter effects,
The blue sky will look more natural, and the white clouds will look
Ye: Yellow crisper.
The blue sky will look slightly darker, The sunset will look more
Or: Orange brilliant,
The blue sky will look quite dark. Fall leaves will look crisper and
R: Red brighter.
Skin tones and lips will look fine. Tree leaves will look crisper and
G: Green brighter.
Increasing the [Contrast] will make the fi!ter effect mare pronounced.
(_)Toning Effect By applying a toning effect, you can
create a monochrome image in that
color. It can make the image look more
impressive.
The following can be selected: [N:None]
[S:Sepia] [B:B(ue] [P:PurpJe]
[G:Green].
93
,>,,~ Registering a Picture Style _
You can select a base Picture Style such as [Portrait] or [Landscape],
adjust its parameters as desired and register it under [User Def. 1],
[User Def. 2], or [User Defo 3].
You can create Picture Styles whose parameter settings such as for
sharpness and contrast are different. You can also adjust the
parameters of a Picture Style which has been registered to the camera
with the provided software.
_ Select [Picture Style].
® Under the [t_:] tab, select [Picture
Style], then press <_>.
_y,,The Picture Style selection screen will
appear.
_9_ Select [User Def.].
® Select [User Def. *], then press the
<DISR> button.
_y,,The Detail set. screen will appear.
Press <_>.
® With [Picture StyJe] selected, press
_ Select the base Picture Style.
® Press the <AY> key to select the
base Picture Style, then press <_>.
® To adjust the parameters of a Picture
Style which has been registered to
the camera with the provided
software, select the Picture Style
here.
94
_:,_ Registeringa PictureStyle"_
5 eJect a parameter.
® Select a parameter such as
[Sharpness], then press <_>.
Set the parameter.
® Press the <_> key to adjust the
parameter as desired, then press
For details, see "Customizing a
Picture Style" on pages 91o93.
® Press the <MENU> button to register
the new Picture Style. The Picture
Style selection screen will then
reappear.
_y,,The base Picture Style will be
indicated on the right of [User Def. *].
_y,,The name of the Picture Style having
any modified settings (different from
the default) registered under [User
Def. *] will be displayed in blue.
@If a Picture Style has already been registered under [User Defo _],
cnanging the base Picture Style in step 4 will nullify the parame[er
settings of the registered Picture Style.
If you execute [CJear aH camera settings] (p.144), all the [User Def. *]
settings will revert to the default
To shoot with the registered Picture Style. follow step 2 on page 75 to select
[User Def. *] ann then SHOO[.
95
Setting the Color Space _
The color space refers to the range of reproducible colors. With tMs
camera, you can set the color space to sRGB or Adobe RGB for
captured images. For normal shooting, sRGB is recommended.
In Basic Zone modes, sRGB is set automatically.
_Select [Color space].
_ Under the [_:] tab, select [CoJor
space], then press <_>.
_et the desired color space.
®_Select [sRGB] or [Adobe RGB], then
press <_>.
About Adobe RGB
This color space is mainly used for commercial pdnting and other
industrial uses. This setting is not recommended if you do not know
about image processing, Adobe RGB, and Design rule for Camera File
System 2.0 (Exif 2.21).
The image will look very subdued in a sRGB personal computer
environment and with printers not compatible with Design rule for
Camera File System 2.0 (Exif 2.21). Post-processing of the image with
software will therefore be required.
® if the image is captured With the color Space set to Adobe RGB, the file
name will start with "MG '_{[first character is an underscore).
¢_ The ICC profile is not appended. See explanations about the ICC profile
in the Software Instruction Manual in the CD-ROM.
96
-)$ AE Lock*
Use AE lock when the area of focus is to be different from the exposure
metering area or when you want to take multiple shots at the same exposure
setting. Pressthe <%> button to lock the exposure, then recompose andtake
the shot. This is called AE lock. It is effective for backlit subjects.
2
Focus the subject.
_ Press the shutter button halfway.
_y,,The exposure setting will be
displayed.
Press the <-)6> button. (G4)
_y,,The <%> icon lights in the viewfinder
to indicate that the exposure setting is
locked (AE lock).
_ Each time you press the <%> button,
it locks the current auto exposure
setting.
Recompose and take the picture.
_ If you want to maintain the AE lock
while taking more shots, hold down
the <-_ > button and press the shutter
button to take another shot.
AE Lock Effects
iiiiiiiiiiiiiiiiiiiiiiiiiiiiiiiiiiiiiiiiiiiiiiii_i_i_i_i!_i_!_i_ii_i_:i_:i_:i_:i_:i_:i_:i_:i_:i_:i_:i_:i_:i_:i_:i_:i_:i_:i_:i_:i_:_:i_i
AE lock isapplied atthe AF AE lock is applied at the
C:_3" point that achievedfocus, selected AF poinL
[:oJ[[_ C:] AE lock isapplied atthe center AF poinL
Whenthetens'focusmodeswitchissetto<MF>, AElockisappliedatthecenterAFpoint.
97
_FE Lock*
FE lock locks the flash exposure setting over the desired area of the
subject. This feature can also be used with a Canon EXoseries Speedlite.
* FEstandsfor Flash Exposure.
IPress the < _ > button to popoup
the buiJtoin flash.
® Press the shutter button halfway and
look in the viewfinder to check that
the <_> icon is lit.
Spot metering circle 2Focus the subject.
Press the < _X-> button. (©16)
® Aim the spot-metering circle over the
subject, then press the <_> button.
_y,,The flash will fire a preflash and the
required flash output is calculated
and retained in memory.
_y,,In the viewfinder, "FEL" is displayed
for a moment and <_> will light.
® Each time you press the <_> button,
a preflash is fired and the required
flash output is calculated and retained
in memory.
Take the picture.
® Compose the shot and press the
shutter button completely.
_. The flash is fired to take the picture.
@ Jfthe SubjeCt iStoo far away and Beyond the effective range of the flash, the
<_> ican will blink, Get cJoseFta the subject and repeat steps 2 to 4,
98
WB: Setting the White Balance*
White balance (WB) is for making the white areas look white, Normally,
the <_> (Auto) setting will obtain the correct white balance, if natural°
looking colors cannot be obtained with <_>, you can select the white
balance to match the light source or set it manually by shooting a white
object. In Basic Zone modes, <_[_> will be set automatically.
2
Press the <A WB> button.
_y,,[White balance] will appear.
Semeet the white balance.
_ Press the <_> key to select the
desired white balance, then press
_ The "Approx. ****K" (K: Kelvin)
displayed for the selected white
balance <_> <_'&> <_> <;_s>
<_> is the respective color
temperature.
_®._Custom White Balance
Custom white balance enables you to manually set the white balance
for a specific light source for better accuracy. Do this procedure under
the actual light source to be used.
E3
B
Photograph a white object,
_ The plain, white object should fill the
spot metering circle.
_ Focus manually and set the standard
exposure for the white object.
_ You can set any white balance.
Spo_ metering circle
99
WB: Setting the White Balance*
2SeJect [Custom White Balance].
® Under the [t_-'] tab, select [Custom
White Balance], then press <_>.
_y,.The custom white balance selection
screen wiii appear=
import the white balance data.
® Select the image that was captured in
step 1, then press <_>=
_y,.On the dialog screen which appears,
select [OK] and the data wiii be
imported.
® When the menu reappears, press the
<MENU> button to exit the menu.
/_ Select the custom white balance.
® Press the <A WB> button=
® Press the <_ _ > key to select <_.=._>,
then press <_>=
might not be 0btained.
® If the image was captured while the Picture Style was set to
[Monochrome] (p 76), it cannot be selected in step 3
_}:Instead Of a White object, an 18% gray Card (commercially available) Can
produce a more accurate white balance.
¢_ The personaJ white balance registered with the provided software will be
registered under <_._ >. If you do step 3, the data fer the registered
personal white balance will be erased.
100
wB White Balance Correction*
+/-
You can correct the white balance that has been set. This adjustment
will have the same effect as using a commercially°available color
temperature conversion filter or color compensating filter. Each color
can be corrected to one of nine levels.
This is for advanced users who are familiar with using color temperature
conversion or color compensating filters.
White Balance Correction
Select [WB Shift]BKT].
® Under the [t_:] tab, select [WB Shift/'
BKT], then press <_>.
_y,,The WB correctioniWB bracketing
screen will appear.
Sample setting: A2, G!
2Set the white bamanee correction.
® Press the <,;, > key to move the "m"
mark to the desired position.
® B is for blue, A is amber, M is
magenta, and G is green. The color in
the respective direction will be
corrected.
® On the upper right, "Shift" indicates
the direction and correction amount.
® Pressing the <DISR> button will
cancel all the [WB ShiftlBKT]
settings.
® Press <_> to exit the setting and
return to the menu.
® One level ofthe blue/ambercorrectionis equivalentto 5mireds ofa color
temperature Conversionfilter.(Mired: Measuringunit !ndicat!ng the
density of aColortemperature conversion filter.)
101
#_ White Balance Correction "_
White BaJance Auto Bracketing
With just one shot, three images having a different color balance can be
recorded simultaneously. Based on the color temperature of the current white
baBancesetting, the image will be bracketed with a b_uelamber bias or
magentalgreen bias. This is called white balance bracketing (WB-BKT). White
baBancebracketing is possible up to _+3levels in singleqevel increments.
Set the white balance bracketing
amount.
® Instep 2for white balance correction, when
you turnthe <_> dial,the "m"mark on
thescreen willchangeto "m[] []" (3 points).
Turning the dial to the right sets the BI
A bracketing, and turning it to the left
sets the MIG bracketing.
_y,,On the right, "Bracket" indicates the
bracketing direction and correction
amount.
® Pressing the <DISR> button will cancel
aHthe [WB Shift/BKT] settings.
® Press <_> to exit the setting and
return to the menu.
Bracketing Sequence
The images will be bracketed in the following sequence: 1. Standard
white balance, 2. Blue (B) bias, and 3. Amber (A) bias, or 1. Standard
white balance, 2. Magenta (M) bias, and 3. Green (G) bias.
B/A bias _+3levels
@ During WB bracketing, the maximum bUrSt for continuous Shooting Will be
_ Since three images are recorded Forene Shot, the Pard Will take longer to
record the shot.
_ !tBKT!: stands for Bracketing.
102
Auto Lighting Optimizer *
If the image comes out dark or the contrast is low, the brightness and
contrast can be corrected automatically. With JPEG images, the
correction is done when the image is captured. For RAW images, it can
be corrected with Digital Photo Professional (provided software).
The default setting is [Standard].
SeJeet [Auto Lighting Optimizer].
® Under the [t_:] tab, select [Auto
Lighting Optimizer], then press
$et the correction setting.
® Press the <_> key to select the
desired setting, then press <_>.
'_._ Take the picture.
® The image will be recorded with the
brightness and contrast corrected if
necessary.
@
Sample of corrected brightness
¢_!f a setting other than [DisabJe] is set and You use exposure
compensation, flash exposure oompensatien, or manua I exposure to
darken the exposure, the image might still come out bright. If you want a
darker exposure, set this to [DisabJe] first.
_n Basic Zone modes, [Standard] is Set automatically.
103
Lens Peripheral illumination Correction _
Due to the lens characteristics, the four corners of the picture might look
darker. This is called lens lightfall=off or drop in peripheral illumination.
With JPEG images, the correction is done when the image is captured.
For RAW images, it can be corrected with Digital Photo Professional
(provided software).
The default setting is [EnabJe].
Correction enabled
,_ Setect [Peripheral illurnin.
correct.].
® Under the [t_'] tab, select
[Peripheral illumin, correct.], then
press <_ >=
*),_,_Set the correction setting.
® On the screen, check that the
attached lens' [Correction data
available] is displayed=
®if [Correction data not available] is
displayed, see "About the Lens
Correction Data" on the next page=
® Press the <A_'> key to select
[EnabJe], then press <_>.
_ ake the picture.
® The image wiii be recorded with the
corrected peripheral illumination=
104
Correction disabled
Lens Peripheral illumination Correction
About the Lens Correction Data
The camera already contains lens peripheral illumination correction
data for approx, 25 lenses, In step 2, if you select [EnabJe], the
peripheral light correction will be applied automatically for any lens
whose correction data has been registered in the camera,
With EOS Utility (provided software), you can check which lenses have
their correction data registered in the camera, You can also register the
correction data for unregistered lenses, For details, see the Software
Instruction Manual (CDoROM) for EOS Utility,
@For JPEG images already captured, lens peripheral illumination
correcuon cannot be applied.
Depending on shooting condltLons, noise m_ght appear on the image
Periphery.
When using a non-Canon lens. setting the correction to [Disable] is
recommended, even if [Correction data available] is displayea.
_t* Lens peripheral Hght correction is aoplJea even when an Extender is
attache(]
if the correction data for the attached lens has not been registered to me
camera, the result wiII be the same as when the correction is se-[[o
[Disable]
The correction amoum applied will be slightly lower than the maximum
correction amount settable with Digital Photo Professional [prowaea
software)
If the ens noes no[ nave distance information, me correcuon amounz wHi
oe lower.
The higher the ISO speed, the lower the correction amount will be. 105
Preventing Camera Shake*
The camera's mechanical shake caused by the reflex mirror action can
blur images taken with a super telephoto lens or close-up (macro) lens.
In such cases, mirror Iockup is effective.
Mirror Jockup is enabled by selecting the [_ Custom Functions
(C.Fn)] menu's [Mirror Jockup] and setting it to [1: EnabJe] (p.195)o
_ Focus the subject, press the shutter button completely.
_2_The mirror will swing up.
_Press the shutter button completely again.
_y,,The picture is taken and the mirror goes back down.
"_ Shooting Tips
® Using the selfotimer <_)2> with mirror Iockupo
When you press the shutter button completely, the mirror locks up,
then the picture is taken 2 sec. later.
® Remote controJ shooting.
Since you do not touch the camera when the picture is taken, remote
control shooting together with mirror Iockup can further prevent
camera shake. With Remote Controller RC-6 set to a 2-sec. delay,
press the transmit button, the mirror will Iockup and the picture will
be taken 2 sec. later.
_ Do not point the camera toward the sun. The sun's heat can damage [he
camera's internal components.
®[fyou use the self-t_mer and m_rrorIOCKUpIn combination with a bulb exposure.
keep pressing the shutter button completely (self-timer delay urne + eu_D
exposure time). If you let go of the shutter button during the self-timer
countdown, there will be a shutter-release souna, put no picture will betaken.
106
Even if <m__i>(Continuous shooting) has been set. single shooun£ wm
lake effect.
If 30 seconds elapse after the mirror has locked up, it will go PaCK oown
au[omatically. Pressing the shutter button eompleteiy again locks up the
mirror again.
ShootingwiththeLCDMonitor
(LiveViewShooti
You can shoot whiJe viewing the image on the camera's
LCD monitor. This is catJed "Live View shooting."
Live View shooting is effective for stHJ subjects which do
not move,
if you handhoJd the camera and shoot while viewing the
LCD monitor, camera shake can cause blurred images.
Using a tripod is recommended.
With EOS Utility (provided software) installed in your computer, you
can connect the camera tQ the computer and shoo t remotely while
viewing the computer screen, For deta!l s, see the Software
Instruction ManuaI in the CD-RQM.
Shooting with the LCD Monitor __
i
,3
Display the Live View image.
® Press the <_> button.
_y,,The Live View image wiii appear on
the LCD monitor.
_ The Live View image will closely
reflect the brightness level of the
actual image you capture.
_ The image's field of view is approx.
100%.
Focus the subject.
_ Before shooting, focus with AF or
manual focus (p.113-120).
_ When you press the shutter button
halfway, the camera will focus with
the current AF mode.
Take the picture.
e Press the shutter button completely.
_y,,The picture will be taken and the
captured image is displayed on the
LCD monitor.
_y,,After the image review ends, the
camera will return to Live View
shooting automatically.
_ Press the <_> button to end the
Live View shooting.
108
Shooting with the LCD Monitor
To EnabJe Live View Shooting
Under [_: Live View function settings],
set [Live View shoot,] to [EnabJe],
Battery Life with Live View Shooting [Approx. number of shots]
No Flash 50% Flash Use
iiiiii
At 23°C /73°F 200 180
At 0°C /32°F 170 150
® The figures above are based on a fully-charged Battery Pack LP-E8 and ClPA
(Camera & Imaging Products Association) testing standards.
® Continuous Live View shooting is possible for approx. 1 hr. 30 min. at 23°C/
73°F (with a fully-charged Battery Pack LP-E8).
@ ® During Live View Shooting, do not POint the tens toward the Sun. The
sun:s heat can damage the camera's internal components.
® Cautions for using Live View shooting are on pages 121-122.
When flash is Used, there Will be two shutter Sounds, but 0nly one shot will
he taken.
109

Other manuals for EOS 550D

3

This manual suits for next models

1

Other Canon Digital Camera manuals

Canon PowerShot SD100 Instruction Manual

Canon

Canon PowerShot SD100 Instruction Manual

Canon EOS 400D Digital User manual

Canon

Canon EOS 400D Digital User manual

Canon EO-1Ds Instruction Manual

Canon

Canon EO-1Ds Instruction Manual

Canon EOS Rebel T5i 18-55mm IS STM Kit User manual

Canon

Canon EOS Rebel T5i 18-55mm IS STM Kit User manual

Canon PowerShot A430 Assembly instructions

Canon

Canon PowerShot A430 Assembly instructions

Canon PowerShot G1 X User manual

Canon

Canon PowerShot G1 X User manual

Canon EOS 7D EF-S 1B-135 IS USM Kit User manual

Canon

Canon EOS 7D EF-S 1B-135 IS USM Kit User manual

Canon EOS Rebel SL1/100D User manual

Canon

Canon EOS Rebel SL1/100D User manual

Canon PowerShot SX500 IS User manual

Canon

Canon PowerShot SX500 IS User manual

Canon POWERSHOT A75 User manual

Canon

Canon POWERSHOT A75 User manual

Canon EOS 1200D User manual

Canon

Canon EOS 1200D User manual

Canon EOS 60D User manual

Canon

Canon EOS 60D User manual

Canon PowerShot S400 Digital Elph User manual

Canon

Canon PowerShot S400 Digital Elph User manual

Canon Powershot S60 User manual

Canon

Canon Powershot S60 User manual

Canon IXUS 120 IS User manual

Canon

Canon IXUS 120 IS User manual

Canon PowerShot S90 User manual

Canon

Canon PowerShot S90 User manual

Canon 1236B001 - EOS Digital Rebel XTi Camera SLR Quick start guide

Canon

Canon 1236B001 - EOS Digital Rebel XTi Camera SLR Quick start guide

Canon PowerShot G15 User manual

Canon

Canon PowerShot G15 User manual

Canon EOS C100 User instructions

Canon

Canon EOS C100 User instructions

Canon IXUS 115 HS User manual

Canon

Canon IXUS 115 HS User manual

Canon EOS 7D Mark II (G) User manual

Canon

Canon EOS 7D Mark II (G) User manual

Canon WP-DC45 User manual

Canon

Canon WP-DC45 User manual

Canon PowerShot SD630 Digital ELPH Camera Operating and maintenance manual

Canon

Canon PowerShot SD630 Digital ELPH Camera Operating and maintenance manual

Canon POWERSHOT SX240HS User manual

Canon

Canon POWERSHOT SX240HS User manual

Popular Digital Camera manuals by other brands

Sony Cyber-shot DSC-QX100 quick start guide

Sony

Sony Cyber-shot DSC-QX100 quick start guide

Genie WHD8BVAF user manual

Genie

Genie WHD8BVAF user manual

Vivitar Vivicam 3825 user manual

Vivitar

Vivitar Vivicam 3825 user manual

Norcent DCS-1050 Specification sheet

Norcent

Norcent DCS-1050 Specification sheet

National Instruments ISC-1762 user manual

National Instruments

National Instruments ISC-1762 user manual

komamura Falcon Eye KC-1100 instruction manual

komamura

komamura Falcon Eye KC-1100 instruction manual

Olympus CAMEDIA C-7000 Zoom quick start guide

Olympus

Olympus CAMEDIA C-7000 Zoom quick start guide

Muddy MTC-150 instruction manual

Muddy

Muddy MTC-150 instruction manual

Sony a6600 Help guide

Sony

Sony a6600 Help guide

Critical Link MityCAM-C8000 Hardware setup guide

Critical Link

Critical Link MityCAM-C8000 Hardware setup guide

Samsung SDC-33 user guide

Samsung

Samsung SDC-33 user guide

Photon Focus Luxima MV4-D1280-L01-G2 user manual

Photon Focus

Photon Focus Luxima MV4-D1280-L01-G2 user manual

Disney Disney Flix user guide

Disney

Disney Disney Flix user guide

Olympus SP-590 UZ - Digital Camera - Compact instruction manual

Olympus

Olympus SP-590 UZ - Digital Camera - Compact instruction manual

CONCORD Eye-Q 4330z quick start

CONCORD

CONCORD Eye-Q 4330z quick start

VOIGTLANDER BESSA-R2A instruction manual

VOIGTLANDER

VOIGTLANDER BESSA-R2A instruction manual

Olympus CAMEDIA C-4040 Zoom Reference manual

Olympus

Olympus CAMEDIA C-4040 Zoom Reference manual

Horseman LE owner's manual

Horseman

Horseman LE owner's manual

manuals.online logo
manuals.online logoBrands
  • About & Mission
  • Contact us
  • Privacy Policy
  • Terms and Conditions

Copyright 2025 Manuals.Online. All Rights Reserved.