Canon LH-WU350UST User manual

MULTIMEDIA PROJECTOR
LH-WU350UST/LH-WX370UST
User's Manual

2
Features and design
This projector is ultra-short-throw model with HLD* LED as high lumen output LED light
source. And it has versatile functions. Imaging devices are 3 sets of LCD panel which
enables 1,073 million color reproduction.
* HLD: High Lumen Density
High lumen and superior durability with HLD LED
This projector achieves 3,500lm and 3,700lm even with LED light source. Compared to UHP
mercury lamp source, it can reduce a labor of maintenance thanks to a long life time of LED.
Large and wide image even in a short throw distance
Throw ratio 0.24:1. Setting projector onto the wall,80 inch. diagonal image can be projected.
Focus adjustment Center/corner
Since focus performance can be adjusted in both center and corner individually, crisp image
can be realized from center to corner all over the screen.
H/V keystone function
Projector image can be corrected in ±5° horizontally and vertically. Even more corner keystone
function is usable. Hence, installation flexibility is improved.
Curved correction (LH-WX370UST)
The curved correction can correct a deformation of vertical line and horizontal line.
16W speaker(mono)
Audio output can reach to a corner in a large conference room and class room.
Multi scan system
This projector can take multiple types of computer output signal for granted. Max. WUXGA
input signal is acceptable.
Auto set up function
Only pushing one button once, projector starts to detect input signal and to adopt for it. Then
projection completes automatically.
Logo Function ( LH-WX370UST )
The Logo function allows you to customize the screen logo. You can capture any
image on the screen.
Multilanguage Menu Display
The screen menu of the projector is available in 24 languages.
Security Function
The Security function helps you to ensure security of the projector. With the Key lock function,
you can lock the operation on the control panel or remote control. Passcode lock function
prevents unauthorized use of the projector.
Power Management
The Power management function reduces power consumption.
Note:
- The screen menu and images in the manual may slightly differ from the real product.
- The manual is subject to change without prior notice.

3
Content
Features and design............................ 2
Content................................................. 3
Safety Instructions .............................. 5
Safety Precautions............................. 5
CAUTION ON HANGING FROM THE
CEILING............................................. 5
READ AND KEEP THIS OWNER’S
MANUAL FOR LATER USE ............... 6
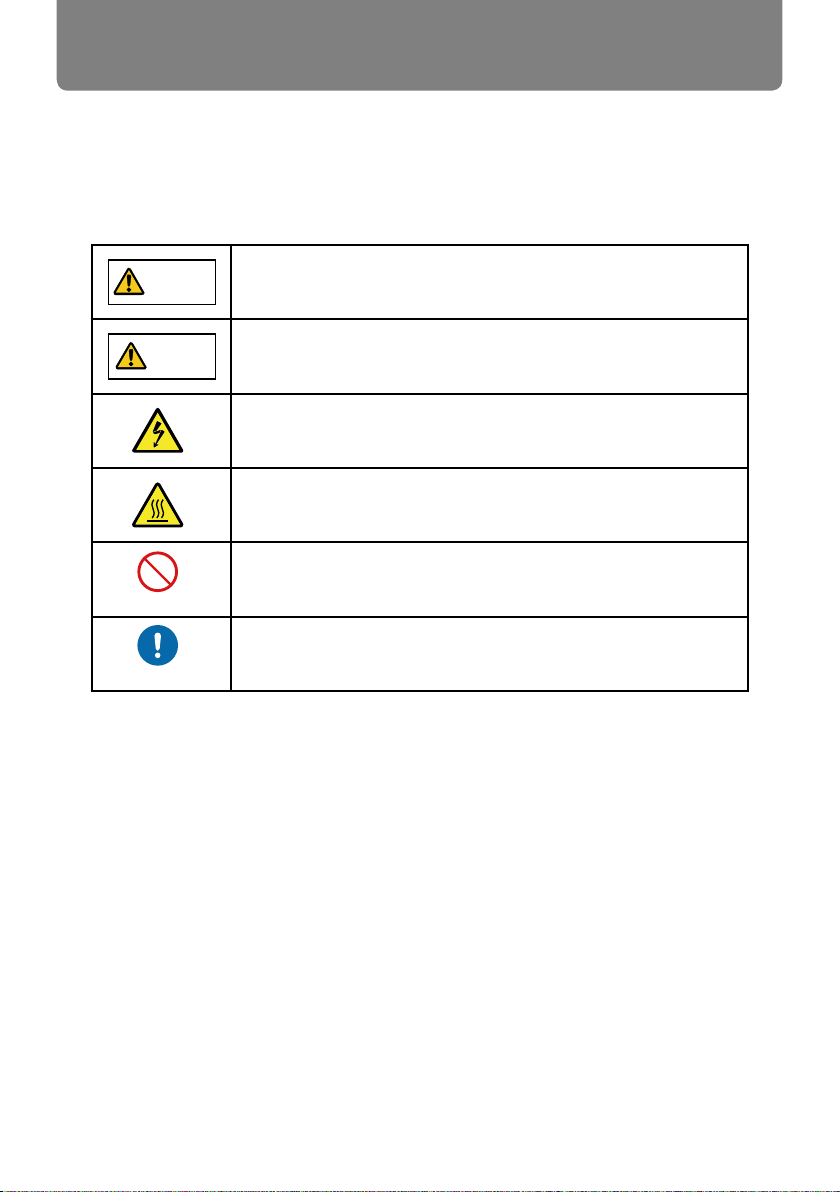
Safety Symbols in this Manual .......... 8
Precautions for Use ........................... 9
For Safe Use....................................... 16
Before Installation ............................. 17
Open Source Software ..................... 21
Accessory ......................................... 22
Name and function of your projector23
Front/Top.......................................... 23
Side.................................................. 23
Bottom.............................................. 23
Terminal............................................ 24
Control panel and indicators ............ 25
Remote controller............................. 26
Install battery of remote controller.... 27
Remote controller operation range... 27
Installation.......................................... 28
Relationship Between Projecting
Distance and Image Size ................. 28
Adjust the projected image............... 29
Connect to PC.................................. 30
Connect to video equipment ............ 31
Connect to audio equipment ............ 32
Connect to USB ............................... 33
Connect the AC power cord ............. 34
Basic operation.................................. 35
Power on your projector................... 35
Power off your projector .................. 36
How to use the OSD ........................ 37
Menu item overview ......................... 38
Focus adjustment............................. 39
Auto setting function......................... 40
Keystone adjustment ....................... 40
H/VKeystone .................................... 40
Volume adjustment ......................... 41
Menu operation ............................... 41
Remote controller operation............. 42
Input selection ................................. 44
Display................................................ 46
Auto PC adj...................................... 46
Fine sync.......................................... 46
H position ......................................... 46
V position ......................................... 47
H size ............................................... 47
Aspect ............................................. 47
Image Flip ........................................ 48
Menu position................................... 48
Background display ......................... 49
Signal Format .................................. 49
Color adjust ....................................... 51
Image mode ..................................... 51
Contrast ........................................... 52
Brightness ........................................ 52
Color temp........................................ 52
Color level ........................................ 52
Color balance................................... 52
Red................................................... 52
Green ............................................... 52
Blue.................................................. 52
Sharpness........................................ 52
Setting ................................................ 53
Direct Power On............................... 53
Standby mode.................................. 53
High altitude ..................................... 54
Cooling Fast..................................... 54
Closed caption ................................. 55
Key lock ........................................... 55
Daynamic Contrast........................... 56
Sound .............................................. 56
HDMI setup...................................... 57
Advaned ............................................. 58
Language ......................................... 58
Auto setup........................................ 59
keystone........................................... 59
Logo ................................................ 62
Security ............................................ 63
Power management......................... 64
Filter counter .................................... 65
Test pattern ...................................... 66
Network............................................ 67
Factory default ................................. 67
Memory Viewer .................................. 68
Start slide ......................................... 68
Slide transition effect........................ 68
Sort order ......................................... 68

4
Content
Rotate ............................................. 69
.............................................. 69
Repeat ............................................. 69
Apply ................................................ 69
Info...................................................... 70
Network control ................................ 71
Useful function ................................. 85
Memory Viewer ................................ 85
USB display function........................ 87
Maintenance and cleaning................ 90
STATUS light indicator..................... 90
Clean casing of your projector ......... 91
.................................. 91
..................... 92
Appendix ............................................ 93
Troubleshooting ............................... 93
Menu tree......................................... 95
LED indicator status......................... 98
Supported Signal Types ................... 99
.................... 100
Dimensions .................................... 101
................................. 102
RS232 control mode ...................... 104

5
Safety Instructions
Safety Precautions
WARNING:
• THIS APPARATUS MUST BE GROUNDED.
• TO REDUCE THE RISK OF FIRE OR ELECTRIC SHOCK, DO NOT EXPOSE
THIS APPLIANCE TO RAIN OR MOISTURE.
DO NOT SET THE PROJECTOR IN GREASY, WET, OR SMOKY CONDITIONS
SUCH AS IN A KITCHEN TO PREVENT A BREAKDOWN OR A DISASTER. IF
THE PROJECTOR COMES IN CONTACT WITH OIL OR CHEMICALS, IT MAY
BECOME DETERIORATED.
• This projector produces intense light from the projection lens. Do not stare
directly into the lens, otherwise eye damage could result. Be especially careful
that children do not stare directly into the beam.
•
• Do not cover the ventilation slots on the projector. Heat build-up can reduce the
service life of your projector, and can also be dangerous.
• If the projector is unused for an extended time, unplug the projector from the
power outlet.
• Do not project the same image for a long time.
An afterimage may remain on the LCD panels due to the characteristics of the
panels of the projector.
When hanging the projector from the ceiling, clean the air intake vents and top of
the projector periodically with a vacuum cleaner. If you leave the projector unclean
for a long time, the cooling fans can be clogged with dust, and it may cause a
breakdown or a disaster.
CAUTION ON HANGING FROM THE
CEILING

6
Safety Instructions
■READ AND KEEP THIS OWNER’S MANUAL
FOR LATER USE.
All the safety and operating instructions should be read before beginning to
operate the product.
Read all of the instructions given here and retain them for later use. Unplug this
projector from the AC power supply before cleaning. Do not use liquid or aerosol
cleaners on the projector. Use a damp cloth for cleaning.
Follow all warnings and instructions marked on the projector.
For added protection of the projector during a lightning storm, or when it is left
unattended or unused for long periods of time, unplug it from the wall outlet. This
will prevent damage due to lightning and power surges.
Do not expose this unit to rain or use near water... for example, in a wet basement,
near a swimming pool, etc...
Do not use attachments not recommended by the manufacturer as they may result
in hazards.
Do not place this projector on an unstable cart, stand, or table. The projector may
fall, causing serious injury to a child or adult, and serious damage to the projector.
Use only with a cart or stand recommended by the manufacturer, or sold with
the projector. Wall or shelf mounting should be carried out in accordance with
the manufacturer’s directions, and should use a mounting kit approved by the
manufacturers.
An appliance and cart combination should be moved with care.
Sudden stops, excessive force, and uneven surfaces may cause
the appliance and cart combination to overturn.
Slots and openings in the rear and front of the cabinet are provided
for ventilation, to insure reliable operation of the equipment and to protect it from
overheating.
The openings should never be covered with cloth or other materials, and the
bottom opening should not be blocked by placing the projector on a bed, sofa,
rug,or other similar surface. This projector should never be placed near or over a
radiator or heat register.
This projector should not be placed in a built-in installation such as a book case
unless proper ventilation is provided.

7
Safety Instructions
Never push objects of any kind into this projector through cabinet slots as they may
electric shock. Never spill liquid of any kind onto the projector.
Do not install the projector near the ventilation duct of air-conditioning equipment.
This projector should be operated using only the type of power source indicated on
the marking label. If you are not sure of the type of power supplied, contact the
Canon Customer Support Center or local power company.
shock. Do not allow anything to rest on the power cord. Do not locate this projector
where the cord may be damaged by people walking on it.
Do not attempt to service this projector yourself as opening or removing covers
may expose you to dangerous voltages or other hazards. Refer all servicing to
personnel under the following conditions:
a. When the power cord or plug is damaged or frayed.
b. If liquid has been spilled into the projector.
c. If the projector has been exposed to rain or water.
d. If the projector does not operate normally after following the operating
instructions. Adjust only those controls that are covered in the operating
instructions as improper adjustment of other controls may result in damage and
to normal operating condition.
e. If the projector has been dropped or the cabinet has been damaged.
f. When the projector exhibits a distinct change in performance-this indicates a
need for servicing.
When replacement parts are required, be sure the service technician uses
injury.
Upon completion of any service or repairs to this projector, ask the service
technician to perform routine safety checks to determine that the projector is in safe
operating condition.

8
Safety Instructions
Safety Symbols in this Manual
This section describes the safety symbols used in this manual. Important projector
information by these symbols.
Denotes the risk of death or serious injury from improper
handling if the information is not observed. To ensure safe use,
always observe this information.
Denotes the risk of injury from improper handling if the
information is not observed. To ensure safe use, always observe
this information.
Denotes the risk of electric shock from improper handling if the
information is not observed. To ensure safe use, always observe
this information.
Denotes the risk of burns from improper handling if the
information is not observed. To ensure safe use, always observe
this information.
Denotes prohibited actions.
Denotes required actions or information that must be observed.
Warning
Caution
Prohibition
Caution

9
Safety Instructions
Precautions for Use
Power Supply
As this section contains important safety-related information, be sure to read the
following carefully beforehand in order to use your projector correctly and safely.
During installation, keep the projector plug easily accessible so that the projector
can be unplugged immediately if necessary, or keep a circuit breaker within reach.
If the following situations occur, turn the power off, remove the power plug from the
power outlet and contact the Canon Customer Support Center. Failure to do so
Pay attention to the following points regarding the power source, power plug and
• If smoke is emitted
• If an unusual smell or noise is emitted
• If water or other liquid has entered the projector
• If metal or any other foreign material has entered the projector
• If the projector is knocked over or dropped and the cabinet is
damaged
• Do not place any objects on the power cord and do not allow
it to become trapped under the projector.
• Do not cover the power cord with a carpet.
• Do not modify or excessively bend, twist, pull, wind, or bundle
the power cord.
• Keep the power cord away from heaters and other sources of
heat.
• Do not use a damaged power cord. If the power cord is
damaged, contact the Canon Customer Support Center.
• Do not use any power source with a voltage other than the
voltage indicated (AC 100 – 240 V).
• Do not insert any metal objects into the contact parts of the
power plug or connector.
• The power cord included with this projector is for use
exclusively with this product. Do not use this cord for
other products.
• Do not remove the power plug or connector with wet hands.
Warning
Prohibition

10
Safety Instructions
Pay attention to the following points regarding the power source, power plug and
• Insert the power plug and connector securely up to the base.
Additionally, do not use a damaged power plug or an outlet
that is loose.
• Do not pull the power cord and be sure to hold the power plug
or connector when removing. Incorrect handling may damage
the power cord.
• When using an extension cord, do not exceed the cord’s rated
capacity.
• Do not exceed the rated capacity of the outlet (as by using it
for more than one piece of equipment), which poses a risk of
• Periodically inspect the power plug and outlet and remove any
dust or dirt from between the plug and the outlet.
• Do not touch the projector itself, the power cord, or the cable if
lightening strikes.
• Do not move the projector until you have switched off the
power, removed the power plug from the power outlet and
unplugged any other cables.
• Unplug the projector before cleaning or maintenance.
Warning
Caution

11
Safety Instructions
Installation and Use
Pay attention to the following points regarding installation and handling of the
• Do not use the projector where it might get wet, such as
outdoors or by bathtubs or showers.
• Do not place containers containing a liquid on top of the
projector.
• Do not install the projector in a location that is damp or dusty,
or here there is a lot of oily smoke or steam. Oil can
degrade the plastic, which could result in a ceiling-mounted
projector falling from its mounting.
• Make sure to implement anti-fall measures such as an
anti-fall wire when installing the projector in high places, for
example, installing it on the ceiling.
• Do not remove the cabinet from the projector or disassemble
it. The interior of the projector contains high-voltage
components as well as parts that are hot. If inspection,
maintenance or repair is required, contact the Canon
Customer Support Center.
• Do not disassemble or modify the projector (including
consumable parts) or the remote control.
• Do not look directly into the exhaust vents during use.
• Do not insert any object into vents in the projector, such as
the air intake vent or exhaust vents.
• Do not place a pressurized can in front of the exhaust vents.
The pressure of the contents of the can may increase due
to heat from the exhaust vents and this could result in an
explosion.
• When cleaning off dust or dirt from projector parts such as
• Do not use adhesives, lubricants, oils, or alkaline detergents
for maintenance of the projector. They could adhere to the
cabinet and damage it, possibly resulting in the projector
falling from its mounting and causing an accident or personal
injury.
Warning
Prohibition

12
Safety Instructions
Prohibition
Pay attention to the following points regarding installation and handling of the
• Do not hold or install optical instruments (such as magnifying
people’s eyes, it may result in eye injury.
• No direct exposure to the beam shall be permitted.
• When setting the projector on a high surface for projection, be
• Do not use the projector on a soft surface such as carpet or
sponge mat, etc.
• For ceiling mounting or other installation work, request service
Center. Poor installation work could result in an accident.
• Do not use where combustible or explosive gases may occur.
Warning
Caution

13
Safety Instructions
Remote Control Batteries
Handling
Pay attention to the following points regarding handling of batteries. Failing to do
Pay attention to the following points regarding installation and handling of the
projector.
Prohibition
• Do not heat, short circuit or disassemble the batteries, or
• Do not attempt to recharge the batteries that are included with
the remote control.
control will not be used for a long period of time.
• When replacing the batteries, replace both at the same time.
Also, do not use two batteries of a different type at the same
time.
• Insert the batteries with the + and – terminals in the correct
directions.
• If any liquid from inside the batteries leaks out and contacts
your skin, be sure to wash the liquid off thoroughly.
• If the projector will not be used for a long period of time, be
sure to remove the power plug from the power outlet to
accumulates on the plug or outlet.
• Do not plug headphones or earphones into the AUDIO OUT
terminal. Doing so may cause hearing impairment.
• Do not set the volume too high initially. Doing so may cause
hearing impairment from sudden sounds played at high
volume. Lower the volume before turning off the projector, and
after startup, raise it gradually.
• Do not touch parts of the cabinet around and above the
exhaust vents, which may become hot during projection.
Pay particular attention in preventing young children from
touching these parts. Additionally, do not place any metal
objects around or above the exhaust vents. Such objects may
become hot from the projector, which may result in burns or
other injury.
Warning
Caution
Caution
Caution

14
Safety Instructions
Pay attention to the following points regarding installation and handling of the
projector.
• Do not place any objects infront of the projection
window during projection. Doing so could cause a
temporarily black out the image.
• Do not place any heavy objects on top of the projector or sit/
stand on it. Pay particular attention to prevent small children
from doing so. The projector may be knocked over and this
could result in damage or a personal injury.
• Do not place the projector on an unstable or slanted surface.
Doing so may cause the projector to fall or be knocked over
and could result in a personal injury.
Caution
Prohibition

15
For Safe Use
Pay attention to the following points when carrying or transporting the projector.
Carrying and Installation
• This projector is a precision instrument. Do not knock it over or
subject it to impacts. Doing so may cause a malfunction.
• Retract the adjustable feet before moving the projector. Leaving the
feet extended may cause damage.
on the lens may affect image quality.
• Protection of the projector cannot be guaranteed if used packaging
or shockabsorbent materials are reused. Fragments from shock-
absorbent material may also enter the interior of the projector which
could cause a malfunction.
Caution
Caution

16
For Safe Use
Pay attention to the following points when installing or using the projector.
• Be careful of condensation.
If the projector is abruptly taken to a warmer location, or if the room
temperature rises abruptly, moisture in the air may condense on the
lens or mirror and affect projected images. In this case, wait a while
and make sure the moisture has evaporated before resuming use.
• Do not install the projector in a location where the temperature is
high or low. Doing so may cause a malfunction. Ranges for the
environment of use and storage are as follows.
• When using the projector at altitudes above 1,400 m (4,593.2'):
Adjust projector installation settings from the menu. Failure to
adjust the settings may damage the optical parts.
• Do not block the air intake or exhaust vents. Blocking the vents may
trap heat inside the projector, which may shorten the useful life of
optical components or other parts and damage the projector.
• Keep adequate clearance around your projector for its ventilation
The least clearance is a MUST when your projector is placed within a
cabinet or other closed environment.
• Environment of use: 0°C (32°F) to 40°C (104°F), 20% to 85% RH
• Storage temperature: -20°C (-4°F) to 60°C (140°F)
Caution
• Do not place any objects on top of the projector that may change
shape or color due to heat.
• Do not install the projector near high-voltage electrical power lines or
an electrical power source. This may cause malfunction.
long periods without cleaning may eventually damage the projector or
affect picture quality.
Caution
• Afterimages may occur when the image changes after the same
image has been projected for some time. This is due to the nature of
the LCD panels and does not indicate a problem. The afterimage will
dissipate after a while during normal projection.
DO NOT tilt your projector more
than 10 degrees.
DO NOT put the projector on a
horizontal projection.
10°
10°
10°
10°
Greater than
50 cm Greater than
100 cm
Sides

17
Before Installation
Prepare the projector as described below before carrying it.
Be sure to read “Safety Instructions” and “For Safe Use” (P5 – P16). Also take
the following precautions during installation.
Precautions When Carrying / Shipping the
Projector
Precautions for Installation
■Do Not Use in the Following Environments
Caution
Caution
Caution
• Disconnect the cables connected to the projector. Carrying the
projector with the cables attached may cause an accident.
• Retract the adjustable feet before moving the projector.
Leaving the feet extended may cause damage.
• Do not subject the projector to strong impacts or vibrations.
• Do not strike the projector or subject it to impact. Doing so
may cause a malfunction.
• Do not install the projector standing on one side or in other
unsteady positions. The projector may be damaged if it tips
over.
• Locations with excessive humidity, dust, oily smoke or
tobacco smoke
Adhesion to the lens, mirrors or other optical parts may
reduce image quality.
In addition, oil can degrade the plastic, which could result in a
ceiling-mounted projector falling from its mounting.
• Near high-voltage power lines or sources of electrical power
This may cause malfunction.
• On soft surfaces such as carpets or cushioned mats
• Locations with excessive temperature or humidity
• Locations subject to vibration or impact
• Near heat or smoke detectors
• Near the ocean, or near air conditioner vents
• Locations where corrosive gases occur, such as sulfur
gas from hot springs
This may damage the projector. Acceptable ranges for
operating and
storage temperature and humidity are as follows.
* Operating temperature and humidity applies to when the
projector is projecting or in standby mode.
Operating temperature Operating humidity Storage temperature
0°C (32°F) – 40°C (104°F) 20% – 85% -20°C (-4°F) – 60°C (140°F)

18
Before Installation
■Do Not Touch the Lens with Bare Hands
■ Install at a Sufcient Distance from Walls and Other
Obstructions
■Be Careful of Condensation
■ At Altitudes above 1,400 m (4,593.2'), Adjust the
Settings
Caution
Caution
Do not touch the lens with bare hands. Any smudges or
ngerprints on the lens may affect image quality.
If the air intake or exhaust vent is
blocked, heat will accumulate inside
the projector, possibly resulting in a
shortened projector
lifetime or a malfunction.Similarly,
do not install in narrow, enclosed
spaces with poor ventilation.
Install the projector leaving at least
50cm (1.6') / 100cm(3.3') between
air Intake/exhaust vents and walls.
If the temperature of the room rises suddenly, moisture in the air may condense on
the projector lens and mirror, causing the image to become blurred. Wait until the
condensation has evaporated for the image projected to return to normal.
Projector settings must be adjusted when using the projector at altitudes of 1,400 m
P54) in the
Air intake
Air outlet
(For heat exhaust)

19
Before Installation
■When Using Mounted on the Ceiling
When the projector is used mounted on
the ceiling or installed in a high location,
it is necessary to periodically clean
the air intake and exhaust vents, and
the area around the air lter. Dust that
accumulates in intake or exhaust vents
may impair ventilation, raising the
temperature inside and posing a risk of
damage or re. Use a vacuum cleaner
or similar means to remove dust from
the intake vent and exhaust vent.
Caution

20
Before Installation
Copyright Notice
Ensure Network Security
About Trademarks
Please note that enlarging or reducing the size of an image for commercial
purposes or public presentation may infringe on the legally protected copyright
or the copyright holder of the original material.
Take measures to ensure network security. Note that Canon is not liable in any
way for direct or indirect loss from network security incidents, such as
unauthorized access.
• Ethernet is a registered trademark of Xerox Corporation.
• Microsoft and Windows are registered trademarks or trademarks of Microsoft
Corporation in the United States and/or other countries.
• Mac, macOS and Macintosh are trademarks of Apple Inc., registered in the
United States and/or other countries.
trademarks or registered trademarks of HDMI Licensing, LLC.
• PJLink is a registered trademark of JBMIA and pending trademark in some
countries.
• PJLink is a registered trademark, or an application has been submitted for
trademark, in Japan, the United States and/or other countries or regions.
• AMX is a registered trademark of Harman International Industries, Inc.
• Crestron®, Crestron RoomView®, and Crestron Connected™ are registered
trademarks of Crestron Electronics, Inc.
• All other trademarks are the property of their respective owners.
appropriately.
• Set up the projector for connections only within your protected network,
This manual suits for next models
1
Table of contents
Other Canon Projector manuals

Canon
Canon LV-8235 UST User manual

Canon
Canon LX-MW500 User manual

Canon
Canon REALiS WUX4000 D User manual

Canon
Canon 2105B002AA User manual

Canon
Canon WUX450 User manual

Canon
Canon LV-7240 User manual

Canon
Canon 1318C002 User manual

Canon
Canon WUX6000 User manual

Canon
Canon WUX5800 User manual

Canon
Canon LV-7525 User manual

Canon
Canon WUX6010 User manual

Canon
Canon LV-7292A User manual

Canon
Canon RE-350 User manual

Canon
Canon LV-7290 User manual

Canon
Canon LV-729 User manual

Canon
Canon LV-7565 User manual

Canon
Canon SX50 - REALiS SXGA+ LCOS Projector User manual

Canon
Canon LV-7280 Owner's manual

Canon
Canon LV-8320 User manual

Canon
Canon LV-5210 User manual