7
Recording
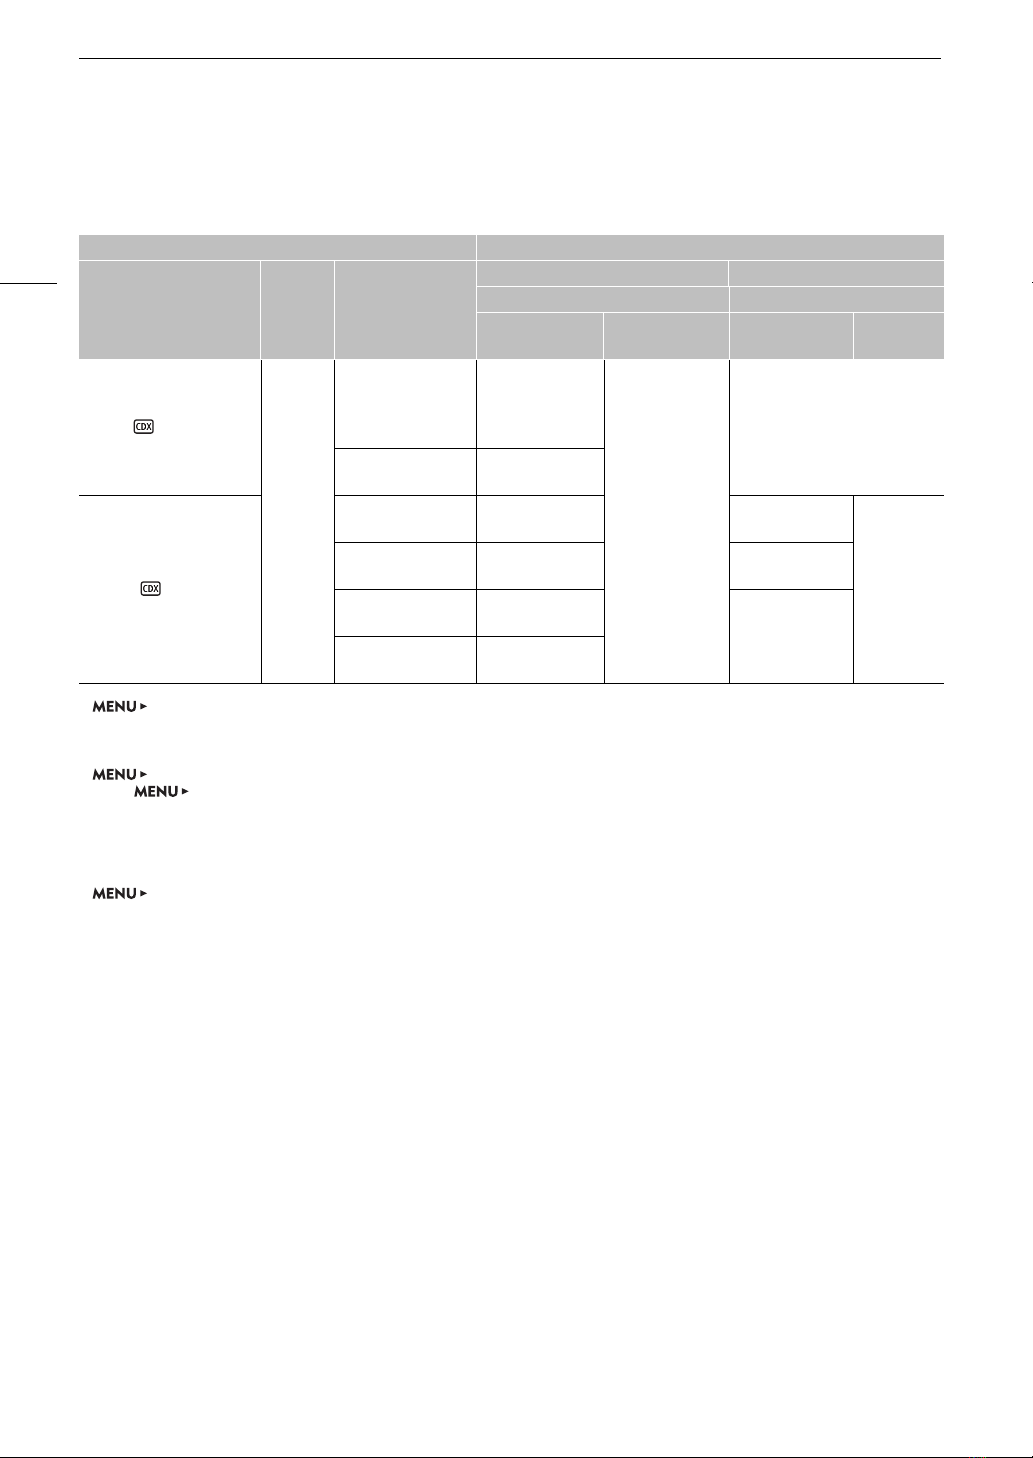
Shooting frame rates during slow & fast motion
Available shooting frame rates vary depending on the [Frame Rate] setting selected in the video configuration.
The range of available shooting frame rates depends also on the resolution and codec used, as shown at the top
of the following tables (
= the shooting frame rates listed under the column are available).
Available shooting frame rates (RAW)
* Only when [S&F FPS] >[ACTIVATE] is set to [On (crop)].
Resolution Available range
Z[ 4512x2376
]4272x2376
– –
Z[ 4512x1920
4096x2160
–
2048×1080 (cropped)*
[Frame Rate] setting Shooting frame rates
59.94P 1.00, 2.00, 3.00, 5.99, 14.99, 29.97, 59.94,
89.91 119.88 149.85, 179.82, 209.79, 239.76
29.97P
1.00, 2.00, 3.00, 5.99, 14.99, 29.97, 31.97,
35.96, 39.96, 43.96, 47.95, 51.95, 55.94, 59.94,
89.91
119.88 149.85, 179.82, 209.79, 239.76
23.98P
1.00, 2.00, 3.00, 5.99, 11.99, 23.98, 25.97,
27.97, 29.97, 31.97, 35.96, 39.96, 43.96, 47.95,
51.95, 55.94, 59.94, 71.93, 95.90
119.88 143.86, 167.83, 191.81, 215.78,
239.76
24.00P
1.00, 2.00, 3.00, 6.00, 12.00, 24.00, 26.00,
28.00, 30.00, 32.00, 36.00, 40.00, 44.00, 48.00,
52.00, 56.00, 60.00, 72.00, 96.00
120.00 144.00, 168.00, 192.00, 216.00,
240.00
50.00P 1.00, 5.00, 15.00, 25.00, 50.00, 54.00, 58.00,
75.00, 100.00 –125.00, 150.00, 175.00, 200.00
25.00P
1.00, 5.00, 15.00, 25.00, 26.00, 28.00, 30.00,
34.00, 38.00, 42.00, 46.00, 50.00, 54.00, 58.00,
75.00, 100.00
–125.00, 150.00, 175.00, 200.00