manuals.online logo
Brands
  1. Home
  2. •
  3. Brands
  4. •
  5. CANOPY
  6. •
  7. Tent
  8. •
  9. CANOPY 22576 User manual

CANOPY 22576 User manual

SET UP
Model #22576
10 x 10
Page 1
STEP 6
Lift up outer legs and slide out
the inner legs until the snap
button locks. Repeat on the
opposite legs.
01-22576 2/1/04
Missing Parts,Need Replacements,or Help
with Assembly Please Contact Customer Service:
1-800-524-9970
Please read instructions
COMPLETELY before assembly.
West Haven, CT 06516
"Sets Up in 60 Seconds!"
POP-UP CANOPY
No. Part # QtyDescription
1
2
3
4
5
6
7
8
9
10
11
12
13
14
15
16
17
18
19
20
21
22
23
24
25
26
27
15266
15237
15270
15239
15240
15271
15274
15275
15277
15278
15279
15280
15281
15283
15284
15256
15257
15348
15285
15286
15287
15288
15289
15351
15263
15290
10431
Leg tube(A)
Plug for leg tube
Corner cover for leg tube
Inner washer for leg tube
Slide connecter for leg tube
Leg tube(B)
Gemel (Folding Holder) A
Gemel (Folding Holder) B
Slide tube(A)
Slide tube(B)
Inclined holding tube
Hex bolt 1/4" L40
Hex bolt 1/4" L37
Hex bolt 1/4" L26
Hex bolt 1/4" L25
Nut 1/4"
Spring pin fit for 15266
Spring pin fit for 15271
Top crest
Plug for gemel
Gemel Corner bush(A)
Gemel Corner bush(B)
Gemel Corner bush(C)
Gemel Corner bush(D)
PP washer
Cover
Anchors
4
4
4
4
4
4
4
4
4
20
16
12
52
56
44
24
20
12
4
4
4
4
1
1
8
8
12
CANOPY PART LIST
Page 4 01-22576 2/1/04
For Replacement Parts or Help with assembly, Please call:
Customer Service:
1-800-524-9970
8am-7pm
Mon-Sat EST
STEP 5
Attach the top to the frame by matching the loop fastening strip on
the frame. pull the corners down fully. Push the loop firmly together
at each corner.
STEP 1
Begin by placing your canopy near
the center of the set-up area. Along
with a helper grasp a canopy leg in
each hand. Slightly lift the frame off
the ground and step backwards,
pulling the frame apart until your
arms are fully extended as shown
in the illustration.
STEP 2
Carefully unfold the fabric top and
place it over the frame, making
sure to align the corners of the top
with the corners of the frame.
STEP 3
Do not put
your hand like
the picture.
While taking care not to pinch your fingers, grasp the frame section
marked "Open Here" and push up until the canopy is fully opened.
STEP 4
Slide the auto slider at
each corner up, while
holding the corner of the
frame down until the snap
button engages into the
hole. Then, pull the corner
of the cover down snugly.
TAKE DOWN
Page 2 01-22576 2/1/04
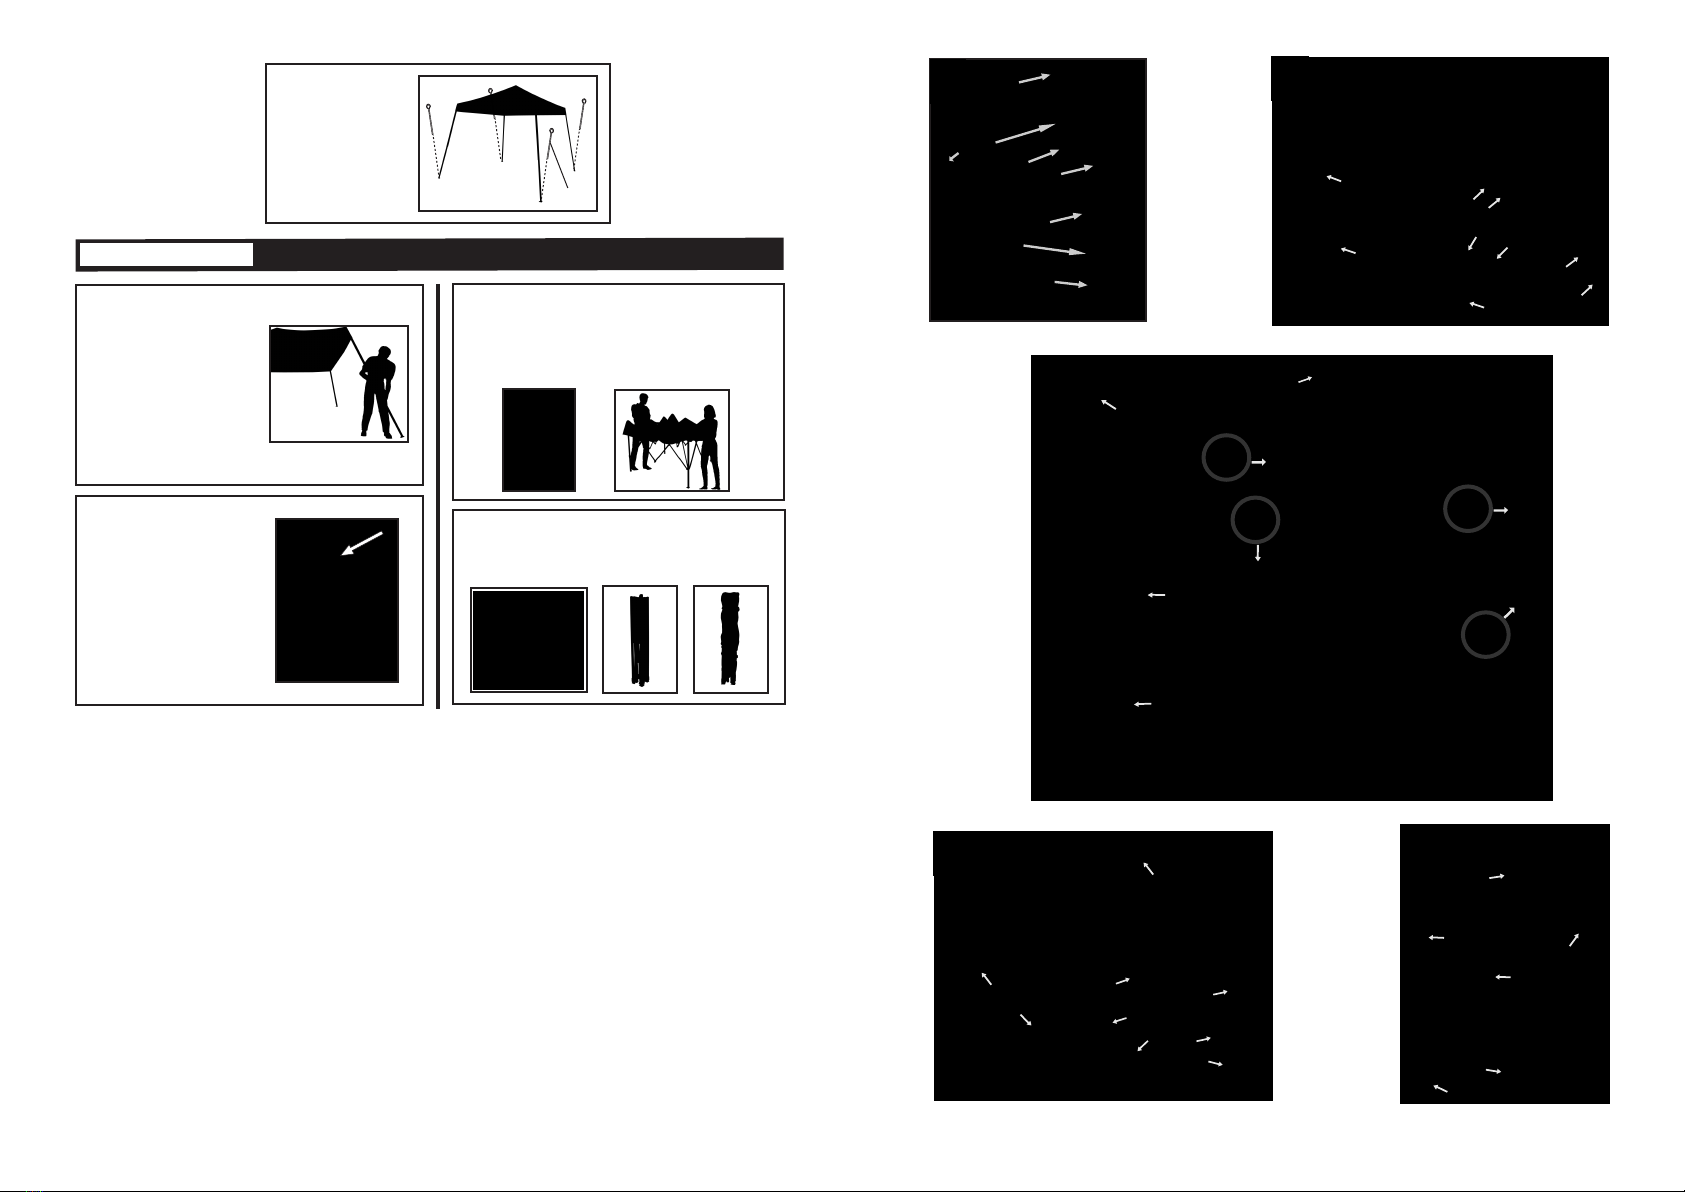
STEP 7
Use anchors at four
corners of canopy
Anchor
CARE & CLEANING INFORMATION
DO NOT expose top or walls to open fire or flame. DO NOT
use barbeque grills or smokers underneath canopy.
DO NOT use harsh abrasives, bleach or cleansers. C over and walls can be easily cleaned with mild soap and water. Periodically check
stakes or anchors to ensure stability of unit, especially following exposure to high winds or heavy rain. NOT meant to hold snow load,
brush snow off top with a broom or mop.
IMPORTANT:PLEASE READ CAREFULLY
North American Outdoor Products has no control over the elements such as wind, snow or heavy rain, we cannot be responsible for
damage caused by the canopy or to the canopy. We suggest you contact your insurance carrier for information just as you would for any
other outside structure. T his is a T emporary Structure and is not recommended as a permanent structure. Safety glasses must be worm
when securing bunges.
Improper Anchoring, Strong Winds, Snow or Ice
North American Outdoor Products does not guarantee these canopies in snow or ice under any circumstances.
Canopies are designed to offer protection fromdamage caused by sun, light rain, tree sap, & birds, and are not designed to hold the
loads that accompany snow or ice. Any canopy that is not anchored securely or properly will fly away. We will not be responsible for
any canopy that blows away. Proper anchoring is your responsibility. We offer several anchoring kits, call customer service for more
information or to place an order. Your canopy's cover can be quickly removed if needed when you know that a strong or severe weather
front is approaching.
Replacement Parts
Additional covers, tubes, & walls are available directly fromthe factory through our customer service department.(1.800.524.9970)
Covers and walls have been treated to withstand high U.V. exposure for longer periods of time than tarps or covers bought at hard-
ware stores or home centers.
Page 3 01-22576 2/1/04
2
1
6
19
A
D
B
C
B
7
6
8
16
8
C9
10
11
23
21
22
12
A6
3
25
5
15
14
16
17
D
18
18
17
1
2
4
20
24
13
16
21
22
STEP 1
Remove anchors from the ground
and remove the cover straps from
the frame. Depress the height
adjusting button and reduce each
corner leg to it shortest position.
(Be sure button engages at
shortest point)
STEP 2
Depress the snap button on the
center pole so it releases to be
below the center connector.
STEP 3
Grasp the frame section where marked "CLOSE HERE"
on opposite sides
. Lift slightly and slowly walk towards
partner as the frame folds in. Keep walking until the
frame is about halfway closed. Take care to avoid
pinching your hand or fingers. Take cover off for storage.
STEP 4
Remove canopy. Grab the two outer legs and push together to
fully close the frame . Place your canopy inside the carry bag
for easy transport and storage.

Popular Tent manuals by other brands

Palram CANOPIA SOPHIA 3x7 How to assemble

Palram

Palram CANOPIA SOPHIA 3x7 How to assemble

Fox Royale user manual

Fox

Fox Royale user manual

Vango NEMESIS Pitching instructions

Vango

Vango NEMESIS Pitching instructions

Skandika Nordland 4 Setup & maintenance

Skandika

Skandika Nordland 4 Setup & maintenance

Coleman SUNDOME 2000002058 instructions

Coleman

Coleman SUNDOME 2000002058 instructions

encompass HB-065 instruction manual

encompass

encompass HB-065 instruction manual

Dometic HUB operating manual

Dometic

Dometic HUB operating manual

for Living cambridge gazebo 088-1383-4 Assembly instructions

for Living

for Living cambridge gazebo 088-1383-4 Assembly instructions

GigaTent Princess Tower owner's manual

GigaTent

GigaTent Princess Tower owner's manual

Tepui HyBox owner's manual

Tepui

Tepui HyBox owner's manual

Palram Juniper 3x2 Extension Assembly instructions

Palram

Palram Juniper 3x2 Extension Assembly instructions

Adlonco Holdings E0806 owner's manual

Adlonco Holdings

Adlonco Holdings E0806 owner's manual

Woods 076-6071-4 owner's manual

Woods

Woods 076-6071-4 owner's manual

Aussie Traveller COOLABAH AWNING quick start guide

Aussie Traveller

Aussie Traveller COOLABAH AWNING quick start guide

RidgeMonkey XF2 PLUS instructions

RidgeMonkey

RidgeMonkey XF2 PLUS instructions

FarmTek 1420CC manual

FarmTek

FarmTek 1420CC manual

MSR MUTHA HUBBA NX Assembly instructions

MSR

MSR MUTHA HUBBA NX Assembly instructions

Mammoth Tents EliteHC 900L quick start guide

Mammoth Tents

Mammoth Tents EliteHC 900L quick start guide

manuals.online logo
manuals.online logoBrands
  • About & Mission
  • Contact us
  • Privacy Policy
  • Terms and Conditions

Copyright 2025 Manuals.Online. All Rights Reserved.