www.caple.co.uk For more information visit www.caple.co.uk
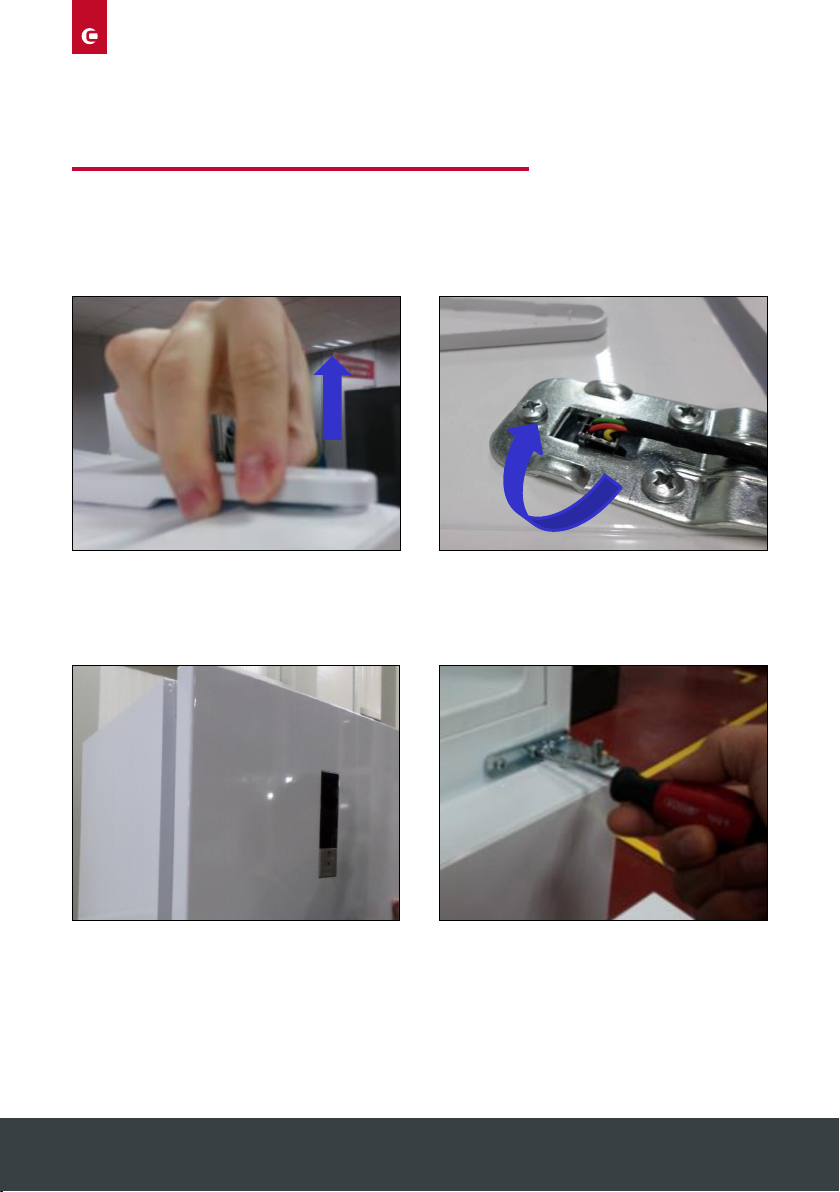
15. Place the bottom door
[fig 6]
and rotate the middle hinge
by 180º. After that, Screw to the right side on the middle
sheet
[fig 7].
16. Remove the socket cover-right of the top door
[Fig 8]
Remove the display socket
[Fig 9]
Please use the socket
cover to hidden other housing
[Fig 10 / 11].
CUSTOMER
SUPPORT
APRIL 2016
RFF730
Reversing the door
15. Place the bottom door (Pic-15.1) and rotate the middle hinge by 180º. After that,
Screw to the right side on the middle sheet. (Pic-15.2)
Picture-15.1
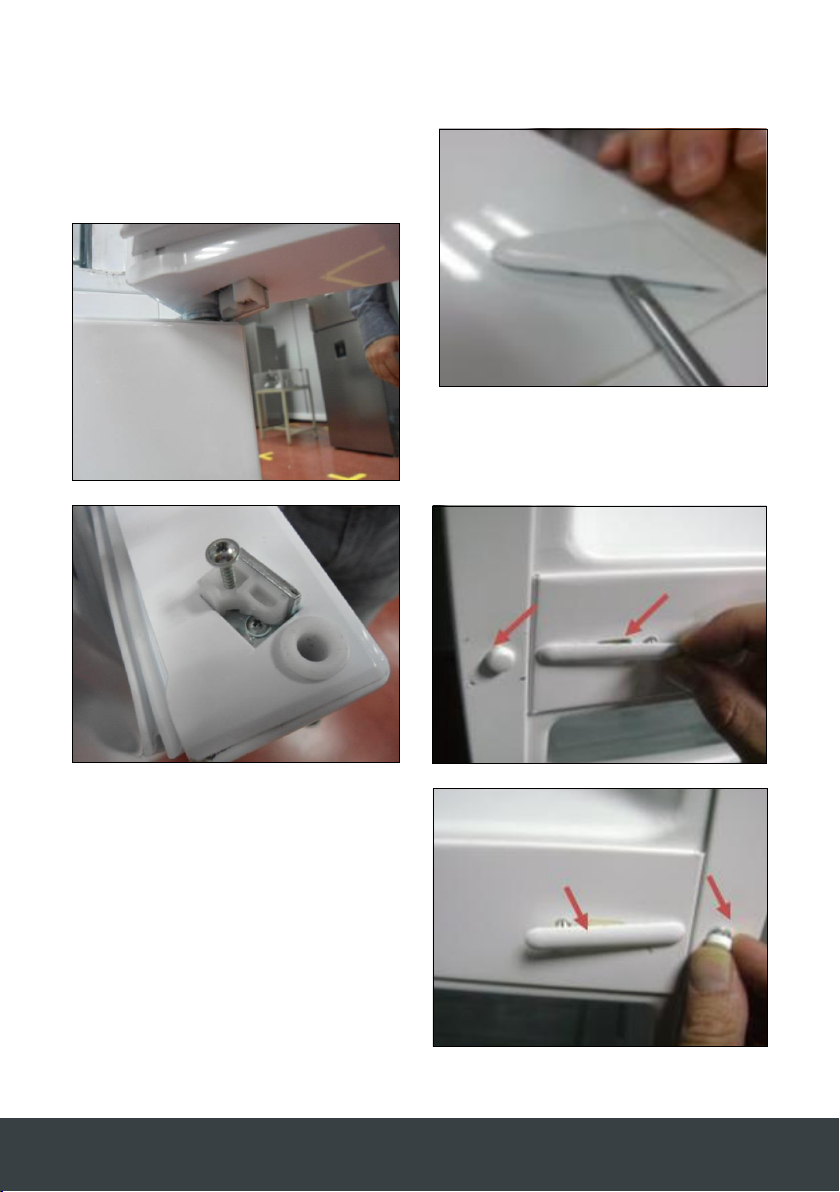
14. Remove the middle hinge cover and then screw the screw on the side panel
(Pic-14.1) and assemble to the right side panel (Pic-14.2)
Picture-14.1 Picture-14.2
Picture-15.2
CUSTOMER
SUPPORT
APRIL 2016
RFF730
Reversing the door
15. Place the bottom door (Pic-15.1) and rotate the middle hinge by 180º. After that,
Screw to the right side on the middle sheet. (Pic-15.2)
Picture-15.1
14. Remove the middle hinge cover and then screw the screw on the side panel
(Pic-14.1) and assemble to the right side panel (Pic-14.2)
Picture-14.1 Picture-14.2
Picture-15.2
CUSTOMER
SUPPORT
APRIL 2016
RFF730
Reversing the door
Picture-17
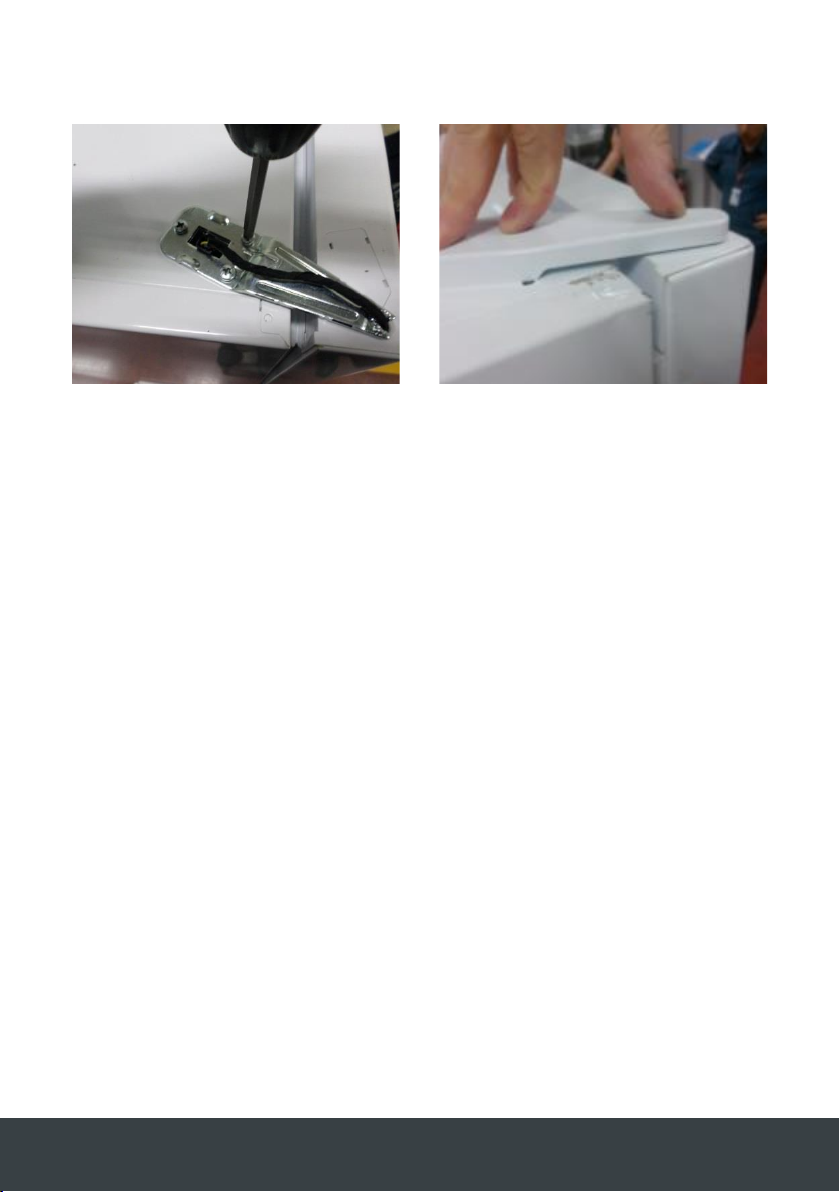
17. Place the top door to the middle hinge
and then connect the display connector and
screw the top hinge to the top panel.
(Pic-17)
Picture-18
18. Place the top hinge cover. (Pic-18)
16.Remove the socket cover-right of the top door (Pic-16.1)
Remove the display socket (Pic-16.2)
Please use the socket cover to hidden other housing (Pic-16.3 / Pic-16.4)
Picture-16.1 Picture-16.2 Picture-16.3
Picture-16.4
CUSTOMER
SUPPORT
APRIL 2016
RFF730
Reversing the door
Picture-17
17. Place the top door to the middle hinge
and then connect the display connector and
screw the top hinge to the top panel.
(Pic-17)
Picture-18
18. Place the top hinge cover. (Pic-18)
16.Remove the socket cover-right of the top door (Pic-16.1)
Remove the display socket (Pic-16.2)
Please use the socket cover to hidden other housing (Pic-16.3 / Pic-16.4)
Picture-16.1 Picture-16.2 Picture-16.3
Picture-16.4
Fig 6
Fig 7
Fig 8
Fig 9
Fig 10
Fig 11