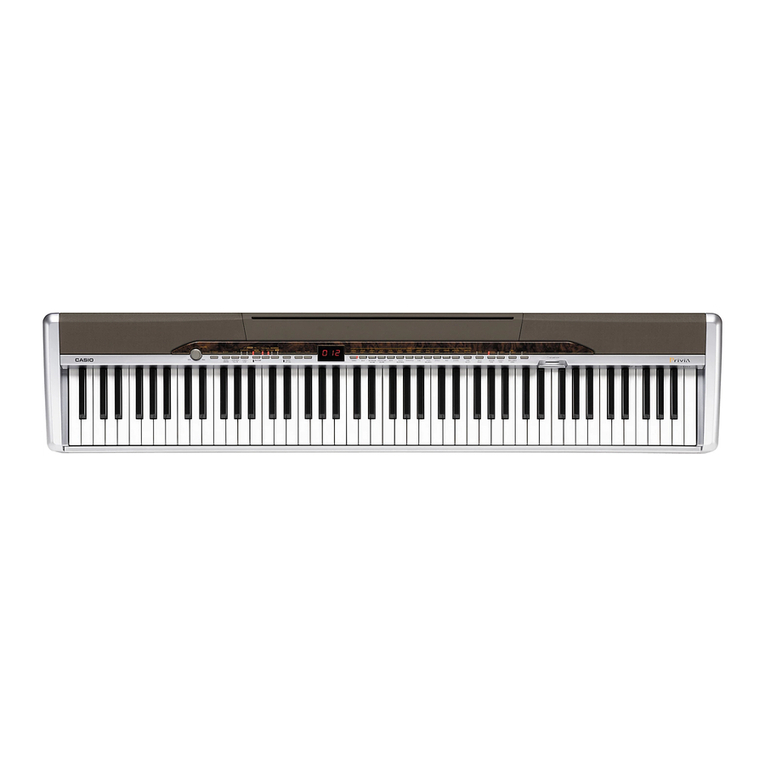
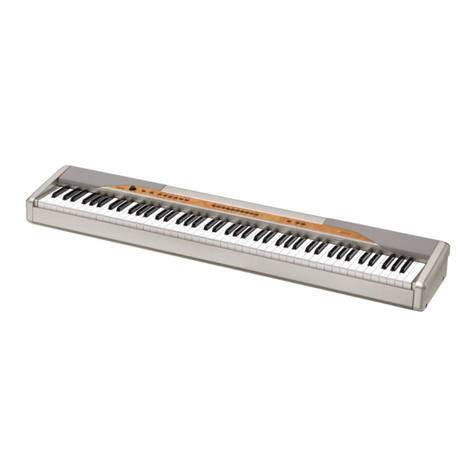
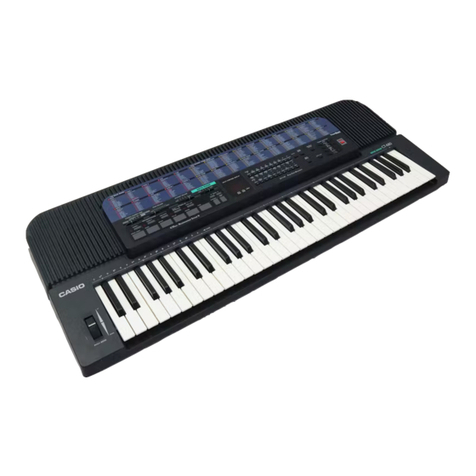
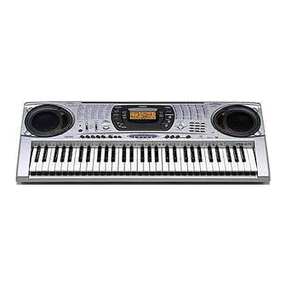
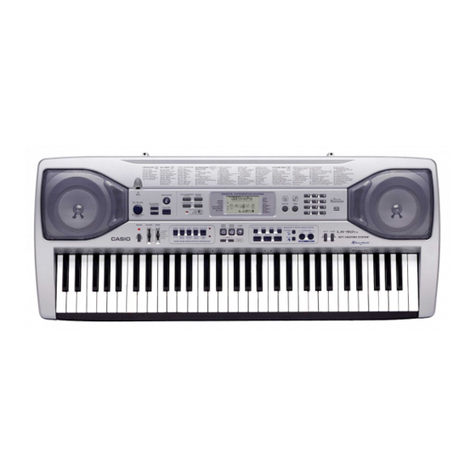
Casio CTK-40I User manual

CTK-4OIl
USER’S
GUIDE
@
GUIA
DEL
USUARIO
This
recycle
mark
indicates
that
the
packaging
conforms
to
the
environmental
protection
legislation
in
Germany.
Esta
marca
de
reciclaje
indica
que
el
empaquetado
se
ajusta
a
la
legislaci6n
de
proteccién
ambiental
en
Alemania.
CASIO.
CASIO
COMPUTER
CO.,LTD.
P
P
6-1,
Nishi-Shinjuku
2-chome
|
MA9703-A
@
@
Printed
in
U.S.A.
Qe
A
Shinjuku-ku,
Tokyo
163-02,
Japan
CTK401ES-1
CTK401ES-1
.

Welcome...
To
the
happy
family
of
satisfied
CASIO
electronic
musical
instrument
owners!
To
get
the
most
out
of
the
many
features
and
functions
of
the
keyboard,
be
sure
to
carefully
read
this
manual
and
keep
it
on
hand
for
future
reference.
Important!
When
using
batteries,
be
sure
to
replace
them
or
shift
to
one
of
the
alternate
power
sources
whenever
you
notice
any
of
the
following
symptoms.
¢
Dim
power
supply
indicator
¢
Dim,
difficult
to
read
display
¢
Abnormally
low
speaker/headphone
volume
e
Distortion
of
sound
output
¢
Occasional
interruption
of
sound
when
playing
at
high
volumes
¢
Sudden
power
failure
when
playing
at
high
volumes
¢
Dimming
of
the
display
playing
at
high
volume
¢
Abnormal
rhythm
pattern
and
Song
Bank
tune
play
GUIDELINES
LAID
DOWN
BY
FCC
RULES
FOR
USE
OF
THE
UNIT
IN
THE
U.S.A
(not
applicable
to
other
areas).
NOTICE
This
equipment
has
been
tested
and
found
to
comply
with
the
limits
for
a
Class
B
digital
device,
pursuant
to
Part
15
of
the
FCC
Rules.
These
limits
are
designed
to
provide
reasonable
protection
against
harmful
interference
in
a
residential
installation.
This
equipment
generates,
uses
and
can
radiate
radio
frequency
energy
and,
if
not
installed
and
used
in
accordance
with
the
instructions,
may
cause
harmful
interference
to
radio
communications.
However,
there
is
no
guarantee
that
interference
will
not
occur
in
a
particular
installation.
If
this
equipment
does
cause
harmful
interference
to
radio
or
television
reception,
which
can
be
determined
by
turning
the
equipment
off
and
on,
the
user
is
encouraged
to
try
to
correct
the
interference
by
one
or
more
of
the
following
measures:
¢
Reorient
or
relocate
the
receiving
antenna.
¢
Increase
the
separation
between
the
equipment
and
receiver.
*
Connect
the
equipment
into
an
outlet
on
a
circuit
different
from
that
to
which
the
receiver
is
connected.
*
Consult
the
dealer
or
an
experienced
radio/TV
technician
for
help.
FCC
WARNING
Changes
or
modifications
not
expressly
approved
by
the
party
responsible
for
compliance
could
void
the
user’s
authority
to
operate
the
equipment.
CASIO
ELECTRONICS
CO.,
LTD.
Unit
6,
1000
North
Circular
Road
London
NW2
7JD,
U.K.
This
mark
is
valid
in
the
EU
countries
only.
Please
keep
all
information
for
future
reference.
ae

Volume
¢
Very
high
volume
levels
can
damage
hearing.
Avoid
using
the
instrument
at
very
high
volume
settings
for
long
periods.
Consult
with
a
physician
immediately
if
you
experience
impaired
hearing
or
ringing
in
the
ears.
Liquid
Crystal
Display
(LCD)
Precautions
*
Avoid
subjecting
the
keyboard's
LCD
to
strong
impact,
which
can
crack
or
break
the
LCD's
glass
creating
the
danger
of
personal
injury.
Should
the
LCD
glass
ever
crack
or
break,
do
not
allow
the
liquid
inside
the
LCD
to
come
into
contact
with
your
skin,
which
can
cause
inflammation
and
redden-
ing.
*Should
the
LCD
liquid
get
into
your
mouth,
immedi-
ately
wash
out
your
mouth
with
water
and
then
con-
sult
a
physician.
*Should
the
LCD
liquid
get
in
your
eyes
or
on
your
skin,
immediately
flush
with
water
for
at
least
15
min-
utes
and
then
consult
a
physician.
Do
not
get
onto
the
instrument
or
stand.*
¢
Do
not
crawl
on
top
of
the
instrument
or
its
optional
stand.
Particular
caution
is
required
in
homes
having
small
children.
This
may
cause
the
instrument
or
stand
to
tip
over
and
break
resulting
in
injury.
Optional
Stand*
*
Carefully
assemble
the
stand
following
the
assembly
instructions
that
come
with
it.
Securely
tighten
all
bolts,
nuts,
and
fasteners,
and
make
sure
that
you
mount
the
instrument
correctly
onto
the
stand.
Incorrectly
or
in-
sufficiently
tightening
screws,
or
incorrectly
mounting
the
instrument
onto
the
stand
can
cause
the
stand
to
tip
over
or
the
instrument
to
fall
off
the
stand,
possibly
leading
to
injury.
*The
stand
is
available
as
an
option.
E-4
OF:
Time)
mY
folels
keyboard
Avoid
heat,
humidity
or
direct
sunlight.
Do
not
overexpose
the
instrument
to
direct
sunlight,
or
place
it
near
an
air
conditioner,
or
in
any
extremely
hot
place.
Do
not
use
near
a
TV
or
radio.
This
instrument
can
cause
video
or
audio
interference
with
TV
and
radio
reception.
If
this
happens,
move
the
instrument
away
from
the
TV
or
radio.
Do
not
use
lacquer,
thinner
or
similar
chemicals
for
cleaning.
Clean
the
keyboard
with
a
soft
cloth
dampened
in
a
weak
solu-
tion
of
water
and
a
neutral
detergent.
Soak
the
cloth
in
the
solu-
tion
and
squeeze
until
it
is
almost
dry.
Avoid
use
in
areas
subjected
to
temper-
ature
extremes.
Extreme
heat
can
cause
figures
on
the
LCD
screen
to
become
dim
and
difficult
to
read.
This
condition
should
correct
itself
when
the
keyboard
is
brought
back
to
normal
temperature.
NOTES
You
may
notice
lines
in
the
finish
of
the
case
of
this
keyboard.
These
lines
are
a
result
of
the
molding
process
used
to
shape
the
plastic
of
the
case.
They
are
not
cracks
or
breaks
in
the
plastic,
and
are
no
cause
for
concern.
.
Contents
WEICOME....
srcsccssreccnssssecascoversseccnssvezecssss
7d
INEFOCUCTION
.....ccssscssssersrnsccresscsesessssesee
EM
Safety
Precautions.
.........ccssesseesseeee
E-2
Care
of
your
keyboard
.........0000000000000.
E-4
CONTONHS
.eeesssscsecssecssecseeseesssessecseeseeeseese
EAS
General
Guide
.......cccscccssssssccesecsssccsscseee
EO
Rear
Panel
.n.cccccsssécccccssvccsccssccereececcdecascoadarcetescecdes
E-7
Song
Bank
Quick
Reference
.............
E-8
To
play
back
a
Song
Bank
tune............ccccssccceeeee
E-8
COMMECTIONS.
.....cccccecececcucccccecscenceccecconc
E-9
Phones/Output
Terminal
................cccscccessscessssccsseeceeees
E-9
Accessories
and
Options
..............cccccccccseeessssseseesecees
E-9
POWEF
SUPPLY.
..ccccccsorresssssrcececseeeseseses
E710
Using
batteries
..............ccssscssesssssecesnsssssennscess
E-10
To
load
batterieS
2.0...
cccssssccecessssseeseresseseeseenessees
E-10
Important
Battery
Information
...............ccceccceeseeeeee
E-10
Using
the
AC
Adaptor
................ccccccsssssessssseees
E-10
Auto
Power
Off...
eectetteteenseeeeeenseenensnes
E-10
To
disable
Auto
Power
Off
..............ccceecsssssesseneeeee
E-10
BaSiC
Operations.
.....cccccccsssessssececeseeee
En
17
To
play
the
keyboard
............ccsscccesssreesesseeeesees
E-11
Selecting
a
TOME
...........sssscccsssssccsccsessecccessessoenes
E-11
TO
SElOCE
A
TOME
.....
eee
cceseeccessssceeensnsensserececseneess
E-11
Keyboard
Split
tones
.0.0..
ee
ccceceeceeeseeeeeseeeeeeeees
E-11
POIW
BRODY
oo
cen
cicacoscce
es
oi
cecrtelengtteiecna
alae
noeanas
E-11
Digital
SAMPIING
.............ccccecssseceeesssseessresecessessseeeceees
E-11
Auto
ACCOMPANIMENE
......c000ceree2e0e000
B12
Selecting
a
RAYthM
............ccssssssssssssessssccssecees
E-12
TO
Select
a
erytlM
ics
vcsssscessiece
x
nesting
vantereorenssacs
E-12
Playing
a
Rhythim.............csscccccssssssesssssesssssnenens
E-12
TO
play
a
rhythit
nu.ccsccccesssecsccccssservessessansesssceunvecsossces
E-12
Adjusting
the
Tempo
...............:cccccssssssssreesesnnens
E-13
To
adjust
the
teMpo
occ
ceeeccccsssesentssssesvenenens
E-13
About
the
Graphic
Metronome
........0....ccceeeeeeeeeeeees
E-13
ee
cit
RE
A
sae
SA
LN
APE
I
et
St
6
OR
rnb
a
Neer
seyret
fA
AA
GP-S
7
PD
PP
SP
-
(ele
end
me
Te
Phin
2
EN
eT
RNC
eee
SeenON
th
ml
AN
LE
ER
OR
a
Rie
YES
AI
I
CT
Using
Auto
Accompaniment............s..ssccessees
E-13
To
use
Auto
Accompaniment
..............cccccccseecsceesees
E-13
CASIO
CHORD,
iicsercicetseriact
ras
acoctsta
Sanenrstamaee
E-14
FINGERED
isj23.tissrsttetescc
eae
lasianiaerei
anand
eae:
E-14
Using
a
Fill-in
Pattern
.................cccsesssssees
careshas
E-15
TO
WSert:
Git
scsa6
3
susdesscarhodiariacesiavidacsigshidastiedccscoules
E-15
Synchro
Starting
Accompaniment
with
Rhythm
Play.....
E-15
To
use
SYNChIO
Stalt.........
ccc
ceeseeecsssecenesceeeceeens
E-15
Adjusting
the
Accompaniment
Volume
..........
E-15
Using
the
Song
Bank
.......s:s00+ss0000
E°16
To
play
back
a
Song
Bank
tune..................0000
E-16
To
pause
Song
Bank
tune
play
............0
cc
cceeeeeeeeee
E-17
To
fast
reverse
during
playback
...........0...ccecceeeeeeee
E-17
To
fast
forward
during
playback
.......0...cc.
cc
eeeeeeeee
E-17
Song
Bank
Mode
Display
................ccscsscccssssnees
E-17
Adjusting
the
Tempo
of
a
Song
Bank
Tune
.....
E-17
To
change
the
tempo
of
a
Song
Bank
tune
..............
E-17
To
change
the
tone
of
a
Song
Bank
tune’s
melody
.....E-18
Playing
Along
with
a
Song
Bank
Tune
...........
E-18
To
play
along
with
a
Song
Bank
tune
.......
E-18
Applause
Sound
................
abSgehonanaieanenavazsed
acacee
E-19
To
consecutively
play
back
all
Song
Bank
tones
.......
E-19
-
Using
the
Chord
Book
.......cccccseseeeeee
E-20
What
is
a
CHOI?
..............cscccccsssseccssseesscneneessees
E-20
Chord
Namess..............csccccccsscsssssssnsssscceressevssesees
E-20
IIVONTO
POLIS
“ac
sivssccscsceccesncesteisandeseucteccesessebiiees
E-20
To
look
up
a
chord
using
the
Chord
Book
................
E-21
Chord
Name
Modifier
Keys
00.0.0...
ccccsceseeeeees
E-22
Keyboard
Settings.
......cccccccccccscrersoeee
E-23
Transposing
the
Keyboard
..............ccccccsssseuees
E-23
To
transpose
the
keyboard
..............ccccccscesseceeeeeeees
E-23
Tuning
the
Keyboard
.................ssccssscssscrsssseseses
E-23
To
tune
the
keyboard
............ccccecssseecssessseeesrecvenss
E-23
TrOUDlESHOOTING
.......2.22cseressereceseeeenes
E24
SPCCIICATIONS
.........esssessrsseereesereerees
EDS
APPONdx
....cssesssssersrescersrerscerevecscrecsccees
Ad
Fingered
Chord
Chaft.................ccccsscssssssessceees
A-1
Percussion
Assignment
List
..............:sccsessseeeee
A-2
CT=al-l
es]
MO{U(e(=
Ot
WU
|
Lb
SKN
[+]/[-]
buttons
*
Negative
values
can
be
changed
only
by
using
[+]
and
[-]
to
increment
and
decre-
ment
the
displayed
value.
Number
buttons/Chord
specification
buttons
¢
For
input
of
numbers
to
change
displayed
settings.
¢
For
input
of
chord
specification
data
when
using
the
Chord
Book.
@
Rhythm
list
@
POWER/MODE
switch
@
Power
indicator
@
MAIN
VOLUME
buttons
©
SYNCHRO/FILL-IN
button
START/STOP
button
@
TEMPO
buttons
CHORD
BOOK
button
ACCOMP
VOLUME
button
@@
Number
buttons
(Chord
specification
buttons)
@)
Display
E-6
ep
eeeeme
sr
nen
+
epegres
©
~
~y
i
‘
-
os
~
.
®@
@O@©
®
O
ce)
al
Unt
[.
fi
(8
SONG
BANK
CONTROLLER
REW
button
STOP
button
FF
buttton
RIGHT
ON/OFF
(MELODY)
button
PLAY/PAUSE
button
LEFT
ON/OFF
(ACCOMP)
button
@
TONE
button
43
RHYTHM
button
@
SONG
BANK
button
(5
TRANSPOSE/TUNE
button
(8
SONG
BANK
CONTROLLER
q%
Tone
list
§8
Speaker
9
Chord
name
@
Percussion
instrument
list
@
Song
bank
list
1
'
Rear
Panel
*
Attachment
of
Score
Stand
Insert
both
ends
of
the
music
stand
provided
with
the
CTK-
401
into
the
two
holes
on
the
top
surface.
2 @
@
PHONES/OUTPUT
jack
@
DC
9V
jack
Using
the
Display
MA
ww
DH
ws
7.
8.
9.
17
Se
Ca
EAL
db
9
8
‘
»
Rhythm,
auto-accompaniment,
Song
Bank
tune
beats
.
Tone
name,
rhythm
name,
song
name,
mode
name
playback
playback
Auto-accompaniment,
Song
Bank,
chord
book
chord
names
er
non
Ihde
7
*
This
is
the
how
the
display
appears
while
the
Song
Bank
is
in
use.
.
An
indicator
appears
next
to
the
type
of
setting
you
are
currently
performing
(TONE,
RHYTHM,
SONG
BANK).
.
Tone
number,
rhythm
number,
song
number
»
Uses
musical
staff
notation
to
show
notes
and
chords
played
on
the
keyboard
or
played
during
Song
Bank
tune
.
Uses
a
graphic
keyboard
to
show
notes
and
chords
played
on
the
keyboard
or
played
during
Song
Bank
tune
Dots
indicate
fingerings
during
Song
Bank
playback.
“L”
and
“R”
indicate
left-hand
and
right-hand
parts.
Rhythm,
auto-accompaniment,
Song
Bank
tune
tempo
10.
Rhythm,
auto-accompaniment,
Song
Bank
tune
tempo;
volume
setting
17.
Song
Bank
controller
indicators

)
)
Song
Bank
Quick
Reference
Display
2.
_—_—
Display
1
Display
6
POWER/MODE
Display
3
Display
4
Display5
Display
7
A
selection
of
100
Song
Bank
tunes
come
built-in
for
your
listen-
ing
pleasure
or
play
along
fun.
A
simple
operation
cuts
out
the
melody
part
or
accompaniment
part
of
the
tune,
allowing
you
to
play
along
on
the
keyboard.
See
“Using
the
Song
Bank”
on
page
E-16
for
details
on
playing
along
with
Song
Bank
tunes.
To
play
back
a
Song
Bank
tune
].
Set
the
POWER/MODE
switch
to
NORMAL.
2.
Press
the
SONG
BANK
button
to
enter
the
Song
Bank
Mode.
3.
Use
the
song
Bank
list
to
find
the
tune
you
want
to
play
back,
and
then
use
the
number
buttons
to
input
the
tune’s
two-digit
number.
Example:
To
select
“72
ODE
TO
JOY”,
input
7
and
then
2.
Display
1,3
cl
te
Cede
Titi
Lestarus
4.
Press
the
PLAY/PAUSE
button
to
start
play
of
the
tune.
¢
The
tune
plays
in
an
endless
loop,
re-starting
after
it
reaches
the
end.
¢
The
display
shows
the
keyboard
keys
(on
the
graphic
key-
board),
fingerings
(with
the
fingering
indicators),
musical
notes
(on
the
staff),
and
chord
names.
Fingers
used
Display
1,
2,
3, 4,
5,
6,7
auges
oge
RHYTHM
aaa
“2
|
SONG
SANK
i
“a
id
tat
Staff
display
Keyboard
keys
used
Chord
name
-
SONG
BANK
Se
ys
RN
REE
od,
RIGHT
ON/OFF
Number
buttons
PLAY/PAUSE
5.
Press
the
RIGHT
ON/OFF
button
to
turn
off
the
right-hand
melody
part
and
try
playing
along
on
the
keyboard.
¢
The
display’s
graphic
keyboard
and
fingering
indicators
show
you
the
melody
notes
to
play.
Display
1,
2, 3, 4,
6,7
TONE
ase
|
SONG
BANK
aoe
abe
6.
Press
the
RIGHT
ON/OFF
button
again
to
turn
the
melody
part
back
on.
Fingers
used
Display
1,
2,
3,
4,
5,
6,7
aun
i"
i.
ib
TONE
RHYTHM
SONG
SANK
STATUS
TEMPO
MAIN
VOLUME
oe
o—
Mi
ddddb
ddd
hkddbdd
bbe
Staff
display
Keyboard
keys
used
Chord
name
7.
Press
the
STOP
button
to
stop
playback
of
the
song
Bank
tune.
8.
Press
the
TONE
button
to
exit
the
Song
Bank
Mode
and
return
to
the
tone
and
rhythm
selec-
tion
screen.
Display
1,
3
veal
SUV
«
RHYTHM
fore
i
wal
os
SONG
BANK
uy
U
i
foase
ard
i
STATUS
TEMPO
MAIN
VOLUME
ma
OF
oe)
alatzyeidlel
ats
Phones/Output
Terminal
Before
connecting
phones
or
other
external
equipment,
be
sure
to
first
turn
down
the
volume
settings
of
the
keyboard
and
the
con-
nected
equipment.
You
can
then
adjust
volume
to
the
desired
lev-
el
after
connections
are
complete.
[Rear
Panel}
PHONES/OUTPUT
Terminal
Connecting
Phones
(Figure
@)
Connecting
phones
cuts
off
output
from
the
keyboard's
built-in
speakers,
so
you
can
play
even
late
at
night
without
disturbing
anyone.
Audio
Equipment
(Figure
@)
Connect
the
keyboard
to
a
audio
equipment
using
a
commercial-
ly
available
connecting
cord
with
a
standard
plug
on
one
end and
two
PIN
plugs
on
the
other
end.
Note
that
the
standard
plug
you
connect
to
the
keyboard
must
be
a
stereo
plug,
otherwise
you
will
be
able
to
output
only
one
of
stereo
channels.
In
this
configura-
tion,
you
normally
set
the
input
selector
of
the
audio
equipment
to
the
terminal
(usually
marked
AUX
IN
or
something
similar)
where
the
cord
from
the
keyboard
is
connected.
See
the
user
doc-
umentation
that
comes
with
your
audio
equipment
for
full
de-
tails.
Musical
Instrument
Amplifier
(Figure
@)
Use
a
commercially
available
connecting
cord
to
connect
the
key-
board
to
a
musical
instrument
amplifier.
HNOTES
Be
sure
to
use
a
connecting
cord
that
has
a
stereo
standard
plug
on
the
end
you
connect
to
the
keyboard,
and
a
connector
that
provides
dual
channel
(left
and
right)
input
to
the
amplifier
to
which
you
are
connecting.
The
wrong
type
of
connector
at
either
end
can
cause
one
of
the
stereo
channels
to
be
lost.
When
connected
to
a
musical
instrument
amplifier,
set
the
vol-
ume
of
the
keyboard
to
a
relatively
low
level
and
make
output
volume
adjustments
using
the
amplifier’s
controls.
[Connection
Example]
PIN
plug
(red)
PIN
jack
To
keyboard's
PHONES/OUTPUT
©
terminal
Stereo
standard
plug
PIN
plug
(white)
Standard
plug
e
|
i
“4
Keyboard
or
guitar
amp
Accessories
and
Options
Use
only
the
accessories
and
options
specified
for
this
keyboard.
Use
of
non-authorized
items
creates
the
danger
of
fire,
electrical
shock,
and
personal
injury.

Power
Supply
This
keyboard
can
be
powered
by
current
from
a
standard
house-
hold
wall
outlet
(using
the
specified
AC
adaptor)
or
by
batteries.
Always
make
sure
you
turn
the
keyboard
off
whenever
you
are
not
using
it.
Using
batteries
Always
make
sure
you
turn
off
the
keyboard
before
loading
or
replacing
batteries.
To
load
batteries
].
Remove
the
battery
compartment
cover.
2.
Load
six
AA-size
batteries
into
the
battery
com-
partment.
¢
Make
sure
that
the
positive
(+)
and
negative
(—)
ends
are
facing
correctly.
3.
Insert
the
tabs
on
the
battery
compartment
cov-
er
into
the
holes
provided
and
close
the
cover.
The
keyboard
may
not
function
correctly
if
you
load
or
replace
batteries
with
power
turned
on.
If
this
happens,
turning
the
key-
board
off
and
then
back
on
again
should
return
functions
back
to
normal.
Important
Battery
Information
@
The
following
shows
the
approximate
battery
life
provided
by
different
battery
types.
¢
Standard
battery
life:
Approximately
2
hours
(SUM-3/R6P)
Approximately
6
hours
(AM3/LR6)
Both
of
the
above
values
are
standard
battery
life
at
normal
temperature,
with
the
keyboard
volume
at
a
medium
setting.
Temperature
extremes
or
playing
at
very
loud
volume
settings
can
shorten
battery
life.
Mf
Any
of
the
following
symptoms
indicate
low
battery
power.
Replace
batteries
as
soon
as
possible
whenever
any
of
the
fol-
lowing
occurs.
¢
Dim
power
supply
indicator
¢
Dim,
difficult
to
read
display
e
Abnormally
low
speaker/
headphone
volume
¢
Distortion
of
sound
output
¢
Occasional
interruption
of
sound
when
playing
at
high
vol-
umes
¢
Sudden
power
failure
when
playing
at
high
volumes
¢
Dimming
of
the
display
playing
at
high
volume
¢
Abnormal
rhythm
or
Song
Bank
tune
play
IMPORTANT!
Improper
handiing
of
batteries
can
cause
them
to
burst
and
leak,
which
creates
the
danger
of
personal
injury
or
damage
due
to
contact
with
battery
acid.
Be
sure
to
note
the
following
important
precautions.
¢
Always
make
sure
that
the
positive
(+)
and
negative
(-)
poles
are
facing
correctly
as
indicated
inside
the
battery
compartment.
¢
To
avoid
damage
caused
by
leaking
batteries,
be
sure
to
re-
move
batteries
from
the
keyboard
whenever
you
leave
it
unat-
tended
for
long
periods
(such
as
when
leaving
on
a
trip).
*
Never
mix
batteries
of
different
types.
ad
¢
Never
mix
old
batteries
with
new
ones.
E-10
¢
Never
discard
batteries
by
incinerating
them,
do
not
allow
their
poles
to
be
shorted
(connected
to
each
other),
never
take
bat-
teries
apart,
and
do
not
expose
batteries
to
direct
heat.
¢
Replace
batteries
as
soon
as
possible
after
any
sign
they
are
getting
weak.
«
Never
attempt
to
recharge
batteries.
Using
the
AC
Adaptor
Make
sure
that
you
use
only
the
AC
adaptor
specified
for
this
keyboard.
Specified
AC
Adaptor:
AD-5
DC
9V
jack
AC
adaptor
AD-5
ar
we
{2
-,
¢
AC
outlet
Also
note
the
following
important
warnings
and
precautions
when
using
the
AC
adaptor.
WARNING!
*
Take
care
to
avoid
any
damage
to
or
breakage
of
the
power
cord.
Never
place
any
heavy
objects
on
the
power
cord
or
expose
it
to
direct
heat.
Doing
so
creates
the
danger
of
power
cord
damage,
fire,
and
electrical
shock.
*
Use
only
the
specified
AC
adaptor.
Use
of
another
type
of
adaptor
creates
the
danger
of
fire
and
electrical
shock.
CAUTION!
¢
For
safety
sake,
be
sure
to
unplug
the
AC
adaptor
from
the
wall
outlet
whenever
leaving
the
keyboard
unattended
for
a
long
time
(such
as
when
leaving
on
a
trip).
*
Always
turn
off
the
keyboard
and
unplug
the
AC
adaptor
from
the
wall
outlet
when
you
are
not
using
the
keyboard.
IMPORTANT!
¢
Make
sure
that
the
keyboard
is
turned
off
before
connecting
or
disconnecting
the
AC
adaptor.
*
Using
the
AC
adaptor
for
a
long
time
can
cause
it
to
become
warm
to
the
touch.
This
is
normal
and
does
not
indicate
mal-
function.
Auto
Power
Off
When
you
are
using
battery
power,
keyboard
power
turns
off
au-
tomatically
whenever
you
leave
it
on
without
performing
any
operation
for
about
6
minutes.
When
this
happens,
use
the
POW-
ER/MODE
switch
to
turn
power
back
on.
HNOTE!
Auto
Power
Off
is
disabled
(it
does
not
function)
when
you
are
using
the
AC
adaptor
to
power
the
keyboard.
To
disable
Auto
Power
Off
Hold
down
the
TONE
button
while
turning
on
the
keyboard
to
disable
Auto
Power
Off.
¢
When
Auto
Power
Off
is
disabled,
the
keyboard
does
not
turn
off
automatically
no
matter
how
long
it
is
left
with
no
operation
being
performed.
SF-4-J
(om
@]ol-\e-1i
le)
ate
Display
1
ceeded
ea
POWER/MODE
This
section
provides
information
on
performing
basic
keyboard
operations.
To
play
the
keyboard
].
Set
the
POWER/MODE
switch
to
NORMAL.
2.
Use
the
MAIN
VOLUME
buttons
to
lower
the
key-
board
volume.
*
It’s
always
a
good
idea
to
set
the
keyboard
volume
at
a
relatively
low
level
before
playing.
*
Pressing
[A]
or
[VW]
causes
the
curent
volume
setting
to
appear
on
the
display.
Press
[A]
or
[W]
again
to
change
the
setting.
,
3.
Play
something
on
the
keyboard.
Selecting
a
Tone
This
keyboard
comes
with
100
built-in
tones.
Use
the
following
procedure
to
select
the
tone
you
want
to
use.
Display
1
MAIN
VOLUME
To
select
a
tone
I.
Find
the
tone
you
want
to
use
in
the
keyboard's
tone
list
and
note
its
tone
number.
2.
Press
the
TONE
button.
Display
1
Tone
(as
Hi
HF
I
"
ae
|
RHYTHM
SONG
BANK
ase
=
bese
3.
Use
the
number
buttons
to
input
the
two
digit
tone
number
for
the
tone
you
want
to
select.
Example:
To
select
“26
WOOD
BASS”,
input
2
and
then
6.
Display
1
H
ALM
TMT
im
Reo
MAIN
VOLUME
*
Now
notes
played
on
the
keyboard
will
be
played
using
an
acoustical
wood
bass
sound.
ENOTES!
*
Always
input
both
digits
for
the
tone
number,
including
a
leading
Zero
(if
any).
If
you
input
one
digit
and
stop,
the
display
will
automat-
ically
clear
your
input
after
a
few
seconds.
¢
You
can
also
increment
the
displayed
tone
number
by
pressing
[+]
and
decrement
it
by
pressing
[-].
*
The
tone
named
“99
PERCUSSION”
assigns
various
percussion
musical
instruments
to
keys
on
the
keyboard.
(page
A-2)
Keyboard
split
tones
Some
of
the
preset
tones
split
the
keyboard
and
assign
two
or
more
sounds.
With
such
a
preset
tone,
the
sound
produced
de-
pends
on
what
position
of
the
keyboard
you
play.
For
example,
BASS/PIANO
(tone
90)
puts
BASS
on
the
left
and
PIANO
on
the
right
of
the
keyboard.
Example:
BASS/PIANO
(tone
90)
se
ew
tr
wm
pene
Pee
mobs
bet
sdbhe
ie
caTew
cs
wats
tune
scnn
aN
|~«————
pass
——»>|~——___
piano
——___—_»
Polyphony
The
term
polyphony
refers
to
the
maximum
number
of
notes
you
can
play
at
the
same
time.
The
keyboard
has
12-note
polyphony,
which
includes
the
notes
you
play
as
well
as
the
rhythms
and
auto-accompaniment
patterns
that
are
played
by
the
keyboard.
This
means
that
when
a
rhythm
or
auto-accompaniment
pattern
is
being
played
by
the
keyboard,
the
number
of
notes
(polypho-
ny)
available
for
keyboard
play
is
reduced.
Also
note
that
some
of
the
tones
offer
only
6-note
polyphony.
¢
When
rhythm
or
auto
accompaniment
is
playing,
the
number
of
sounds
simultaneously
played
is
reduced.
Digital
Sampling
A
number
of
the
tones
that
are
available
with
this
keyboard
have
been
recorded
and
processed
using
a
technique
called
digital
sam-
pling.
To
ensure
a
high
level
of
tonal
quality,
samples
are
taken
in
the
low,
mid,
and
high
ranges
and
then
combined
to
provide
you
with
sounds
that
are
amazingly
close
to
the
originals.
You
may
notice
very
slight
differences
in
volume
or
sound
quality
for
some
tones
when
you
play
them
at
different
positions
on
the
keyboard.
This
is
an
unavoidable
result
of
multiple
sampling,
and
it
is
not
a
sign
of
malfunction.
:
E-ff

PANU)
Com
Nexoro)
nny
oy-Taliinr=vay
Display
1
Display
6
POWER/MODE
Display
3
Display
4
Display
5
Display
7
This
keyboard
automatically
plays
bass
and
chord
parts
in
accor-
dance
with
the
chords
you
finger.
The
bass
and
chord
parts
are
played
using
sounds
and
tones
that
are
automatically
selected
to
select
the
rhythm
you
are
using.
All
of
this
means
that
you
get
full,
realistic
accompaniments
for
the
melody
notes
you
play
with
your
right
hand,
creating
the
mood
of
an
one-person
ensemble.
Selecting
a
Rhythm
This
keyboard
provides
you
with
100
exciting
rhythms
that
you
can
select
using
the
following
procedure.
Display
1
To
select
a
rhythm
I.
Find
the
rhythm
you
want
to
use
in
the
key-
board's
rhythm
list
and
note
its
rhythm
number.
2.
Press
the
RHYTHM
button.
Display
1
[-
"t
fe
Golub
Fe
rema|y
et)
bdbbddb
bdbbdd
dab
ddd
deb
Number
and
Name
of
selected
rhythm
Appears
when
RHYTHM
button
is
pressed
E-12
Number
buttons
3.
Use
the
number
buttons
to
input
the
two
digit
rhythm
number
for
the
rhythm
you
want
to
se-
lect.
Example:
To
select
“64
WALTZ”,
input
6
and
then
4.
Display
1
TONE
RHYTHM
t
bacne
SONG
BANK
ea”
usene
STATUS
TEMPO
MAIN
VOLUME
HNOTESS
*
“00
CLUB
POP”
is
the
initial
default
rhythm
setting
whenever
you
turn
on
keyboard
power.
*
You
can
also
increment
the
displayed
rhythm
number
by
pressing
[+]
and
decrement
it
by
pressing
[-].
Playing
a
Rhythm
Use
the
following
procedure
to
start
and
stop
rhythm
play.
To
play
a
rhythm
I.
Set
the
POWER/MODE
switch
to
NORMAL.
2.
Press
the
START/STOP
button
to
start
play
of
the
currently
selected
rhythm.
3.
To
stop
rhythm
play,
press
the
START/STOP
but-
ton
again.
NOTES
All
of
the
keyboard
keys
are
melody
keys
while
the
POWER/MODE
switch
is
set
to
NORMAL.
Adjusting
the
Tempo
You
can
adjust
the
tempo
of
rhythm
play
within
a
range
of
20
to
255
beats
per
minute.
The
tempo
setting
is
applied
to
Auto
Ac-
companiment
chord
play,
and
Song
Bank
operations.
.
Display
1,3
TONE
RHYTHM
shh
Hot
|
T
SONG
BANK
an
Bee
es
shees
be
eras
TEMPO
MAIN
VOLUME
To
adjust
the
tempo
].
Use
the
TEMPO
buttons
(&
,
¥)
to
adjust
the
tem-
po.
A
:
Increments
displayed
value
(increases
tempo)
v
:
Decrements
displayed
value
(decreases
tempo)
Example:
Hold
down
the
W
button
until
the
tempo
value
110
is
on
the
display.
Display
3
status{
MAIN
VOLUME
et
F
|
ENOTES
Pressing
both
TEMPO
buttons
(&
and
Y)
at
the
same
time
resets
the
tempo
to
the
default
value
of
the
currently
selected
rhythm.
About
the
Graphic
Metronome
The
graphic
metronome
appears
on
the
display
along
with
the
tempo
value
and
beat
of
a
rhythm
or
built-in
tune.
The
graphic
metronome
helps
you
keep
in
time
as
you
play
along
with
a
rhythm
or
built-in
tune.
Display
3
ae
=
15n
ico
&
Tempo
value
Graphic
metronome
STATUS
Beat
TEMPO
MAIN
VOLUME
Using
Auto
Accompaniment
The
following
procedure
describes
how
to
use
the
keyboard's
Auto
Accompaniment
feature.
Before
starting,
you
should
first
select
the
rhythm
you
want
to
use
and
set
the
tempo
of
the
rhythm
to
the
value
you
want.
Display
1,
3,
4,
5,
6,7
TONE
RHYTHM
ft
emp
SONG
BANK
a
oer
STATUS
as
eee:
j
ot
ste
Ba
TEMPO
.
re
i
ce
ed
Cee
MAIN
VOLUME
{
OPE
KE,
LidbddubbdbddLLdLLAILSLLLID
To
use
Auto
Accompaniment
].
Set
the
POWER/MODE
switch
to
CASIO
CHORD
or
FINGERED.
2.
Press
the
START/STOP
button
to
start
play
of
the
currently
selected
rhythm.
3.
Play
a
chord.
¢
The
actual
procedure
you
should
use
to
play
a
chord
de-
pends
on
the
current
POWER/MODE
switch
position.
Re-
fer
to
the
following
pages
for
details
on
chord
play.
CASIO
CHORD
sesseccsesssssssiohavsssedsivertoctonts
Page
E-14
PINGERE
Diss
cicissecsconivestias
een
ice
aclont
Page
E-14
Chord
name
MAIN
VOLUME
M7
de
dh
db
dd
thks
dl
Basic
fingering
of
current
chord
(May
be
different
from
chord
actually
being
played
on
the
keyboard.)
4.
To
stop
Auto
Accompaniment
play,
press
the
START/STOP
button
again.
E-13

CASIO
CHORD
This
method
of
chord
play
makes
it
possible
for
anyone
to
easily
play
chords,
regardless
of
previous
musical
knowledge
and
expe-
rience.
The
following
describes
the
CASIO
CHORD
“Accompani-
ment
keyboard”
and
“Melody
keyboard”,
and
tells
you
how
to
play
CASIO
CHORDs.
CASIO
CHORD
Accompaniment
Keyboard
and
Mel-
ody
Keyboard
Accompaniment
i
keyboard
Melody
keyboard
seas
ENOTES
The
accompaniment
keyboard
can
be
used
for
playing
chords
only.
No
sound
will
be
produced
if
you
try
playing
single
melody
notes
on
the
accompaniment
keyboard.
Chord
Types
CASIO
CHORD
accompaniment
lets
you
play
four
types
of
chords
with
minimal
fingering.
Major
chord
names
are
marked
C
Major
(C)
above
the
keys
of
the
accompani-
EIF'GAIBICIDEIF
ment
keyboard.
Note
that
the
chord
produced
when
you
press
an
accom-
paniment
keyboard
does
not
change
octave,
regardless
of
which
key
you
use
to
play
it.
Minor
chords
(m)
To
play
a
minor
chord,
keep
the
ma-
jor
chord
key
depressed
and
press
any
other
accompaniment
keyboard
key
located
to
the
right
of
the
major
chord
key.
C
minor
(Cm)
i
F
I
CIDEIF
C
seventh
(C7)
AU
C
minor
seventh
(Cm7)
IDEIF'GABICIDEF
Seventh
chords
(7)
To
play
a
seventh
chord,
keep
the
major
chord
key
depressed
and
press
any
other
two
accompaniment
key-
board
keys
located
to
the
right
of
the
major
chord
key.
Minor
seventh
chords
(m7)
To
play
a
minor
seventh
chord,
keep
the
major
chord
key
depressed
and
press
any
other
three
accompani-
ment
keyboard
keys
located
to
the
right
of
the
major
chord
key.
NOTES
It
makes
no
difference
whether
you
press
black
or
white
keys
to
the
right
of
a
major
chord
key
when
playing
minor
and
seventh
chords.
E-14
FINGERED
FINGERED
provides
you
with
a
total
of
15
different
chord
types.
The
following
describes
the
FINGERED
“Accompaniment
key-
board”
and
“Melody
keyboard”,
and
tells
you
how
to
play
a
C-
root
chord
using
FINGERED.
FINGERED
Accompaniment
Keyboard
and
Melody
Keyboard
Accompaniment
=>
keyboard
————
Melody
keyboard
——
HNOTE!
The
accompaniment
keyboard
can
be
used
for
playing
chords
only.
No
sound
will
be
produced
if
you
try
playing
single
melody
notes
on
the
accompaniment
keyboard.
C
Cm
Cdim
Caug
“
Csus4
C7
*?
Cm7
*
Cmaj7
*?
Cm7*5
MAL
Wt
C75"
C7sus4
Cadd9Q
*?
Cmaddg
*2
CmM7
“2
Cdim7
“'
A)
LENG)
AY
See
the
FINGERED
Chord
Chart
on
page
A-1
for
details
on
play-
ing
chords
with
other
roots.
*1:
Inverted
fingerings
cannot
be
used.
The
lowest
note
is
the
root.
*2:
The
same
chord
can
be
played
without
pressing
the
5th
G.
ENOTESE
¢
Except
for
the
chords
specified
in
note’'
above,
inverted
fingerings
(i.e.
playing
E-G-C
or
G-C-E
instead
of
C-E-G)
will
produce
the
same
chords
as
the
standard
fingering.
*
Except
for
the
exception
specified
in
note’?
above,
all
of
the
keys
that
make
up
a
chord
must
be
pressed.
Failure
to
press
even
a
single
key
will
not
play
the
desired
FINGERED
chord.
i
Display
1
SYNCHRO/FILL-IN
START/STOP
POWER/MODE
Display
3
Using
a
Fill-in
Pattern
Fill-in
patterns
let
you
momentarily
change
the
rhythm
pattern
to
add
some
interesting
variation
to
your
performances.
The
following
procedure
describes
how
to
use
the
Fill-in
feature.
To
insert
a
fill-in
1.
Press
the
START/STOP
button
to
start
rhythm
play.
2.
Press
the
SYNCHRO/FILL-IN
button
to
insert
a
fill
in
pattern
for
the
rhythm
you
are
using.
Synchro
Starting
Accompani-
ment
with
Rhythm
Play
You
can
set
up
the
keyboard
to
start
rhythm
play
at
the
same
time
you
play
the
accompaniment
on
the
keyboard.
The
following
procedure
describes
how
to
use
synchro
start.
Be-
fore
starting,
you
should
first
select
the
rhythm
you
want
to
use,
set
the
tempo,
and
use
the
POWER/MODE
switch
to
select
the
chord
play
method
you
want
to
use
(CASIO
CHORD,
FINGERED).
To
use
synchro
start
].
Press
the
SYNCHRO/FILL-IN
button
to
put
the
key-
board
into
synchro
start
standby.
Display
3
STATUS
TEMPO
MAIN
VOLUME
2.
Play
a
chord
on
the
accompaniment
keyboard
and
the
rhythm
pattern
starts
to
play
automat-
ically.
HNOTESI
¢
If
the
POWER/MODE
switch
is
set
to
NORMAL,
only
the
rhythm
plays
(without
a
chord)
when
you
play
on
the
accompaniment
key-
board.
*
To
cancel
synchro
start
standby,
press
the
SYNCHRO/FILL-IN
but-
ton
one
more
time.
ACCOMP
VOLUME
Number
buttons
Adjusting
the
Accompaniment
Volume
"You
can
adjust
the
volume
of
the
accompaniment
parts
as
a
value
in
the
range
of
0
(minimum)
to
9.
1.
Press
the
ACCOMP
VOLUME
button.
Current
accompaniment
volume
setting
Display
1
2.
Use
the
number
buttons
or
the
(+)/(-)
buttons
to
change
the
current
volume
setting
value.
Example:
5
Display
1
TONE
RHYTHM
SONG
BANK
ENOTES!
¢
The
current
accompaniment
volume
value
that
appears
in
Step
1
automatically
clears
from
the
display
if
you
do
not
input
anything
within
about
five
seconds.
¢
Pressing
[+}
and
[-]
buttons
at
the
same
time
automatically
sets
an
accompaniment
volume
of
7.
*
You
can
make
independent
accompaniment
volume
settings
for
auto-
accompaniment
and
Song
Bank
tune
accompaniment
parts.
E-15
—

Display
2
Display
1
Display
6
OF
TTale
Mtal-meye)
are
m=r-1al.¢
MAIN
VOLUME
POWER/MODE
Display
3
Display4 Display5
Display
7
A
selection
of
100
Song
Bank
tunes
come
built-in
for
your
listen-
ing
enjoyment
of
play
along
fun.
You
can
turn
off
the
left-hand
or
right-hand
part
to
practice
with
the
remaining
part,
and
the
dis-
play
even
shows
you
what
keys
to
press
and
which
fingers
you
should
use.
To
play
back
a
Song
Bank
tune
].
Set
the
POWER/MODE
switch
to
NORMAL.
FIN-
GERED,
or
CASIO
CHORD.
2.
Adjust
the
main
volume
and
accomp
volume.
3.
Press
the
SONG
BANK
button
to
enter
the
Song
Bank
Mode.
Display
1,3
tits
4.
Use
the
Song
Bank
list
to
find
the
tune
you
want
to
play
back,
and
then
use
the
number
buttons
to
input
the
tune’s
two-digit
number.
Example:
To
select
“43
ALOHA
OE”,
input
4
and
then
3.
Display
1
Number
buttons
[+}]-]
PLAY/PAUSE
HNOTES!
*00
HOW
DEEP
IS
YOUR
LOVE?’
is
the
initial
default
Song
Bank
tune
setting
whenever
you
turn
on
keyboard
power.
You
can
also
increment
the
displayed
tune
number
by
pressing
[+]
and
decrement
is
by
pressing
[-].
Before
advancing
to
the
next
step,
which
actually
starts
playback,
you
can
adjust
the
tempo
(page
E-13),
select
a
tone
(page
E-11)
for
the
melody
part,
or
turn
off
the
left-hand
or
right-hand
part
(page
E-
18).
5.
Press
the
PLAY/PAUSE
button
to
start
play
of
the
tune.
Display
1,
2,
3,
4,
5,
6,7
~YWHioha
Ge
TONE
RHYTHM
SONG
BANK
STATUS
TEMPO
MAIN
VOLUME
6.
Press
the
STOP
button
to
stop
playback
of
the
song
Bank
tune.
Display
1,
2,
3
-Y4FH,
TONE
RHYTHM
SONG
BANK
STATUS
TEMPO
MAIN
VOLUME
To
pause
Song
Bank
tune
play
I.
While
a
Song
Bank
tune
is
playing,
press
the
PLAY/PAUSE
button
to
pause
it.
Display
1,
2,3,
5
arr
UCT
ik,
STATUS
TEMPO
MAIN
VOLUME
°
The
indicator
“
Il”
appears
on
the
display
while
a
tune
play
is
paused.
2.
To
resume
play,
press
PLAY/PAUSE
again.
To
fast
reverse
during
playback
I.
While
playback
is
in
progress,
hold
down
the
REW
button.
*
There
is
no
playback
while
the
fast
reverse
operation
is
being
performed.
Display
1,
2,3
TONE
uae
oon
veel
YI
Hoke
De
SONG
BANK]
es
ais)
eau
ape
ues)
nae
STATUS]
4¢
>
ete
TEMPO
MAIN
VOLUME
°
The
indicator
“<q”
appears
on
the
display
while
a
fast
reverse
operation
is
in
progress.
*
Beeps
sound
during
fast
reverse
to
give
you
an
idea
of
where
you
are
located
in
the
tune.
1
beep:
indicates
a
change
to
anther
measure.
2
beeps:
indicates
the
beginning
of
the
tune.
2.
To
resume
normal
playback,
release
the
REW
button.
To
fast
forward
during
playback
I.
While
playback
is
in
progress,
hold
down
the
FF
button.
¢
There
is
no
playback
while
the
fast
forward
operation
is
being
performed.
Display
1,
2,3
TONE
ona
RHYTHM
alae
|
|
rae
SONG
BANK
esa
one oes
pee
STATUS
TEMPO
MAIN
VOLUME
¢
The
indicator
“
®}”
appears
on
the
display
while
a
fast
forward
operation
is
in
progress.
¢
Beeps
sound
during
fast
forward
to
give
you
an
idea
of
where
you
are
located
in
the
tune.
1
beep:
indicates
a
change
to
anther
measure.
3
beeps:
indicates
the
beginning
of
the
tune.
2.
To
resume
normal
playback,
release
the
FF
but-
ton.
FNOTESI
¢
Each
time
you
select
a
new
Song
Bank
tune,
the
tone,
tempo,
and
rhythm
that
is
programmed
for
the
tune
are
automatically
selected.
You
can
change
a
tune’s
tone
and
tempo
during
playback,
but
you
cannot
change
the
rhythm.
*
You
can
also
adjust
the
accompaniment
volume
(page
E-15)
for
tunes
00
through
89.
Song
Bank
Mode
Display
In
the
Song
Bank
Mode,
the
display
shows
a
variety
of
informa-
tion
about
the
tune
being
played.
*
Playback
Display
Fingers
used
Tune
name
Display
1,
2, 3, 4,
5,
6,7
TONE
RHYTHM
SONG
BANK
STATUS
TEMPO
MAIN
VOLUME
A
dod
Ah
Keyboard
keys
used
Chordname
_
Staff
display
Tune
tempo
HNOTES
Chord
names
are
not
displayed
for
Songs
90
through
99.
Adjusting
the
Tempo
of
a
Song
Bank
Tune
To
change
the
tempo
of
a
Song
Bank
tune
The
tempo
can
be
set
within
a
range
of
20
to
255
beats
per
minute.
The
tempo
setting
can
be
adjusted
while
the
tune
is
stopped,
play-
ing
back,
or
paused.
I.
Use
the
TEMPO
buttons
(4/¥)
to
adjust
the
tem-
po.
A:
each
press
increases
the
value
WV
:
each
press
decreases
the
value
BENOTEF
Pressing
both
the
[A]
and
[W)
TEMPO
buttons
at
the
same
time
re-
turns
the
tempo
setting
to
the
preset
value
for
the
currently
selected
tune.
E-17

Display
1
POWER/MODE
To
change
the
tone
of
a
Song
Bank
tune’s
melody
You
can
select
any
one
of
the
keyboard’s
100
tones
to
be
used
to
play
the
melody
part
of
a
Song
Bank
tune.
The
tone
setting
can
be
changed
while
the
tune
is
stopped
or
playing
back.
I.
While
a
song
is
playing
back,
press
the
TONE
button.
Display
1
el
OT
Tart.
ltr
2.
Find
the
tone
you
want
in
the
Tone
List,
and
then
use
the
number
buttons
or
the
(+)
and
(-)
but-
tons
to
specify
the
tone
number.
Example:
To
select
“30
VIOLIN”,
input
3
and
then
0.
Display
1
TONE
[|
op
'
WH
i.
Ju
Li
|
HNOTESS
*
Pressing
both
the
[+]
and
[-]
buttons
at
the
same
time
selects
“00
PIANO
1”.
*
With
two-hand
tunes
(90
to
99),
you
can
select
tones
for
both
the
left
hand
part
and
right
hand
part.
*
To
return
a
Song
Bank
tune
to
its
origina!
settings,
simply
select
that
tune
again.
Playing
Along
with
a
Song
Bank
Tune
You
can
turn
off
the
left-hand
part
or
right-hand
part
of
a
Song
Bank
tune
and
play
along
with
the
remaining
part
on
the
key-
board.
Of
the
100
Song
Bank
tunes,
numbers
00
through
89
fea-
ture
auto-accompaniment
(auto-accompaniment
tunes),
while
90
through
99
are
played
using
both
hands
(two-hand
tunes).
E-18
ED
RE
ee
ee
ee
Syste
Sees
ila
aba
RIGHT
ON/OFF
PLAY/PAUSE
seca
neh
ean
bass,
chords)
Auto-accompaniment
Tunes
(Tune
Numbers
00
to
89)
¢
Turn
off
the
right-hand
part
and
you
can
play
the
melody
on
the
keyboard.
¢
Turn
off
the
left-hand
part
and
you
can
play
chords
to
accompa-
ny
the
melody.
Left-hand
notes
Two-hand
Tunes
(Tune
Numbers
90
to
99)
¢
Turn
off
a
part
and
you
can
play
it
on
the
keyboard.
To
play
along
with
a
Song
Bank
tune
Before
pressing
the
PLAY/PAUSE
button
to
start
Song
Bank
tune
play
(page
E-16),
press
LEFT
ON/OFF
to
turn
off
the
left-hand
part,
or
RIGHT
ON/OFF
to
turn
off
the
right-hand.
¢
A
part
is
turned
on
when
its
indicator
(L
or
R)
is
shown
on
the
display
inside
the
graphic
hands.
A
part
is
turned
off
when
no
indicator
is
shown.
INOTES!I
*
During
playback
of
a
two-hand
tune
(90
to
99),
the
entire
keyboard
functions
as
a
melody
keyboard,
regardless
of
the
POWER/MODE
switch
setting.
*
With
two-hand
tunes
(90
to
99),
you
cannot
turn
off
both
the
left-
hand
and
right-hand
parts
at
the
same
time.
Turning
off
a
part
caus-
es
the
other
part
to
turn
on
automatically.
*
The
selected
Song
Bank
tune
continues
to
repeat
until
you
stop
playback
by
pressing
the
STOP
button.
*
The
accompaniment
volume
setting
(page
E-15)
affects
only
auto-
accompaniment
tunes
(00
to
89).
te
Applause
Sound
Whenever
you
turn
off
the
left
hand
or
right
hand
part
of
a
Song
Bank
tune
and
play
it
back,
an
applause
sound
is
produced
when
the
tune
reaches
the
end.
To
turn
off
the
applause
sound,
press
the
STOP
button
and
the
LEFT
ON/OFF
or
RIGHT
ON/OFF
but-
ton
at
the
same
time.
Display
1
tie
|
lie
°
Pressing
the
STOP
button
and
the
LEFT
ON/OFF
or
RIGHT
ON/OFF
button
at
the
same
time
again
turns
the
applause
sound
back
on.
To
consecutively
play
back
all
Song
Bank
tones
l.
Use
the
TONE
or
RHYTHM
button
to
change
to
any
mode
other
than
the
Song
Bank
Mode.
*
Make
sure
a
dot
is
not
on
the
display
next
to
the
SONG
BANK
indicator.
2.
Press
the
PLAY/PAUSE
button
to
start
playback
of
the
Song
Bank
tunes
starting
from
tune
00.
5.
To
stop
Song
Bank
tune
playback,
press
the
STOP
button.
¢
Pausing
playback
automatically
cancels
consecutive
play-
back
of
all
Song
Bank
tunes.
Re-starting
playback
causes
repeat
playback
of
the
current
tune
only.
E-19

Display
1
Display
6
Display
3
Disptay
4
Display5
Display
7
The
Chord
Book
feature
of
this
keyboard
makes
it
possible
for
you
to
look
up
information
about
chords
quickly
and
easily.
Sim-
ply
input
the
name
of
the
chord
and
the
the
keyboard
keys
you
should
press,
the
fingers
you
should
use,
and
the
notes
that
make
up
the
chord
appear
on
the
display
along
with
the
chord
name.
What
is
a
chord?
A
chord
is
made
up
of
a
root
note,
upon
which
is
stacked
a
num-
ber
of
other
notes.
A
variety
of
different
chords
can
be
created
by
changing
the
notes
stacked
onto
a
root.
<Example:
C
chord>
}—
Stacked
notes
Root
Chord
Names
Chords
are
named
using
upper-case
letters
from
A
through
G,
which
indicate
the
root
note
of
the
chord.
If
the
root
note
is
a
sharp
or
flat,
the
chord
itself
is
sharp
or
flat.
A
chord
name
may
also
be
followed
by
a
degree
number
or
other
symbols
that
indicate
cer-
tain
characteristics
about
the
chord.
<Examples>
Sharp
|
Diminished
Ct
dim
Sus
fourth
Esus4
Root
E-20
Chord
name
OFTT
ale
Mi
tal-
OF
ale)
gem
afore)
¢
CHORD
BOOK
Chord
specification
buttons
<Note
Names>
SSS
2
Cc
DE
F
G
A
8
C=
White
keys
Ce
Ft
Ab
Bb
(De)
(Dt)
(G)
(GA
(AN
Black
keys
Sharps
and
flats
can
be
referred
to
using
either
of
the
names
shown
here.
The
names
in
the
upper
row
of
this
illustration
are
used
by
this
keyboard,
because
they
are
the
names
that
are
most
common-
ly
used
in
musical
notation.
Inverted
Forms
There
are
a
number
of
different
ways
to
play
the
same
chord.
A
form
that
is
different
from
the
basic
form
but
still
produces
the
same
chord
is
called
an
“inverted
form.”
<Example:
C
chord>
All
of
the
following
are
C
chords.
a
=
2
2
To
look
up
a
chord
using
the
Chord
Book
I.
Press
the
CHORD
BOOK
button.
Display
1,
3,5
TONE
RHYTHM
SONG
BANK
STATUS
TEMPO
MAIN
VOLUME
2
.
Press
the
CLEAR
button.
3.
if
the
chord
name
you
plan
to
input
is
a
non-
major
chord,
use
the
chord
specification
but-
tons
to
specify
the
chord
type.
*
Non-major
chords
include
minor,
seventh,
sustained,
etc.
chords.
¢
See
page
E-22
for
details
on
the
chord
specification
but-
tons.
*
Skip
step
3
if
you
want
to
input
a
major
chord
name.
<Example:
Fim7-5>
TONE
RHYTHM
SONG
BANK
STATUS
TEMPO
MAIN
VOLUME
ma
Be
4,
Press
the
accompaniment
keyboard
key
that
corresponds
to
the
root
note
of
the
chord.
¢
A
dash
appears
in
place
of
the
chord
name
if
the
chord
cannot
be
recognized
by
the
keyboard.
*
To
specify
F,,
for
example,
press
the
Ft
key.
¢
The
key
you
press
is
indicated
on
the
graphic
keyboard
and
the
corresponding
chord
sounds.
<Example:
Fi'm7-5>
ce
@ae
ce
CDEFGABCOEF
RHYTHM
SONG
BANK
STATUS
TEMPO
MAIN
VOLUME
5:
Check
to
make
sure
that
the
chord
name
on
the
display
is
the
one
you
want.
if
it
isn’t,
repeat
the
above
from
step
2.
6.
Ifthe
chord
Is
correct,
you
can
see
its
fingering
on
the
graphic
keyboard.
Try
playing
the
chord
‘
on
the
keyboard.
<Example>
E-21
-

Chord
Name
Modifier
Keys
hee
es
Modifier
Key
Cc
(C
major)
Cm
(C
minor)
Caug
(C
augmened)
°
m
7
Csus4
(C
sustained
fourth)
(C
diminished)
C7
(C
seventh)
CM7
(C
major
seventh)
Cm7
(C
minor
seventh)
(C
minor
Major
seventh)
(C
minor
seventh
flat
five)
E-22
Se_|
"Rar
—s
4
(C
seventh
sus
fourth)
(C
add
ninth)
NOTES!
*
Since
the
chord
fingerings
that
appear
on
the
display
are
selected
to
allow
chord
play
within
the
accompaniment
keyboard,
inverted
chord
forms
(page
E-20)
are
often
suggested.
Inverted
chord
forms
are
useful
to
help
you
learn
how
to
play
chord
variations
that
make
it
possible
to
move
from
one
chord
to
another
with
minimal
hand
movement.
These
forms
come
in
handy
when
using
FINGERED
Auto
Accompaniment
play.
While
a
chord
name
is
on
the
display,
you
can
press
keys
on
the
accompaniment
keyboard
to
find
out
the
fingerings
of
the
same
chord
with
a
different
root.
Chord
fingerings
that
appear
or
the
display
are
formed
using
only
the
keys
within
the
range
of
the
accompaniment
keyboard
(left
most
18
keys).
Chords
that
cannot
be
formed
using
the
keys
within
this
range
are
not
displayed.
(C
minor
add
ninth)
C7-5
(C
seventh
flat
five)
(C
diminished
seventh)
e
Keyboard
Settings
Display
1
Redcar
eau
Transposing
the
Keyboard
Transpose
lets
you
raise
and
lower
the
overall
key
of
the
keyboard
in
semitone
units.
If
you
want
to
play
an
accompaniment
for
a
vocalist
who
sings
in
a
key
that’s
different
from
the
keyboard,
for
example,
simply
use
transpose
to
change
the
key
of
the
keyboard.
To
transpose
the
keyboard
1.
Press
the
TRANSPOSE/TUNE
button
until
the
trans-
pose
screen
appears
on
the
display.
Display
1
TONE
RHYTHM
SONG
BANK
Lo
savus
TEMPO
MAIN
VOLUME
2.
Use
(+)
and
(-)
to
change
the
transpose
setting
of
the
keyboard.
Example:
To
transpose
the
keyboard
five
semitones
upwards.
Display
1
TONE
RHYTHM
S
lrarrcstt:
SONG
BANK
HNOTES#S
*
The
keyboard
can
be
transposed
within
a
range
of
-6
to
+5.
*
The
default
transpose
setting
is
“O”
when
keyboard
power
is
turned
on.
*
If
you
leave
the
transpose
screen
on
the
display
for
about
five
sec-
onds
without
doing
anything,
the
screen
is
automatically
cleared.
°
The
transpose
setting
also
affects
Auto
Accompaniment.
*
Playing
back
a
Song
Bank
tune
automatically
returns
the
transpose
setting
to
its
standard
default
of
“0”.
TRANSPOSE/TUNE
Tuning
the
Keyboard
The
tuning
feature
lets
you
fine
tune
the
keyboard
to
match
the
tuning
of
another
musical
instrument.
To
tune
the
keyboard
].
Press
the
TRANSPOSE/TUNE
button
twice
to
dis-
play
the
tuning
screen.
Display
1
TONE
RHYTHM
SONG
BANK
STATUS
TEMPO
MAIN
VOLUME
2.
Use
(+)
and
(-)
to
change
the
tuning
setting
of
the
keyboard.
Example:
To
lower
the
tuning
by
20.
eo
lune
¢
The
keyboard
can
be
tuned
within
a
range
of
-50
cents
to
+50
cents.
*100
cents
is
equivalent
to
one
semitone.
The
default
tuning
setting
is
“OO”
when
keyboard
power
is
turned
on.
if
you
leave
the
tuning
screen
on
the
display
for
about
five
seconds
without
doing
anything,
the
screen
is
automatically
cleared.
The
tuning
setting
also
affects
Auto
Accompaniment.
Playing
back
a
Song
Bank
tune
automatically
returns
the
tuning
setting
to
its
standard
default
of
“OO”.
:
Display
1
TONE
RHYTHM
SONG
BANK
;
|
E-23

A
ce}}]
6)
(=
aTore)ifaye
No
keyboard
Sound
Possible
Cause
1.
Power
supply
problem.
Page
E-10
1.
Correctly
attach
the
AC
adaptor,
make
sure
that
batteries
poles
(+/—)
are
fac-
ing
correctly,
and
check
to
make
sure
that
batteries
are
not
dead.
2.
Set
the
POWER/MODE
switch
to
the
NORMAL
position.
3.
Use
the
MAIN
VOLUME
button
to
in-
crease
volume.
4.
Normal
play
is
not
possible
on
the
ac-
companiment
keyboard
while
the
POW-
ER/MODE
switch
is
set
to
CASIO
CHORD
or
FINGERED.
Change
the
POWER/MODE
switch
setting
to
NOR-
MAL.
2.
Power
is
not
turned
on.
Page
E-11
3.
Volume
setting
is
too
low.
Page
E-11
Fy
4.
The
POWER/
MODE
switch
is
in
the
CA-
SIO
CHORD
or
FINGERED
position.
Page
E-13
Any
of
the
following
symptoms
while
using
battery
power.
¢
Dim
power
supply
indicator
*
Dim,
difficult
to
read
display
*Abnormally
low
speaker/head-
phone
volume
¢
Distortion
of
sound
output
¢
Occasional
interruption
of
sound
when
playing
at
high
volumes
¢
Sudden
power
failure
when
playing
at
high
volumes
¢
Dimming
of
the
display
playing
at
high
volume
¢
Abnormal
rhythm
pattern
and
Song
Bank
tune
play
Auto
Accompaniment
does
not
sound.
|
Accompaniment
volume
is
set
to
0.
Use
the
ACCOMP
VOLUME
button
to
in-
crease
the
volume.
Missing
Song
Bank
tune.
1.
Left-hand
or
right-hand
part
is
turned
|
1.
Check
the
display
to
see
if
the
indica-
off.
tor
for
one
of
the
parts
is
not
displayed.
If
so,
press
the
part’s
button
(LEFT
ON/OFF,
RIGHT
ON/OFF)
to
turn
it
on.
2.
Adjust
accompaniment
volume.
Low
battery
power
Replace
the
batteries
with
a
set
of
new
ones
or
use
the
AC
adaptor.
Page
E-10
Page
E-15
2.
Accompaniment
volume
is
set
to
0.
Page
E-15
E-24
Specifications
Keyboard
49
standard-size
keys,
4
octaves
Polyphony:
12
notes
maximum
(6
for
certain
tones)
Auto
Accompaniment
Rhythm
Patterns:
100
Tempo:
Variable
(236
steps,
J
=
20
to
255)
Chords:
2
fingering
methods
(CASIO
CHORD,
FINGERED)
Rhythm
Controller:
START/STOP,
SYNCHRO/FILL-IN
Accomp
Volume:
0
to
9
(10
steps)
Song
Bank
Tunes:
100
PLAY/PAUSE,
STOP,
REW,
FF,
LEFT
ON/OFF,
RIGHT
ON/OFF
Controllers:
Musical
Dictionary
Name
display:
TONE,
RHYTHM,
SONG
BANK
name/number
Tempo:
Tempo
value,
metronome,
synchro
standby,
beat
indicator
Chord:
Chord
name,
Chord
form
Fingering:
Fingering
indcators,
parts
Song
Bank
Status:
PLAY,
PAUSE,
REW,
FF,
playing
Staff:
Four
octaves
with
sharp
and
flat
indications
Keyboard:
Four
octaves
Other
Functions
Transpose:
12
steps
(-6
semitones
to
+5
semitones)
Variable
(A4
=
approximately
440Hz
+50
cents)
0
to
9
(10
steps)
Tuning:
Volume:
Terminals
Phones/Output
Terminal:
Stereo
standard
jack
Output
Impedance:
1000
Output
Voltage:
3.0V
(RMS)
MAX
9V
DC
Dual
power
supply
system
Power
Supply
Terminal:
Power
Supply
Batteries:
Six
AA-size
batteries
Battery
Life:
Approximately
2
hours
(SUM-3/R6P)/6
hours
(AM3/LR6)
AC
Adaptor:
AD-5
Auto
Power
Off:
Speaker
Output:
98.8
x
33.2
x
12.4
cm
(38
!/is
x
13
1/16
x
4
7/s
inch)
Weight:
Approximately
3.5kg
(7.7Ibs)
(without
batteries)
Turns
power
off
approximately
six
minutes
after
last
key
operation.
Enabled
under
battery
power
only,
can
be
disabled
manually.
E-25
-

PAN
eo}
ol-lalolb
dP.
el-larel(ex=
Fingered
Chord
Chart
Cuadros
de
acordes
Fingered
:
Left
hand
finger
numbers
This
table
shows
the
left-hand
fingerings
(including
inverted
forms)
for
a
number
of
often-used
chords.
These
fingering
indications
also
appear
on
the
keyboard’s
display.
Chords
marked
with
asterisk
(*)
cannot
be
played
in
the
Fingered
Mode
on
this
keyboard.
:
Numeros
de
los
dedos
de
la
mano
izquierda
Esta
tabla
muestra
las
digitaciones
(incluyendo
las
formas
invertidas)
para
varios
de
los
acordes
mas
a
menudo
usados.
Estas
indicaciones
de
digitacién
también
aparecen
sobre
la
presentacion
del
teclado.
En
este
teclado,
los
acordes
marcados
con
asterisco
(+)
no
pueden
ejecutarse
en
el
modo
de
digi-
tacion.
roa
Cc
m7-5
|
dim
igen
(5,
TT
w
|
Ga
a)
a
~~
wa
Lidhdd
Litdkdd
3.3,1
ULL
FOOT)
aT)
CALLS
Sawin
ToT
7)
w
~
(5,
3.
2,
TANT
:
Ly
CS
ua
»
=
~
ad
]
3
TAL
dd
—.
:
a]
;
Maki
Hb
da!
TTL
€
|fitemen
fewer
|iiton
Rin
|
ikon
itowen
teenie
|
fietmen
|
frttperen
freien
liviberer,
ig
a
once
aliveareniiier
ND
FSET
Ty
7
|_suss
[|
7sus4
|
5
Ea
LEAL
|
ERED
ee
EE
TNT
aT
Uk
1
a
o
re
|
i>
es
a...
Bo
b=
3)
a
i
Cc
al
:
EAU
AME
TCLC
LA
TUT
ieipreren)
PEED
CET
fide
be
LAU
bd
"hy
[4,3,
2,
1]
SQ
ua
o-
wa
cy:
a
iL__J
a
o
=
=
:
—
5.3.2,
1]
(4.3.2.1)
(oy
|
EEENT
heer
tito
li
TTYL
a
sad
—
=
{5.2.1
3.2.1
bh
LAAN
Gh
wa
ww
(4,3.
2,
1]
Lun
=
:
Eo
Ca
bod
n
2
=
Ta
ew
FF)
=F
=
|
gd
pt
a. en
3
a
’
n
a
a
wo
7
N
Ny
=
2
|
el
‘
mj
|
ee
|
|-—
—
}
Bun
Er
a]
=
a
wo
x
ww
i]
a
‘
a
‘
.
head
.
{
(5.
4,2,
4]
docddb
ddl
(5.
4,
2,
1}
(5.
4.2
dbs
UeLd
bddbe
dB
GAIL
og
TPIT
Se
oT
PTD
AD
ory
fico
"Wy
hdd
ad
ry
Pre
iden
dk
?
a
oT
ww
a
“-
j=
Be
a5
rr
a:
Pp
Pe
ham
td
a
wv
»
-
N
|
__
=
=
w
:
=
a,
rr
a=
=
_
Ho
_
ww
~
Percussion
Assignment
List
Lista
de
sonidos
de
percusion
¢
PERCUSSION
(tone
99)
assigns
39
percussion
sound
to
the
keyboard
as
illustrated
below.
The
sound
assigned
to
each
key
are
indicated
above
the
keyboard.
¢
PERCUSSION
(sonido
99)
asigna
39
sonidos
de
percusion
al
teclado
como
se
ilustra
debajo.
Los
sonidos
asignados
a
cada
tecla
se
indican
sobre
el
teclado.
BASS
DRUM
=?
OPEN
HI-HAT
COWBELL
«3
LOW
TIMBALE
€
SIDE
STICK
©
LOW-MID
TOM
“?
CRASH
CYMBAL
2
QQ
HIGH
AGOGO
€
ACOUSTIC
SNARE
(}
HIGH-MID
TOM
6$
CLAVES
QQ
LOW
AGOGO
773
HAND
CLAP
“7
CRASH
CYMBAL
1
ss
RIDE
CYMBAL
2
€.
CABASA
@
ELECTRIC
SNARE
&
HIGH
TOM
ft?
HIGH
BONGO
&
MARACAS
3
LOW
FLOOR
TOM
|
SS
RIDE
CYMBAL
1
tity
LOW
BONGO
(3—_
VOICE
BASS
DRUM
<>
CLOSED
HI-HAT
&
CHINESE
CYMBAL
§
MUTE
HIGH
CONGA
(3a
VOICE
SNARE
3
HIGH
FLOOR
TOM
“v?
RIDE
BELL
©
OPEN
HIGH
CONGA
<>
VOICE
CLOSED
HI-HAT
25
PEDAL
HI-HAT
©
TAMBOURINE
—
LOWCONGA
<~_
VOICE
OPEN
HI-HAT
3
LOW
TOM
2”
SPLASH
CYMBAL
«3
HIGH
TIMBALE
Table of contents
Other Casio Electronic Keyboard manuals

Casio
Casio OMNION User manual

Casio
Casio MA-100 User manual

Casio
Casio CTK-496 User manual

Casio
Casio PS-3000 User manual

Casio
Casio CTK-1100 User manual

Casio
Casio RZ-1 Troubleshooting guide

Casio
Casio CTK-6300in User manual

Casio
Casio CTK-2300 User manual

Casio
Casio CTK-500 User manual

Casio
Casio CPS-85 User manual

Casio
Casio CTK-620L User manual

Casio
Casio CTK-491 - Portable Keyboard User manual

Casio
Casio LK-50 Assembly instructions

Casio
Casio CZ-5000 CosmoSynthesizer User manual

Casio
Casio SK-8 User manual

Casio
Casio Privia PX-100 User manual

Casio
Casio CTK-451 User manual

Casio
Casio LK-50 Instruction and safety manual

Casio
Casio SK-8A Troubleshooting guide

Casio
Casio ToneBank CA-100 User manual