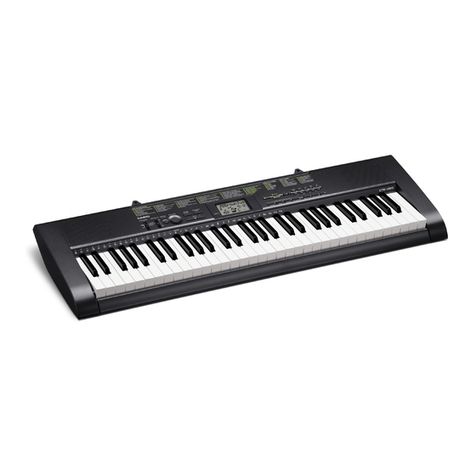
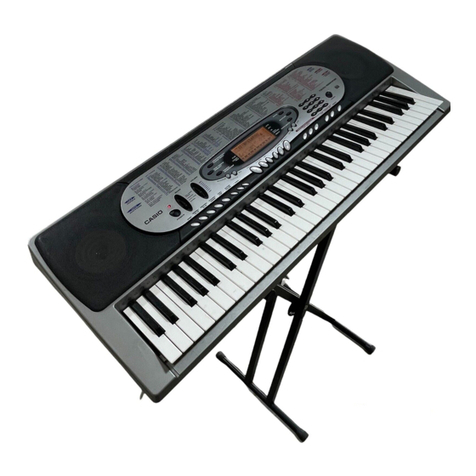
Casio CTK-496 User manual

ELECTRONIC KEYBOARD
CTK-496
JUN. 2004
CTK-496
Ver.1 : Feb. 2005

CONTENTS
Specifications ---------------------------------------------------------------------------------------------- 1
Block Diagram --------------------------------------------------------------------------------------------- 3
Circuit Description --------------------------------------------------------------------------------------- 4
Printed Circuit Board ------------------------------------------------------------------------------------ 5
Disassembly ------------------------------------------------------------------------------------------------ 6
Diagnostic Program-------------------------------------------------------------------------------------- 7
Schematic Diagrams----------------------------------------------------------------------------------- 12
Exploded View ------------------------------------------------------------------------------------------- 14
Parts List--------------------------------------------------------------------------------------------------- 15

— 1 —
SPECIFICATIONS
GENERAL
Keyboard: 61 standard-size keys, 5 octaves
Tones: 100
Polyphony: 12 notes maximum (6 for certain tones)
Auto Accompaniment
Rhythm Patterns: 100
Tempo: Variable (236 steps, = 20 to 255)
Chords: 2 fingering methods (CASIO CHORD, FINGERED)
Rhythm Controller: START/STOP, SYNCHRO/FILL-IN
Accomp Volume: 0 to 9 (10 steps)
Song Bank
Tunes: 100
Controllers: PLAY/PAUSE, STOP, REW, FF, LEFT ON/OFF (ACCOMP), RIGHT ON/OFF
(MELODY)
Display
Name display: TONE, RHYTHM, SONG BANK name/number, keyboard settings name/value
Tempo: Tempo value, metronome, synchro standby, beat indicator, volume setting
Chord: Chord name, Chord form
Fingering: Fingering indicators, parts
Song Bank Status: PLAY, PAUSE, REW, FF
Staff: 5 octaves with sharp and flat indications, pedal symbol, octave symbol
Keyboard: 5 octaves
MIDI: 5 multi-timbre receive
Other Functions
Transpose: 12 steps (–6 semitones to +5 semitones)
Tuning: Variable (A4 = approximately 440Hz ±50 cents)
Volume: 0 to 9 (10 steps)
Terminals
MIDI Terminals: IN, OUT
Sustain Terminal: Standard jack
Phones/Output Terminal: Stereo standard jack (Output is monaural.)
Output Impedance: 78Ω
Output Voltage: 4V (RMS) MAX
Power Supply Terminal: 9V DC
Microphone In: Standard jack (with microphone volume knob)
Input impedance: 40kΩ
Input sensitivity: 10mV
Power Supply: Dual power supply system
Batteries: 6 AA-size batteries
Battery Life: Approximately 4 hours continuous operation on alkaline batteries
Approximately 2 hours continuous operation on manganese batteries
AC Adaptor: AD-5
Auto Power Off: Turns power off approximately 6 minutes after last key operation. Enabled under battery
power only, can be disabled manually.
Speaker Output: 2.0W + 2.0W
Power Consumption: 9V 7.7W
Dimensions: 95.6 ×35.4 ×13.2 cm (37 11/16 ×13 15/16 ×3 3/16 inch)
Weight: Approximately 3.8kg (8.4lbs) (without batteries)
— 2 —
ELECTRICAL
Current drain with 9 V DC:
No sound output 86 mA ±20 %
Maximum volume 650 mA ±20 %
with 13 keys C1 to C2 pressed in 60 Synth-Lead 1
Volume: Maximum, Velocity: Maximum
Speaker output level (Vrms with 4 Ωload each channel):
with key C1 pressed in 60 Synth-Lead 1 1080 mV ±20 %
Phone output level (Vrms with 32 Ωload each channel):
with key F5 pressed in 60 Synth-Lead 1 295 mV ±20 %
Output level (Vrms with 47 KΩload each channel):
with key F2 pressed in 60 Synth-Lead 1 1250 mV ±20 %

— 3 —
BLOCK DIAGRAM
LCD Driver
LSI201
ST7066U-OAQ
DB4 ~ DB7
SEG1 ~ SEG40
COM1 ~ COM7
COM9 ~ COM16
E
P/W
RS
KI1 ~ KI7
KO1 ~ KO7
KOD8 ~ KOD12
KID0 ~ KID6
MPU
LSI301
ML6756B24
OP AMP
IC205
NE5532P
DAO
D/A Converter
IC402
LA4227
Keyboard
LCD
MIC
MIC
VR
Speakers
(L) (R)
MIDI
IN
OUT
Sustain Jack
Buttons
Power Switch
OP AMP
IC204NE5532P

— 4 —
CIRCUIT DESCRIPTION
KEY MATRIX
C2 C3 C4 C5 C6 C7
BUTTON MATRIX
KID5
VOLUME-
DOWN
CHORD
BOOK
RHYTHM
POWER / MODE
(NORMAL)
REW
KID6
VOLUME-
UP
ACCOMP.
VOLUME
TONE
POWER / MODE
(OFF)
–
KID3
TEMPO
DOWN
START /
STOP
TRANSPOSE/
TUNE
POWER / MODE
(FINGERD)
STOP
KID4
TEMPO UP
SYNCRO /
FILL-IN
SONG
BANK
POWER / MODE
(CASIO CHORD)
LEFT
KID1
+
2
5
8
RIGHT
KID2
0
1
4
7
PLAY/PAUSE
KOD8
KOD9
KOD10
KOD11
KOD12
KID0
-
3
6
9
FF
KI0 KI1 KI2 KI3 KI4 PI4 PI5 PI6 PI7
KO0 C2 G2# E3 C4 G4# ––––
KO1 C2# A2 F3 C4# A4 ––––
KO2 D2 A2# F3# D4 A4# ––––
KO3 D2# B2 G3 D4# B4 ––––
KO4 E2 C3 G3# E4 –––––
KO5 F2 C3# A3 F4 –––––
KO6 F2# D3 A3# F4# –––––
KO7 G2 D3# B3 G4 –––––
PO0 ––––––E5 C6 G6#
PO1 ––––––F5 C6# A6
PO2 ––––––F5# D6 A6#
PO3 ––––––G5 D6# B6
PO4 –––––C5 G5# E6 C7
PO5 –––––C5# A5 F6 –
PO6 –––––D5 A5# F6# –
PO7 –––––D5# B5 G6 –
NOMENCLATURE OF KEYS

— 5 —
PRINTED CIRCUIT BOARDS
MAIN PCB M627-MAIN1
Keyboard PCBs M627-KEY1/KEY2
MIC JACK PCB M627-MAIN2 MIC VOLUME PCB M627-MAIN3 PCB

— 6 —
DISASSEMBLY
1. Remove the battery cover and the batteries.
2. Remove the volume knob.
3. Remove 12 screws on the bottom of the product, and three lower plates.
Note: Fix the screws in the right order when assembling each lower plate.
4. Remove 35 screws on the bottom of the product.
Note: Fix the screws in the right order when assembling.
Fix a screw here first.
LOWER PLATE ×3
5. Remove the upper case.

— 7 —
Note: Pay attention to the position of the LED(D225) when assembling the upper case.
Note: Be careful of the height of the LED (D225) when replacing it.
17.5 ±0.5 mm SOLDER SIDE
COMPONENT SIDE
6. Remove four solders and two speakers.
7. Remove two screws and unsolder one connector (CN31), and then remove the M627-MAA2 and M627-
MAA3 PCBs.
White
Orange
Brown
Connector (CN31)
M627-MAA2 PCB
M627-MAA3 PCB
Blue

— 8 —
8. Unsolder two lead wires for the power source.
Unsolder one connector (CN1) and then remove the M627-MAA1 PCB.
Connector (CN1)
M627-MAA1 PCB
9. Remove 21 screws and the keys.
10. Remove five rubber keys on the keyboard.
Note: The length of this one rubber key is different.
Note: Push the rubber keys all the way in by tweezers when
assembling.
Make sure that they are tightly fixed.
Power Cord (Black)
Power Cord (Red)

— 9 —
11. Unlock 17 hooks and remove the M627-KYA1 and M627-KY2 PCBs.
Note: Make sure to lock all the hooks when assembling.
M627-KYA1 PCB M627-KYA2 PCB

— 10 —
■Initial Setting
1. Connect an AC adaptor.
2. Connect a Sustain pedal.
NOTE: If there is no pedal or MIDI cable, pedal or MIDI check can be skipped.
■How to start diagnostic program
1. Press the “POWER” button while pressing the “0” and “START/STOP” buttons.
DIAGNOSTIC PROGRAM
TEST
SONG BANK
Message on LCD
AD-5
SP-2
3OK sound must be audible with the display as Message on LCD
3. ROM check
1Press “2”button.
OK sound must ne audible.
4. ROM Version check
1Press “1”button.
Pip sound must be audible.
5. D/A check
1Press “4”button.
Minimum sine wave sound must be audible at center position.
2Press “5”button.
Middle sine wave sound must be audible at center position.
3Press “6”button.
Maximum sine wave sound must be audible at center position.
OKSWIT
ROM TEST
↓
ROM 0000
↓
ROM OK
627Vr100
MIN
MID
MAX
■Diagnostic program
1. MODE Switch check
1Set to “CONCERT CHORD”position.
2Set to “FINGERED”position.
3Set to “NORMAL”position.
2. SWITCH check
1Press “0”button.
2Press the buttons in the following order.
TEST
RHYTH
TEST
TONE
TEST
SONG BANK
SWITCH
1
2
3 4
8
9
5 6 7
302928262725
13
10
11
12
16 19
22
14 17
20 23
15 18
21 24

—11 —
Message on LCD
6. MIDI check
1Press “9”button.
OK sound must ne audible.
7. PEDAL check
1Press “RHYTHM”button.
2Press “Sus PEDAL”button.
8. LCD check
1Press “TONE”button.
Pip sound must be audible.
All characters turn on.
2Press “TONE”button.
Pip sound must be audible.
All characters turn off.
9. AC Adaptor check
1Press “SONG BANK”button.
OK sound must be audible.
10. APO check
1Press “STOP”button.
* Go out from TEST mode (Power off).
* The LCD turns off.
DIAGNOSTIC PROGRAM IS FINISHED.
MIDI OK
P=AC ADP
PED OFF
PED ON

— 12 —
SCHEMATIC DIAGRAMS
MAIN PCB M420-MAIN1/MIC JACK PCB M420-MAIN2/MIC VOLUME PCB M420-MAIN3

— 13 —
Keyboard PCBs M627-KEY1/KEY2

— 14 —
EXPLODED VIEW
9
1722
18
10
19
2
19 8
5
6
3
4
12
13
23 14
11
1
16
15
R-1
R-2
R-5
R-5
R-4
R-4
R-3
21
7
R-5
27
25 24
26
20

—15 —
Notes: This parts list does not include the cosmetic parts, which
parts are marked with item No. "R-X" in the exploded
view.
Contact our spare parts department if you need these
parts for refurbish.
1. Prices and specifications are subject to change with-
out prior notice.
2. As for spare parts order and supply, refer to the
"GUIDEBOOK for Spare parts Supply", published
seperately.
3. The numbers in item column correspond to the same
numbers in drawing.
PARTS LIST
CTK-496

PARTS PRICE LIST
CTK-496
NItem Parts code Parts name Specification QPrice
Code RRemarks
Main PCB
N11016 3666 PCB ASSY/MAA TK-RJM503927*001 1CV A
ND225 1010 7268 LED 1154HD-B5/7-90 1AA C
J204 1008 1222 CONNECTOR HDC-052S-02 1AF C
J203,205 6932 5081 CONNECTOR JY-6314-01-030 2AB C
J201 6932 5082 CONNECTOR JY-6316-01-070 1AD C
L201 1005 7360 COIL R2318-RB53-856396 1BB X
L202 1005 6228 COIL R2318-RB53-856397 1AB X
IC203 6932 3623 PHOTO COUPLER PC900V0NSZX 1AF X
VR201 2775 0994 VARIABLE R EVN-D8AA03B53 1AA C
Q302 1007 9925 TRANSISTOR KTA1267GR-AT 1AA C
Q202,205 1007 9927 TRANSISTOR KTC3199GR-AT 2AA C
Q304 1013 2122 TRANSISTOR KTD863GR-AT 1AA C
Keyboard PCB
N21016 3667 PCB ASSY/KYA TK-RJM503929*001 1BX C
ND701-761 1010 8141 DIODE 1SS133TP 61 AA X
Keyboard unit
36922 2720 KET SET/WHITE M312118*1 4AP C
46922 2730 KEY SET/WHITE M312118*2 1AR C
56922 2740 KEY SET/BLACK 10P M111726-1 2AQ C
66922 2750 KEY SET/BLACK 5P M111726-2 1AH C
N71016 3902 RUBBER/KEY RJM503854-001V01 4AD B
N81016 3903 RUBBER/KEY RJM503855-001V01 1AF B
Panel unit
N91016 3946 PLATE/DISPLAY RJM503799-001V01 1AE C
N10 1016 3934 RUBBER/KEY/A RJM503792-001V01 1AB C
N11 1016 3931 RUBBER/KEY/B RJM503793-001V01 1AA C
N12 1016 3932 RUBBER/KEY/C RJM503794-001V01 1AB C
N13 1016 3942 RUBBER/KEY/D RJM503795-001V01 1AA C
N14 1016 3943 RUBBER/KEY/E RJM503796-001V01 1AB C
N15 1016 3944 RUBBER/KEY/F RJM503797-001V01 1AC C
N16 1016 3945 RUBBER/KEY/G RJM503798-001V01 1AE C
N17 1016 1407 KNOB/SLIDE RJM503803-001V01 1AA C
18 6927 0510 CONTACT/SLIDE CSB-08D 1AD B
19 3831 1043 SPEAKER S10JA13B 2BE C
N20 1016 3669 COVER ASSY/BATTERY TK-M340884*014 1AU B
21 1007 8118 CONNECTOR M440863-003V01 2AB C
N22 1016 1408 KNOB/ROTARY RJM503816-001V01 1AA C
N23 1016 9838 LCD TR3573N 1AU C
24 6927 1080 TERMINAL/BATTERY (+) M440112-1 1AB X
25 1000 8078 TERMINAL/BATTERY (-) M440002A-1 1AA X
26 6927 1060 TERMINAL/BATTERY M440676-1 2AA X
27 6927 1070 TERMINAL/BATTERY M440677-1 3AA X
Refurbish
NR-1 1016 3933 CASE/UPPER RJM503790-001V01 1BR C
NR-2 1016 3668 CASE ASSY/MIDDLE TK-RJM503916*001 1CN C Except US
NR-2 1016 4732 CASE ASSY/MIDDLE TK-RJM503916*002 1CN C For US
NR-3 1016 3935 PLATE/LOWER/A RJM503801-001V01 1AE C
NR-4 1016 3936 PLATE/LOWER/B RJM503802-001V01 2AB C
R-5 6922 6920 RUBBER/FOOT M41361-6 5AA C
Accessories
-6920 8690 STAND/MUSIC M311760-1 1AL C
-1008 3548 BATTERY R6UW/2STA 3AC COnly DI
Notes:
N
- New parts
Q
-Quantity used per unit
- 16 -

CASIO TECHNO CO.,LTD.
Overseas Service Division
6-2, Hon-machi 1-Chome
Shibuya-ku, Tokyo 151-8543, Japan
Ver.1 : Feb. 2005
Correction of the EXPLODED VIEW (P14)
Other manuals for CTK-496
1
Table of contents
Other Casio Electronic Keyboard manuals

Casio
Casio HZ-600 User manual

Casio
Casio CTK-485 User manual

Casio
Casio CTK-485 User manual

Casio
Casio LK-50 Parts list manual

Casio
Casio CT-647 User manual

Casio
Casio Celviano AP-21 User manual

Casio
Casio CTK-711EX User manual

Casio
Casio CTK-573 User manual

Casio
Casio PS-20 User manual

Casio
Casio Casiotone MT-520 User manual

Casio
Casio CT-X5000 User manual

Casio
Casio WK-7500 Technical document

Casio
Casio CTK-520L User manual

Casio
Casio Privia PX-320 User manual

Casio
Casio MA-170 User manual

Casio
Casio CDP-200R Troubleshooting guide

Casio
Casio CTK-330 User manual

Casio
Casio SA-46 User manual

Casio
Casio LK-35 User manual

Casio
Casio LK-94TV User manual