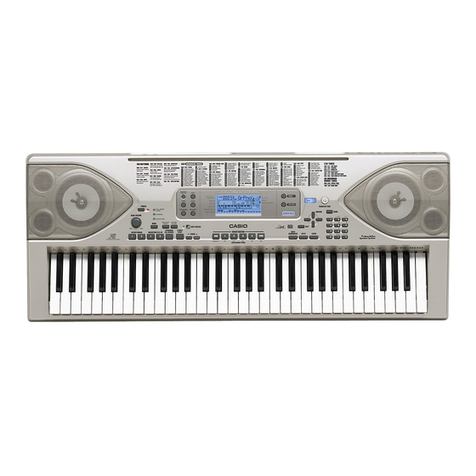
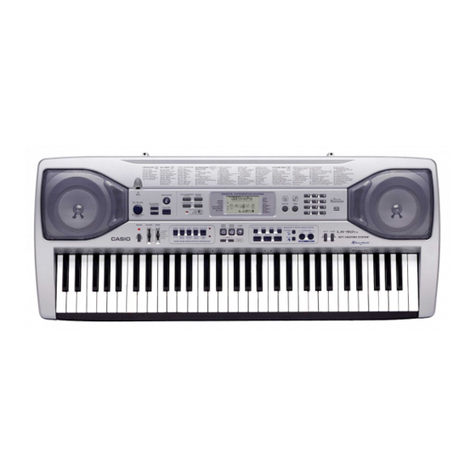
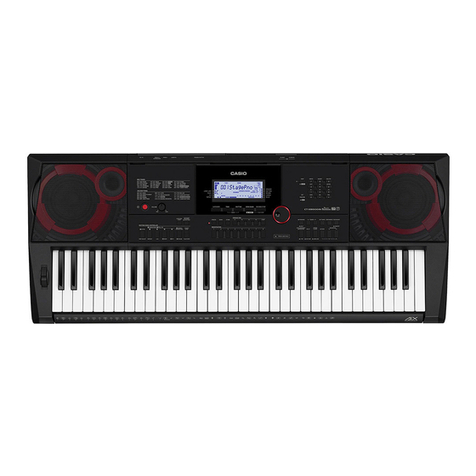
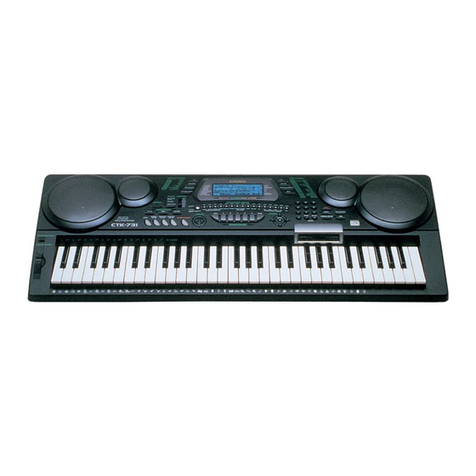
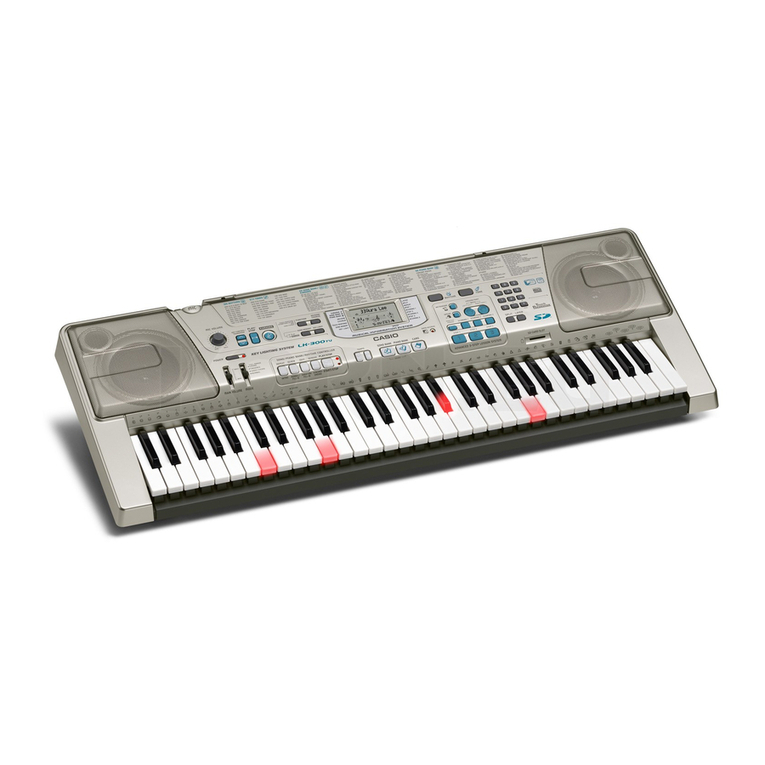
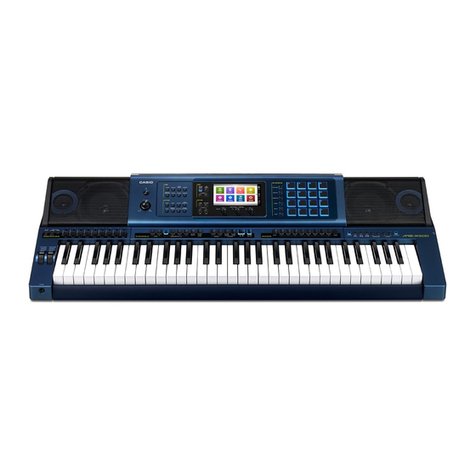
Casio CTK-520L User manual

CTK-
ELECTRONIC MUSICAL INSTRUMENT
INSTRUMENTO MUSICAL ELECTRONICO
OPERATION MANUAL
MANUAL DE OPERACI6N
P
®@
CTK520LES-1 CASIO,

Welcome...
To the happy family of satisfied CASIO electronic musical instrument owners! To get
the most out of the many features and functions of the CTK-520L, be sure to carefully
read this manual and keep it on hand for future reference.
Important!
Promptly replace the batteries or use the AC adaptor when the following symptoms
Occur.
• Dim power supply indicator
• Abnormally low speaker/headphone volume
•Distortion of sound output
• A totally different tone may sound
• Abnormal rhythm pattern and demo tune play
•Continued sound output even after you release a button
• Occasional interruption of sound when playing at high volumes
•Sudden power failure when playing at high volumes
Please keep all information for future reference.
GUIDELINES LAID DOWN BY FCC RULES FOR USE OF THE UNIT IN
THE U.S.A (not applicable to other areas).
NOTICE
This equipment has been tested and found to comply with the limits for a
Class B digital device, pursuant to Part 15 of the FCC Rules. These
limits are designed to provide reasonable protection against harmful
interference in a residential installation. This equipment generates, uses
and can radiate radio frequency energy and, if not installed and used in
accordance with the instructions, may cause harmful interference to
radio communications. However, there is no guarantee that interference
will not occur in a particular installation. If this equipment does cause
harmful interference to radio or television reception, which can be deter-
mined by turning the equipment off and on, the user is encouraged to try
to correct the interference by one or more of the following measures:
• Reorient or relocate the receiving antenna.
• Increase the separation between the equipment and receiver.
• Connect the equipment into an outlet on a circuit different from
that to which the receiver is connected.
•Consult the dealer or an experienced radio/TV technician for help.
FCC WARNING
Changes or modifications not expressly approved by the party responsi-
ble for compliance could void the user's authority to operate the equip-
ment.
E-2
Main Features
D
Q
C3
O
O
I00 amazingly realistic tones
Enhanced auto-accompaniment function for greater versatility
50 built in auto-accompaniment patterns.
40 Built-in Song Bank tunes
A total of 40 built-in Song Bank tunes come built in for playback enjoyment or
play-along practice.
A three-step lesson functions lets you develop your musical skills
by following the keys as they light (Three Step Lesson System).
First you become familiar with the timing of the notes by watching the keys light
as you playback one of the 40 built-in Song Bank tunes. Next, practice playing
along at a pace that's comfortable for you. Finally, try playing along at the normal
tempo for the Song Bank tune.
Auto Accompaniment
Simply specify a chord and the keyboard automatically produces the matching
rhythm, bass, and chord patterns. One-touch fill-ins make accompaniments sound
interesting and natural.
OTranspose Function
• An easy operation instantly changes the key of the keyboard.
E-3

Safety Precautions ]
Symbols
Various symbols are used in this operating manual and on the product itself to ensure that the
product is used safely and correctly, and to prevent injury to the user and other persons as well
as damage to property. Those symbols along with their meanings are shown below.
WARNING
This indication stipulates matters that have the risk of causing death or serious
injury if the product is operated incorrectly while ignoring this indication.
CAUTION
This indication stipulates matters that have the risk of causing injury as well as
matters for which there is the likelihood of occurrence of physical damage only if
the product is operated incorrectly while ignoring this indication.
Symbol Examples
This triangle symbol (_) means that the user should be careful. (The example at
left indicates electrical shock caution.)
\
This circle with a line through it (_) means that the indicated action must not be
performed. Indications within or nearby this symbol are specifically prohibited.
(The example at left indicates that disassembly is prohibited.)
The black dot ( O ) means that the indicated action must be performed. Indica-
tions within this symbol are actions that are specifically instructed to be per-
formed. (The example at left indicates that the power plug must be unplugged
from the electrical socket.)
//_ WARNING
Please use caution regarding the handling of the AC adaptor.
•Do not use avoltage other than the indicated power supply voltage. Use of a
voltage other than that indicated may cause fire or electrical shock.
• If the power cord should become damaged (exposed wires, disconnection,
etc.), purchase a new AC adaptor. Use of a damaged power cord may cause
fire or electrical shock.
.Do not cut or damage the power cord. Also do not place heavy objects on top
of it or subject it to excessive heat. Damage to the power cord may cause fire or
electrical shock.
•Do not attempt to shape the power cord or subject it to excessi_;e bending,
twisting or pulling. This may cause fire or electrical shock.
• Please use the adaptor specified for this instrument. Use of another adaptor
may cause fire, electrical shock, or malfunction.
E-4
Do not place containers containing water or other liquids on the instrument.
•Do not place the following objects on the instrument. Placing such objects on
the instrument may cause fire or electrical shock if they spill and get inside the
instrument.
• Containers filled with water or other liquids (including vases, potted plants,
cups, cosmetics and medicines)
• Small metal objects (including hairpins, sewing needles and coins)
• Flammable objects
In the event a foreign object should happen to get inside the instrument,
please take the following actions:
1. Turn power off.
2. Unplug the AC adaptor from the wall outlet.
3. If there are any batteries loaded in the keyboard, remove them.
• Do not touch the batteries directly with your hands when removing them.
They may be hot or battery fluid may be leaking from them.
4. Consult with the dealer where you purchased the keyboard or with an
authorized CASIO service provider.
Do not disassemble or modify the instrument.
• Never attempt of take apart or modify the instrument, its accessories, or
separately sold options. Doing so may cause fire, electrical shock or malfunc-
tion. Consult your dealer concerning all inspection, adjustment or repair of
internal components.
Do not use if there is an abnormality or malfunction.
i, Do not use the instrument if there appear to be abnormalities such as the
presence of smoke or abnormal odor. Also do not use the instrument if there
appear to be malfunctions such as the power not coming on or sound not
being produced. Use under such conditions may cause fire or electrical shock.
In such cases, take the following actions immediately. Never attempt to repair
the instrument yourselL
1. Turn power off.
2. Unplug the AC adaptor from the wall outlet.
3. If there are any batteries loaded in the keyboard, remove them.
•Do not touch the batteries directly with your hands when removing them.
They may be hot or battery fluid may be leaking from them.
4. Consult with the dealer where you purchased the keyboard or with an
authorized CASIO service provider.
When the instrument has been dropped:
•In the case the instrument has been dropped or damaged, take the following
actions. Continued use may cause fire or electrical shock.
1. Turn power off.
2. Unplug the AC adaptor from the wall outlet.
3. If there are any batteries loaded in the keyboard, remove them.
•Do not touch the batteries directly with your hands when removing them.
They may be hot or battery fluid may be leaking from them.
4. Consult with the dealer where you purchased the keyboard or with an
authorized CASIO service provider.
Be careful of the bags around children.
• Never allow anyone to place the plastic bags of the instrument, its accessories,
and its separately sold options over their heads. Doing so may cause suffoca-
tion. Particular caution is required in homes with small children.
E-5
IHI//_ CAUTION
AC Adaptor
• Do not locate the power cord in close proximity to heaters or other heating
appliances. This may cause the cord to melt leading to possible fire or electri-
cal shock.
•When unplugging the AC adaptor from an electrical outlet, always make sure
to pull on the adaptor itself and not the cord. Pulling excessively on the cord
may cause it to be damaged or break leading to possible fire or electrical
shock.
•Do not touch the AC adaptor with wet hands when it is plugged in. This may
cause electrical shock.
• When not using the instrument for an extended period such as when traveling,
always make sure to unplug the AC adaptor from the electrical outlet for
safety reasons.
• After use turn off the power switch of the instrument and unplug the AC
adaptor from the electrical outlet.
Batteries
• Improper battery use may cause batteries to rupture and leak. This may cause
injury, malfunction of the instrument or discoloration of furniture and other
articles that come into contact with battery fluid. Take care to observe the
following.
• Install batteries so their polarity (+/-) matches that indicated on the instru-
ment.
• For safety and to prevent possible leakage of battery fluid, always make
sure to remove batteries from the instrument when you do not plan to use it
for a long time.
• Always make sure that the batteries making up a set are all of the same
type.
•Never combine new batteries with old ones.
•Never dispose of batteries by incinerating them. Never short or disassemble
batteries, and do not expose them to excessive heat.
•Replace dead batteries as soon as possible.
•Never attempt to recharge batteries.
Transport
•When transporting the instrument, always make sure to unplug the AC adap-
tor from the electrical outlet and confirm that all other external connections
have been disconnected. Only then should the instrument be transported. If
the above is not done, the cord may be damaged leading to possible fire or
electrical shock.
Care
•Whenever caring, make sure to first unplug the AC adaptor from the electrical
outlet. Also remove the instrument's batteries if battery power is being used.
Location
• Never locate the instrument in areas subject to high humidity or heavy accu-
mulation of dust. Doing so may cause fire or electrical shock.
•Never locate the instrument in areas subject to grease splatters or steam, such
as in a kitchen or near a humidifier. Doing so may cause fire or electrical
shock.
Do not place keyboard on lacquered furniture.
*The instrument's silicone rubber feet may eventually blacken or scar lac-
quered surfaces. Use felt cloth pads to insulate the feet or preferably use a
CASIO musical instrument stand designed for your keyboard.
E-6
,4,,
Do not get onto the instrument or stand.
• Do not crawl on top of the instrument or its optional stand. Particular caution
is required in homes having small children. This may cause the instrument or
stand to tip over and break resulting in injury.
Do not place heavy objects on the instrument.
•Do not place heavy objects on the instrument. This may cause the instrument
to tip over or break resulting in injury.
Optional Stand (sold separately)
•Carefully assemble the stand following the assembly instructions that come
with it. Securely tighten all bolts, nuts, and fasteners, and make sure that you
mount the instrument correctly onto the stand. Incorrectly or insufficiently
tightening screws, or incorrectly mounting the instrument onto the stand can
cause the stand to tip over or the instrument to fall off the stand, possibly
leading to injury.
Volume
•Very high volume levels can damage hearing. Avoid using the instrument at
very high volume settings for long periods. Consult with a physician immedi-
ately if you experience impaired hearing or ringing in the ears.
Accessories and options
•Use only accessories that come with the instrument or authorized CASIO
options (sold separately). Use of non-specified accessories or options may
cause fire, electrical shock, or malfunction.
I • You may not be able to see the keyboard keys light under direct sunlight or in
I
other brightly lit areas. I
Care of Your Keyboard ]
Avoid heat, humidity or direct sunlight.
Do notoverexposethe instrument todirectsunlight,or placeit near an air conditioner,orin any
extremely hotplace.
Take care not to drop the instrument and avoid strong impact.
Strong impact may cause malfunctions.When carryingor transportingthe instrument,protect
the keyboardand switcheswithsoftcloth or other material.
Never attempt to modify any parts of the instrument.
Your keyboard is aprecisionelectronicmusical instrument.Any modificationof, or tampering
with parts may cause malfunction.
Do not use lacquer, thinner or similar chemicals for cleaning.
Clean the keyboard with asoft cloth dampened in a weak solution of water and a neutral
detergent. Soak the cloth in the solution and squeeze until it is almost dry.
E-7

Contents 1
Safety Precautions .................................................................. E-4
Care of Your Keyboard .......................................................... E-7
Contents ................................................................................... E-8
Control Locations .................................................................. E-10
Melody Guide Reference ..................................................... E- 12
Part I Before using the keyboard ...................................... E-14
About the power supply ....................................................................... E-14
Installing the batteries ................................................................................... E-14
Using AC power ............................................................................................. E-15
Auto Power Off and Power On Alert ................................................... E-15
Auto Power Off (when using batteries) ....................................................... E-15
Power On Alert (when using the AC adaptor) ........................................... E-16
To disable auto power off and power on alert .......................................... E-16
Part
To
To
2 Basic operations ....................................................... E-17
switch power on and off .................................................................. E-17
change tones .................................................................................... E-17
Keyboard split tones ...................................................................................... E-18
Digital Sampling ............................................................................................. E-19
Polyphony. ...................................................................................................... E-19
Other Useful Functions ........................................................................... E-19
To change the key of the keyboard ........................................................... E-19
To tune the keyboard .................................................................................... E-20
Playing the demo tunes ........................................................................ E-21
To start demo tune play ................................................................................ E-21
To stop demo tune play .............. _................................................................. E-21
Playing rhythms ...................................................................................... E-22
To select and play a rhythm ......................................................................... E-22
Using auto-accompaniment ................................................................ E-23
About the accompaniment keyboard ....................................................... E-23
Using the CASIO CHORD system .................................................................. E-24
E-8
i
To play a CASIO CHORD auto-accompaniment ...................................... E-25
Using standard fingerings .............................................................................. E-25
To play a FINGERED auto-accompaniment ............................................... E-26
Improvising with the preset patterns .................................................... E-27
Using fill-in rhythm ................................................................................... E-27
Using Synchro start ................................................................................. E-27
Part 3 Three Step Lesson System ............... -......................... E-28
Using Three Step Lesson System ........................................................... E-28
Three Step Lesson System Tempo Setting ................................................... E-29
To play a built-in Song Bank tune ................................................................. E-29
Using the Three Step Lesson System with Song Bank Tunes ...................... E-30
How the Three Step Lesson System operates in Steps 1 through 3 .......... E-31
Turning Off the Three Step Lesson System ................................................... E-32
Number of Simultaneously Lit Keys .............................................................. E-32
To change the tone used for the melody of a Song Bank tune .............. E-32
Step 1: Easy Play ..................................................................................... E-33
Step 2: Slow Play .................................................................................... E-33
Step 3: Normal Play ................................................................................ E-34
To practice the left hand part .............................................................. E-35
To check if the right hand or left hand part iscurrently selected ............ E-35
Part4 Technical Reference ................................................ E-36
Troubleshooting ............................................................................... i...... E-36
Specifications ......................................................................................... E-37
Part 5 Appendix .................................................................... A-I
Fingered Chord Chart ............................................................................ A-1
E_9

Control Locations ]
0 0 0 0
®@
Speakers
(_) 100 TONES list
_) TEMPO/TRANSPOSE/TUNE
buttons
(_) TONE button
(_) SONG BANK button
®3 STEP LESSON buttons
(_) 50 RHYTHMS list
_) 40 SONG BANK list
E.IO
(_) POWER/MODE selector
_) VOLUME buttons
(_) SYNCHROIFILL-IN button
_) STARTISTOP button
(_ 0-9 buttons
RHYTHM button
_) PART SELECT button
ONE KEY PLAY buttons
Display
Note
*You may notice lines in the finish
of the case of this keyboard. These
lines are a result of the molding
process used to shape the plastic of
the case. They are not cracks or
breaks in the plastic, and are no
cause for concern.
_) PHONES/OUTPUT jack
For connection of commercially available
headphones. Output from the speakers is
automatically cut when headphones are
connected.
(_ DC 9V jack
* Attachment of Score Stand
Insert both ends of the music stand
provided with the CTK-520L into the
two holes on the top surface.
E-11

Melody Guide Reference 1
Melody guide uses the Three Step Lesson System to teach you how to play each of the
40 Song Bank tunes in three steps. The following is an overview of steps I and 2. See
page E-28 for detailed explanations of these steps.
Set the POWER/MODE
selector to NORMAL.
I_OWER/MODE
Press the SONG BANK button.
SONG
SONG
Indicator li
F@
Find the song you want to play in the
Song Bank list on the keyboard's console
and input its song number.
• To select"Greensleeves" _-_(-¢_o' ' (_)(_.)
for example, use 0-9 buttons _-_' _'__,_ _,_)_v
to input [0][7].
o o
Press the STEP 1or STEP 2 button.
•After a single beat, the keyboard
stands and waits for you to play
the first note.
• The keyboard key that corresponds
to the first note of _ ......
the tune you [] %,.,)
selected flashes.
E-12
F®
Play the melody part on the keyboard.
M
<If you pressed the STEP 1 button in_..>
Play the notes with the ONE KEY PLAY buttons.
• The accompaniment tempo automatically adjusts to play along
with your melody,
<If you pressed the STEP 2 button in _...>
Play the notes on the keyboard, pressing keys as they light.
• Keepthe key depressedas longas itstayslit.
• If youselectedany songfrom number28 through39,the litkey
goes out as soon as you press it.
•The key that corresponds to the next note
you need to play will flash.
• After you press the correct melody key,
accompaniment proceeds to the next note.
M,.J
E-13

Before using the keyboard ]
Be sure to read the contents of this part of the manual before using the keyboard for
the first time.
•About the power supply
You can power your keyboard with 6 AA batteries, standard AC power (with an
optional AC adaptor).
Installing the batteries
This keyboard can be powered by 6 AA size (SUM-3/R6P) dry cell batteries. Make
sure that the unit is turned off when installing batteries.
1. Open the battery compartment cover on the bot-
tom of the unit.
2. Load new batteries as illustrated, taking care
that the plus (+) and minus (-) polesare facing in _=_<_---"e--_--"@_-----6]_'-"_]<_--_:_]
the correct directions.
3. Replace the battery compartment cover.
• Standard battery life: Approximately I hour (SUM-3/R6P).
Approximately 4 hours (AM3/LR6).
Important!
Promptly replace the batteries or use the AC adaptor when the following symptoms
occur.
• Dim power supply indicator
• Abnormally low speaker/headphone volume
• Distortion of sound output
• A totally different tone may sound
• Abnormal rhythm pattern and demo tune play
• Continued sound output even after you release a button
• Occasional interruption of sound when playing at high volume
• Sudden power failure when playing at high volumes
IPrecautions ]
Incorrectly using batteries can cause them to leak or burst, and may damage your
unit. Note the following precautions:
• Be sure that the plus (+) and minus (-) poles are facing in the correct directions.
• Do not mix battery types.
• Do not mix new batteries with old ones.
• Never leave dead batteries in the battery compartment.
• Remove batteries when not using the unit for extended periods.
• Never try to recharge the batteries that are specified for the power supply of this
unit.
E-14
• Do not expose batteries to direct heat, let them become shorted or try to take them
apart.
(If a battery leaks, clean out the battery compartment of the unit immediately,
taking care to avoid letting the battery fluid come into direct contact with your
skin.)
Using AC power
An AC adaptor (AD-5, optional) is required when using household current. Use only
genuine CASIO adaptor with the same voltage rating (100, 120, 220, 230 or 240V) as
the power supply in your area to prevent damage to internal components. Be sure to
turn the power of the unit off before you connect the adaptor to the unit. Plug the AC
adaptor into the AC outlet and the cord into the unit. This will automatically cut off
the battery power supply.
ACzdaptor AD-5 -_
_AC outlet
DC 9V jack
Note:
The shapes of the AC adaptor's
plug and wall outlet differ in
accordance with countries or re-
gions.
The illustration shows an exam-
ple.
Important!
•The adaptor may become warm when it is being used. This is normal and does
not indicate any problem.
•Be sure to unplug the adaptor from the power source when you are not using the
unit.
•Whenever connecting or disconnecting the adaptor, be sure that the power of the
unit is switched off.
•Never use a power supply that does not match that specified for the unit. Doing
so can damage the adaptor or your unit.
•Auto Power Off and Power On Alert
Auto Power Off (when using batteries)
The Auto Power Off function automatically switches power off if you do not perform
any operation for about six minutes. When this happens, change the POWER/MODE
selector position to OFF and then to NORMAL, CASIO CHORD, or FINGERED to
turn power back on. You can also use the following operation to cancel the Auto
Power Off function so that it does not switch power off.
E-15

Power On Alert (when using the AC adaptor)
If you leave power on without performing any operation for about six minutes, all of
the keyboard keys light to alert you (no audible alarm sounds). Pressing any button
or keyboard key returns to normal operation with the keyboard in its initial power on
setting.
Notes
•The Auto Power Off function is invalid when the keyboard is powered by an
AC adaptor.
•The power on alert does not function when the keyboard is being powered by
batteries.
To disable auto power off and power on alert
While holding down the TONE button, turn keyboard power on. This disables the
auto power off and power on alert until you turn power off and then back on again.
E-16
Basic operations 1
This part of the manual provides you with the basic information you need to use your
keyboard.
•To switch power on and off
1. Set the POWER/MODE selector to NORMAL.
2. Press the keyboard keys.
3. The VOLUME up and down arrow buttons are used to adjust main volume.
•Pressing _ or _ displays the currently set volume setting. Press
(_ or @ again to change the volume setting.
*Volume can be adjusted over arange of 0(minimum) to 9 (maximum).
• Volume is set to 7 when the power is turned on.
• A setting of 0 turns down the volume completely.
• The volume can be changed continuously by continuously pressing
down the up or down buttons.
• Pressing the up and down buttons simultaneously sets the volume to
level 7.
• Numeric values can be entered directly with the 0-9 buttons after the
volume button has been pressed in step 3.
• The amount that the volume settings raises or lowers the volume level
differs according to the tone, auto accompaniment, or song you are
using.
4. To switch power off, set the POWER/MODE selector to OFF position.
•To change tones
1. Look at the tone list printed on the keyboard's console and find the one you want.
• A total of 100 tones are available.
2. Press the TONE button.
T_ • The number for the tone that is currently selected is
('_ shown on the display. I OOI
Tone indicator
E-17

3. Use the 0-9 buttons to input the 2-digit number that identifiesthe tone you want to select.
__ • Alwasy enter two digits for the tone number. If you. enter only one
_ _ _ digit, the display will automatically return to the previous tone number
. . setting after a few seconds.
• If you change the tone setting while a keyboard key is depressed, the
tone does not change until you release the key and press a keyboard
key again.
• With certain tones (such as percussion sounds and sound effects), there
may be very little or no change at all in the pitch, no matter which
keyboard key you press.
• You can specify tone numbers in the range of 00 to 99.
'_ *If you input the wrong first digit for atone number, you can return to
the previous setting by pressing the TONE button.
Keyboard split tones
Some of the preset tones split the keyboard and assign two or more sounds. With
such a preset tone, the sound produced depends on what position of the keyboard
you play. For example, BASS/PIANO (tone 90) puts BASS on the left and PIANO on
the right of the keyboard.
<Example>
BASS/PIANO (No.90)
--BASS +" P,ANO
PERCUSSION (No.99)
• PERCUSSION (tone 99) assigns 35 percussion sound to the keyboard as illustrated
below. The sound assigned to each key are indicated above the keyboard.
E-18
_) BASS DRUM _ HIGH-MID TOM _ HIGH BONGO
SIDE STICK _ CRASH CYMBAL ! _ LOW BONGO
ACOUSTIC SNARE _ HIGH TOM _ MUTE HIGH CONGA
HAND CLAP _= RIDE CYMBAL 1 _ OPEN HIGH CONGA
ELECTRIC SNARE ,_g CHINESE CYMBAL _ LOW CONGA
LOW FLOOR TOM ",_' RIDE BELL _;_ HIGH TIMBALE
CLOSED HI-HAT _ TAMBOURINE _ LOW TIMBALE
HIGH FLOOR TOM zp SPLASH CYMBAL '_ HIGH AGOGO
PEDAL HI-HAT _ COWBELL _ LOW AGOGO
LOW TOM 'W" CRASH CYMBAL 2 Jf_ CABASA
_' OPEN HI-HAT _ CLAVES aO MARACAS
LOW-MID TOM _ RIDE CYMBAL 2
•There are no sounds assigned to any keyboard keys from B4 onward when the "99
PERCUSSION" tone is selected.
Digital Sampling
Anumber of the tones that are available with this keyboard have been recorded and
processed using a technique called digital sampling. To ensure a high level of tonal
quality, samples are taken in the low, mid, and high ranges and then combined to
provide you with sounds that are amazingly dose to the originals. You may notice
very slight differences in volume or sound quality for some tones when you play
them at different positions on the keyboard. This is an una;coidable result of multiple
sampling, and it is not a sign of malfunction.
Polyphony
The term polyphony refers to the maximum number of notes you can play at the same
time. The CTK-520L has 12-note polyphony, which includes the notes you play as well
as the rhythms and auto-accompaniment patterns that are played by the keyboard. This
means that when a rhythm or auto-accompaniment pattern is being played by the
keyboard, the number of notes (polyphony) available for keyboard play is reduced. Also
note that some of the tones offer only 6-note polyphony.
• When rhythm or auto accompaniment is playing, the number of sounds simulta-
neously played is reduced.
•Other Useful Functions
To change the key of the keyboard
The transpose feature of this keyboard lets you raise or lower its key in semitone
increments. This means you can easily match to suit someone's voice, and you can
eliminate sharps and flats from music making it easier to play.
1. While in any mode besides the Song Bank Mode (indicated by a dot in the first digit of the
display),holddown theTONEbuttonand pressthe RHYTHMbutton.
_o_ *Perform step 2 within five seconds after performing n ]
step 1. U1
©
2. Use the TRANSPOSE/TUNE buttons to change the key of the keyboard.
'_ •Example: To change the tuning to B (indicated by-1 ,]
since it is one tone below C, which is the normal - iI
tuning of the keyboard).
• See page E-20 for the indicator that appears for each re-
Indicator
T.,.=o_u_ mains on the
key. display for a few
seconds.
Normal tuning B (-1) tuning E-19

<Keys and their indicators>
Key: F#_ G I) A_ I) AI) B_m)B I) C I) C#l) D_ E_ E QF
I_ : P_essing_
<Note Names>
C D E F G A B C
Notes
• You cannot change the transpose setting while the keyboard is in the Song Bank
Mode.
•In step 2 of the above operation, you could also use 0-9 buttons [0] to [5] to specify
C through F.
• Pressing both of the TRANSPOSE/TUNE buttons (_ /@)at the same time
returns the transpose setting to C(0).
•The transpose setting is automaticaBy set to C(0) whenever you turn keyboard
power on.
•The transpose setting is automatically set to C(O) whenever you press the SONG
BANK button.
• The pitch of a transposed note depends on the tone you are using. If the transpose
operation causes a note to exceed its upper range, the same note from the lowest
octave available is substituted.
• The transpose operation does not affect tone number 99 (PERCUSSION) or auto-
accompaniment rhythms.
•Transposing tones 75 through 79 and 90 through 96 changes the range of keys to
which each of the tones is assigned.
•The transpose setting is automatically set to C(0) whenever you press the DEMO
button.
To tune the keyboard
A simple operation lets you tune the keyboard to another musical instrument.
1. While in any mode besides the Song Bank Mode (indicated by a dot in the first digit ofthe
display), hold down the TONE button and press the SONG BANK button.
_ step 1.
2. Use the TRANSPOSE/TUNE buttons to change the tuning of the keyboard.
©
Indicator re-
mains on the
display for a few
seconds.
E-20
Notes
•In step 2 of the above procedure, you could also use 0-9 buttons to input a value
from 00 to 50.
• Pressing both of the TRANSPOSE/TUNE buttons ( _ /_) at the same time
returns the tuning setting to 00.
• Pressing the SONG BANK button changes the tuning setting to 00.
•The tuning setting does not affect any of the 40 Song Bank tunes.
•You can tune the keyboard within a range of approximately -+50cents (100 cents =
1 semitone).
•The tuning setting is automatically set to 00 whenever you turn the keyboard on.
•Pressing the DEMO button changes the tuning setting to 00.
•The tuning operation does not affect rhythm (percussion).
• Playing the demo tunes
You can set up the keyboard to continually play its 40 built-in Song Bank tunes.
Keyboard keys light to indicate the melody notes of the demo tune as it plays.
To start demo tune play
1. Swatchpower on and adjustthe volume level.
2. Press the DEMO button.
_o • Demo tune play continues in a sequential endless loop until you switch
[] it off.
• The number of the demo tune currently playing is shown on the dis-
play.
• You can play along on the keyboard while a demo tune is playing back.
3. You can change the demo tune play being played by pressing 0-9 buttons.
..... *The Song Bank tunes play back in tune number sequence, starting from
Q Q _ _ the one you select.
@.@,@.@@.
To stop demo tune play
Press the DEMO button again to stop demo tune play.
_uo
[]
Notes
Only the following buttons are enabled while a Song Bank tune is being played.
•VOLUME _/@
•0-9 buttons
•START/STOP button
• POWER/MODE selector (OFF)
•DEMO button E-21

• While holding down the TONE button, press the PART SELECT button (see
"Turning Off the Three Step Lesson System" on page E-32).
• You cannot change the tone being used for the melody of a Song Bank tune.
• You can specify demo tune numbers from 00 to 39 only.
•Playing rhythms
This keyboard features a collection of 50 exciting built-in rhythm patterns. Each
pattern provides percussion back up for all your performances.
To select and play a rhythm
1. Set the POWER/MODE selector to NORMAL.
2. Look at the rhythmlist printedon the keyboard's console and find the one you want.
3. Press the RHYTHM button.
(_ • When you do, the rhythm indicator lights.
,._,. •The number that appears on the display indicates the
currently selected rhythm. q
Rhythm indicator
4, Use the 0-9 buttons pad to input the 2-digit rhythm number for the rhythm you want to use.
To select "11 SLOW ROCK", for example, input 1, 1.
__ Be sure to always specify a 2-digit number.
__ ! You cannot specify numbers greater than 50. Io I n
If you discover a mistake before you input the second
digit, press the RHYTHM button to return to the
previously set rhythm number.
5. Press the START/STOP button to start play of the rhythm.
="_' When you do, the selected rh
_T_ • ythm starts to sound.
6. Use the TEMPO buttons to adjust the tempo of the rhythm.
'_° • Pressing _ or Q displays the currently set tempo setting. Press _ or
(_ _ again to change the tempo setting.
• When you press one of the TEMPO buttons, the tempo setting appears
..... on the display. The value indicates the number of beats per minute. The
display returns to normal shortly after you release the TEMPO button.
•Each time y°u press °ne °f the TEMPO butt°ns while I II_ Ithe tempo value is displayed, the tempo setting v
changes one step, within the range of 040 to 255.
• Holding down either of the TEMPO buttons changes the tempo setting
at high speed.
• To reset the tempo to the standard value of each rhythm, press both
TEMPO buttons.
• Be sure to always specify a 3-digit number.
• Specifying a tempo below 040 or above 255 does not change the current
setting.
7. Use the VOLUME buttons to adjust the volume of the rhythm.
©
8. To stop rhythm play, press the START/STOP button again.
ST_I
STtXP
1
•Using auto-accompaniment
This keyboard features 50 accompaniment patterns that let you add full accompani-
ments to your performances automatically. With auto-accompaniment, part of the
keyboard is reserved as an accompaniment keyboard. As you play your chords on
the accompaniment keyboard, the accompaniment patterns adjusts automatically to
follow the progression you play.
You get a choice between two different methods for chord play. FINGERED lets you
play chords as you normally do, while CASIO CHORD makes it possible to play fully
formed chords with one finger.
About the accompaniment keyboard
The lower (left) 1.5 octaves are reserved for use as an accompaniment keyboard
whenever you select CASIO CHORD or FINGERED with the POWER/MODE selec-
tor. The panel above the accompaniment keyboard keys is marked with the names of
the notes they play. The remainder of the keyboard (the part that is not included in
the accompaniment keyboard) is called the me!ody keyboard. Please be sure to
remember these terms, because they will be used throughout the rest of this manual.
E-22 E-23

I___ Accompaniment"-'-")'t '( Melodykeyboard
keyboard
The entire keyboard can be used for melody play while
the POWER/MODE selector is set to NORMAL. /
Using the CASIO CHORD system
The CASIO CHORD system lets you easily play the four main types of chords. Play of
chords is simplified as shown in the chart below.
Keys
Pressing one
accompaniment
key
Pressing two
accompaniment
keys
Pressing three
accompaniment
keys
Pressing four
accompaniment
keys
Chord Type
Major chord
Minor chord
Seventh chord
Minor seventh
chord
Example
CC : EF:AIBICIDIEFI
CM ,or ho,d
Cm CIDIEIFIG A3 C" EF
lrl[
(C Seventh Chord)
i
,L i i
| |w
Cm7
(C Minor Seventh
Chord)
Note
• The bottom (leftmost) note that you play determines the name of the chord. If the
bottom note is a C for example, the keyboard produces a C chord.
E-24
To play a CASIO CHORD auto-accompaniment
1. Use the POWER/MODE selector to select CASIO CHORD.
2. Select an auto-rhythm as described under "To select and play arhythm" on page E-22.
3. Start play of the rhythm.
'T_d' • If you want start play of the normal rhythm pattern, press START/
STOP.
• You can also use synchro start (page E-27) _o start rhythm play.
4. Press either one or up to four keys on the accompaniment keyboard, and the corresponding
accompaniment starts to play automatically.
5. Continue pressing different keys on the accompaniment keyboard to play your chord
progression.
6. To stop auto-accompaniment play, press START/STOP again.
sr_a_TJ
sToP
Using standard fingerings
The FINGERED mode lets you play a wider variety of chords. In this mode, you can
start play of an accompaniment pattern by pressing three or four of the accompani-
ment keyboard keys.
This keyboard is capable of recognizing 15 different chords. The following shows the
fingerings of these chords with a root of C. Note that you can omit the fifth notes
(which are shown inside parentheses in the illustrations below) to produce 7, m7,
maj7, add9 and mM7 chords.
C Cm Cdim Caug ('1) Csus4
C7 Cm7 Cmaj7 Cm7 "5 C7"s(*1)
C7sus4 Cadd9 Cmadd9 CmM7 Cdim7(*l )
E-25

*1 With this chords, the lowest note in your fingering is always used as the root.
Make sure thatyour fingering correctly identifies the root you want to use.
Important!
• If you play one or two notes only in the left hand, or three notes that do not make
up a recognizable chord formation, no sound will be produced. FINGERED
mode requires a conventional three or four-note chord formation to produce an
auto-accompaniment. Also, note that auto-chords only work in conjunction with
rhythm patterns, and not independently of them.
Notes
•The above examples show only one of the possible fingerings for each chord. Note
that you can play the notes that form a chord in any combination. Each of the
following fingerings for example, produces the same C chord.
Accompaniment keyboard
•See the "Fingered Chord Charts" on page A-1 for information on the fingerings of
chords for all roots.
To play a FINGERED auto-accompaniment
!. Use the POWER/MODE selector to select FINGERED.
2. Select an auto-rhythm as described under "To select and play a rhythm" on page E-22.
3. Start play of the rhythm.
sd,_, • If you want start play of the normal rhythm pattern, press START/
STOP.
• You can also use synchro start (page E-27) to start rhythm play.
4. Play a chord on the accompaniment keyboard to start play of the auto-accompaniment.
5. Continue pressing keys on the accompaniment keyboard to play your chord progression.
6. To stop auto-accompaniment play, press START/STOP again.
STaaT!
STO_
E-26
•Improvising with the preset patterns
Pressing the START/STOP button to start rhythm play causes the normal version of
the pattern to be played. You can also play a variation of the rhythm using the
operation described below.
•Using fill-in rhythm
You can insert a fill-in rhyttun by pressing the SYNCHRO./FILL-IN button while an
auto-rhythm plays.
F"-l-m
•Using Synchro start
You can start the rhythm and accompaniment pattern at the same time, with your
play of the accompaniment keyboard. To do this, follow the steps below.
1. Set the POWER/MODE selector to the CASIO CHORD or FINGERED position.
Powtmaaoc_
2. Select an auto-rhythm.
3. Press the SYNCHRO/FILL-IN button,
SVNCH_
4. Press the accompaniment keys to play the first chord. As soon as you do, the auto-
accompaniment pattern begins to play.
5. To stop the auto-accompanimentpattern play, press the START/STOP button.
ST_W
STC_
Note
•If you set the POWER/MODE selector to NORMAL in step 1 on this page, the
operation in step 4 starts play of the rhythm (percussion instruments) only. E-27

Three Step LessonSystem 1
[] Using Three Step Lesson System
Even individuals who cannot play the keyboard at all can follow along with the 40
built-in Song Bank tunes with the ONE KEY PLAY buttons. You can also use the
Three Step Lesson System to learn at your own pace. Play slowly at first until you are
able to play along at normal speed.
Of the 40 built-in tunes, numbers 00 through 27 feature auto-accompaniment (auto-
accompaniment tunes), while 28 through 39 are played using both hands (two-hand
tunes).
Auto accompaniment tunes
;ongBanknumber
O0
01
02
03
04
05
06
07
08
09
10
11
12
13
14
15
16
17
18
19
2o
21
22
23
24
25
26
27
Tune name
WHEN YOU WISH UPON A STAR
TWINKLE TWINKLE LITTLE STAR
ACH DU LIEBER AUGUSTIN
AMAZING GRACE
ODE TO JOY
LONDON BRIDGE
LONDONDERRY AIR
GREENSLEEVES
AULD LANG SYNE
JOY TO THE WORLD
JINGLE BELLS
OVER THE RAINBOW
O CHRISTMAS TREE
YANKEE DOODLE
SANTA LUCIA
WHENTHESAINTSGOMARCHINGIN
ALOHA OE
SPRINGFROM "THE FOURSEASONS"
STAND BY ME
YOU CAN'T HURRY LOVE
IMAGINE
IJUSTCALLEDTOSAYI LOVEYOU
LITTLE BROWN JUG
MARCHFROM"THENUTCRACKER"
THE ENTERTAINER
SERENADE'_INEKLEINENACHTMUSIK"
THE GIRL FROM IPANEMA
LOVE STORY
Two-hand tunes
SongBanknumber
28
29
30
31
32
33
34
35
36
37
38
39
Tune name
FROM THE NEW WORLD
MISTY
MINUET (J.S.BACH)
CANON (PACHELBEL)
SILENT NIGHT
CLAIR DE LUNE
ETUDEoio.t0,no3"CHANSONDEL'ADIEIY
THEENTERTAINER
MOONRIVER
FURELISE
TURKISHMARCH(RONDOALIATURCA)
INVENTIONno.1
The Three Step Lesson System can be used with the following three-step lesson plan
to master keyboard play.
Pressing the ONE KEY PLAY buttons plays the melody for an auto-accompa-
niment tune or the right hand part for two-hand tunes. In both cases, the auto-
accompaniment (the right hand part in the case of two-hand tunes) is played
automatically by the keyboard. In place of the ONE KEY PLAY buttons, you
can also press any key of the keyboard to play the melody or right hand part.
The purpose of this step is to familiarize yourself with the timing required to
play melody notes.
Press the keys that light as they teach you the correct notes to play. You can
play at the pace you want, because the auto-accompaniment or left hand part
waits until you press the correct key.
At this level, the keyboard's keys still light to indicate which notes to play, but
they no longer wait for you to press the correct key. The auto-accompaniment
or left hand part is played at normal speed.
Notes
• You may not be able to see the keyboard keys light under direct sunlight or in
other brightly lit areas.
• You can press the ONE KEY PLAY, STEP 1, STEP 2, and STEP 3 buttons at any
time, except while a demo tune is playing. To return the keyboard to its normal
mode, press the SONG BANK button.
Three Step Lesson System Tempo Setting
You can use the procedure in step 6 of the procedure on page E-22 to set the tempo of
the left-hand part for Song Bank and Three Step Lesson System play (Step 1through
3).
This means you can use a slower tempo at the beginning, and then increase it as you
learn. Press both of the TEMPO buttons (Oand @ ) at the same time to return the
tempo to its initial preset setting.
To play a built-in Song Bank tune
1. Look up the number of the tune you want to play in the song book list.
2. Press the SONG BANK button until the Song Bank indicator lights.
°I
o D/I
Indicates Song Bank number.
The number that appears is the cur-
rsntly selected Song Bank number,
E-28 E-29

3. Inputthe two digit number for the song you want to play.
_Q • Example: 18 "Stand By Me"
.oo.oo. I
4. Press the START/STOP button to start play of the selected song.
_'_' * The song you select plays repeatedly, with the keyboard keys lighting
to indicate the melody notes.
5. To stop Song Bank tune play, press the START/STOP button again.
6. To exit the SONG Mode, press the SONG BANK button again.
•At this time the tone number or rhythm number appears on the dis-
play.
Notes
• Always enter two digits for the Song Bank number.
• You can input Song Bank tune numbers in the range of 00 to 39.
• You can input a Song Bank tune number even while another Song Bank tune is
playing.
• If you input the wrong first digit for a Song Bank tune number, you can return to
the previous setting by pressing the SONG BANK button.
• The RHYTHM button is disabled in the Song Bank Mode. If you want to play a
rhythm, press the SONG BANK button to return to the normal mode first.
Using the Three Step Lesson System with Song Bank Tunes
When you use a Song Bank Tune with melody guide, the Three Step Lesson System
teaches you which melody notes to play.
Auto-accompaniment Song Bank Tune
Chord and melody part keys light.
Chord I
The root (the C-note of aC-chord) Melody note lights.
and other notes that make up the
chord alternately light.
Note
•Some Song Bank tunes use chords (such as C6) that cannot be played with the
Fingered setting (page E-25). Though you will be able to play these chords in the
Song Bank mode by pressing the keyboard keys that light, you will not be able to
play these chords by using the same fingering in the Fingered Mode.
E-30
Two-hand Song Bank Tune
Left hand and right hand part keys light.
I__J L_J
Left hand part Right hand part
How the Three Step Lesson System operates in steps 1 through 3
When using an auto-accompaniment Song Bank tune with the Three Step Lesson
System, the lights indicate not only the note you should play, but how long you
should play it (how long you should keep the key depressed). The following de-
scribes what illumination of keys indicates.
•Note Guide: Alit key indicates the note to be played.
•Length Guide: Key remains lit for as long as note should be played.
• Next Note Guide: A flashing key indicates the next note to be played.
•Consecutive Note Guide: When a key lights, goes out momentarily, and then
lights again, it indicates that the same note should be played in succession.
Flashes
First Note
Second Note
idI-Rrst note length -_:
Lights Goesout
Press Release
Flashes Lights Goes out
Press Release
i i
:i
Note lengths are not indicated by the Three Step Lesson System when playing a two-
hand tune with Step I and Step 2. The lit key goes out as soon as you press the correct
keyboard key and the next note's key flashes.
Lights Flashes
(Next note to be played.) E-31

Turning Off the Three Step Lesson System
1. While holding down the TONE button, press the PART SELECT button.
_,_ * Repeat the above to turn the Three Step Lesson System back on.
©©
©©
Note
•The Three Step Lesson System turns back on when you start demo tune play,
when you press the SONG BANK button in the normal mode (pages E-29-E-30
steps 1 to 3), or after the power on alert function (page E-16) operates.
Number of Simultaneously Lit Keys
The keyboard can play up to four notes at the same time. All four keys light when
pressed while the Three Step Lesson System is turned on.
To change the tone used for the melody of a Song Bank tune
1. Following step 3 of the procedure on page E-30, press the TONE button.
appear on the display, along with the tone number of
the tone that is currently assigned to the keyboard. T
Tone
indicator
Song Bank
indicator
Indicates "00 PIANO 1"
is assigned to keyboard.
2. Inputa value to select the tone you want to use.
__ • Example: 30 Violin
,oo.
Notes
•You cannot change the tone of the two-hand Song Bank tunes (number 28 through
39).
•Selecting another Song Bank tune switches the tone setting to the newly selected
tune's preset melody tone.
•The tone assigned to the keyboard is the same one specified for the melody of the
Song Bank tune.
•The above procedure can be used to change the Song Bank melody tone before
starting play or while play is already in progress.
• Step I: Easy Play
You can press the ONE KEY PLAY buttons or any of the keyboard keys to play along
with the melody (right hand part) of the Song Bank tune. You do not have to worry
about pressing the right key, so you can concentrate on getting the timing right.
1. Press the STEP 1button.
svapi
] • You will hear asingle beat, and then the keyboard stands by waiting
for you to play the first note. If the tune includes intro measures, the
keyboard enters standby after the intro measures are complete.
2. Press the ONE KEY PLAY buttons to play each note of the tune.
[_ _] • The accompaniment (left hand) part of the tune follows along as you
_J play the melody (right hand) part.
• The keyboard key that corresponds to the next note to be played
flashes, and lights when you play the note.
• The rhythm (percussion) part does not sound.
• Play of the accompaniment (left hand part) ends when you play the last
note of the tune or after the ending measures of the tune are played,
and then re-starts from the beginning.
3. Try pressing any one of the keyboard keys in place of the ONE KEY PLAY buttons.
• Pressing any keyboard key plays the correct melody (right hand part) note.
• Pressing more than one (up to four) keyboard keys plays the corresponding
number of melody notes.
not press the key that is lit.
4. To interrupt an Easy Play session, press the START/STOP button.
•Step 2: Slow Play
With Slow Play, you have to play the note that the Three Step Lesson System
indicates. But don't worry - the accompaniment (left hand part) waits until you can
play the correct note before continuing. This means you can take your time and play
at your own pace.
1. Press the STEP 2 button.
Sl_P2
]•After a count beat, the keyboard stands by waiting for you to play the
first note. If the tune includes intro measures, the keyboard enters
standby after the intro measures are complete.
E-32 E-33

2. Play the notes indicated by the Three Step Lesson System.
•The accompaniment (left hand) part of the tune follows along as you play the
melody (right hand) part.
• The keyboard key that corresponds to the next note to be played flashes, and
lights when you play the note.
•The rhythm (percussion) part does not sound.
• Play of the accompaniment (left hand part) ends when you play the last note of
the tune or after the ending measures of the tune are played, and then re2starts
from the beginning.
Press keyboard keys as they light. More then
one key may light when you are playing a
two-hand tune. Press all keys that IighL
3. To interrupt an Slow Play session, press the START/STOP button.
START1
•Step 3: Normal. Play
Normal Play also shows you which notes to play, but unlike Slow Play, it does not
wait for you to press the key. The accompaniment part is played at normal speed, no
matter what you play (or don't play) on the keyboard.
1. Press the STEP 3 button.
_"_=_ • Play starts after a count beat.
_=_
2. Play along on the keyboard, followingthe keys as they light.
•The accompaniment (left hand) part of the tune plays at normal speed, regardless
of what you play on the keyboard.
•The keyboard key that corresponds to the next note to be played flashes, and
lights when the note should be played.
!!llllll!l !llllllllllll
3. To interrupt a Normal Play session, press the START/STOP button.
ST_T_
ST(_P
•Topractice the left hand part
Once you master melody (right hand) part play, you can use the two-hand tunes
(numbers 28 through 39) to practice the accompaniment (left hand) part.
1. Press the STEP 1,STEP 2, or STEP 3button.
......... • Playback returns to the beginning of the song, and after a count beat the
[] [] [] [] melody (right hand) part starts to play with the Three Step Lesson
System indicating how to play the accompaniment (left hand) part.
2. Press the PART SELECT button to switch the left hand play.
Q
3. To interrupt play of the melody, press the START/STOP button.
ST_
4. Press the PART SELECT button to return the part selection to its previous setting.
©
sEu_'r
Notes
•The Three Step Lesson System indicating how to play the melody (right hand)
partimmediately afteryou select one of the two-hand tunes (numbers 28 through
39).
• The PART SELECTbuttons areoperational only while STEP 1, SI_P 2, or STEP3
is playing orpaused (by the START/STOP button).
To check if the right hand or left hand part is currently selected
The Three Step Lesson System tells you what part is currently selected whenever you
press the STEP 1, STEP2 or STEP 3 button. Pressing either of these buttons causes the
leftmost three keys to light when the left hand part is selected, and the rightmost
three keys to light when the right hand part is selected.
IIII!1!I!1 IIII!II!II
Left hand part selected Right hand part selected
E-34 E-35

Technical Reference 1
•Troubleshooting
Be sure to check the following table whenever you experience problems with key-
board operation.
Cause Action
Symptom
•No sound when keyboard
keys are pressed.
• Keyboard keys remain lit.
•Keyboard keys light but
no sound is produced.
•Tone "99 PERCUSSION"
is selected and you are
pressing keys that are not
assigned tones.
•Keyboard is standing by
for keyboard play in STEP
2.
•Power on alert is telling
you that power is left on.
• While "99 PERCUSSION"
is selected, you can use
only keys to the left of B_4.
These keys are marked on
the console with illustra-
tions of percussion instru-
ments.
• Press the lit keys and con-
tinue with STEP 2 play.
* Press the START/STOP
button to stop STEP 2.
•Press any button or key-
board key to resume nor-
mal operation with the
keyboard in its initial
power on setting.
•Atwo-hand Song Bank
tune (number 28 through
30) is selected.
•RHYTHM button does • Keyboard is in the Song *Press the SONG BANK
not work. Bank Mode. button to return to the
Normal Mode.
• Song Bank tone does not
change.
•Keyboard is in the Song
Bank Mode.
• Demo tune play is in
progress.
•Cannot change TRANS-
POSE/TUNE settings.
•Cannot play correctly
even when the lit key-
board keys are pressed
withSTEP 1.
•More than one key is be-
ing pressed at the same
time, which causes ac-
companiment to advance
the corresponding
number of notes (up to
four).
*Change to an auto accom-
paniment Song Bank tune
(number 00 to 27). You
cannot change the tone
setting of a two-hand
Song Bank tune (number
28 through 39).
• Press the SONG BANK
button to return to the
Normal Mode.
•Stop demo tune play.
•When using STEP 1, press
keyboard keys one by
one.
•Specifications
Model: CTK-520L
Keyboard: 61 standard-size keys; 5 octaves
Tones: 100 presets
Polyphony: 12 -note (max.)
Three Step Lesson System:Number of simultaneosly lit keys; 4
Auto-accompaniment:
Song Bank tunes:
Other Functions:
Speakers:
Digital Volume Control:
I/O Terminals:
Power Supply:
Auto Power Off:
Power Consumption:
Dimensions:
Weight:
Three steps
Playback: 1 tune repeat playback
Rhythm patterns 50 presets
Tempo Adjustable, 216 steps (40 ~ 255), initial value:
120
Chords Two systems: CASIO CHORD, FINGERED
Other Fill-in pattern, Synchro start
40 tunes
Transpose (F#-C~F: half-note)
Tuning Adjustable A4 = Approx.440 Hz, +50 cents,
initial value: A4 = Approx.440 Hz
10 cm diameter x 2 (Output: 2W+2W)
Main volume; 10 steps (0 - 9), initial value: 7
Power Supply DC 9V jack
Headphones/Output Stereo standard jack
[out-put impedance: 50 t, output voltage: 2V (RMS)
MAX],
2-way AC/DC power sources;
Batteries 6 AA-size
Battery life approximately I hour
on R6P (SUM-3)
manganese batteries/
4hours on LR6 (AM3)
alkaline batteries
AC Required optional AD-5
AC adaptor
Approximately 6 minutes after the last operation
(Operates during battery use only)
9V----: 7.7 W
924 x 325 x 89 mm (36 7/16" x 12 13/16" x 3 1/2")
4.35 kg (9.6 lbs) excluding batteries
* Designs and specifications are subject to change without notice.
E-36 E-37

m_i_1 Appendix/Ap6ndice
[] Fingered Chord Charts
[] Cuadros de acordes digitados
Mm7m7 dim7
C
D
(D')/E I'
F_/(G _)
G
(G')/A L'
A
(A')/B U
B
)
A-]
Other manuals for CTK-520L
4
Table of contents
Other Casio Electronic Keyboard manuals

Casio
Casio CDP-220R User manual

Casio
Casio CELVIANO AP-31V User manual

Casio
Casio Cosmo CZ-1 Guide

Casio
Casio CTK-731 User manual

Casio
Casio Tone Bank CT-636 User manual

Casio
Casio LK-50 Service manual

Casio
Casio Tone Bank CT-650 User manual

Casio
Casio CTK-1100 Troubleshooting guide

Casio
Casio CTK-900 User manual

Casio
Casio CTK-6200 User manual

Casio
Casio WK-1500 User manual

Casio
Casio SK-1 User manual

Casio
Casio LK-94TV User manual

Casio
Casio CTK-501 User manual

Casio
Casio CTK-4000 Troubleshooting guide

Casio
Casio Celviano AP-45 User manual

Casio
Casio DM-100 User manual

Casio
Casio CTK-220L User manual

Casio
Casio LK-50 Instruction manual

Casio
Casio LK-50 Assembly instructions