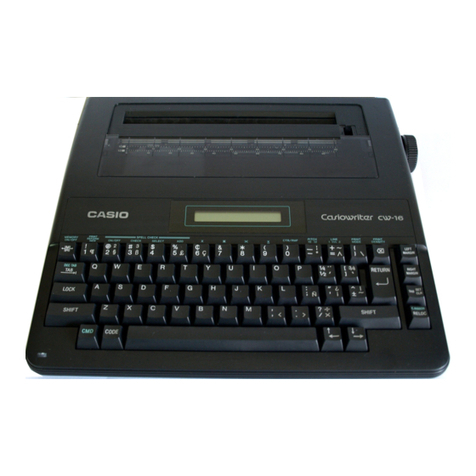
Casio CW-16 User manual

Cariovwrritarcur-16
PERSONAL ELECTRONIC TYPEWRITER
Pn]
CASIO.
oe

INTRODUCTION
Congratulations on your selection of aCASIOWRITER!
More than just an electronic typewriter, the CASIOWRITER offers ahost of features
and functions designed to make typing quicker and easier. These include:
*Built-in spelling check system* with correction function
*Decimal tab
®Special print styles
*Automatic centering
*Right margin justification
*Right margin flush
*Automatic word wrap
*Automatic carrier return
*Repeat typing for all keys
*Full punctuation capabilities
*Special symbols
eText memory
*Plain or thermal paper capabilities
*Battery or AC
*Automatic power OFF
Be sure to read this manual carefully before operation to become familiar with the fea-
tures and functions of your new CASIOWRITER.
*The Spelling portion of this product is based on Proximity Linguistic Technology.
*THE PROXIMITY/MERRIAM-WEBSTER LINGUIBASE
Copyright 1984 All Rights Reserved
Proximity Technology Inc.
Copyright 1984 All Rights Reserved
Merriam-Webster Inc.
THE PROXIMITY/COLLINS LINGUIBASE
Copyright 1984 All Rights Reserved
Proximity Technology Inc.
Copyright 1984 All Rights Reserved
William Callins Sons &Co., Ltd.

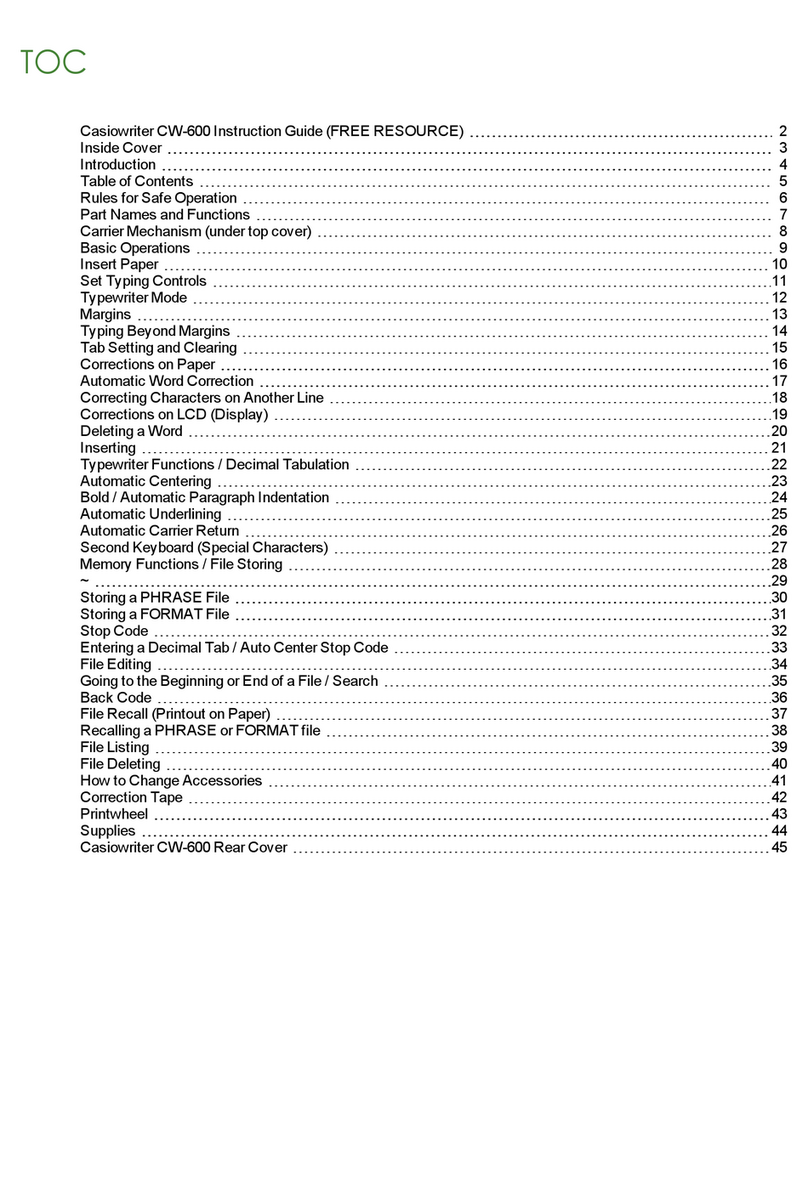
CONTENTS
1GETTING TO KNOW YOUR CASIOWRITER ..........coiiiiiiinnnnnnn 1
1.1 UNPACKING 11.4 RIBBON CASSETTES 6
1.2 PRECAUTIONS 11.5 PAPER T
1.3 POWER SUPPLIES 4
2BASIC FUNCTIONS. isvi sis mvoaiannin cess sos sv ead 8umslon Gina Britt forse B
2.1 KEY IDENTIFICATION CHART 825 PRINT DENSITY ADJUSTMENT 1"
2.2 AUTO TEST FUNCTION 926 HOT ZONE AND WORD WRAP 11
23 DISPLAY 10 2.7 INITIALIZATION 12
2.4 DISPLAY CONTRAST CONTROL 10
3BASIC OPERATION ...........ccun 490 WF AS in ae Ass snes: siatse el)
3.1 PRINT MODES 13 3.8 RIGHT MARGIN 18
3.2 PRINT PITCH 15 39 MARGIN RELEASE 18
3.3 LINE SPACING 16 3.10 TAB SET 19
3.4 CURSOR KEYS 17 3.11 TAB CLEAR 20
3.5 LINE TOP 17 3.12 TAB ALL CLEAR 20
3.6 LINE END 17 8.13 DELETE 20
3.7 LEFT MARGIN 17 3.14 INSERT 21
4SPECIAL TYPING FUNCTIONS ....cccovovsinanannnssscssonassnns ied
4.1 DECIMAL TAB 22 44 RIGHT MARGIN FLUSH 23
4.2 RELOCATE 22 45 QUIT 24
4.3 CENTERING 23
5PRINT STYLES ....:voovummsmumvess Nemes hby sieSRI ae RD
5.1 BOLD PRINT 25 54 UNDERLINED PRINT 27
5.2 DOUBLE WIDTH PRINT 26 55 CURRENT PRINT STYLE 28
53 NORMAL PRINT 27
G8 MEMORY MODE ..::.:coveommnmeinemwwans nev SObEE er wan so R29
6.1 EDIT MODE 29 68 POSITION 32
6.2 PAGE SIZE 30 6.9 PRINT 33
6.3 PAGE END MARK 30 6.10 REFORM 34
6.4 PAGE TOP 31 6.11 NEW 35
6.5 NEXT PAGE TOP 31 6.12 ONE LINE PRINT 35
6.6 FIND 31 6.13 MEMORY CHECK 36
6.7 CONTINUE 32
7SPELL CHECK FUNCTION. ...... eT Te PTY CITT To Peete Torte Bo erpdehoriar 37
7.1 SPELL ON/OFF 37 7.5 DEL DICTIONARY 40
7.2 CHECK 38 7.6 LIST 41
7.3 SELECT 38 7.7 SPELL CHECK OPERATION SUMMARY 42
7.4 ADD DICTIONARY 39
BRBENBICEST. Io. ivvvvisisvsress sn saa ess sans vasa si sdb seleriend ible44
1TROUBLESHOOTING 44
2INITIALIZATION TABLE 45
3MESSAGE TABLE 46
4COMMAND SUMMARY 48
5OPERATIONAL PRECAUTIONS 50
SPECIFICATIONS. ols oo re Nx <3 sas nw nen aineennnnor eae52
COMMAND INDEX ........cciiiiiiininnannnnnnnnnns rr crsencaese nore cosa BO

GETTING TO KNOW
YOUR CASIOWRITER
1.1 UNPACKING
Remove the CASIOWRITER from its carton and ensure that the following items are
included:
*One black ribbon cassette
*10 sheets of plain paper
*Four D-SIZE batteries
1.2 PRECAUTIONS
AVOID HEAT, HUMIDITY, AND DIRECT
SUNLIGHT
Do not overexpose the unit to direct sunlight,
place it near a heater or in any area subject
to high temperatures.
DO NOT DROP THE UNIT AND AVOID
SEVERE IMPACTS
Severe impact can result in malfunction. When
carrying or transporting the unit, be sure to
handle it gently.

AVOID LIQUIDS, DUST, ETC.
Do not allow foreign matter to enter between
the keys. Be especially careful of metallic ob-
jects such as hairpins, sewing needles or coins.
Also, do not allow the unit to get wet.
DO NOT USE CHEMICAL AGENTS FOR
CLEANING
Clean the unit with soft cloth dampened with
amild neutral detergent solution. Soak the
cloth in the solution and then squeeze until
almost dry.
NEVER ATTEMPT YOUR OWN
MAINTENANCE
Your CASIOWRITER is aprecision instrument
made up of sophisticated electronic parts. Any
modification of or tampering with internal com-
ponents can cause trouble or malfunction.
WARNING BEEPS AND RAM DEAD
MESSAGE
Warning beeps sound and aRAM DEAD mes-
sage may appear when misoperation occurs.
For details, see APPENDIX 5at the back of the
manual.

IN CASE OF MALFUNCTION... Bile an
Check whether switches, connections, etc. are
set correctly. If the unit still does not work, con-
tact the original retailer or anearby dealer.
Never attempt to repair the unit yourself.
The precautions note herecover only generalsituations. Besureto alsoread
the operational
f
r
l
)

1.3 POWER SUPPLIES
The 2-way power supply of CASIOWRITER allows the unit to be powered by batteries
or standard household current (using an optional AC adaptor). Power is switched ON
and OFF using the power switch on the leftside of the unit.
BATTERIES
The unit is capable of being powered by four D-SIZE batteries.
1. Ensure that the power of the unit is OFF.
2. Open the battery compartment cover on the
bottom of the unit by sliding it in the direc-
tion indicated by the arrow.
3. Load the four batteries ensuring that polari-
ty is correct.
4. Replace the battery compartment cover.
*Remove batteries from the battery compart-
ment when the unit is not used for extended
periods. Battery leakage can damage elec-
trical components.
*Always replace all four batteries.

AC ADAPTOR (Option)
Connection of an optional AC adaptor
(AD-4845) allows the unit to be powered by
standard household current (mains).
*Always ensure that the power of the unit is
OFF when connecting or disconnecting the
adaptor.
(Option)
*Use only the specified CASIO adaptor to pre-
vent damage to the unit.
*Adaptors normally become warm when con-
nected to the power source. This is not cause
for worry, but adaptors should be disconnect-
ed whenever the unit is not used for extended
periods.
AUTO POWER OFF FUNCTION
An automatic power cut-off function activates approximately 6 minutes after the last
operation of the unit, even when the optional AC adaptor is being used. Power can
be restored by switching the power of the unit OFF and then ON again, or by pressing
the (sur) .

1.4 RIBBON CASSETTES
Ribbon cassettes are available in three colors (black, blue, red).
Load the cassette as outlined below:
1. Remove the cassette from its package and
remove the plastic retainer that keeps the
spools from turning.
2. Use your finger or apencil to wind the rib-
bon past the leader. Always ensure that the
exposed portion of the ribbon is taut.
3. Press +to bring the carrier to the
center. At this time, the message ‘Change
Ribbon" appears on the display.
4. Open the hood by lifting it up.
5. Place the cassette onto the carrier and press
gently until it snaps into place. Ensure that
the printhead enters between the exposed
ribbon and the cassette.
6. Replace the hood.
7. Press either or ¥to clear
the display and return the carrier to the next
typing position.
*Store cassettes in acool, dry place.
*Ribbon cassettes are not required when ther-
mal paper is employed.

1.5 PAPER
The CASIOWRITER is capable of printing on either plain, untreated paper with cas-
sette ribbon, or on thermal paper (without cassette ribbon). Load paper into the unit
using the following procedure:
1. Insert the paper into the paper slot.
2. Turn the platen knob to feed the paper into
the unit.
hi
ey
3. After the top of the paper appears, pull the
paper release lever to release the paper and
then align the top corners of the paper with
the bottom.
4. After the paper is aligned properly, return
the paper release lever to its original posi-
tion and move the top of the paper down by
turning the platen knob.
*Always keep the hood closed when typing.
*Paper sizes up to awidth of 220mm can be used.
*When using thermal paper, ensure that the shiny side of the paper is facing the print-
head when in the CASIOWRITER.
*Roughly grained papers do not produce satisfactory results.

2.1 KEY IDENTIFICATION CHART
Each Casiowriter key produces four characters,
though letter keys show only the one, most com- lid +
monly used letter they represent. Pressing
will result in either acapital letter or common
punctuation sign. All keys automatically repeat
their respective functions when held down.
Normal
Figure 1
The Casiowriter also has aCODE key (), that types adifferent letter or symbol
when pressed along with another key. +(sw) +character key will produce stilt
more characters (Figure 1).
The Casiowriter produces punctuated characters, such as [fi] or [U]; and also produces
accents, tildes, umlauts, and other superscript punctuation alone: ["[. [7], ["],["], and
["]. When you type any of these, the Casiowriter automatically waits for input of the
ae aFor instance, to type [E], you press +(7] (the keyin Figure 1),
+E].
Certain other keys are used to control typing, editing, and memory functions when used
in combination with the
[CMD]
key.

2.2 AUTO TEST FUNCTION
The auto test function produces a hardcopy that demonstrates the print functions of
the CASIOWRITER.
1. After loading paper into the unit, turn on power while holding down the key.
2. The following should appear on the paper:
The Next Generation Typewrlter
Guiding Your Typing
With Intelligent Technology
*SPELL CHECK lets you know the misspelled word as well as the
correct spelling. Words are checked against a50,000 word
dictionary that memorizes up to 130 additional words.
*DISPLAY CORRECTION lets you correct up to afull line before
printing. The entire text can be corrected in memory and
reprinted.
*TWO DOUBLE-SPACED PAGES of typing can be stored in the internal
text memory -even when power is off.
*DOUBLE WIDTH, bold, underlining, 10 or 12 pitch, are
all included as well as extra features 1ike the following :
CENTERING
RIGHT MARGIN FLUSH
DECIMAL TABULATION
12345.67890
0.1234
*# NUMEROUS EDITING FEATURES and RIGHT MARGIN JUSTIFICATION provide
the professional touch to all your correspondence and reports.
AT CASIO
MIRACLES NEVER CEASE!

2.3 DISPLAY
The 15-character display of the CASIOWRITER shows text, as well as the status of
various functions.
Right margin flush
Centering Margin release
Justification —, —Memory mode
Print mode—, Edit mode
Line spacing— r—Spell check mode
nl [Sh lock
1012 1142 DPLP JUST CTR RMF <> MEMORY EoiT (EEE [Cock
Besides this, other symbols and messages appear to provide important information and
prompts that help to ensure proper operation.
2.4 DISPLAY CONTRAST CONTROL
Use the display contrast control on the right-
side of the unit to adjust the darkness of the
characters appearing on the display. Rotating
the control towards the back makes the display
darker, while rotating it towards the front makes
the display lighter.

2.5 PRINT DENSITY ADJUSTMENT
DENSITY
KEY OPERATION: CMD) +|X
1. Press +[@to enter the print density adjustment mode. At this time, the display
should appear as follows:
2. Enter avalue from(1](lightest) through (5] (darkest) to adjust print density. Entering
[P)(upper case or lower case) produces a demonstration print of the available densi-
ties and returns to the print density adjust mode.
Density:1 Density:2 Density:3 Density:4 Density:
3. Press any key to return to the mode in effect prior to the print density adjust mode.
*The print density adjust mode can only be entered when the printhead is at the left
margin or when the current line contains only spaces.
*Density values 1through 5can be entered by pressing the corresponding keyboard
key, regardless of the shift lock status.
2.6 HOT ZONE AND WORD WRAP
The "hot zone'' is an area that extends from apoint eight spaces from the right margin
up to the margin itself. Abeep will always sound automatically when you enter the hot
zone while typing.
In the direct print mode (see 3.1), this will signal that acarrier return is required since
you are nearing the right margin. If you continue typing without acarrier return, the
printhead will stop when the right margin is reached. (See MARGIN RELEASE, 3.9.)
In the line print (see 3.1) and memory modes, entering the hot zone will cause the unit
to search back in the line for the last space or hyphen. Once you reach the right mar-
gin, the unit will automatically break the line at the last space or hyphen and wrap all
subsequent text to the beginning of the next line.
11

*Word wrap does not function properly when very narrow margins or very long words
are used. Asingle word whose length exceeds the space available between the left
and right margins is automatically cut off at the right margin, and the cut off portion
is printed on the next line.
——Hot zone
ZRight margin
Pree ia crn
80
50
2.7 INITIALIZATION
SER
key operaion: (Bk +POWER ON
The unit should be initialized by holding down the (dH) key while switching power ON
after replacing batteries. This procedure can also be used to clear memory. See page
45 for initialized function settings.

BASIC OPERATION
This section explains the basic typing operations of the CW-16. Besides the standard
pitch, margin and tab settings, the CW-16 is also equipped with avariety of print modes
to suit the specific typing job being performed. The operation described in this section
can also be used in the memory mode (see page 29).
3.1 PRINT MODES
PRINT
MODE
Key operaTion: |CMD| +|| |
Switches between the three available print modes in the sequence:
LP =LP JUST =BP =wis
DP (DIRECT PRINT) MODE
DISPLAY: 1012 11%2 DPLP JUST CTR RMF +i» MEMORY EDIT EZENN LOCK
Prints everything typed on the keyboard directly onto the paper as it is typed. The 15
most recent characters typed are also shown on the display. Abeep sounds when the
hot zone is entered (see 2.6). Another beep sounds when the right margin is reached,
and further inputis impossible. At this time, press either or (4H(see 3.9). Pressing
[@](see page 20) deletes text from the display, but not from the paper. This setting is
retained even when the power of the unit is switched OFF.
LP (LINE PRINT) MODE
DISPLAY: 1012 1142 DPLP JUSTCTR RMF “4 MEMORY EDIT EZHIN LOCK

Prints everything typed on the keyboard after is pressed or when aspace or hyphen
is typed after entering the hot zone (see 2.6), resulting in an automatic carrier return.
The 15 most recent characters typed are also shown on the display.
Corrections can be made on the display before the current line is printed. Entering
spaces from the beginning of aline causes the carrier to move along the platen with
each space entered, Carrier movement stops when any otherinput key (besides the
spacebar) is pressed. The line print setting is retained even when the power of the unit
is switched OFF.
LP JUST (LINE PRINT JUSTIFIED)
DISPLAY: 1012 11/42 DPLP JUST CTR RMF +> MEMORY
Chin
CK
The same as the LINE PRINT mode, except printing is performed with right margin
justification. Only lines completed by automatic carrier returns are justified. Lines ended
with amanual carrier return are printed as they are entered.
EXAMPLES:
*RAGGED MARGIN
Congratulations on your selection of a
CASIOWRITER! More than just an electronic
typewriter, the CASIOWRITER offers a
host of features and functions designed
to make typing quicker and easier.
*JUSTIFIED MARGIN
Congratulations on your selection of a
CASIOWRITER! More than just an electronic
typewriter, the CASIOWRITER offers ahost
of features and functions designed to
make typing quicker and easier.

3.2 PRINT PITCH
Key operaTioN: [CMD] +|= 4
DISPLAY: Sa
or142 DPLP JUSTC
CTR AME «te
ar MEMORY
,EDITEEN
Switches the pitch of the characters printed between Pica (10 chrs/inch) and Elite (12
chrsl/inch). Pitch can be changed only at the beginning of aline or within aline that
contains spaces only. The double scale on the transparent portion of the hood shows
the character spacing for the two available pitches. The maximum line length in Pica
is 80 characters, while the maximum line in Elite is 96 characters. These values are
halved when double width characters (see 5.2) are used. Pitch settings are retained
even when the power of the unit is switched OFF.
EXAMPLES:
*PICA (10)
Congratulations on your selection of a CASIOWRITER!
«ELITE (12)
Congratulations on your selection of aCASIOWRITER!
15

16
3.3 LINE SPACING
KEY OPERATION: (CMD| +[+
DISPLAY: :;
1012 11%2 DPLP JUST CTR RMF ++ MEMORY EDIT (EES LOCK
Switches the spacing between lines from single, to 11/2, to double. Line space settings
are retained even when the power of the unit is switched OFF.
EXAMPLES:
«SINGLE (1)
More than just an electronic typewriter,
the CASIOWRITER offers ahost of features
and functions designed to make typing
quicker and easier.
12
More than just an electronic typewriter,
the CASIOWRITER offers ahost of features
and functions designed to make typing
quicker and easier.
«DOUBLE (2)
More than just an electronic typewriter,
the CASIOWRITER offers ahost of features
and functions designed to make typing
quicker and easier.
Other manuals for CW-16
2
Table of contents
Other Casio Typewriter manuals