USER’S GUIDE 2441
2
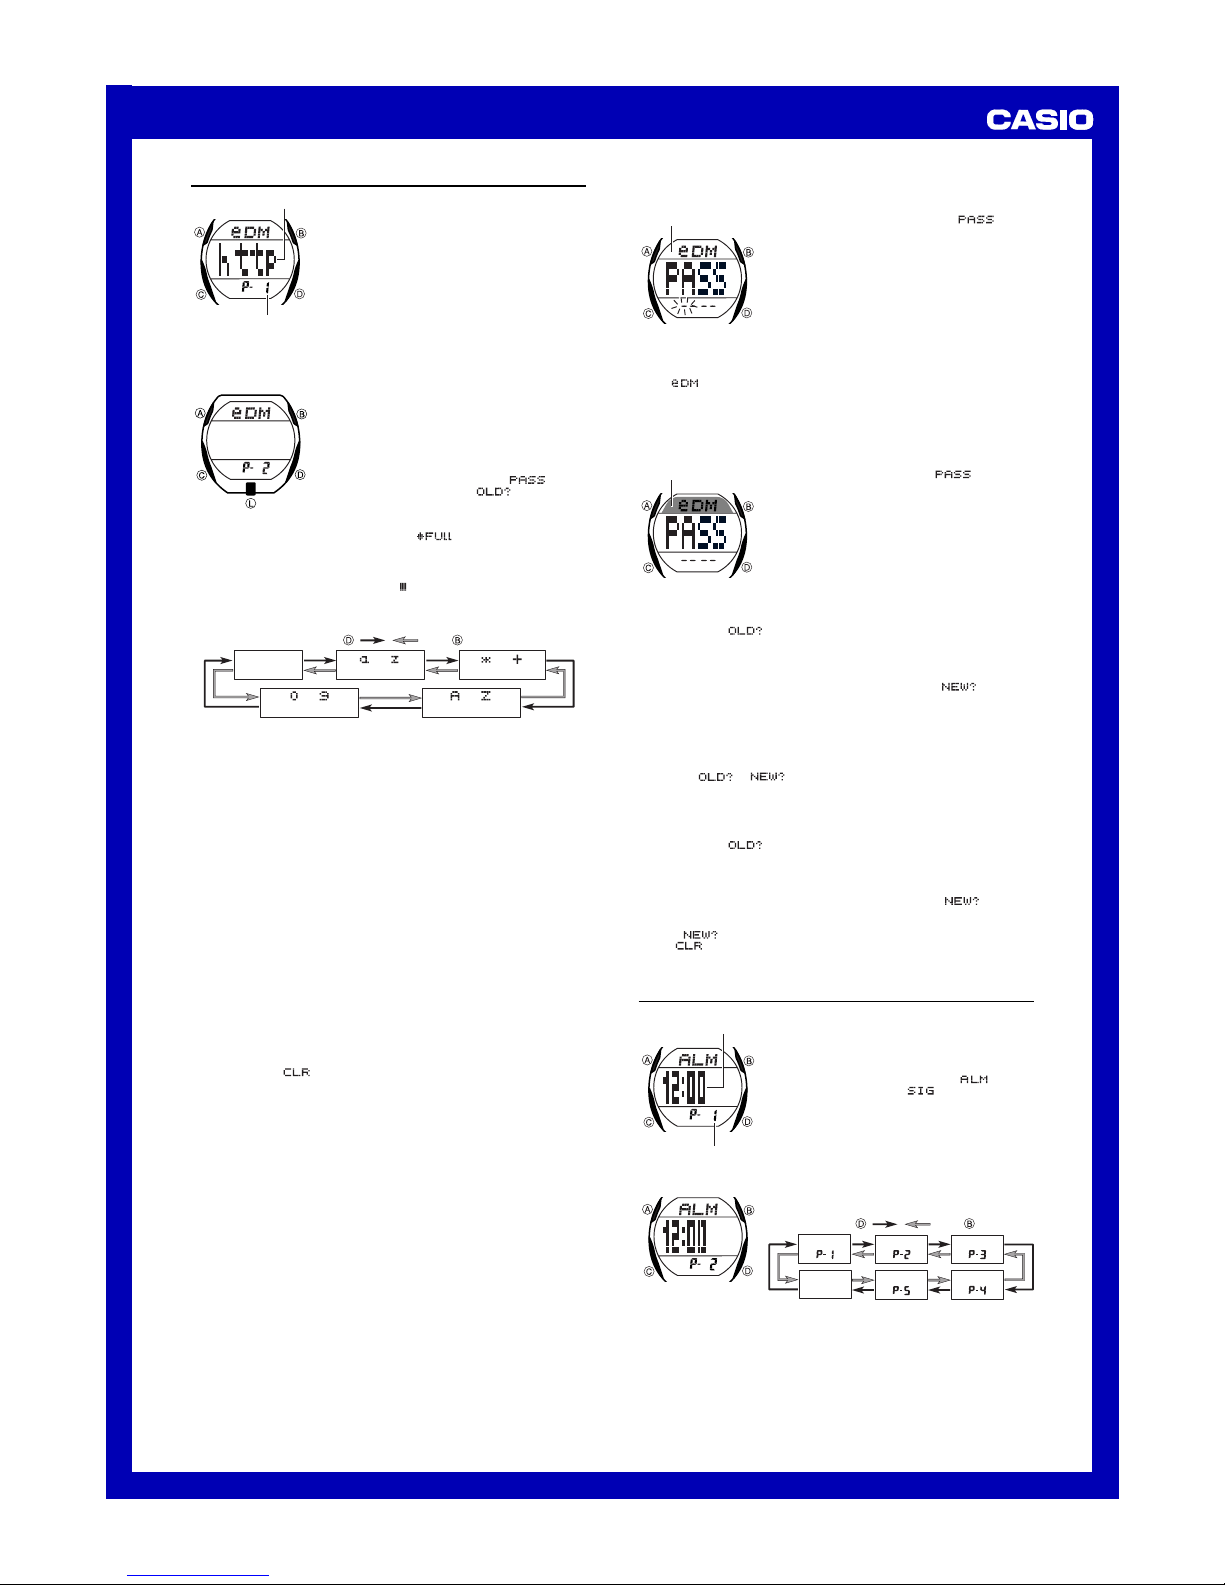
e-DATA MEMORY
You can use the watch’s e-DATA MEMORY to store
e-mail addresses, Web page URLs, and other text
data.You can store up to 20 records (data items),
and even use a password to limit access to e-DATA
MEMORY contents.
•You can input alphabetic lower-case and upper-
case characters, symbols, and numbers for an e-
DATA MEMORY record.
•You can input up to 20 characters for the text of
each record.
•Records are stored in memory in the sequence
they are created.
•All of the operations in this section are performed in
the e-DATA MEMORY Mode, which you enter by
pressing C.
Te x t
Record number
(Page number)
To create a new e-DATA MEMORY record
1. In the e-DATA MEMORY Mode, press Band Dat
the same time to display the new data screen.
•You do not have to perform the above step if the
new data screen is already on the display.
•The new data screen is the one that is blank
(contains no text).
•Take care that you press Band Dat the same
time. Accidentally pressing Balone changes to
the new password setting screen ( ) or the
old password input screen ( ). If this
happens, press Bagain to exit the password
screen, and then carefully press Band Dat the
same time.
•If the message appears on the display, it
means that memory is full. To store another
record, you will first have to delete some of the
records stored in memory.
2. Hold down Auntil the flashing cursor ( ) appears on the display, which
indicates the setting screen.
3. Use Dand Bto change the character at the cursor position. The character
changes in the sequence shown below.
(space)
0to
(number)
to
(upper-case)
to
(lower-case)
to
(symbol)
Press . Press .
•See the “Character List” at the back of this manual for information about
the characters you can input.
4. When the character you want is at the cursor position, press Cto move the
cursor to the right.
•You can move the cursor to the left by pressing L.
5. Repeat steps 3 and 4 until the text is complete.
New Data Screen
6. Press Ato store your data and return to the e-DATA MEMORY record
screen (without the cursor).
•When the text has more than four characters, it scrolls from right to left on the
display.
To recall e-DATA MEMORY records
In the e-DATA MEMORY Mode, press Dto scroll forward through e-DATA
MEMORY records.
•Pressing Dwhile the last record in memory is on the display changes to the
new data screen. Pressing Dagain displays the first record.
To edit an e-DATA MEMORY record
1. In the e-DATA MEMORY Mode, display the record you want to edit.
2. Hold down Auntil the flashing cursor appears on the display.
3. Use Cand Lto move the flashing to the character you want to change.
•Use Cto move the cursor to the right, and Lto move it to the left.
4. Use Dand Bto change the character.
5. After making the changes you want, press Ato store them and return to the
e-DATA MEMORY record screen.
To delete an e-DATA MEMORY record
1. In the e-DATA MEMORY Mode, display the record you want to delete.
2. Hold down Auntil the flashing cursor appears on the display.
3. Press Band Dat the same time to delete the record.
•The message appears to indicate that the record is being deleted.
After the record is deleted, the cursor appears on the display, ready for
input.
4. Input data or press Ato return to the e-DATA MEMORY record screen.
Using a Password to Protect e-DATA MEMORY Data
You can register a 4-digit password to keep e-DATA MEMORY data secure.
Important!
Use a 4-digit password that is easy for you to remember, but difficult for others
to decipher. If you forget the password, you will have to have your watch
initialized (which deletes all data in memory) in order to access the e-DATA
MEMORY again.To have the watch initialized, contact the store or dealer
where you purchased it, and ask to have the AC operation performed.
To register a new password
1.In the e-DATA MEMORY Mode, press B.
•This displays a screen that shows
xxxx, with the first hyphen flashing. This is the
new password setting screen.
2.Press Dto scroll through numbers at the first digit.
3.When the first digit is the number you want, press
Cto advance to the next digit.
4.Repeat steps 2 and 3 to input all four digits of the
password you want.
•Pressing Bwhile inputting a new password
clears your input and returns to the e-DATA
MEMORY record screen.
5.After all four of the password digits are the way you
want, press Cto register them.
•After you register a password, the e-DATA MEMORY record screen appears
with displayed at the top in red on blue. The red on blue coloring
indicates that e-DATA MEMORY is protected by a password.
•After registering a password, you can input, recall, edit and delete data, if you
want. After you exit the e-DATA MEMORY Mode, you will have to input the
password every time you want to enter it again.
To input the password
1.Enter the e-DATA MEMORY Mode.
2.On the password input screen ( xxxx),
input the password.
•Press Dto scroll through numbers at each digit.
•Press Cto advance to the next digit.
3.After the password is the way you want, press C.
•The e-DATA MEMORY record screen appears if the
password you input matches the one you
registered.
•The password input screen reappears if the
passwords do not match.
Black on white
Red on blue
To change the password
1. While a record screen or password input screen is on the display in the e-
DATA MEMORY Mode, press B.
•This displays xxxx for input of the current password.
2. Input the current password.
•Press Dto scroll through numbers at each digit.
•Press Cto advance to the next digit.
3. After the password is the way you want, press C.
•If the password you input matches the current password xxxx
appears for input of the new password.
•The password input screen appears if the passwords do not match.
4. Input the new password.
•Press Dto scroll through numbers at each digit.
•Press Cto advance to the next digit.
5. After the new password is the way you want, press Cto register it and
change to the e-DATA MEMORY record screen.
•While the or input screen is on the display, you can press B
to change to the password input screen.
To delete the password
1. While a record screen or password input screen is on the display in the e-
DATA MEMORY Mode, press B.
•This displays xxxx for input of the current password.
2. Input the current password.
•Press Dto scroll through numbers at each digit.
•Press Cto advance to the next digit.
3. After the password is the way you want, press C.
•If the password you input matches the current password, xxxx
appears for input of the new password.
•The password input screen appears if the passwords do not match.
4. While xxxx is on the display, hold down A. Keep Adepressed
until first appears, and then the e-DATA MEMORY record screen
appears.
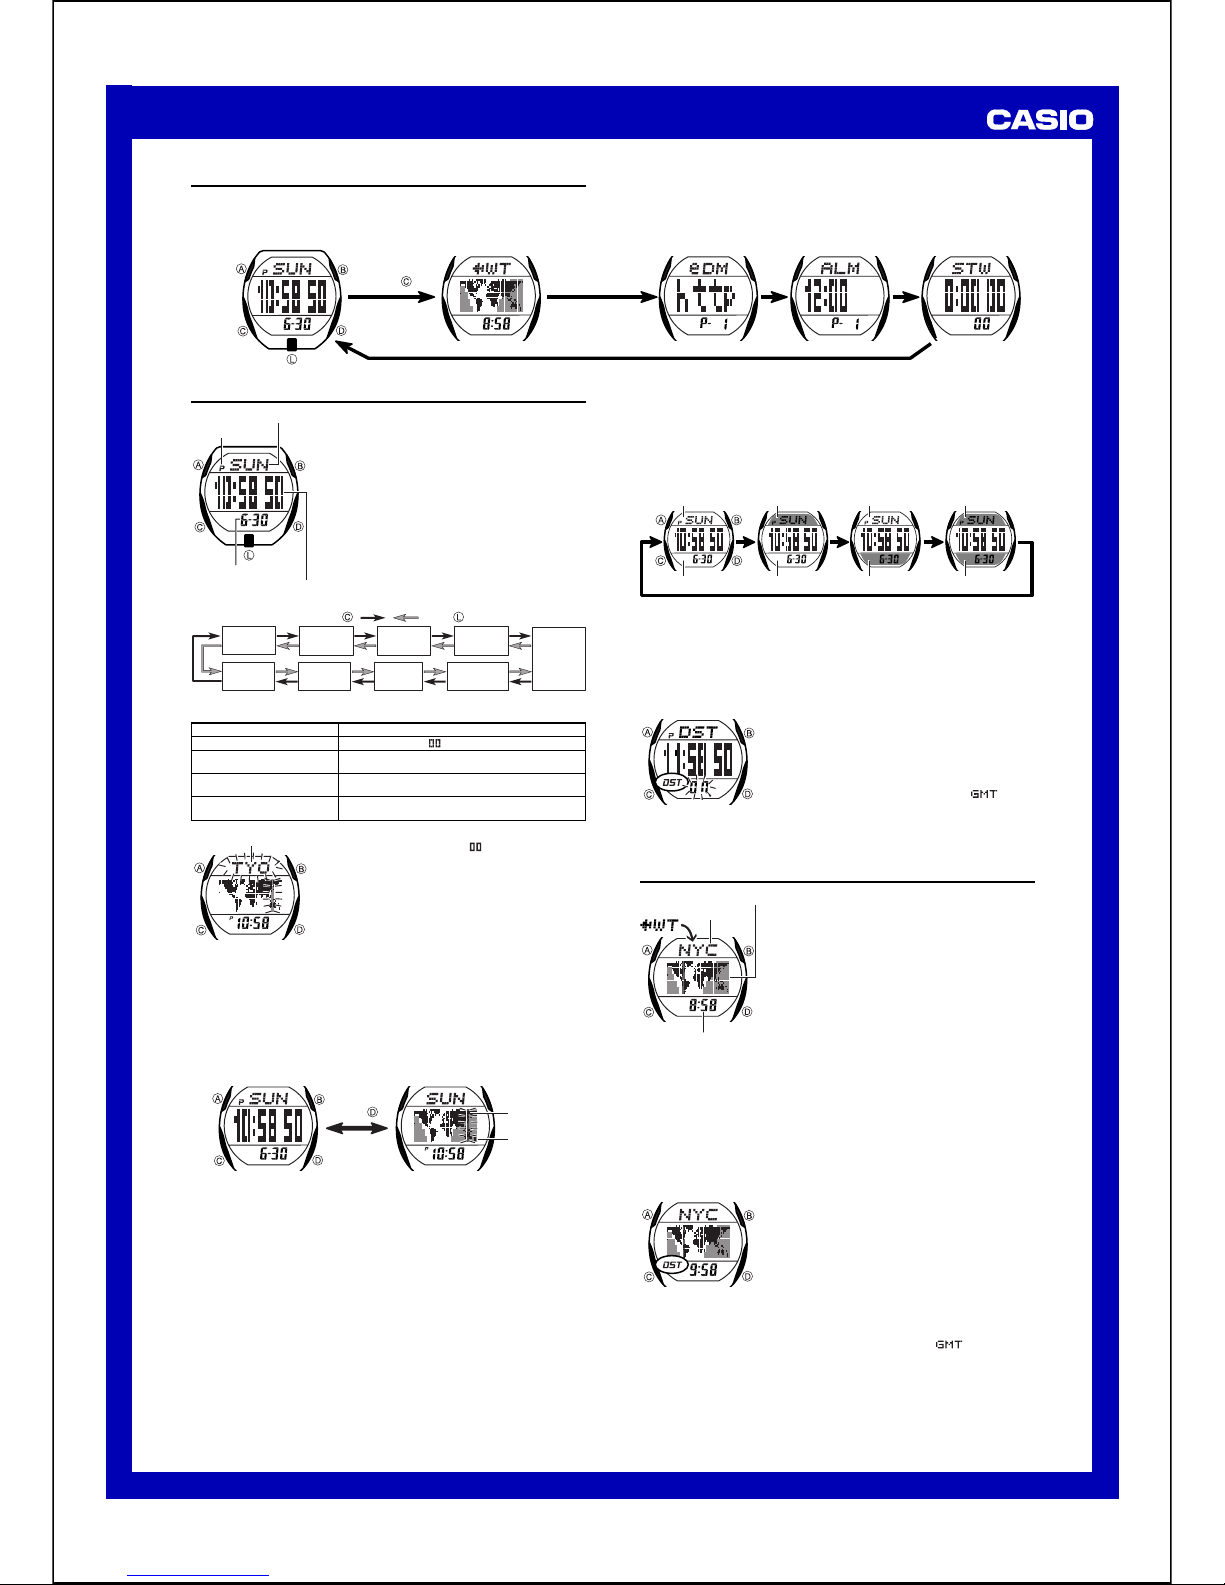
Alarm
You can set five independent Daily Alarms. When an
alarm is turned on, the alarm tone sounds when the
time is reached.
You can also turn on an Hourly Time Signal that
causes the watch to beep twice every hour on the
hour.
•The alarm screen is indicated by the indicator
in the upper display, while indicates the
Hourly Time Signal screen.
•The five alarms are identified by alarm numbers P-
1through P-5.
•Alarm settings (and Hourly Time Signal settings)
are available in the Alarm Mode, which you enter by
pressing C.
To set an alarm time
1.In the Alarm Mode, use Dand Bto select the
alarm whose time you want to set.
Alarm 1 Alarm 3Alarm 2
Time
Signal Alarm 4Alarm 5
Press . Press .
2. After you select an alarm, hold down Auntil the hour setting of the alarm
time starts to flash, which indicates the setting screen.
•This operation automatically turns on the alarm.
3. Press Cto move the flashing between the hour and minutes.
4. While a setting is flashing, use D(+) and B(–) to change it.
•When setting the alarm time using the 12-hour format, take care to set the
time correctly as a.m. (no indicator) or p.m. (Pindicator).
5. Press Ato exit the setting screen.
Alarm time
(Hour : Minutes)
Alarm number
(Page number)


 User manual")