manuals.online logo
Brands
  1. Home
  2. •
  3. Brands
  4. •
  5. CAVE
  6. •
  7. Security Camera
  8. •
  9. CAVE VHS-011-HDC User manual

CAVE VHS-011-HDC User manual

hd wireless IP camera
VHS-011-HDC
3
Introduction to the
Cave HD IP Camera
Contents UK Before pairing the Cave HD
IP Camera with your Cave Smart
Hub please read the following.
Ensure the camera and Smart
Hub is within range of the phone/
device which you use to access
the Cave app.
You will need your router
username and password to
hand.
IMPORTANT: Only use the
supplied power cable with the
camera and a compatible power
source. Failure to do so may
invalidate your warranty.
FR Avant de coupler la caméra IP
Cave HD avec votre Cave Smart
Hub, veuillez lire ce qui suit.
Assurez-vous que la caméra
et le Smart Hub sont à portée
du téléphone/appareil que
vous utilisez pour accéder à
l’application Cave.
Vous aurez besoin du nom
d’utilisateur et du mot de passe
de votre routeur.
IMPORTANT: Utilisez
uniquement le câble
d’alimentation fourni avec
l’appareil photo et une source
d’alimentation compatible. Le
non-respect de cette consigne
peut invalider votre garantie.
ES Antes de emparejar la cámara
IP Cave HD con su Cave Smart
Hub, lea lo siguiente.
Asegúrese de que la cámara y
el Smart Hub estén dentro del
alcance del teléfono/dispositivo
que usa para acceder a la
aplicación Cave.
Necesitará el nombre de usuario
y la contraseña de su enrutador
a mano.
IMPORTANTE: Utilice
únicamente el cable de
alimentación suministrado
con la cámara y una fuente de
alimentación compatible. El
no hacerlo puede invalidar su
garantía.
Introduction to the Cave IP Camera 3
Pairing the Cave IP Camera to the Cave system 4
Motion Detection & Recording 12
Controlling the Cave IP Camera 14
Edit camera settings 15
Using the Cave IP Camera with a generic app 16
Cave accessories 17
Support & troubleshooting 18
Visit our YouTube channel for Cave installation guides
https://bit.ly/2GoPtxN
4 5
Pairing the Cave IP Camera
STEP 1
UK Plug the Cave IP Camera into
a compatible power source using
the supplied power cable. The
camera LED will continuously
flash green to indicate it is in
pairing mode.
FR Branchez la caméra IP Cave
à une source d’alimentation
compatible à l’aide du câble
d’alimentation fourni. La LED de
la caméra clignotera en vert en
continu pour indiquer qu’elle est
en mode de couplage.
ES Conecte la cámara IP Cave
a una fuente de alimentación
compatible utilizando el cable
de alimentación suministrado.
El LED de la cámara parpadeará
continuamente en verde para
indicar que está en modo de
emparejamiento.
STEP 2
UK Open the Cave app and press
the ‘Add Accessory’ button then
press ‘By scanning QR Code’.
FR Ouvrez l’application Cave et
appuyez sur le bouton «Ajouter
un accessoire», puis sur «En
scannant le code QR».
ES Abra la aplicación Cave
y presione el botón “Agregar
accesorio”, luego presione
“Escaneando el código QR”.
6 7
STEP 3
UK Scan the QR Code on the
base of the camera using the
scan window in the app. Take
note of the camera pairing name,
shown on screen, next open wi-
settings on your device.
Note: If the camera does not
appear on the wi- list press and
hold the reset button on the rear
of the camera for 10 seconds,
when released, you will hear
a ‘Beep’. The camera should
appear within 30 seconds.
FR Scannez le code QR sur la
base de la caméra à l’aide de
la fenêtre de numérisation de
l’application. Prenez note du
nom de couplage de la caméra,
afché à l’écran, après avoir
ouvert les paramètres wi- sur
votre appareil.
Remarque: Si la caméra
n’apparaît pas dans la liste wi-,
maintenez enfoncé le bouton
de réinitialisation à l’arrière de la
caméra pendant 10 secondes,
une fois relâché, vous entendrez
un «bip». La caméra devrait
apparaître dans les 30 secondes.
ES Escanee el código QR en
la base de la cámara usando
la ventana de escaneo en la
aplicación. Tome nota del
nombre de emparejamiento
de la cámara, que se muestra
en la pantalla, luego abra la
conguración de wi- en su
dispositivo.
Nota: Si la cámara no aparece
en la lista de Wi-Fi, presione
y mantenga presionado el
botón de reinicio en la parte
posterior de la cámara durante
10 segundos, cuando lo
suelte, escuchará un “Bip”. La
cámara debería aparecer en 30
segundos.
8 9
STEP 4
UK Select the camera from the
wi- list and enter the default
password ‘01234567’ and
click ‘Join’. The camera should
connect to your wi-.
FR Sélectionnez la caméra dans
la liste wi- et entrez le mot de
passe par défaut «01234567»
et cliquez sur «Rejoindre». La
caméra doit se connecter à votre
wi-.
ES Seleccione la cámara de
la lista de wi- e introduzca la
contraseña predeterminada
“01234567” y haga clic en
“Unirse”. La cámara debería
conectarse a tu wi-.
STEP 5
UK Re-enter the Cave app your
wi- router should be already
listed, enter your wi- router
password and conrm the
password before clicking ‘Start’.
Network conguration may take
up to a few minutes.
FR Entrez à nouveau dans
l’application Cave, votre routeur
wi- devrait déjà être répertorié,
entrez le mot de passe de votre
routeur wi- et conrmez le mot
de passe avant de cliquer sur
«Démarrer».La conguration
du réseau peut prendre jusqu’à
quelques minutes.
ES Vuelva a ingresar a la
aplicación Cave, su enrutador
wi- ya debería estar en la lista,
ingrese la contraseña de su
enrutador wi- y conrme la
contraseña antes de hacer clic
en “Iniciar”. La conguración
de la red puede tardar unos
minutos.
10 11
STEP 6
UK Enter a name for your new
IP camera and click the tick icon
to save. The camera will now
appear in the Cave app under
‘Smart cameras’.
FR Entrez un nom pour votre
nouvelle caméra IP et cliquez sur
l’icône de coche pour enregistrer.
La caméra IP devrait maintenant
apparaître dans l’application
Cave sous «Caméras
intelligentes».
ES Introduzca un nombre para
su nueva cámara IP y haga
clic en el icono de marca de
vericación para guardar. La
cámara IP debería aparecer
ahora en la aplicación Cave en
“Cámaras inteligentes”.
STEP 7
UK To view the camera for the
rst time, you will need to reset
the default password. Press ‘OK’
and enter a new password, once
conrmed the camera will be
online and ready to view.
FR Pour voir la caméra pour
la première fois, vous devrez
réinitialiser le mot de passe par
défaut. Appuyez sur «OK»et
entrez un nouveau mot de passe,
une fois conrmé, la caméra sera
en ligne et prête à être visionnée.
ES Para ver la cámara por
primera vez, deberá restablecer
la contraseña predeterminada.
Presione “OK” e ingrese una
nueva contraseña, una vez
conrmada, la cámara estará
en línea y lista para ver.
12 13
Motion Detection
& Recording
UK The camera records 18
second video clips 3 seconds
of this is pre-recording when
movement is detected. The
clips automatically save onto a
microSD card (not included).
Activate recording
Install a microSD card (up to
128GB) and enter the camera
settings. Click ‘Motion Detection
& Recording’ to activate. To
view footage use ‘Play Video
Recordings’ under advanced
camera settings.
FR La caméra enregistre 18
secondes de clips vidéo dont 3
secondes de pré-enregistrement
lorsqu’un mouvement est
détecté. Les clips sont
automatiquement enregistrés
sur une carte microSD (non
incluse).
Activer l’enregistrement
Installez une carte microSD
(jusqu’à 128Go) et entrez les
paramètres de l’appareil photo.
Cliquez sur “Détection
et enregistrement de
mouvement” pour l’activer. Pour
visionner des séquences, utilisez
“Lire les enregistrements vidéo”
dans les paramètres avancés de
la caméra.
ES La cámara graba clips
de video de 18 segundos,
3 segundos de esto es
pregrabación cuando se
detecta movimiento. Los clips
se guardan automáticamente
en una tarjeta microSD (no
incluida).
Activar grabación
Instale una tarjeta microSD
(hasta 128GB) e ingrese la
conguración de la cámara.
Haga clic en “Detección y
grabación de movimiento” para
activarlo. Para ver el metraje,
use “Reproducir grabaciones
de video” en la conguración
avanzada de la cámara.
up to 128GB
14 15
Edit camera
settings
UK
- Motion Detection & Recording
- Sync time zones
- Horizontal/vertical flip corrects camera view.
- Change wi- settings. Press the reset button
on the camera for approx 10 secs until you hear
a beep, then wait 25 secs before attempting to
pair the camera to the Smart Hub again.
- Format SD card.
FR
- Détection et enregistrement de mouvement
- Synchroniser les fuseaux horaires
- Le retournement horizontal/vertical corrige la
vue de la caméra.
- Modiez les paramètres wi-. Appuyez sur le
bouton de réinitialisation de la caméra pendant
environ 10 secondes jusqu’à ce que vous
entendiez un bip, puis attendez 25 secondes
avant de tenter à nouveau de coupler la caméra
au Smart Hub.
- Formatez la carte SD.
ES
- Detección y grabación de movimiento:
- Sincronizar zonas horarias
- El giro horizontal/vertical corrige la vista de la
cámara.
- Cambie la conguración de wi-. Presione
el botón de reinicio de la cámara durante
aproximadamente 10 segundos hasta que
escuche un pitido, luego espere 25 segundos
antes de intentar emparejar la cámara con el
Smart Hub nuevamente.
- Formatee la tarjeta SD.
Controlling the
Cave HD IP Camera
UK
Shows all IP cameras connected
to the Cave Smart Hub
Snapshot and image save, talk through
the camera and listen to audio
Edit camera settings
FR
Afche toutes les caméras IP connectées
au Cave Smart Hub
Capture d’écran et image, parler à travers
la caméra et écouter le son
Modier les paramètres de la camér
ES
Muestra todas las cámaras IP conectadas
al Cave Smart Hub
Instantánea y guardado de imágenes, habla
a través de la cámara y escucha audio
Editar la conguración de la cámara
16 17
Cave accessories
Cave Wireless Motion Sensor
VHS-003-PIR
Cave Wireless Outdoor Siren
VHS-006-WS
Cave Wireless Smart LED Bulb (E26)
VHS-014-E26
Cave Wireless Smart LED Bulb (E27)
VHS-007-E27
Using the camera
with a generic app
UK The Cave IP Camera will work
independently from the Smart
Hub as a standalone IP camera
with a generic (non-Cave) app.
We recommend ‘GrapeCam’
available on iOS & Android.
Download the app and follow
the same pairing instructions as
used for the Cave version.
FR La caméra IP Cave
fonctionnera indépendamment
du Smart Hub en tant que
caméra IP autonome avec une
application générique (non
Cave). Nous recommandons
“GrapeCam” disponible sur
iOS et Android. Téléchargez
l’application et suivez les mêmes
instructions d’association que
celles utilisées pour la version
Cave.
ES La cámara IP Cave
funcionará independientemente
del Smart Hub como una cámara
IP independiente con una
aplicación genérica (no Cave).
Recomendamos “GrapeCam”
disponible en iOS y Android.
Descargue la aplicación y siga
las mismas instrucciones de
emparejamiento que se utilizan
para la versión Cave.
18
Support &
troubleshooting
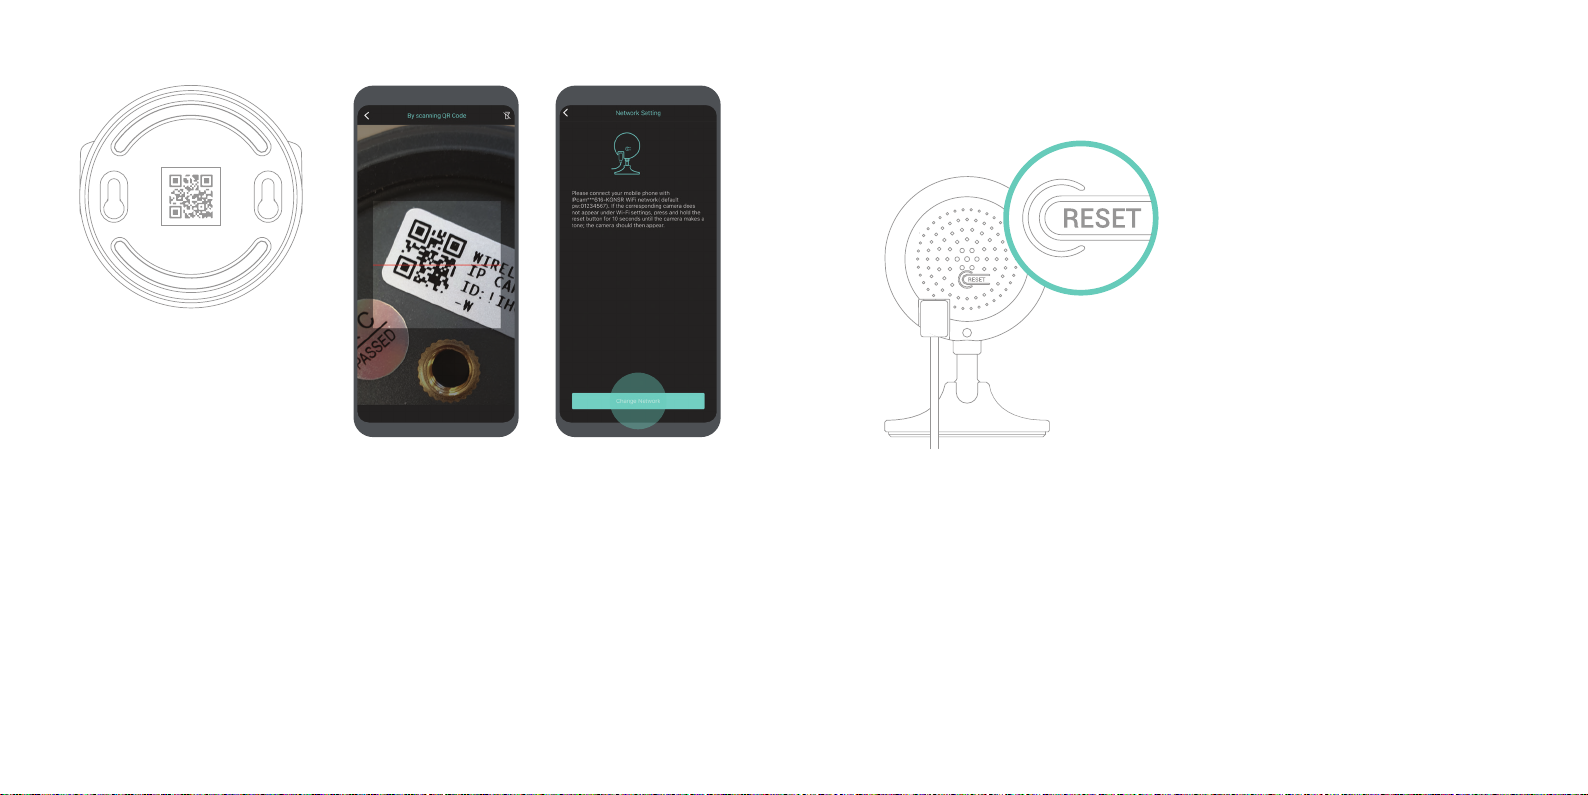
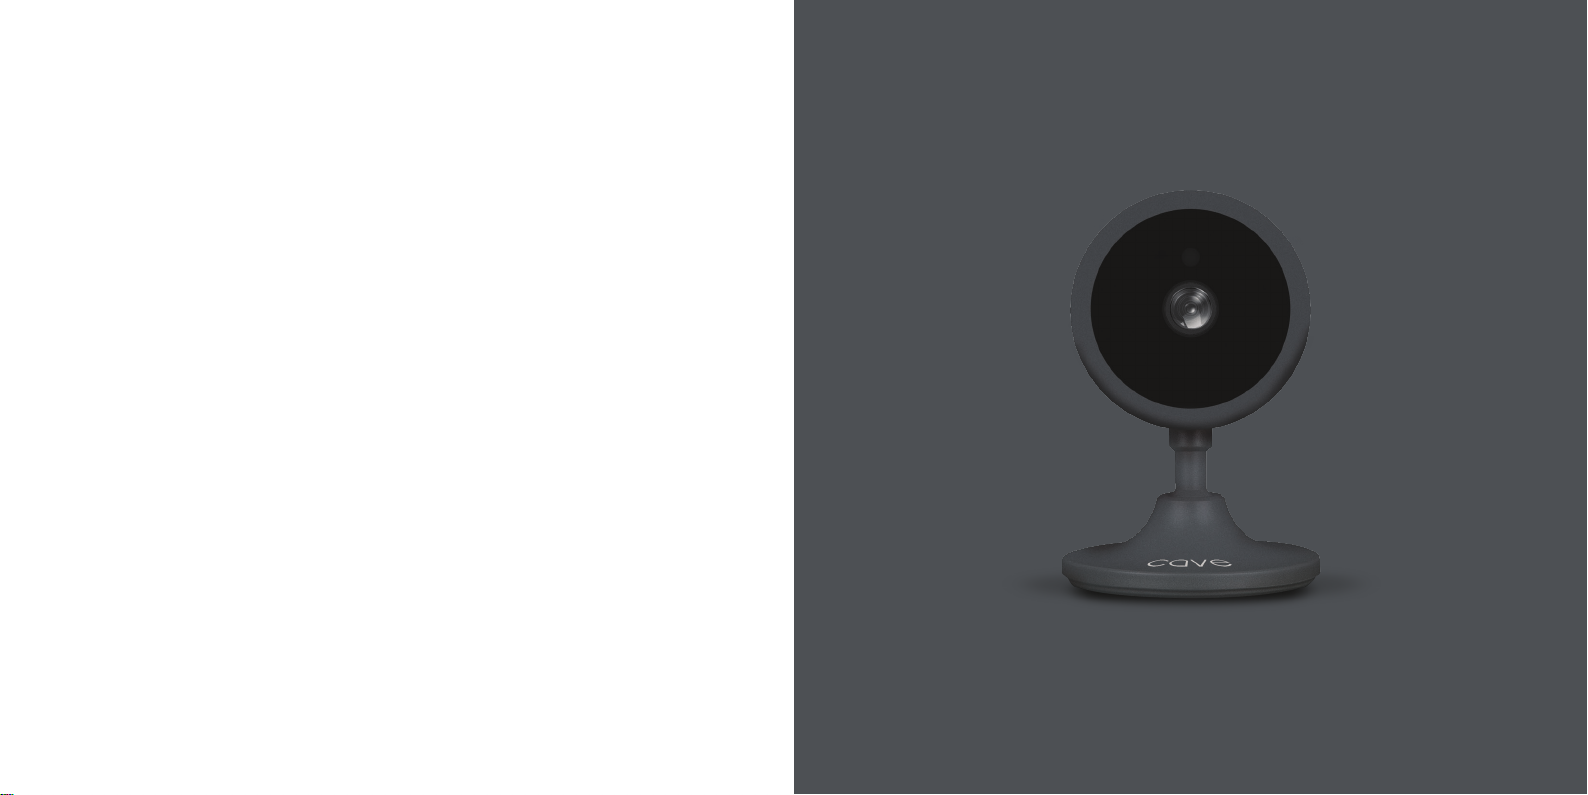
UK How do you reset the Cave HD IP Camera?
Press and hold the reset button on the rear of the
camera until you hear the reset success tone,
approximately 10 seconds. Release the button and
wait until you hear a beep to conrm the camera
is in pairing mode, this can take up to 30 seconds;
proceed to set up the camera after the beep.
FR Comment réinitialiser la Caméra IP Cave?
Appuyez sur le bouton de réinitialisation à l’arrière
de l’appareil photo et maintenez-le enfoncé jusqu’à
ce que vous entendiez la tonalité de réussite de la
réinitialisation, environ 10 secondes. Relâchez le
bouton et attendez jusqu’à ce que vous entendiez
un bip pour conrmer que la caméra est en
mode de couplage, cela peut prendre jusqu’à 30
secondes; procédez à la conguration de la caméra
après le bip.
ES ¿Cómo restableces la Cámara Cave IP?
Mantenga presionado el botón de reinicio en la
parte posterior de la cámara hasta que escuche
el tono de reinicio exitoso, aproximadamente 10
segundos. Suelte el botón y espere hasta que
escuche un pitido para conrmar que la cámara
está en modo de emparejamiento, esto puede
demorar hasta 30 segundos; proceda a congurar
la cámara después del pitido.
Contacting Veho
To contact Veho for support or troubleshooting
for your Cave IP Camera visit our website at
veho-world.com and use our pop-up chatbox.
Pour contacter Veho pour l’assistance ou le
dépannage de votre Caméra IP Cave, visitez notre
site Web à veho-world.com et utilisez notre boîte
de discussion contextuelle.
Para ponerse en contacto con Veho para obtener
asistencia o solución de problemas para su
Cámara IP Cave, visite nuestro sitio web en
veho-world.com y utilice nuestro chatbox
emergente.
DISCLAIMER:
Veho is not responsible for ensuring all footage is captured. Please ensure the
Cave HD IP Camera is installed and positioned correctly, and you are familiar
with operating the camera and app before using.
This symbol, affixed to the product or its packaging, indicates that the product must not be processed as household waste. This product should
be correctly disposed of according to your local guidelines for electrical and battery operated products. Correct disposal of the battery will avoid
potential harm to the environment and human health. For further information regarding the recycling of this product, please contact your local
waste recycling centre.
EC DECLARATION OF CONFORMITY
Hereby, Veho UK LTD declares that the radio equipment type (VHS-011-HDC) is in compliance
with Directive 2014/53/EU. The full text of the EU Declaration of Conformity
is available at https://veho-world.com/compliance/
Frequency band(s) - 2.40GHz
Maximum radio-frequency power - 14dBm

Other manuals for VHS-011-HDC

1

Other CAVE Security Camera manuals

CAVE VHS-011-HDC User manual

CAVE

CAVE VHS-011-HDC User manual

CAVE TeamUp TX20i User manual

CAVE

CAVE TeamUp TX20i User manual

Popular Security Camera manuals by other brands

Philips VCM8175/00T user manual

Philips

Philips VCM8175/00T user manual

Dedicated Micros 2060 quick start guide

Dedicated Micros

Dedicated Micros 2060 quick start guide

Vitek VTD-B72 Specifications

Vitek

Vitek VTD-B72 Specifications

ALIBI ALI-NS1012VR 2.1 Quick installation guide

ALIBI

ALIBI ALI-NS1012VR 2.1 Quick installation guide

VADDIO WallVIEW CCU HD-19 Installation and user guide

VADDIO

VADDIO WallVIEW CCU HD-19 Installation and user guide

Smartwares CIP-39220 user manual

Smartwares

Smartwares CIP-39220 user manual

4xem WLPTZ brochure

4xem

4xem WLPTZ brochure

ALIBI ALI-TS1015VR Quick installation guide

ALIBI

ALIBI ALI-TS1015VR Quick installation guide

Panasonic WVCP254H - DAY/NIGHT CLR/BW CAM Specifications

Panasonic

Panasonic WVCP254H - DAY/NIGHT CLR/BW CAM Specifications

Honeywell ACUIX ES Installation and configuration guide

Honeywell

Honeywell ACUIX ES Installation and configuration guide

Panasonic WV-CP110E Operating	 instruction

Panasonic

Panasonic WV-CP110E Operating instruction

Transition Networks TX MC01 user manual

Transition Networks

Transition Networks TX MC01 user manual

König SAS-IPCAM110 manual

König

König SAS-IPCAM110 manual

JVC TK-C1480E Product guide

JVC

JVC TK-C1480E Product guide

Evertech EV-CHDBLB user manual

Evertech

Evertech EV-CHDBLB user manual

D-Link DCS-930L user manual

D-Link

D-Link DCS-930L user manual

Bosch FLEXIDOME IP 3000i IR user manual

Bosch

Bosch FLEXIDOME IP 3000i IR user manual

Vezco VZ-TVI-B3020 user manual

Vezco

Vezco VZ-TVI-B3020 user manual

manuals.online logo
manuals.online logoBrands
  • About & Mission
  • Contact us
  • Privacy Policy
  • Terms and Conditions

Copyright 2025 Manuals.Online. All Rights Reserved.