CEntrance MicPort Pro 2 User manual

MixerFace™ and CEntrance™ are trademarks or registered
trademarks of CEntrance LLC, All rights reserved. Other trademarks
are property of their respective holders. Rev 1.7. 2019-07-07
MicPort Pro 2
USB Mic Preamp
User Manual

MicPort Pro 2 User Manual
1
Recording Studio, in Your Hand
These days, your smart phone or tablet is not
only your Digital Audio Workstation, but also
your means of sharing content with the world
online. MicPort Pro 2 lets you take advantage
of this connected environment by bringing
your audio sources to the digital ecosystem,
making it the ultimate mobile recording
interface.
Traveling audio professionals demand field
reliability and rechargeable batteries. VO
artists, musicians, online personalities, and
field recording enthusiasts alike share a need
for a durable, portable recording tool that
delivers pristine audio quality, available on-
the-go, session after session.

MicPort Pro 2 User Manual
2
If you are a voice-over actor, broadcaster or
radio journalist, you already know the original
CEntrance MicPort Pro Classic. That ground
breaking USB preamp connected any
professional mic to a computer for making
professional recordings on the go. Endorsed
by 100+ broadcasters, it created a much-
needed bridge between your laptop and your
favorite mic. But it didn't support your phone.
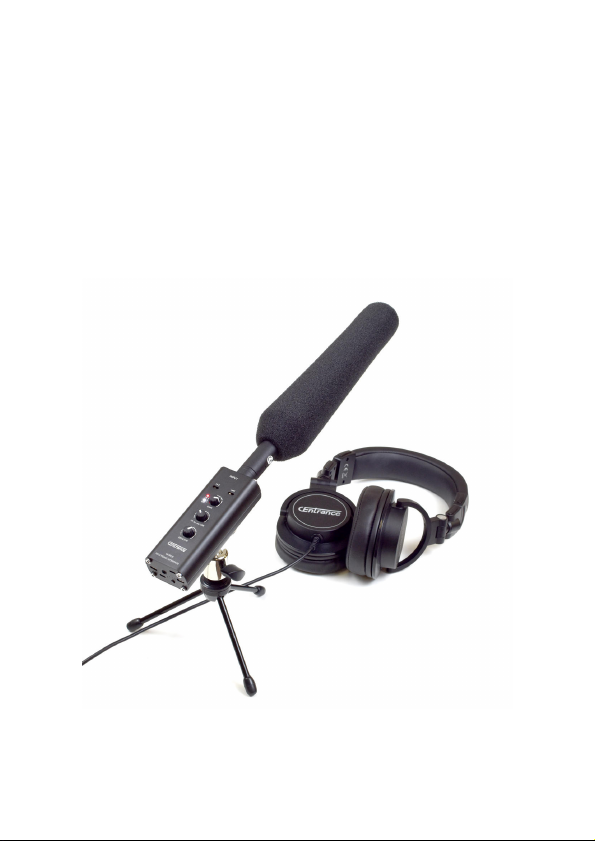
The new MicPort Pro 2 is a totally portable
USB mic preamp. Smaller than most mics, it
is feature-rich, easy to use, and travel-
friendly. A built-in rechargeable battery lets
you record to your phone and tablet. The low-
noise Jasmine™ mic preamp and a musical,
soft-knee limiter make it a portable vocal
processor and put MicPort Pro 2 in a class of
its own.

MicPort Pro 2 User Manual
3
MicPort Pro 2 — a modern, sophisticated
piece of recording equipment, which allows
you to create pro-level content in any
location.

MicPort Pro 2 User Manual
4
Table of Contents
FEATURES AT A GLANCE.........................5
TOP PANEL CONTROLS..........................11
FRONT PANEL FEATURES......................20
BACK PANEL FEATURES........................21

MicPort Pro 2 User Manual
5
Features at a Glance
One of the most impressive features of
MicPort Pro 2 lies in its digital technology,
which connects the built-in pristine analog
preamplifiers to your phone and tablet’s
audio app for recording and playback. While
your phone or tablet replaces the laptop,
MicPort Pro 2 places the entire production
studio in the palm of your hand. Let’s look at
the product’s features.

MicPort Pro 2 User Manual
6
Intuitive Tactile Controls
MicPort Pro is part high quality mic preamp
and part USB recording interface. The top
panel looks like a familiar music mixer
channel, offering an easy way to adjust signal
and monitoring levels. The controls are laid
out logically, making sure all audio
adjustments are right at your fingertips.
Preamps and A/D Converters
Don’t let the small size fool you! MicPort Pro
2 packs a boutique microphone preamplifier
with custom Jasmine™technology, which
delivers clean, velvety-smooth sound with
high gain, and lowest noise and distortion.

MicPort Pro 2 User Manual
7
MicPort Pro 2 uses a professional A/D and
D/A converter, which operates at sampling
rates of up to 192kHz, and resolutions up to
24-bit, meeting the most demanding needs of
today’s content producers.
Phantom Power
MicPort Pro 2 offers +48V phantom power,
enabling you to use professional condenser
microphones anywhere. Unlike other devices,
it offers true +48V, which means you can use
any condenser mic in your mic locker. This
feature was previously found only in studio-
level products, but now MicPort Pro 2 makes
it available in a mobile package.

MicPort Pro 2 User Manual
8
Signal Peak & Present LEDs
To ensure high-quality, distortion-free
recording, the mic preamplifier features bright
“SIG” and “PK” LED indicators for monitoring
incoming signal strength. The White LED
indicates signal present (“SIG”) and Red LED
indicates overload or peak (“PK”).
• White LED turns on when the input
signal level is 30dB below clipping.
• Red LED turns on when the input
signal is 6dB below clipping.
• Once triggered, all LEDs remain on for
a little while to make sure you notice
them.

MicPort Pro 2 User Manual
9
-12 dB Safety Track
Nobody wants clipping in their recordings.
Clipping happens as the result of input
overload and sounds like nasty, crunchy
distortion. In addition to the limiter, MicPort
Pro 2 has a useful feature, which makes it
virtually impossible to "clip" the input.
It works like this. Even though MicPort Pro 2
is a single-channel device, it records in
stereo, yet the two channels are not the
same. While the Left channel records regular
audio, the right channel records the same
audio -12dB lower in level. This way, even if
the main channel clips at the input of the A/D
converter, you would still have a safety copy
available to you on the other channel, which
is not clipped. You will be able to use that

MicPort Pro 2 User Manual
10
safety copy in post production and replace
the clipped part with clean audio.
Dual Clipping Protection
The Dual Clipping Protection feature refers to
the combination of the soft limiter and the
built-in –12dB safety track recording. When
both are used together, it is virtually
impossible to clip the A/D input.

MicPort Pro 2 User Manual
11
Top Panel Controls
Top panel controls, as described below.

MicPort Pro 2 User Manual
12
Channel Switches
All switches are active when the lever is
moved to the right. The levers are recessed
to prevent accidental adjustment. Use a thin,
sharp object, such as a paperclip, toothpick
or a pen tip to slide the lever to the right to
activate the feature.
Hi-Z and HPF switches and the GAIN knob

MicPort Pro 2 User Manual
13
LINE / Hi-Z switch
MicPort Pro 2 can act as a direct box. It
includes an electric guitar preamplifier with a
high impedance (“Hi-Z”) input. This means
you can connect an electric guitar or bass
directly to MicPort Pro 2 to record anywhere.
This Hi-Z switch selects between line input
and electric guitar or bass (“Hi-Z”) input on
the ¼” portion of the Neutrik combo jack.
Hi-Z switch operation is described below:
• Slide the lever to the right to engage
the “Hi-Z” feature per channel. Ideal
for plugging an electric guitar and bass
straight into the combo XLR’s ¼” side.

MicPort Pro 2 User Manual
14
• Slide the lever to the left to engage the
“Line” position. Hi-Z input is
disconnected and input gain is
reduced to accommodate line-level
sources on the ¼” jack
Low Cut Switch (HPF)
To simplify recording in noisy environments
and reduce wind or mic handling noise in
outdoor recordings, a low cut switch is
available as part of the input channel. By
design, the low frequency rumble is cut early
– right at the input jack, long before the mic
preamp has a chance to overload and ruin
your take. The switch is labeled HPF, short
for “High Pass Filter”, which is a more
appropriate name, if you want to get technical
about it. The 6dB/octave cut is below 130Hz.

MicPort Pro 2 User Manual
15
GAIN Control
The MicPort Pro 2 Jasmine™ preamplifier
has a wide gain adjustment range of over
55dB. This covers a variety of applications –
from on-the-mic narration, to recording from a
distance. The preamp is compatible with
such staples of the radio and broadcast
industry as SM7B and RE-20 microphones,
both known for needing a high-gain preamp.
MicPort Pro handles them with ease and
delivers clean, low-noise sound.
The GAIN control knob lets you adjust the
input level for minimum noise and distortion.
A common guideline when adjusting input
levels is to let the red “peak” LED blink
occasionally, but to not stay illuminated all

MicPort Pro 2 User Manual
16
the time. The white “signal present” LED is
useful to check signal level during quieter
passages.

MicPort Pro 2 User Manual
17
Blend Control (IN … USB)
The Blend control knob adjusts the mix
between zero latency input signal and USB
playback. This allows you to strike the right
balance between the mic signal (turn CCW)
and the signal coming back from your
computer or smart phone (turn CW), as seen
below:

MicPort Pro 2 User Manual
18
You will find the Blend knob useful when
playing over a backing track fed from the
computer. It will allow you to dial in the
perfect mix of direct and backing tracks.
Another use of this feature is in Voiceover,
where you need to narrate over a music bed
playing back from the computer. In both
cases you can adjust the blend to taste.
The Blend knob also comes in handy when
you are using your computer or smartphone
as an effects processor and need to dial in
just the right amount of direct signal vs.
effects return (AKA dry/wet control).
When specifically monitoring the inputs,
rotate the dial counter-clockwise to silence
the signal from USB. When focusing on

MicPort Pro 2 User Manual
19
playback form the computer, smart phone or
tablet, rotate the dial clockwise to silence the
input channels.
Note: The blend you create is provided for
headphone monitoring convenience. The
blend will not be recorded.
MONITOR Control
The MONITOR knob adjusts the volume level
in your headphones.
Tip: If the MONITOR knob is turned all the
way up and your volume level is still too low,
adjust the blend control counter-clockwise.
Table of contents
Other CEntrance Amplifier manuals