Certa CTSTMCLN900A User manual

900W Handheld Steam Cleaner
CTSTMCLN900A
Quick Start Guide
Product Features
•Advanced Technology: with exclusive patented technology, high-
temperature and high-pressure steam is used for clearing away dirt and
stains on floor boards, windows, doors and clothes. The unit will also kill
bacteria on surfaces, while being completely environmentally friendly.
•Improved afety: To ensure that the unit avoids empty heating, once the
water in the boiler tank is heated and evaporated, the unit will
automatically shut-down the power supply.
With a highly sensitive thermostat, 135C high-temperature steam is
available, ensuring complete disinfection and sterilization. The safety valve
has an automatic pressure release function ensuring that excessive
pressure will not build up inside the unit.
•Durable Construction: The machine is manufactured with an aluminium
alloy die casting boiler body with an extra-thick inner wall designed to
resist high pressures.
Product La out
1. Body
2. hort spray nozzle
3. afety cap
4. team button
5. Handle
6. Power cord and plug
7. Power indicator
8. Funnel
9. Measuring cup
10. pray cup with round brush
11. Bent spray nozzle
12. Long spray nozzle
13. Extended connecting spray nozzle
14. General spray nozzle
15. Door/window spray nozzle
16. Towel sleeve
1

Safet
•Do not allow children to use this machine. Keep the unit out of reach of
children when not in use.
•This device is not intended for use by persons (including children) with
reduced physical, sensory or mental capabilities, or lack of experience and
knowledge, unless they have been given supervision or instruction
concerning use of the appliance by a person who is responsible for their
safety.
•To prevent electric shock, do not immerse power cord or power plug in
water or other liquids.
•The power cord and power plug should be in good condition and should
not be damaged. Damaged or defective power cords and power plugs
must not be used, and must be repaired or replaced.
•The product is designed only for use in households and is not suitable for
industrial applications.
•Do not turn on the power supply until the tank is full of water.
•During operation, the tank mouth must be plugged hermetically and the
safety cap should be tightened in position.
•While in use, the body of the unit should not be included at an angle
greater then 45 degrees. Otherwise the boiling water may be sprayed out
together with the steam.
•Do not direct steam towards other people, animals or electrical products.
•Before refilling the water, ensure the power cord has been unplugged
from the power supply. It is necessary to unplug the power cord after the
machine has been used, before it is cleaned and while it is being repaired.
•Do not add rust remover, odour counteracting agents, alcohol or
detergents into the water tank.
•The filling aperture must not be opened during use.
•Never overfill the tank as the steam generation may be effected.
Before Use
Unpack the product.
Read the user manual carefully.
Check the accessories to ensure that all accessories have been provided.
Accessor Qt
Funnel 1
Measuring Cup 1
Extended Connecting pray Nozzle 1
Towel leeve 1
Long pray Cup 1
pray Cup for Doors/Windows 1
pray Cup with Round Brush 1
Bent pray Cup 1
Quick tart Guide 1
pray Cup Connecting Pipe 1
2

Product Specifications
Power supply rating: AC 220-240V~ 50Hz
Tank capacity: 300ml
Max capacity of water cup: 175ml
Rated power: 900W ~ 1050W
team pressure: 2.5 ~ 4.2bar
Injected steam capacity: 28g/min
Overall dimensions: 250 x 140 x 230mm
Net weight: 1.85kg
Operating Procedures
1. Unpack the product, check accessories and make sure all parts are
present and undamaged.
2. Before use, read the user manual thoroughly and carefully. The steam
cleaner is only for household use.
3. First, place the steam cleaner on a level platform. Push the safety cover
down, then unscrew the safety cap anti-clockwise, as shown below. Then
install the funnel.
4. Take 175ml of clean water with the measuring cup and then add the water
into the tank. (Max. capacity of the tank is 300ml. Do not overfill the tank,
and note that some space must be left in the tank.) Replace the safety cap
and tighten it into position.
5. Check the power supply and socket to make sure they are plugged in
securely. Then turn power supply on.
6. After about 4 minutes, the steam will be ready. To confirm this, lightly
press the steam button and check that steam vapors are being sprayed
out of the nozzle. (Do not aim the nozzle at other people or animals).
7. If steam vapors are coming out, release the steam button and install
whichever accessory is required for your use.
8. Once the accessory is fitted, press the steam button again to use product.
3
Press
down
Turn
left

Installation of Accessories
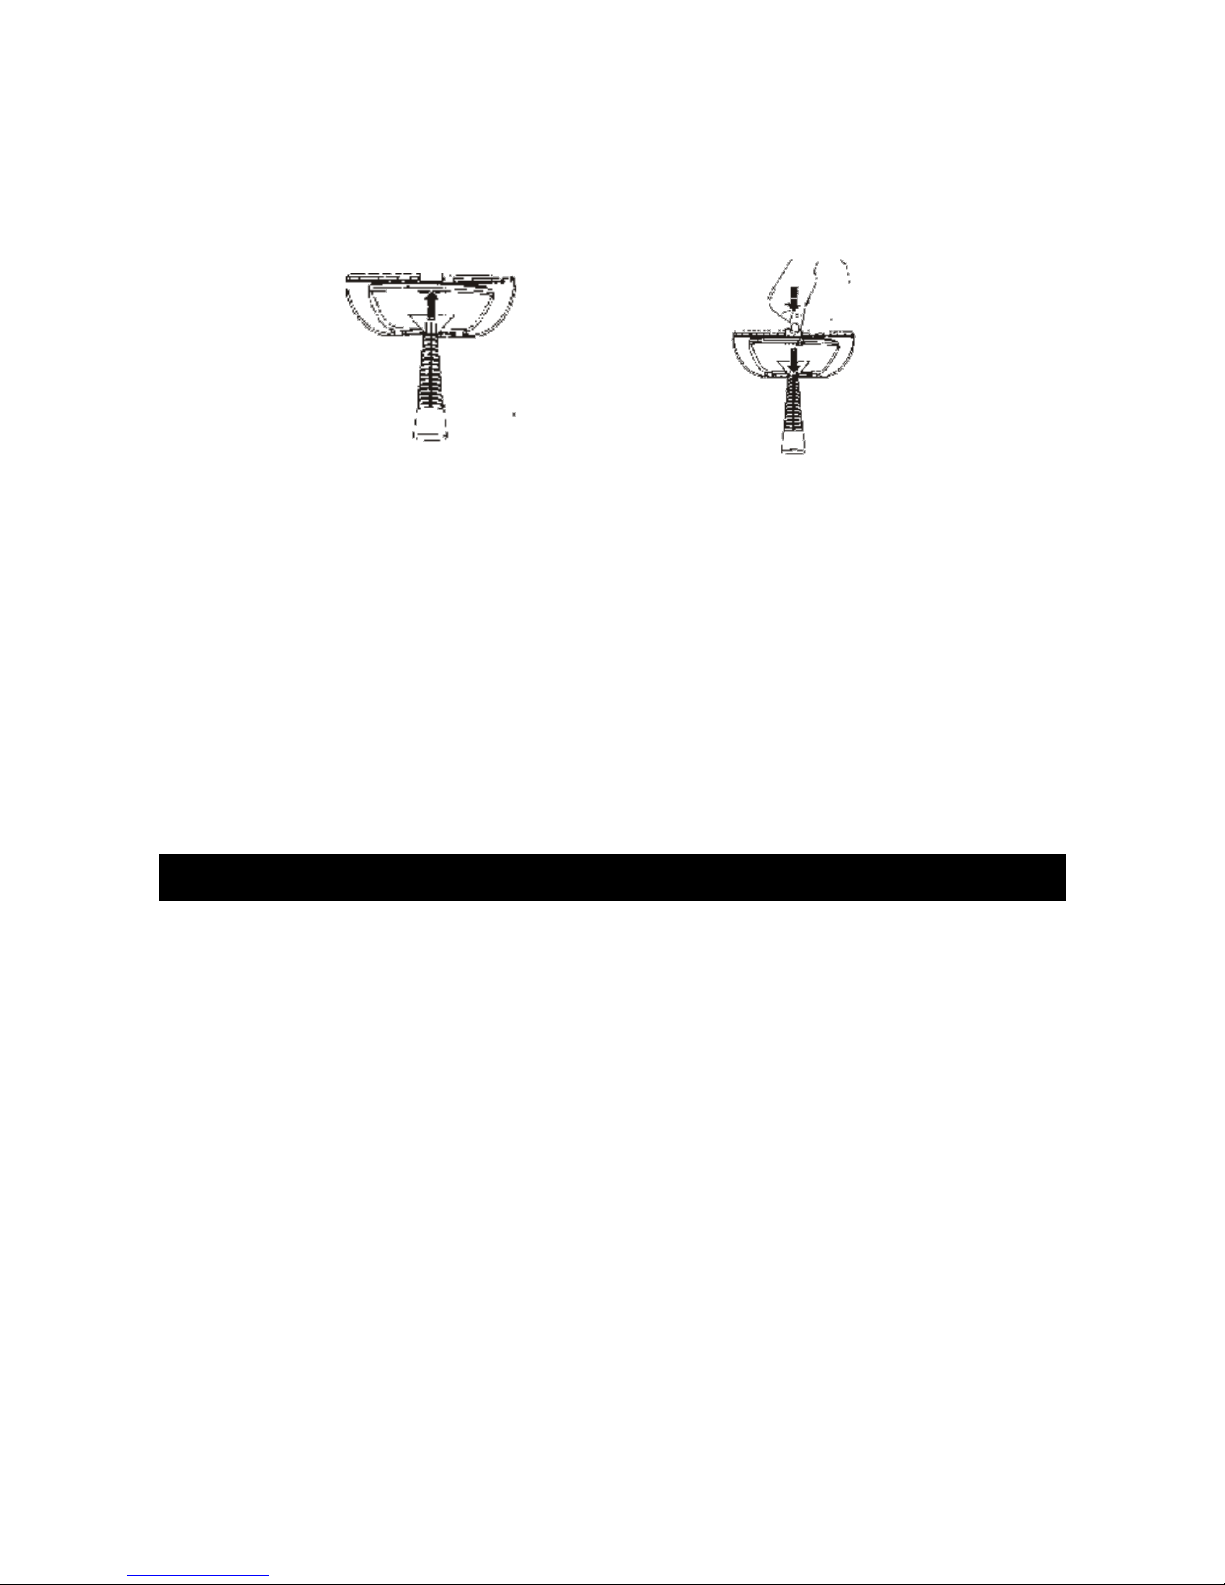
Long Spra Cup
Hold the pipe section of the long spray cup in your hand, aligning the arrow on
the spray cup with the single-line mark on the short spray nozzle on the
machine body, then insert the spray cup into position. Rotate the spray cup in a
clockwise direction, aligning the arrow on the spray cup with the double-line
mark on the short spray nozzle on the machine body, as shown in Figure 1. Fix
the spray cup to the machine body.
To remove the long spray cup, please rotate the spray cup anti-clockwise, as
shown in Figure 2. Align the arrow on the spray cup with the single-line mark on
the machine body, then the long spray cup can be pulled out.
Fig. 1 Fig. 2
Spra Cup with Round Brush or Bent Spra Cup
For direct installation on the short spray nozzle, aim the spray cup with the
round brush or the bent spray cup at the top of the spray nozzle, as shown in
Figure 3. Push the spray cup upwards until it is in position. As the short spray
nozzle and spray cup are positioned in six directions, the angle and direction
can be adjusted during installation.
The spray cup with round brush and the bent spray cup and long spray cup can
be installed in the same way as the installation on the short spray nozzle.
Fig. 3
4
Spra Cup for Doors/Windows
As shown in Figure 4 and Figure 5, install the two small hooks of the spray cup
for doors/windows, then connect the trigger for the big hook. Then push the
spray cup for doors/windows up and attach it onto the body of the general
spray nozzle.
Fig. 4 Fig. 5
Refilling Water during Operation
1. Unplug the power cord and disconnect the unit entirely from the power
supply.
2. Press the steam button down to release all pressure until steam is no
longer being ejected from the unit.
3. lowly unscrew the safety cap but DO NOT remove it. Residual steam
vapors will be discharged slowly, then eventually no more steam will come
out. Place the unit in a cool location to allow it to cool further for five
minutes. Finally, completely remove the safety cap.
4. Use the funnel and measuring cup to refill a suitable quantity of cold or
hot water into the tank.
5. Replace the safety cap onto the unit and tighten it back into position.
After Use
1. Once the job has been completed, unplug the power cord and disconnect
the unit entirely from the power supply.
2. Press the steam button down to release all pressure until steam is no
longer being ejected from the unit.
3. lowly unscrew the safety cap but DO NOT remove it. Residual steam
vapors will be discharged slowly, then eventually no more steam will come
out. Place the unit in a cool location to allow it to cool further for five
minutes. Finally, completely remove the safety cap.
4. Empty residual water from the tank and clean the external surface with a
dry cloth.
5. Replace the safety cap back onto the unit, and tighten it into position.
If ou have an further issues or questions regarding use of this product,
please contact the Kogan customer support team.
5
Table of contents
Other Certa Steam Cleaner manuals

Popular Steam Cleaner manuals by other brands

Silvercrest
Silvercrest SDMF 1300 A1 Operating instructions and safety instructions

Silvercrest
Silvercrest 331230 1907 Operating instructions and safety instructions

EUROPRO
EUROPRO Shark UV610 owner's manual

Silvercrest
Silvercrest 103808 operating instructions

BLACK DECKER
BLACK DECKER HGS100T use and care manual

Silvercrest
Silvercrest 4160 user manual

Silvercrest
Silvercrest SDRB 1000 B1 operating instructions

Silvercrest
Silvercrest SDGS 1630 B1 Operating instructions and safety instructions

Kärcher
Kärcher SC 3 Deluxe EasyFix Premium manual

Kruger
Kruger KGV8000 instruction manual

Nilfisk-ALTO
Nilfisk-ALTO SV 8000 operating instructions

Sienna
Sienna Flex SSM-4003 instruction manual


