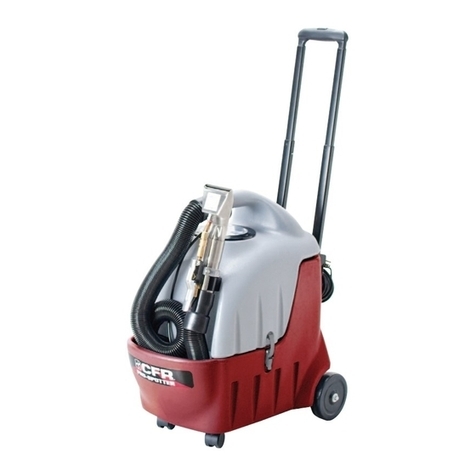
CFR Perfect Heat Pro 750 Series User manual

Perfect Heat, P
ro
500
and Pro 750 S
eries
72671A 01/2005
INSTRUCTION MANUAL
Read all instructions before using this machine.
IMPORTANT SAFETY INSTRUCTIONS
This manual is to ensure that the CFR Pro Series is operated correctly.
All operators must read, understand and practice the following safety instructions.

INTRODUCTION
Congratulations on your purchase of a CFR Pro 500/750.
Read this entire manual before operating or servicing the .
Please complete and return the enclosed warranty card.
Parts and Service
The Paramount is covered by CFR’s Preventative
Maintenance Program which is designed to maintain the
Paramount on a quarterly basis. The program focuses on:
inspecting the equipment, replacing covered parts as
required, and identifying potential situations where a more
in-depth service or training may be required.
If service is required, it must be performed by an authorized
CFR repair center. Contact your local dealer or call
1.800.533.2557 for the location of a repair center.
Serial Number
The serial number of the machine is located on the name-
plate, located next to power switch. This information is
needed when ordering parts or scheduling repairs. Fill in
the information below for future reference:
Serial Number ___________________________________________________________________
Part Number _____________________________________________________________________
Purchase Date _________________________________________________________________
CFR PRO SERIES
2
TABLE OF CONTENTS
Introduction . . . . . . . . . . . . . . . . . . . . . . . . .2
Unpacking instructions . . . . . . . . . . . . . . . .3
Safety instructions . . . . . . . . . . . . . . . . . . . .3
Preparing for cleaning . . . . . . . . . . . . . . . . .4
Operating instructions . . . . . . . . . . . . . . . . .4
Maintenance . . . . . . . . . . . . . . . . . . . . . . . .5
Parts and drawings . . . . . . . . . . . . . . . . . . .8
Warranty . . . . . . . . . . . . . . . . . . . . . . . . . .12
UNPACKING INSTRUCTIONS
Your Pro 500/750 was thoroughly inspected, tested, and
packaged to deliver the equipment in good operating con-
dition. The freight carrier received and signed for the
equipment in good condition. Damage can occur during
shipping and to protect your interest, all cartons must be
inspected for damage (including any concealed damage)
that might have occurred during shipment. Any damage is
the responsibility of the freight carrier and should be
reported immediately to the carrier. It is your responsibility
to issue a claim and to receive compensation from the
freight carrier for any damage done in transit. Shipping
damage is not warranted.
CAUTION
Read All Instructions, Warnings and Cautions
Before Using
These guidelines are provided for your protection and con-
venience. Please read them carefully.If you have any
questions regarding the use of your equipment call CFR
Technical Service at 800.533.2557 Failure to adhere to
instructions provided can potentially void any warranties.
Precautions and safety warnings are provided for your
protection Failure to observe these warnings could result
in personal injury and damage to the equipment. When
using an electrical appliance, basic safety precautions
should always be followed.
WARNING!
To avoid fire, do not use with a flammable or combustible
liquid to clean floor.
IMPORTANT SAFETY INSTRUCTIONS
The Pro 500/750 is intended for use only as described in
this manual. Using the equipment in any manner not
described in this manual can void the warranty.Use only
manufacturer’s recommended accessories.
READ ALL INSTRUCTIONS BEFORE USING
THIS PRODUCT IS INTENDED FOR
COMMERCIAL USE ONLY
When using a electrical piece of equipment basic precau-
tions should be followed, including the following:

CFR PRO SERIES 3
WARNING! To reduce the risk of electric
shock, fire, or injury:
1. Operators must read and understand this manual
completely before operating the equipment.
2. Make sure all caution, warning, and instructional
decals are in place and legible. Replace damaged or
missing labels.
3. Do not leave unit when plugged in. Unplug from outlet
when not in use and before servicing.
4. Connect to a proper grounded outlet only.
(See Grounding Instructions.)
5. Do not use with damaged cord or plug.
6. Do not handle plug or unit with wet hands.
7. Do not pull or carry by cord, use cord as a handle,
close a door on cord, or pull cord around sharp edges
or corners. Do not run appliance over cord. Keep cord
away from heated surfaces.
8. Turn off all controls before unplugging.
9. Do not unplug by pulling on cord. To unplug, grasp the
plug, not the cord.
10. Do not put any object into openings. Do not use with
any opening blocked; keep free of dust, lint, hair, and
anything that may reduce air flow.
11. Do not pick up anything that is burning or smoking,
such as cigarettes, matches, or hot ashes.
12. Do not use without filters in place.
13. Use extra care when cleaning stairs.
14. Do not use to pick up flammable or combustible liquids
such as gasoline or use in areas where they may
be present.
15. Do not expose to rain. Store indoors.
16. If unit is not working as it should, has been dropped,
damaged, left outdoors, or dropped into water, take it
to a local CFR service center.
GROUNDING INSTRUCTIONS
This unit must be grounded. Grounding provides the path
of least resistance for electric current, in the event of mal-
function or breakdown, to reduce the risk of electric shock.
This unit is equipped with a cord having an equipment-
grounding conductor and grounding plug. The plug must
be inserted into an appropriate outlet that is properly
installed and grounded in accordance with all local codes
and ordinances.
WARNING! Improper connection of the
equipment-grounding conductor can result in a risk of elec-
tric shock. Check with a qualified electrician or service per-
son if you are in doubt as to whether the outlet is properly
grounded. Do not modify the plug provided with the appli-
ance – if it will not fit the outlet; have a grounded outlet
installed by a qualified electrician.
SET UP INSTRUCTION
Filter Installation
There are three filters in the Pro 500/750: inlet filter, main
filter and pump protection filter. It is imperative to the effi-
cient operation of the Pro 500/750 that the filters are
installed properly.
Pump Protection Filter –Position on brass fitting on
the filter mound. Slide it down.
Main Filter – Wet the rim of the filter and position it on
the filter mound. (white plastic disc) Twist and slide over
the mound by pushing downward.
Inlet Filter – Position on top of the tank.
OPERATING INSTRUCTIONS
1. Remove lid and inlet filter.
2. Check main filter. Make sure the main filter is
installed snugly.
3. Fill tank with water to a desired level. Use solution
level gauge.Maximum water temperature to be used
is 120 to 130 degrees F.
4. Add CFR in-tank cleaner per chemical label use
instructions. In addition, pre-spraying is often desirable
and will assist in producing the fastest and best
cleaning results. See chemical product labels for more
information. Note: Use caution when moving machine
(especially on inclines) with fluid in the tank to prevent
fluid from entering vacuum standpipe at back of
machine tank and flooding the vacuum.
CFR chemicals have been speically
formulated to work with this machine.
5. Prime pump by re-circulating fluid through priming
hose included for 15/30 seconds. Re-circulating the
fluid primes the pump and expels trapped air from the
system.
6. Replace inlet filter and lid
7. Attach hose assembly to machine. Connect fluid hose
to the quick-disconnect found on the front of machine.
8. Attach the desired tool to the valve end of the
hose assembly.
9. Close tank cover lid, turn on vacuum and pump
switches.

10. Clean surface with tool attached to hose assembly.
11. During the cleaning process, the fluid level will be
reduced and the lower level float switch will shut off
the pump. When the pump shuts off, drain and rinse
tank, rinse main filter, refill with fresh water and
cleaning chemical, and continue cleaning.
CAUTION! When cleaning, monitor foam in
the machine's tank. Areas cleaned with other cleaning
equipment or chemicals may cause excessive foam to col-
lect in the tank.
WARNING! EXCESSIVE FOAM IN THE
TANK MAY CAUSE VACUUM MOTOR FLOODING AND
MACHINE DAMAGE. Pour one to two ounces of CFR
Defoam directly into the tank or into the vacuum hose
while the vacuum is running. CFR Defoamer has
been speically formulated to work with this
machine.
When finished cleaning, perform the daily maintenance
procedure. Be sure that all filters are cleaned thoroughly
and replaced in machine. Leave lid offfor drying.
Perfect Heat System
WARNING! The Perfect HeatTM Plus System can pro-
duce very hot water that could damage some delicate fabrics
and fibers. Please ensure the surface being cleaned will not be
damaged by hot water up to 200 degrees Fahrenheit.
This machine is equiped with the Perfect HeatTM Plus System for
heating the cleaning solution. This system uses a combination
of the patent pending Perfect HeatTM coils and an inline electri-
cal heater.
Operation:
1. Follow operating instructions steps for filling the machine
with water and cleaning solution.
2. Turn on electrical heater, switch is located on panel.
3. Pre-heat machine for 5-10 minutes before use.
NOTE: There is a valve in the upper compartment that either
sends the water through the heating components, or bypasses
them. The machine is preset in the “HOT” position. To clean
with cold water, turn the valve to “COLD” or UP position. This
should be done prior to filling the tank with water.For gener-
al cleaning, it is recommended leaving the valve in the “HOT”
or down position and cleaning with hot water.
CFR PRO SERIES
4
drain hose
pump filter
main filter
inlet filter
switch panel
valve

CFR PRO SERIES 5
MAINTENANCE
Daily Maintenance
To maintain optimum performance the equipment, tools
and filters should be cleaned after each use. Replace any
filters that cannot be cleaned or are damaged. Nozzles
that cannot be cleared should be discarded. Wipe down
the equipment with a damp cloth to keep clean and pre-
serve the appearance.
1. Wands and Tools
Rinse opening of tool with water to eliminate
any debris.
Wand only – open and clean in-line strainer.
A. Disconnect the In-line Strainer by using the quick
disconnect coupler.
B. Remove the filter and rinse with water.
C. Remove any debris from the strainer.
D. Keep o-ring and threads of the plug lubricated.
CFR DEFOAM is a good lubricant or use a
non-petroleum based lubricant. This will ensure a
tighter seal.
Wipe tool with damp cloth and store with head up to
prevent clogging of nozzle.
2. Filters
In-Line Strainer Filter – Disconnect the In-line Strainer
Filter on the wand by using the quick disconnect
coupler. Remove the filter and rinse with water.
Remove any debris from the strainer.Keep o-ring and
threads of the plug lubricated. CFR DeFoam is a good
lubricant or use a non-petroleum based lubricant.
This will ensure a tighter seal.
Inlet Filter – Remove the inlet filter. Dump and clean debris
at the end of each cleaning job.
Main Filter – Remove the main filter sleeve and rinse out
and clean thoroughly.
Pump Protection Filter – This ball-shaped filter should be
in place when the tank is cleaned and rinsed. Remove
and rinse only after the tank is rinsed.
Periodic Maintenance
1. Check power cord for any breaks, separations, or cuts.
Make sure the ground pin on the connector is intact or
the machine will be unsafe. Make sure the ground pin
on all three prongs on the twist lock connector
are intact.
2. Check for plugged nozzles when using tools. If
streaking occurs during cleaning, a plugged nozzle
may be the cause. A plugged or partially plugged
nozzle can be identified by holding the tool 5-7" above
the surface and checking for an even spray pattern.
To clean a plugged nozzle, remove the nozzle and
direct pressurized air backwards through the nozzle or
backwash the nozzle with water. A convenient method
is to insert the nozzle into a garden hose ball valve,
tighten the ball valve to a faucet, and turn on the
water. (CFR has ball valves available, part #7AX020).
Inspect nozzle and repeat cleaning procedure, if
necessary. Discard nozzles that cannot be cleared.
Tool nozzles wear and must be replaced after 200-250
hours of use.
3. Occasionally open the base and inspect hose and
other connections for leaks. Repair or replace any
leaking parts. Always disconnect power cord, before
removing side panels.
Periodic Maintenance
4. It is very important to monitor machine operating hours
for proper maintenance of the motors and pumps. After
700 hours of operation, the vacuum motor brushes
should be inspected by an authorized repair station
and replaced if worn (length is .5 inches or less).
5. Check vacuum motor performance using a vacuum
gauge. Place this gauge on the tank inlet fitting with
the vacuum turned on. Water lift should be between
135 and 150 inches. If the reading is lower, check for
air leaks in the tank, cover gasket, and drain hose.
6. Check pump performance occasionally against built-in
pressure gauge. Pump running pressure on the Pro
500 should be 500 + 10 p.s.i, Pro 750 should be 750+
15 p.s.i. If the pumping pressure is outside of this
range, call your dealer or authorized station. After 400
hours, the pump valves should be replaced. After 700
hours of operation the pump cam bearing and plunger
should be replaced. The pressure regulator should be
rebuilt after 400 hours of operation.
A
B

CFR PRO SERIES
6
SPECIFICATIONS - Pro 500
Power Cord ..............One Cord, 12 Ga, 3 Wire, Molded End
Plug
Voltage . . . . . . . . . . . . . . . . . . 115/120 volts AC, 60 HZ
Vacuum Motor . . . . . . . . . . . . 1’ amps
Pump Motor . . . . . . . . . . . . . . 3 amps
Tank Volume. . . . . . . . . . . . . . 15 gallons max
Fill Level . . . . . . . . . . . . . . . . . 1” below the bottom of the Inlet filter.
Vacuum Motor . . . . . . . . . . . . (2) 2 stage with150" water lift
Pump Motor ..............1/2 hp AC motor
Pump . . . . . . . . . . . . . . . . . . . plunger type; 0 to 500 psi.
Weight . . . . . . . . . . . . . . . . . . 124 lbs.
Height...................41"
Width ...................29"
Length. . . . . . . . . . . . . . . . . . . 22"
Wheels . . . . . . . . . . . . . . . . . . non-marking wheels
Casters..................non-marking wheels
Body . . . . . . . . . . . . . . . . . . . . rotomolded polyethelene
Filters . . . . . . . . . . . . . . . . . . .three filters: inlet filter,main filter, and
pump protection filter.
Circuit Breakers: Overload circuit breakers are placed in both the
pump and vacuum circuits to protect against unusually heavy current
(ampere) loads. If either breaker trips, the pump motor or vacuum
motor is overloaded.
SPECIFICATIONS – Pro 750
Power Cord . . . . . . . . . . . . . .One Cord, 12 Ga, 3 Wire, Molded End
Plug
Voltage . . . . . . . . . . . . . . . . . .115/120 volts AC, 60 HZ
Vacuum Motor . . . . . . . . . . . .5.4 amps
Pump Motor . . . . . . . . . . . . . .3 amps
Tank Volume . . . . . . . . . . . . .15 gallons max
Fill Level . . . . . . . . . . . . . . . . .1” below the bottom of the Inlet filter.
Vacuum Motor . . . . . . . . . . . .3 stage with135" of maximum water lift
Pump Motor . . . . . . . . . . . . . .1/2 hp AC motor
Pump . . . . . . . . . . . . . . . . . . .plunger type; 0 to 750 psi.
Weight . . . . . . . . . . . . . . . . . .128 lbs.
Height . . . . . . . . . . . . . . . . . . .41"
Width . . . . . . . . . . . . . . . . . . .29"
Length . . . . . . . . . . . . . . . . . .22"
Wheels . . . . . . . . . . . . . . . . . .non-marking wheels
Casters . . . . . . . . . . . . . . . . . .non-marking wheels
Body . . . . . . . . . . . . . . . . . . . .rotomolded polyethelene
Filters . . . . . . . . . . . . . . . . . . three filters: inlet filter, main filter, and
pump protection filter.
Circuit Breakers: Overload circuit breakers are placed in both the
pump and vacuum circuits to protect against unusually heavy current
(ampere) loads. If either breaker trips, the pump motor or vacuum
motor is overloaded.
vac motor
pump
pressure
guage
tank inlet

Vacuum or pump will not run Check that electrical cord is firmly seated in wall outlet.
Check and reset building circuit breaker if tripped.
Check vacuum/pump switch. It should be in the “on” position.
Trips building circuit breaker Circuit is overloaded – move cord to a different wall outlet.
If using an additional extension cord, make sure it is in good condition, less than 70 feet long
and #10 gauge or heavier.
Check plug end and cord for damage.
Vacuum won’t run. Check vacuum switch. It should be in the “on” position.
Check fuses and replace if tripped. (located on base of machine)
Pump won’t run Check pump switch – it should be in the “on” position.
Check pump circuit breaker (5 amp) and reset if tripped.
Check fluid level, must have at least 5 gallons in tank.
Check fluid level inside of Main Filter Cage – pump float must be at highest position to operate.
If fluid is lower inside filter, drain tank and remove and clean filter.
Pump tries to run and then blows circuit breaker Check power cord for frayed, cut or worn spots.
If using an extension cord,make sure it is in good condition, less than 70 feet long and #10
gauge or heavier.
Check pump static PSI – must be 400 psi or less
Check wall outlet voltage. If below 105 volts, pump will not work.
Pump starts and stops Check for dirty Main Filter. Water level should be the same inside and outside of filter.
Check for sticking pump float.
Check fluid level – must have at least 5 gallons in tank.
Water dripping from bottom of machine exhaust. Check machine for excess foaming. Add CFR Defoam to tool hose and tank. Open machine top
cover and let vacuum run for 10 minutes to dry out vacuum motor,then close lid and
resume cleaning.
Vacuum hose or tool leaks. Leave vacuum running for 1 minute when finished cleaning to clear hose.
Check for holes/breaks in vacuum hose.
Make sure the inline strainer is properly tightened and fluid hose connectors are fully seated.
Carpet too wet. NOTE: CFR floor tool is used in forward direction only.
Check carpet tool position – head must be completely “seated” on carpet to provide good
drying times.
Check tool and hose for any obstructions.
Check lid cover sealing properly – is filter case properly seated in tank? Is lid gasket in good
shape with no cuts, cracks, or worn/compressed areas?
Check for cracks in lid cover.
Check drain hose and fittings for cracks and tears.
Check tool hose for holes, cracks, or cuts.
Check hose cuffs – must seat firmly on tank fitting and tool.
Check water dripping from bottom of machine exhaust. If present, check machine for
excess foaming.
Check carpet installation. Some carpets are installed on uneven surfaces with ridges and
bumps. It is difficult to get good drying times with this type of installation.
Streaks on carpet. Check tool and hose for obstructions.
Check and clean inline strainer filter.
Check and clean main filter.
Check and clean stainless back flush filter screen inside tank.
Check nozzles for full spray. Clean if clogged or replace if worn.
Check pump pressure drop while cleaning. Should not drop more than 100 p.s.i. Make sure air
is out of system by re-priming pump. If there is still a problem, remove and clean back
flush filter screen.
Make sure strokes overlap a minimum of 3 inches.
Check CFR chemical usage instructions for proper application.
Multiple cleanings may be needed to clean deeply imbedded dirt that is pulled to the surface
by CFR’s deep cleaning technology. Offset cleaning passes by 6 inches.
Excessive pressure drop when cleaning. Adjust static pressure to 500/750 p.s.i. when not cleaning.
(exceeds 100 p.s.i.) Check and clean main filter and inner stainless back flush filter.
Check and replace worn spray nozzles and loose or leaking fittings on hose.
Purge excess air from pumping system using hose with no nozzle or priming hose.
CFR PRO SERIES 7
TROUBLE SHOOTING GUIDE

CFR PRO SERIES
8
Base Assembly

CFR PRO SERIES 9
Base Assembly
Ref # Part # Description
1 72620AM Base, PFX1350, Maroon
2 72633A Axle, 23.375” Long
3 X9066+ Wheel, 12” x 1.75” Non-Marking
4 7GL002 Push Nut, 1/ 2”
5 7CM007 Washer, 1/ 2 USS Flat, 18-8 SS
6 72635A Spacer, 1/ 2” ID x 3/ 4” OD x 1/ 4” Long
7 72640A Gasket, Vac Manifold, Long
8 72623A Cover, Vacuum manifold
9 7CW002 Screw, #6 x 3 /4 Phil Pan TS, Type A 18-8 SS
10 X9204+ Rod, 10-24, “T” Bolt
11 72000A Rod, 3/16 x 5-1/2, All Thread Stud, 18-8 SS
12 72651A Spacer, VAC Motor, 2.375”
13 70020B Gasket, Vacuum Motor Seal
14 1942-C Vacuum Motor, 115VAC, 2 – satage
72365A Vacuum Motor, 3 stage, 120V For Pro 750
72611A Vacuum Motor, 3 stage, 230V, 5.7IN
15 7BF003 Nut, Kep, #10-24 Zinc
16 7CM003 Washer, #10 USS Flat, 18-8 SS
17 72624A Cover, Vacuum manifold, Shor
72630A Cover, Vacuum manifold, Flat
18 72641A Gasket, Vac manifold, Short
19 72662A Screw, #10 x 1/ 2”, Flat Phill SM, Black
20 72638A Pressure regulator plate
21 72636A Cover Plate, Bottom
22 72388A Screw, #10 x 5/8, Tap phil, SS pan Head
23 PX65 Caster, 4” Black
24 7DT001 Screw, 5/16-18 x 5/8, Hex Tap Zinc
25 X8851 Screw, 10-32 x 1’ Phil, Pan MS, Black, Zinc
26 72639A Gasket, mounting pressure regulator
27 7BF008 Nut, kep, 10-32 Zinc
28 X8239 Washer, 1/ 2 USS Flat Zinc
29 PX6 1/ 4 x 1/ 4 Female Quick disconnect, Brass
30 7CX002 Nipple, Hex 1/ 4 MPT
31 7AV001 Tee, Union, 1/ 4 NPT
32 72642A Gasket, Vac manifold, Circle
33 72625A Cover, Vacuum manifold, Circle
34 7DL003 Clamp, Hose 1/ 4”
35 71521A Tee, barb, 1/ 2” x 1/ 2”
36 X9069 End Loop, SS, w / 2 holes, 16G
37 X8848 Jacknut, 1/ 4 -20 Steel, #8 LJN
38 7GF033 Pad, Motor mount
72667A Washer, Rubber, 29 ID, .688OD, .093THK
39 72643A Pump Assembly, 500 PSI
72644A Pump Assembly, 750 PSI, .140 CAM
40 71644A Screw, #10 x 1 Phil Pan TS, 18-8 SS
41 70079C Hose, 1/ 4” Wire Reinforced
42 7DL008 Clamp, 1/ 4” Worm Gear, SS, Hex Slot, Phil HD
43 X8235 Washer, 1 /4 Flat USS Zinc
44 7EW001 Screw, 1 /4-20 x 3/ 4” Phil pan MS SS
45 7BS003 Screw, 1 /4-20 x 1 /2, Phil, pan, MS 18-8 SS
46 X9014 Hinge
47 72020A Screw, #12 x 1”, Self tap, PHMS, Zinc
48 PF1750 Heater Unit, 1750 Watts
PF1750-2 Heater unit, 220V
Ref # Part # Description
49 PX212 Fitting, Brass, 90 degree elbow, 1 /4 NPTM
50 PD8 Strain Relief, 1/ 2” NPT
51 7FC010 Circuit Breaker, 8A
71653A Circuit Breaker, 10A
72710B Circuit Breaker magnetic, 5A
53 X9173 Hole plug, Switch Hole
54 72411A Hour meter, AC
71544A Hour meter, 230V
55 72387A Screw, #8 x 5/8, Black, Tap Phil, Pan Head
56 PX112 Pigtail, Black, 12/3 SJT x 39” Long
57 72632B Switch Panel, With fan
72715A Switch Panel, Perfect Heat (no fan)
58 X8008N Nut, Lock, 1 /2” Steel Conduit
59 71379A Relay, 25A, 120V
71379B Relay, 240V
60 72684A Screw, 1 /4-20 x 2-1/2 Phil, Pan
61 72665A Insert, Tee Nut, 1 /4 -20 Thread
62 72661A Wand Holder
63 71952A Convertor Kit, OZ Long
71953A Convertor Kit, OZ Long, 230V
64 71716AP carbon Filter
65 72698A Cover, Carbon Filter, Pro Series
66 X9179 Pump motor, 100 PSI, 115V
67 71775A Elbow, 1 /2” Hose x 3/8” NPT, 90deg Plastic
68 7GG003 Hose A/S Braided
69 71570A Injector, ozone
70 71810A Hose, Clear, tygon, 1/8” ID x 1 /4” OD
71 71629A O-ring, Shaft end pulley
72 71999A Barb Hose, 1/2H
73 72702A Cover, Fan
74 72699A Foam, Switch panel
72718A Foam, Switch Panel , Pro 400
75 72700A Fan, Cooling, 115V, 92mm, 35CFM
72701A Fan, Cooling, 230V,92mm, 50CFM
76 72703A Screw, 8-32 x 2” L, phil, Pan MS, Zinc
77 71743A Screw, 8-32 x3/16” PHMS
78 7CY006 Washer #8 Internal Tooth Lock, 18-8 SS
79 X8260+ Nut, 8-32 Lock w/ Nylon Insert
80 71804A Plug, 1 /2” Hole, Black Nylon
81 72142A Plug, 7/8” black nylon
82 X8256 Mut, 8-32, keps, Zinc
83 X8254 Hose, Solution, 1 /4” Id, 400 PSI
84 PC66 Fitting, Brass, 1/8 NPTM x 1 /4 Barb Hose
85 71130A Coupler QD, 1/8 M
86 70101A Nipple, QD, 1/8F, Brass
87 72713A Heater Coil, 2- stage vacuum
72713B Heater Coil, 3- stage Vacuum
88 X8244 Screw, 1—24 x 2”, Phil, Pan MS, Zinc
89 7AT003 Barb, Hose, 1/4H – 1/4M
90 PC38 Connector, Double thread, female
91 72726A Valve, 3-way
92 SW158 1 /4” Cable Clamp
93 7BF030 Nut, 10-24, Nylon Insert Lock, 18-8 SS

CFR PRO SERIES
10
Tank Assembly

CFR PRO SERIES 11
Tank Assembly
Ref # Part # Description Qty
172619A Tank, Recycling 1
2 PX25+ Fitting, Plastic, 1- ?” NPT x 1- ?” Hose Barb 1
3 X9014+ Tank Hinge 2
4 7BS003 Screw, ?-20 x 1/2” Phil Pan MS 18-8 SS 4
5 71644A Screw, #10 x 1” Phil Pan TS 8
6 71920A Ring Washer 1
7 72388A Screw, #10 x 5/8, Tapping Phil, SS Pan Head 4
8 72631A Latch Bracket 2
9 72666A Inlet Fitting, Short 1
10 PX14A+ Dump Valve Gasket 1- ?”, 2.5 OD x 1.75 Rubber2
11 72173A Spring Clip, Black Vinyl Coated 2
12 72224B Main Filter, New, Smaller 1
13 72326A Filter, Inlet 1
14 72323B Gasket, Lid 43” 1
15 72321A Lid, Tank 1
16 7DE016 Nozzle H 1/8 VV CH SS 11001 2
17 71576A Nipple QD 1/8 M SS 1
18 71495A Pump Protection Filter 2
19 7AT006 Barb Elbow, 90°, ?-1/8 1
20 71817A Hose, ?” Braided 22”
21 7DL003 Hose Clamp, ?” 1
22 71897A Gasket, Filter Mount 1
23 7DL008 Hose Clamp, ?” SS 2
24 70079C Hose, ? Wire Reinforced 42”
25 PC25+ ?” to ?” Male/Male Barb 2
26 7AF003 Plug, Counter Hex ?” 1
Ref # Part # Description Qty
27 72317A Filter Mount 1
28 70343A Switch Float 2 Pole 1
29 71553A E-Ring, Float Switch 70143A 1
30 70100A Coupler QD 1/8F 1
31 7CX001 Nipple Hex 1/8 1
32 SW139+ Elbow, 1/8 Street (90 degree) 2
33 71485A Header Backflush Nozzle 1
34 72628A Vacuum Standpipe, New Pro 1
35 PX63+ Coupler, Plastic, 1- ?” Slip 1
36 X8235+ Washer, ?” Flat, USS Zinc 4
37 72486A Spacer, 1.625 Long, .50 OD, .313 ID 2
38 7DL005 Clamp Worm Gear 1-1/2 SS 3
39 PAS37+ Drain Hose 1
40 PAS36+ Expansion Plug Drain 1
41 72645A Bolt, 5/16-18 x 2-1/4, Hex 2
42 X8025+ Wheel, Black, 4” x 1-1/4” 2
43 7BH004 Screw, 10-32 x 3/8” Phil Pan 18-8 SS 4
44 72656A Hose, 1-1/2” Wire-Reinforced, Black 32”
45 72476A Fitting, Nylon Hose Barb, 1-1/4” ID, 1-1/2” NPT 1
46 72598A Screw, 1/4-20 x 3/4” Phil Flat, SS 1
47 72589A White Delrin Hollow Rod, 1/2" OD, 1/4" ID, 7” Long
1
48 72659A Decal, Water Level Gauge 1
49 72588A Heat Shrink Tubing, Clear PVC,
5/8” Exp. ID, 7.5”L1
50 72660A Rope 26”

72671A 01/2005
3101 Wichita Court ■Fort Worth, TX 76140 ■800.533.2557 ■www.CFRcorp.com
Warranty
CFR, a Tacony company, warrants new products manufactured and sold under the name CFR to be free from defects in
materials and workmanship under normal use and service. CFR’s obligation under this warranty is limited to repairing or
replacing, at our option, such products or parts which are returned to our factory authorized service center, freight pre-
paid, within the warranty period and are found to be defective in materials or workmanship. For rotationally molded poly-
ethylene housings and aluminum frames and chassis this warranty expires 60 months from the date of registration; if the
warrant is not registered, it expires 60 months from the factory shipment date. For all other components, with the excep-
tion of wear items (i.e. filter, nozzles, etc.) this warranty expires 12 months from the date of registration on the warranty.
If not registered, is expires 12 months from the factory shipment date. For hoses, tools, and other attachments manufac-
tured and sold by CFR, this warranty expires 12 months form factory shipment date. Parts replaced or repaired under
warranty are guaranteed for the remainder of the original warranty period. Replacement parts that have become defec-
tive through wear or abuse are not included in this warranty. CFR will pay service labor to the distributor or authorized
service repair center per the warranty flat rate schedule. Service labor will be paid for two years on all warranted poly-
ethylene housings, aluminum frames and chassis, and one year on all other warranted components.
CFR systems are designed for use only with specially formulated CFR Recyclable Cleaning Chemicals. Use of any other
chemical in CFR systems may cause damage to the pump, motor and other components and may void the warranty.
This warranty shall cease to be in effect if repairs, replacements or alternations are made by the purchaser or any non-
authorized service station. This warranty does not apply to damage caused by misuse, abuse, or negligence of the
buyer or third party, or damage due to transportation of product.
CFR MAKES NO WARRANTY, EXPRESS OR IMPLIED, INCLUDING WITHOUT LIMITATIONS, ANY WARRANTIES OF
FITNESS OR MERCHANTABILITY, EXCEPT AS EXPRESSLY SET FORTH ABOVE WITH RESPECT TO SUCH PROD-
UCTS OR PARTS THEREIN. NOR SHALL CFR HAVE INCURRED ANY OTHER OBLIGATIONS OR LIABILITIES ON
ITS PART OR BE LIABLE FOR ANY ANTICIPATED OR LOST PROFITS, INCIDENTAL DAMAGES, CONSEQUENTIAL
DAMAGES, TIME CHARGES OR ANY OTHER LOSSES INCURRED IN CONNECTION WITH THE PURCHASE,
INSTALLATION, REPLACEMENT OR REPAIR OF SUCH PRODUCTS OR ANY PARTS THEREIN WHETHER ORIGI-
NAL EQUIPMENT OR INSTALLED AS A REPLACEMENT, COVERED BY THIS WARRANTY OR OTHERWISE; AND
CFR DOES NOT AUTHORIZE ANY PERSONA TO ASSUME FOR CFR ANY OTHER LIABILITY IN CONNECTION
WITH THE PRODUCTS OR PARTS THEREIN.
For more information about top quality CFR products please see your local CFR distributor or visit us at
www.CFRcorp.com
Thank you for purchasing
CFR Cleaning Systems.
Table of contents
Other CFR Vacuum Cleaner manuals
