Chair Care Patio Homecrest series User manual
1
Chair Care Patio Homecrest Style Sling Installation Instructions Standard Chair
This document is a copyright of Advanced Refinishing, Inc. and Chair Care Patio 2008
Homecrest Style Sling
Standard Chair Installation
Instructions
Tools Required
•Sheppard Hook Spreader Tool
•Rubber Mallet
•7/16” Ratchet/Wrench
OPTIONAL NEW HARDWARE PER CHAIR
Although your existing Homecrest Furniture will have all
the necessary hardware, we usually replace the
hardware for our local customers with new stainless
steel washers, nuts and bolts. It makes for a nice clean
look. You can buy these items in any hardware store.
Here is a list of what you will need per chair:
•Qty 8- ¼-20 washers
•Qty 8- ¼-20 nuts
•Qty 4- ¼-20 bolts ½” long
DISASSEMBLE THE CHAIR
Disassemble sling chair frame from the round swivel
base. Remove the chair support frame from the bottom
of the chair frame. Remove the 2 metal rails from inside
the sling fabric material. Take careful note of how your
chair is disassembled. This will help you with the
installation of the new sling.
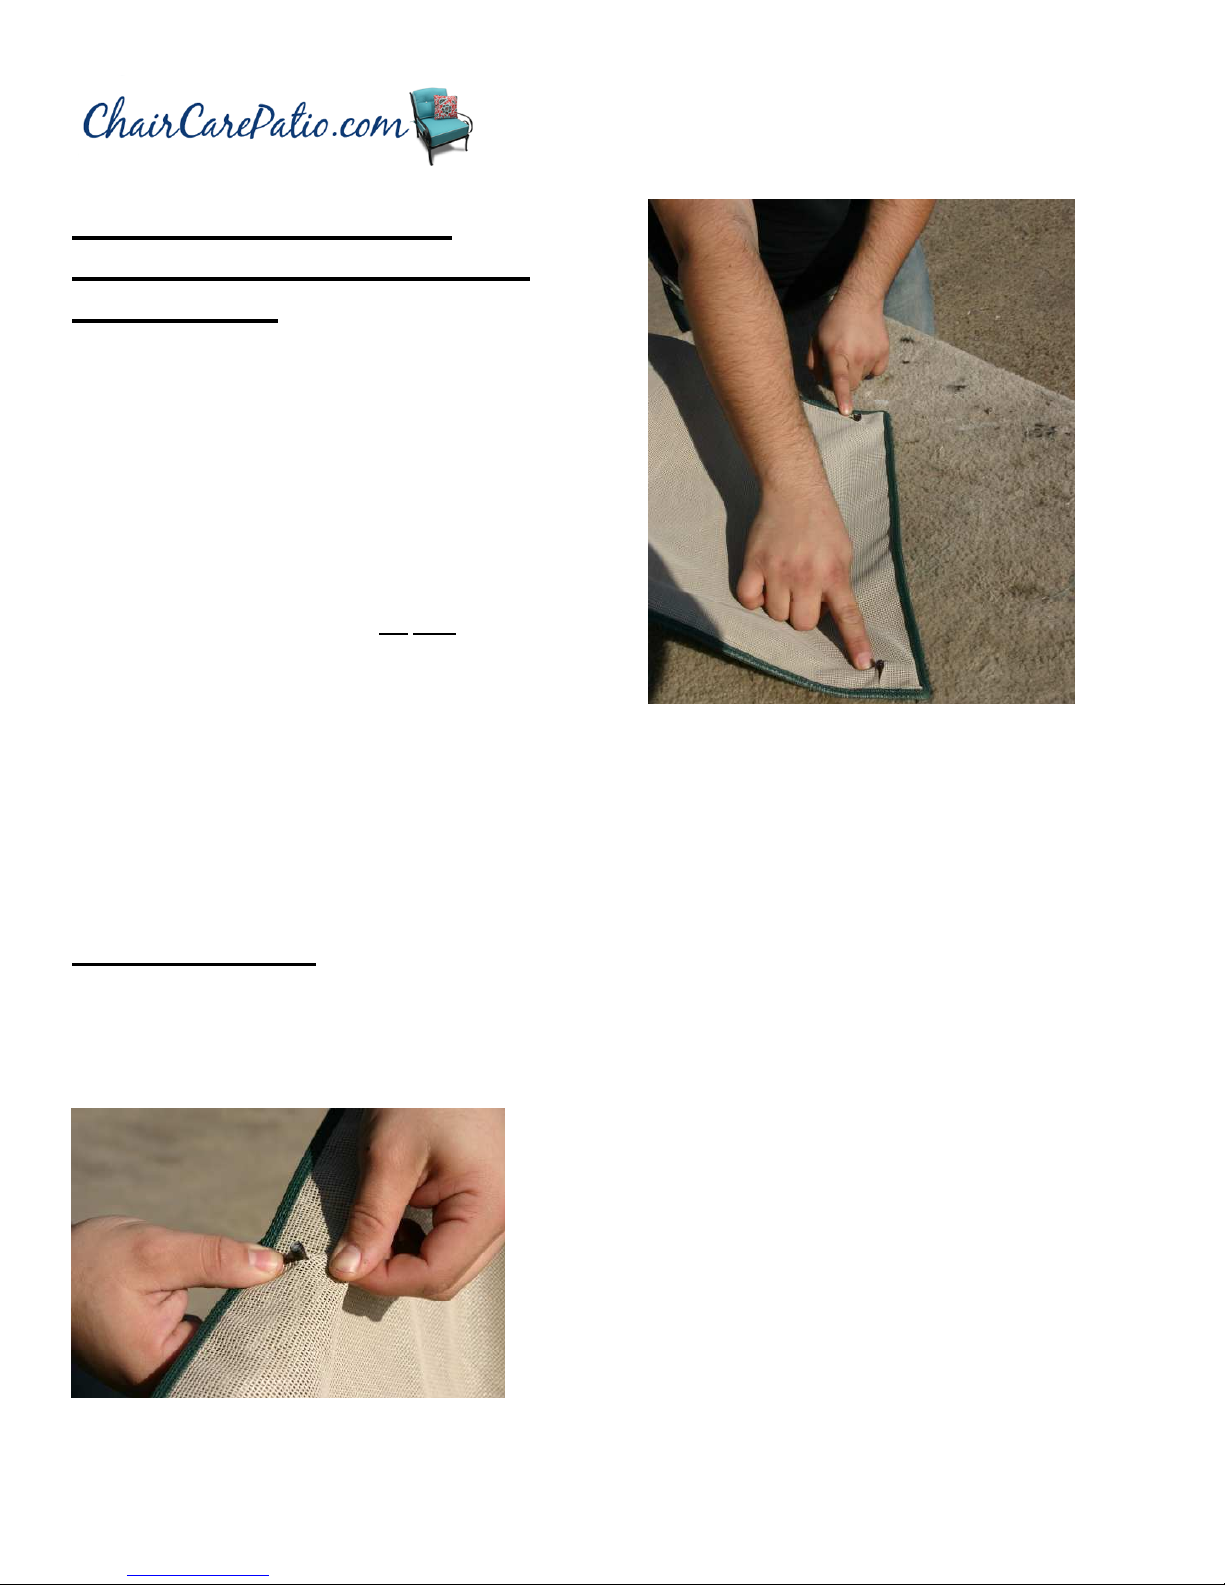
INSTALL NEW SLING
STEP 1 - Installing the rails.
Insert metal rails into the new sling exposing the threads
through the slits in the back of the sling fabric. They
should align easily.
STEP 2 - Installing the top spreader bar.
The special spreader tool is supplied with all Homecrest
sling orders. Its function it to pry the two metal sling rails
apart and keep them separated so you can fit the chair
back spreader bar onto the threaded bolts that are
welded to the metal sling rail bars.
The chair back spreader bar has 2 size holes. The
special spreader tool will only fit through the bigger hole.
Place the smaller hole of the chair back spreader bar
onto the exposed thread on one side of the sling. Install
a washer and nut on the thread and finger tighten Place
the spreader tool through the larger hole on the other
side of the chair back spreader bar. Next fit the end of
the spreader tool onto the opposite exposed thread.
Pry the rails apart and push down on the chair back
spreader bar until it slides over the threads.

2
Chair Care Patio Homecrest Style Sling Installation Instructions Standard Chair
This document is a copyright of Advanced Refinishing, Inc. and Chair Care Patio 2008
If you can’t get the spreader bar to slide down the tool by
hand, you may need to use the rubber mallet. Tap the
bar into place while prying the rails apart with the
spreader tool. Place a nut and washer on the bolt and
finger tighten.
STEP 3 - Repeat this process with the
bottom set of threads.

3
Chair Care Patio Homecrest Style Sling Installation Instructions Standard Chair
This document is a copyright of Advanced Refinishing, Inc. and Chair Care Patio 2008
STEP 4 - Installing the seat support frame.
This is the frame that is attached to the bottom of the
chair. This frame is then attached to the round swivel
base. Please note that there are 4 sets of threads on the
back of the fabric sling chair seat. For installation
purposes they will be referenced as set 1-4. Set #1 is
located at the top of the sling (at your head). Set number
4 at your knees.
Install the seat support frame onto the back of the fabric
sling frame starting at the 3rd thread set. You will again
need to use the spreader bar tool to pry the rails apart as
described in step 2. Place a washer and nut onto the
third thread set and finger tighten. The other end of the
support frame should fit easily onto the 4th thread set.
STEP 5 – Attach the chair arms.
Insert the chair arms into the 2nd and 4th thread set.

4
Chair Care Patio Homecrest Style Sling Installation Instructions Standard Chair
This document is a copyright of Advanced Refinishing, Inc. and Chair Care Patio 2008
Install a washer and nut on each thread and tighten well
at this point.
STEP 6 - Tighten all the nuts.
Now it is time to tighten all the nuts on the entire chair.
STEP 7 - Install swivel base.
Slide the chair support frame onto the swivel base
frame.
Reinstall the original bolts or replace with ¼-20-½” long
as suggested. These bolts keep the seat from slipping
off the base. DO NOT OVERTIGHTEN.

5
Chair Care Patio Homecrest Style Sling Installation Instructions Standard Chair
This document is a copyright of Advanced Refinishing, Inc. and Chair Care Patio 2008
Finally, insert the security pin into both holes in the chair
base.
Popular Indoor Furnishing manuals by other brands

Regency
Regency LWMS3015 Assembly instructions

Furniture of America
Furniture of America CM7751C Assembly instructions

Safavieh Furniture
Safavieh Furniture Estella CNS5731 manual

PLACES OF STYLE
PLACES OF STYLE Ovalfuss Assembly instruction

Trasman
Trasman 1138 Bo1 Assembly manual

Costway
Costway JV10856 manual


