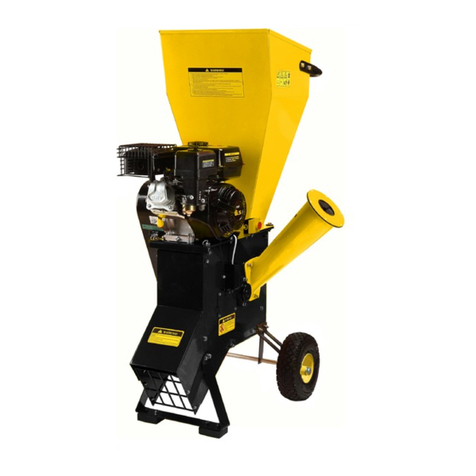
Champion Power Equipment RT10010 User manual

OWNER’S MANUAL
4 in. (10 cm)
Chipper-Shredder
WINCH SOLUTIONS,LTD.
Unit 17-18 Bradley Trading Estate
Standish,WN6 0XQ, UK
+44-1942-715-407
WWW.CHAMPIONPOWEREQUIPMENT.CO.UK
SAVE THESE INSTRUCTIONS
Important Safety Instructions
are included in this manual.
MADE IN CHINA
RT10010
MODEL NUMBER
ENGLISH
SVENSKA

2
ENGLISH RT10010
IntroductIon
Record the model and serial numbers as well as date and place of purchase for future reference. Have this
information available when ordering parts and when making technical or warranty inquiries.
Model Number
Serial Number
Date of Purchase
Purchase Location
44(0)1942-715-407
RT10010
For Oil Type see ‘Add Engine Oil‘ section. For Fuel Type see ‘Add Fuel‘ section.
Champion Power Equipment Support
AN IMPORTANT MESSAGE ABOUT TEMPERATURE:
Your Champion Power Equipment product is designed and rated for continuous operation at ambient temperatures up to
40°C (104°F). When your product is needed your product may be operated at temperatures ranging from -15°C (5°F) to
50°C (122°F) for short periods. If the product is exposed to temperatures outside this range during storage, it should be
brought back within this range before operation. In any event, the product must always be operated outdoors, in a
well-ventilated area and away from doors, windows and other vents.

3
RT10010 ENGLISH
EN
Manual conventIons
CAUTION indicates a potentially hazardous
situation which, if not avoided, may result in minor
or moderate injury.
CAUTION
CAUTION used without the safety alert symbol
indicates a potentially hazardous situation which, if
not avoided, may result in property damage.
CAUTION
This manual uses the following symbols to help differentiate between different kinds of information. The safety symbol
is used with a key word to alert you to potential hazards in operating and owning power equipment.
Follow all safety messages to avoid or reduce the risk of serious injury or death.
DANGER indicates an imminently hazardous
situation which, if not avoided, will result in death
or serious injury.
DANGER
WARNING indicates a potentially hazardous
situation which, if not avoided, could result in
death or serious injury.
WARNING
If you have questions regarding your chipper-
shredder, we can help. Please call our help line at
44(0)1942-715- 4 07.
NOTE

4
ENGLISH RT10010
safety rules
Engine exhaust contains carbon monoxide, a
colorless, odorless, poison gas. Breathing carbon
monoxide will cause nausea, dizziness, fainting or
death. If you start to feel dizzy or weak, get to fresh
air immediately.
DANGER
Run the motor outdoors only in a well ventilated
area. DO NOT operate the engine inside any
buildings or enclosures.
DO NOT allow exhaust fumes to enter a confined
area through windows, doors, vents or other
openings. DANGER CARBON MONOXIDE, using an
engine indoors CAN KILL YOU IN MINUTES.
Hands, feet, hair, clothing and / or accessories can
be caught in moving rotating parts and cause a
traumatic amputation or severe laceration.
DANGER
Keep hands and feet away from rotating parts. Tie up
long hair and remove jewelry. Operate equipment with
guards in place. DO NOT wear loose-fitting clothing,
dangling drawstrings or items that could become
caught.
The engine exhaust from this product contains
chemicals known to the state of California to cause
cancer, birth defects, or other reproductive harm.
WARNING
Sparks can result in fire or electrical shock.
DANGER
When servicing the engine:
Disconnect the spark plug wire and place it where
it cannot contact the plug. DO NOT check for spark
with the plug removed. Use only approved spark
plug testers.
Running engines produce heat. Severe burns can
occur on contact. Combustible material can catch
fire on contact.
DO NOT touch hot surfaces. Avoid contact with
hot exhaust gases. Allow equipment to cool before
touching. Maintain at least 3 ft. (91.4 cm) of
clearance on all sides to ensure adequate cooling.
Maintain at least 5 ft. (1.5 m) of clearance from
combustible materials.
WARNING
Child, Pet and Bystander Hazard
Do not allow children, pets or bystanders near
the work area or location of the chipper-shredder.
This can create potential distractions and safety
hazards. Accidents, damage and injury could occur.
A minimum distance of 75 ft. (22.9 m) from the
chipper-shredder is recommended. Projectiles
can also fly haphazardly in the work area. Only a
qualified adult with complete working knowledge
of the product and safety rules should operate the
chipper-shredder and be in the work area.
WARNING
Read this manual thoroughly, and understand all safety rules before operating the chipper-shredder. Become
familiar with the product and know how to stop the product immediately if needed. Failure to follow safety
instructions and familiarize one’s self with product operation could result in serious property damage, injury or
death.
DANGER
Always disconnect the spark plug wire during times
of inactivity, cleaning and maintenance. This will
prevent any accidental start up that may cause
damage or injury.
DANGER

5
RT10010 ENGLISH
EN
safety rules
Projectile Hazard
Pieces of debris may be ejected from the chipper-
shredder while operating. Be alert.
WARNING
Always wear proper clothing and safety gear.
DANGER
Close fitting clothing and safety approved eye
protection must be wore at all times around the
chipper-shredder. Wear boots or sturdy shoes that
will improve footing around slippery surfaces.
Keep Operator Work Zone Clear
Keep work zone clear of debris while working to
ensure safe footing.
WARNING
Rapid retraction of the starter cord will pull hand and
arm towards the engine faster than you can let go.
Unintentional startup can result in entanglement,
traumatic amputation or laceration.
Broken bones, fractures, bruises or sprains could
result.
When starting engine, pull the starter cord slowly
until resistance is felt and then pull rapidly to avoid
kickback.
WARNING
Improper treatment or use of the chipper-shredder
can damage it, shorten its life and void your
warranty.
Use the chipper-shredder only for intended uses.
Operate only on level surfaces. DO NOT expose
chipper-shredder to excessive moisture, dust, or
dirt. DO NOT allow any material to block the cooling
slots.
DO NOT use the engine if:
– Equipment sparks, smokes or emits flames
– Equipment vibrates excessively
– Equipment makes unusual sounds
– Equipment is damaged
CAUTION
Fuel and fuel vapors are highly flammable and
extremely explosive.
Fire or explosion can cause severe burns or death.
Unintentional startup can result in entanglement,
traumatic amputation or laceration.
When adding or removing fuel:
Turn the engine off and let it cool for at least two
minutes before removing the fuel cap. Loosen the
cap slowly to relieve pressure in the tank.
Only fill or drain fuel outdoors in a well-ventilated area.
DO NOT pump gas directly into the chipper-
shredder at the gas station. Use an approved
container to transfer the fuel to the chipper-
shredder.
DO NOT overfill the fuel tank.
Always keep fuel away from sparks, open flames,
pilot lights, heat and other sources of ignition.
DO NOT light or smoke cigarettes.
When starting the engine:
DO NOT attempt to start a damaged engine.
Make certain that the gas cap, air filter, spark plug,
fuel lines and exhaust system are properly in place.
Allow spilled fuel to evaporate fully before
attempting to start the engine.
Make certain that the chipper-shredder is resting
firmly on level ground.
When operating the chipper-shredder:
DO NOT move or tip the chipper-shredder during
operation.
DO NOT tip the chipper-shredder or allow fuel or oil
to spill.
When transporting or servicing the chipper-shredder:
Make certain that the fuel shutoff valve is in the off
position and the fuel tank is empty.
Disconnect the spark plug wire.
When storing the chipper-shredder:
Store away from sparks, open flames, pilot lights,
heat and other sources of ignition.
DANGER

6
ENGLISH RT10010
safety rules
Training
1. Read the Operator’s Manual completely before
attempting to use this chipper-shredder.
2. Do not allow anyone to operate your chipper-
shredder who has not read the Operator’s Manual
or has not been instructed on the safe use of the
chipper-shredder.
3. Never allow children or untrained adults to operate
this machine.
4. Many accidents occur when more than one (1)
person operates the chipper-shredder. If a helper is
assisting, never actuate controls until helper is clear
of the area.
5. Never allow anyone to ride on the machine.
6. Never transport cargo on the chipper-shredder.
7. Projectiles can exit the chipper-shredder at high
velocities. Therefore, the following instructions
should be heeded at all times.
a. Never operate the unit on hardened ground, such
as asphalt or concrete.
b. Never operate the unit close to any buildings or
walls.
c. Do not allow children, pets, bystanders, and
assistants to be within 75 ft. (22.9 m) of the
unit during operation.
d. Do not lean directly over any chute, entry or exit,
during operation.
8. Keep the operator zone and adjacent area clear for
safe, secure footing.
9. If your chipper-shredder is equipped with an
internal-combustion engine and intended for use
near any unimproved forest, brush, or grass covered
land, the engine exhaust should be equipped with
a spark arrestor. Make sure you comply with local,
state, and federal codes. Take appropriate fire-
fighting equipment with you.
10. Chipper-shredders should be used only for chipping
branches 4 in. (10 cm) or less in diameters or
shredding vegetation with small diameter branches.
Do not use for other purposes.
11. Always make sure the spark plug wire is
disconnected from the engine when not in use, and
before cleaning or maintenance.
Preparation
1. Be thoroughly familiar with all controls and with
proper use of the equipment.
2. Make sure the spark plug wire is disconnected until
operation.
3. Safety Gear:
a. Always wear safety shoes or heavy boots when
operating the machine.
b. Always wear safety glasses or goggles when
operating the machine.
c. Never wear jewelry or loose-fitting clothing that
might become entangled in moving or rotating
parts of the machine.
d. Always wear hearing protection.
e. Tie back long hair or anything that will dangle
and may get entangled.
4. Inspection:
a. Make sure the spark plug wire has been fully
removed and the unit is grounded.
b. Make sure the chutes, chambers, and intakes/
exits are all clean and free of any debris.
c. Make sure the work area is clean and has no
obstacles or distractions.
d. Make sure all connections and parts are secure
and undamaged.
e. Make sure collection bag is fully connected and
secure.
f. Make sure material to be chipped is less than
4 in. (10 cm) in diameter. Branches to be
chipped can be pruned down.
g. Make sure material to be chipped or shredded is
not damp or wet.
5. Check to make sure the chipper-shredder is on a
level surface that is not asphalt, concrete or harden
ground. Block the wheels and ensure support leg
is secure to prevent unintended movement of the
chipper-shredder during operation.
a. Always operate the chipper shredder from the
manufacturer’s indicated operator zone.
6. Fuel:
a. Use an approved fuel container.
b. Never add fuel to a running or hot engine.
c. Fill fuel tank outdoors with extreme care. Never
fill fuel tank indoors.
d. Replace gasoline cap securely and clean up any
spilled fuel.

7
RT10010 ENGLISH
EN
safety rules
Maintenance and Storage
1. Always shut off the power source and disconnect
the spark plug wire and ground the engine, while
repairing or adjusting the unit.
2. Clean debris, shrubbery and chaff from the engine
cylinder, cylinder head fins, blower house rotation
screen, and muffler areas. If the engine is equipped
with a spark arrestor muffler, clean and inspect it
regularly (follow manufacturer’s service instructions).
Replace, if damaged.
3. Never store the unit with fuel in the tank. Fumes
might reach an open flame spark. Allow the engine
to cool before storing in any enclosure.
4. Clear debris from moveable parts, but only when the
engine is off, the fuel valve is in the “OFF” position,
and the spark plug wire is disconnected.
5. Check to be sure all nuts and bolts are tight to
assure the equipment is in safe working condition.
Operation
1. Before starting this chipper-shredder, review all
safety rules. Failure to follow these rules may result
in serious injury to the operator or bystanders.
2. Be sure to confirm all connections are tight before
each use. It is possible for connections to vibrate
loose over time.
3. Never leave the machine unattended with the power
source operating.
4. Never operate the machine when under the
influence of alcohol, drugs or medication.
5. The machine owner should instruct all operators in
safe chipper-shredder operation.
6. Always operate the chipper-shredder with all
safety equipment in place and all controls properly
adjusted for safe operation.
7. Always operate the chipper-shredder at
manufacturer’s recommended speed.
8. Always keep hands and feet clear of moving parts.
9. When loading the chipper-shredder, never place
your hands inside or on the sides of the chutes,
chambers, or intake. Never place your hands or any
part of your body between the material and any part
of the chipper-shredder.
a. Never attempt to chip more than one (1) branch
at a time, this may cause the chute, chamber or
intake to become clogged.
b. Never attempt to use your hand, foot or any body
part to unclog the chipper-shredder.
c. Only attempt to unclog with a small diameter
stick that can get chipped.
d. If a major clog occurs; turn the fuel valve off and
let the unit run until dry, turn off the engine, let
the unit cool down, unplug the spark plug wire
and take apart the unit to see where the clog has
occurred. Remove clog before further operation.
10. Only chip branches 4 in. (10 cm) or less in diameter.
11. Only shred dry or slightly damp material. Never
attempt to shred material that is wet, as this may
cause clogging to occur.
12. Use only your hand to operate the chipper-shredder
controls.
13. Do not refuel the engine until it has cooled for several
minutes.

8
ENGLISH RT10010
(1) Discharge chute cover
(2) Hopper inlet
(3) Muffler
(4) Hopper
(5) Fuel tank
(6) Oil filler cap
(7) Transport Handle
(8) Foot mounting bracket
(9) Base frame
(10) Emergency stop
(11) Engine On/Off switch
(8) Throttle
(9) Fuel Tank Cap
(10) Air Cleaner
(11) Exhaust
(12) Pull Start Handle
(13) Emergency Stop
(12) Wheel x 2
(13) Air filter
(14) Blade shaft cover
(15) Discharge chute
(16) Axle
(17) Hex key
(18) Spanner x 2
(19) Spark plug tool
(20) M10 Handle assembly fasteners x 2
(21) M8 Foot mounting bracket fasteners x 2
Chipper-shredder
controls and features
Read this owner’s manual before operating your chipper-shredder. Familiarize yourself with the location and function
of the controls and features. Save this manual for future reference.

9
RT10010 ENGLISH
EN
controls and features
Parts Included
Your RT10010 gasoline powered chipper-shredder ships
with the following parts:
– Oil Funnel ............................1
– PPE Helmet ...........................1
– Spark Plug Socket....................... 1

10
ENGLISH RT10010
asseMbly
Your chipper-shredder requires some assembly. This unit
ships from our factory without oil. It must be properly
serviced with fuel and oil before operation.
If you have any questions regarding the assembly of your
chipper-shredder, call our help line at +44(0)1942-715-407.
Please have your serial number and model number available.
Unpacking
1. Set the shipping crate on a solid, flat surface
2. Carefully cut the shipping bands and remove lid of
shipping crate.
3. Locate all hardware before beginning assembly.
Install the Wheels & Axle
1. Slide a wheel (12) with valve stem facing out onto the
axle (16) (fig. 1).
Slide the first wheel on the circlip side of the axle
(16).
The circlip on the axle (16) will prevent the wheel
(12) touching the base frame (9).
By tightening the wing bolt on the axle frame (fig. 4)
the axle (16) will be held in position and allow the
wheel nuts to be tightened fully.
Slide the first wheel on the circlip side of the axle
(16).
NOTE
NOTE
NOTE
NOTE
2. To secure, place the wheel washer and nut onto the
axle. Tighten the nut (fig. 2).
3. Slide the axle through the hole in the base frame (9)
and out the other side (fig. 3).
4. Place the second wheel (12) on the protruding end
of the axle (16) and secure in place with the wheel
washer and nut. Tighten the nut.
5. Check and maintain tyre pressure at 20 psi.
Fig.1
Fig.2
Fig.3
Fig.4

11
RT10010 ENGLISH
EN
asseMbly
Transport Handle
1. Place the transport handle (7) on the base frame
(9).Align the holes in the handle (7) and the base
frame(9). From the handle assembly fasteners (20),
inserteach bolt with washer from the top. Secure in
placewith nut (fig. 5,6).
Foot Mounting Bracket
1. Align the holes in the foot mounting bracket
(8)with those in the base frame (9) and secure in
placeusing the two bolts and nuts from the foot
mountingbracket fasteners (21). Using a 12mm
spannersecurely tighten both nuts (fig. 7).
Hopper
1. Place the hopper (4) in position on the base frame
(9) above the cutting blades and slide it across so
that the pins of the frame engage the hinges on the
hopper (4) (fig. 8).
Fig.5
Fig.6
Fig.7
Fig.8
DO NOT place hands or any other body parts
insidethe cutter head opening. DO NOT touch the
bladeswith your hands or any other body parts.
WARNING

12
ENGLISH RT10010
Fig.9
Fig.10
Fig.11
Fig.12
Fig.13
2. Check the lower side of the hopper (4), so thatthe
two holes are aligned with the holes in the frame.(fig.
9).
3. Tighten the two bolts safely with the 13mm wrench
clockwise (fig. 10).
Discharge Chute
1. Place the discharge chute (15) in position on the
rearof the base frame (9) and slide it across so
that thepins of the frame engage the hinges on the
dischargechute (15), (fig. 11).
2. Check the lower side of discharge chute (15), so
thatthe two holes are aligned with the holes in the
frame.(fig. 12).
3. Tighten the two bolts safely with the 13mm
wrenchclockwise (fig. 13).
It is necessary to ensure that the bolts of
thefixed funnel (4) and the unloading chute (15)
arefastened, otherwise there will be danger.
WARNING
asseMbly

13
RT10010 ENGLISH
EN
Add Oil
Air filter
Adding fuel
1. Be sure to check that the wood chipper is on a level
surface with the engine stopped.
2. Remove the oil filler cap (6), and wipe the
dipstickwith a clean rag. Check the oil level by
inserting thedipstick in the filler hole without
screwing it in andthen removing it again (fig. 14).
The air filter (13) must always be in perfect
workingorder, to prevent debris and dust from being
sucked intothe engine thus reducing the efficiency and
life of theengine.
– Always keep the air filter (13) free of debris and
inperfect working order.
– If necessary, replace the filter with an original
sparepart. Incompatible filtering can impair the
efficiencyand life of the engine.
– Never start the engine without the air filter
(13)assembled.
– To change the air filter (13) refer to the
maintenancesection of the engine instruction
manual.
The wood chipper is shipped without oil and must be
filled before starting. Engine sump capacity: JRE-
1005:600ml,JRE-1007:1100ml. (Use SAE30 or
10W30 oil).
Only use unleaded 91 RON (Research Octane
Number) petrol. Purchase fuel in quantities that can
be used every 30 days to prevent gum or foaming
inside the container and/or fuel tank.
NOTE
NOTE
3. If the oil level is below the end of the dipstick,refill
(use a funnel, do not tip wood chipper) untilit
registers on the halfway mark of the dipstick(fig.
15). Use premium quality 4-stroke engine
oil.Recommended SAE30 or 10W30 for most
climateconditions in Australia.
Fig.14
Fig.15
Using non-detergent oil or 2-stroke engine oil could
shorten the engines service life.
CAUTION
Keep away from cigarettes, smoke and sparkswhen
refuelling the engine. Always refuel in a
wellventilatedlocation.
WARNING
Be careful not to spill fuel when refuelling.
Spilledfuel or fuel vapour may ignite. If any fuel
is spilled,make sure the area is dry before starting
theengine.
WARNING
Do not over fill the fuel tank.
WARNING
Do not refill tank while engine is running or hot.
WARNING
Pre-oPeratIon cHecK

14
ENGLISH RT10010
1. Place the wood chipper on a flat level surface.
2. Ensure the engine is switched OFF.
3. Remove the fuel cap from the top of the fuel tank(5).
4. Using a funnel, carefully fill the tank (5) with fuel(fig.
16).
5. Fasten the fuel cap and clean any spillage.
Drive Belt
To ensure optimum power from the engine the drive belt
must be in good condition and operate under proper
tension. To remove, install and inspect the drive belt
refer to the maintenance section of this instruction
manual.
Spark plug
– Use only the spark plug that is recommended for this
wood chipper.
– Make sure that the electrode is clean and the air
gap is correct (refer to the specs of the spark plug
manufacturer).
– To remove, install and inspect the spark plug refer
to the maintenance section of the engine instruction
manual.
Not all spark plugs for engines are the same.
CAUTION
Fig.16
Pre-oPeratIon cHecK

15
RT10010 ENGLISH
EN
1. ENGINE ON/OFF SWITCH - Move the engine on/
offswitch to the ON position.
2. FUEL - Move the fuel lever to the right,
OPENposition.
3. CHOKE - Move the choke lever to the left,
choke(closed) start position.
Starting the Engine (fig 17,18,19)
Ensure you have filled the engine sump with
engineoil before starting the engine. The dipstick
mustindicate the oil level is at maximum for the
unit tostart.
WARNING
Prior to starting the engine ensure the hopper
(4)is empty. Ensure you wear safety gloves,
safetyglasses and earmuffs when the wood chipper
is inuse.
WARNING
Ensure the hopper (4) and discharge chute (15)
arefitted and secured with T-bolts (20) otherwise
thesafety interlock will prevent the motor from
starting.
IMPORTANT
4. THROTTLE - Move the throttle lever slightly
lefttowards the symbol.
5. STARTER - Grip the recoil starter and slowly
pulluntil resistance is felt, then pull the recoil
starterrapidly. Allow the rope to rewind slowly
and ifnecessary, repeat this procedure until the
enginestarts.
6. Once started move the choke lever right
(run)position and open the throttle lever further left
- runat full speed.
If the engine is still hot, closing the choke is not
necessary.
NOTE
Fig.17
Fig.19
Fig.18
oPeratIon

16
ENGLISH RT10010
Stopping the Engine
1. Move the throttle lever fully right towards the
indicator (fig. 20), move the engine on/off switch
tothe OFF position (fig. 21) and fuel lever left,
closedposition (fig. 22).
Emergency Stop
1. If the engine is stopped using the emergency stop
button(10) (fig. 23), reset the button by rotating it
right until itpops up. The button must be reset in
order to start theengine).
Fig.20
Fig.23
Fig.21
Fig.22
The following types of material can be used in the
woodchipper.
– Trees, including roots.
– Branches.
– Waste from cut branches.
– Waste from hedge trimming.
– Bamboo
Chipping & Shredding
The wood chipper is not suitable for
materialsincluding glass, metal plastic bags,
stones, fabric,vines, soft leafy material and waste
without firmconsistency (eg kitchen waste).
WARNING
To prevent damage to the wood chipper it
isrecommended that garden material greater
than50mm in diameter (green) or 30mm in
diameter (dry) is not fed into hopper.
WARNING
oPeratIon

17
RT10010 ENGLISH
EN
Clearing Jammed Blades
If the blades become jammed, this is usually caused by
attempting to shred material that is too large.
Tips
Following the below procedures will improve operationand
prolong the life of the wood chipper.
– Trees and branches should be shredded shortly
afterthey are cut. They become extremely hard once
dryand the maximum cutting diameter is reduced.
– Garden waste such as fresh foliage, creepers
andvines contain a lot of moisture, this can result
inmaterial sticking to the cutter head. Such
materialshould be allowed to dry for a few days
before beingfed into the shredder.
– Always check material before shredding, ensure
itdoes not contain any stones or nails as this
mayseverely damage the shredder.
Discharge Chute Cover (fig. 25)
1. Feed the material to be shredded into the hopper
inlet (2).
Stay clear of the discharge chute opening the
chipsthat are expelled can hurt you or may cause
seriousinjury (fig. 24).
CAUTION
Blades are sharp, handle with care. It
isrecommended to use gardening or safety gloves
whenhandling or cleaning the blades.
CAUTION
2. Once the material makes contact with the blades
itwill be pulled into the machine, no need to push
itin.
1. When finished, stop the engine as described in
“Stop the engine” section of this manual.
Fig.24
Fig.25
The wood chipper may clog if too much fine material
is fed in. To prevent clogging, mix fine material with
larger material.
In the upper most position the chippings will fall
further away.
NOTE
NOTE
– Material that contains dirt will rapidly blunt
thecutting blades and should be avoided.
– For roots, always remove dirt and tones
beforechipping.
– When chipping large material, process one branch
ata time.
– During the chipping process, place the larger
sidefirst (trunk side before branch) in order to get
goodchipping.
The discharge chute has an adjustable cover (1), this is
used to direct where the chippings are expelled.
1. Loosen, do not remove, the four bolts.
2. Adjust up or down as required. Note: In the upper
most position the chippings will fall further away.
3. When adjustment is completed, firmly tighten bolts.
oPeratIon

18
ENGLISH RT10010
1. Stop the engine.
2. Remove the hopper (4) and discharge chute
(15) (fig. 26-27). Ensure both are free of any
obstructions.
3. To allow access to the blade shaft remove the two
nuts from the blade shaft cover (14) (fig. 28 ).
4. Rotate the blade shaft as required using a 17mm
spanner (not supplied) (fig. 29).
5. Carefully clean out the cutting and discharge
area.Ensure that all debris is removed to prevent
theblades from clogging. The discharge area should
befree of all organic matter (fig. 30).
6. Once the blades are completely clean refit blade
shaft cover (14),hopper (4) and discharge chute
(15).
– The engine should be cool enough to touch
beforeperforming any maintenance.
– Inspect and maintain the wood chipper before
eachuse. If the wood chipper has been used
previously,it must be inspected and maintained
before eachsubsequent use.
– Always shut off the engine before
inspecting,cleaning, adjusting, or repairing the wood
chipper.
Fig.26 Fig.29
Fig.30
Fig.27
Fig.28
MaIntenance

19
RT10010 ENGLISH
EN
1. Stop the engine.
2. Remove the hopper (4)
3. To allow access to the blade shaft remove the two
nuts from the blade shaft cover (14) (fig. 31).
Avoid contact with hot muffler.
CAUTION
Blades are sharp, handle with care. It
isrecommended to use gardening or safety gloves
whenhandling or cleaning the blades.
CAUTION
Replacing Blades
The blades supplied with the wood chipper are
resharpenedand will become blunt over a period of
time.Additional blades & bolts can be obtained as spare
parts.Always replace both blades at the same time.
Ensure theblades are kept in good condition and correct
clearance ismaintained.
– Remove debris from the engine, muffler, and
movingparts. Debris on a hot engine can be a fire
hazard.Clean debris and chaff from the engine
cylinderhead, cylinder head fins, blower housing
rotatingscreen, and muffler areas.
– After the first 25 hours of use the engine oil
requiresto be replaced, and then every 50 hours
after that.Refer provided engine manual for further
enginemaintenance procedures.
Fig.31
Fig.32
Fig.33
4. Rotate the blade shaft as required using the 17mm
spanner (fig. 32).
5. There are two blades and these are each fixed to
therotating drum with four screws. To remove the
bladesfirst clean out any debris and build up of
materialfrom the screw heads. Rotate the blade
shaft toposition the first blade, allowing you to
access screws(fig. 33)
MaIntenance

20
ENGLISH RT10010
6. The screws may be tight due to corrosion and
dirtbuildup. Ensure that the supplied hex key (17)
is agood fit onto the screw and that the hex key
(17) isheld firmly and at right angles to the blade.
Removethe four blade securing screws by rotating
the hexkey (17) in the anti- clockwise direction. (fig.
34).
1. Stop the engine.
2. Remove the belt cover by removing the six bolts with
M10 spanner.
7. To remove the second blade repeat steps 5 and 6.
8. Once the blades are replaced refit blade shaft cover
(14) and hopper (4).
Fig.34
Fig.35
Fig.36
Ensure the blade securing screws secure the
bladesare fully tightened prior to operation. If
there isany vibration or abnormal noise after
re-startingthe wood chipper, immediately stop
operation.Check that the blades are assembled
correctly andsecurely tightened.
WARNING
It is recommended to add Loctite¨ 222 Threadlockerto
the thread of the blade securing screws, Loctite¨222
Threadlocker is available from all Bunningsstores. This
assists in securing the screw andreduces the chance
of the blade securing screwvibrating loose whilst in
operation.
NOTE
Drive Belt (fig. 35-39)
If the drive belt is damaged, it should be replaced.
Ensurethat the drive belt tension is maintained at
all times. Ifworn, slipping may occur (this is usually
noticeable by asquealing noise) or slowing and or
stopping of the bladeswhen the machine is under load.
3. Loosen, do not remove the four engine
mountingbolts (A) (two on the front and two on the
rear side ofthe engine.
4. Loosen, do not remove the two engine locating
bolts(B), one either side of the engine. Depending
onthe direction you need to move the engine,
you caneither increase or degrease the drive belt
tension. Byrotating these two bolts sufficiently you
can slide theengine either forward or backward.
MaIntenance
Table of contents
Languages:
Other Champion Power Equipment Paper Shredder manuals
Popular Paper Shredder manuals by other brands

Opus
Opus CS 2208 AF user guide

EFCUT
EFCUT MF30 instruction manual

Parkside
Parkside PWH 2800 B2 Operating and Safety Instructions, Translation of Original Operating Manual

Martin Yale
Martin Yale intimus 130SP2 operating instructions

Stiga
Stiga BioMaster Instructions for use

Aurora
Aurora AU870MA user manual