CHAPALA CHIMENEAS Chimenea Medium User manual

FOR OUTDOOR USE ONLY
03674 11/17
IMPORTANT: RETAIN THESE INSTRUCTIONS FOR FUTURE USE
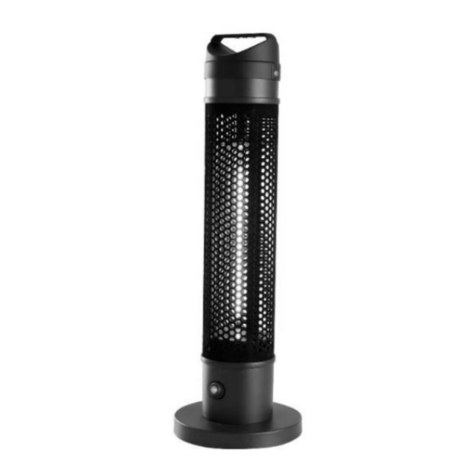
This image is for illustration purposes only.
The product you purchase may differ slightly from the one shown here.
MEDIUM & LARGE
INCA CLAY CHIMENEAS
• Traditionally handmade in Mexico
• Volcanic clay pottery with integrated
capillaries for improved durability
• Add magic ambience to your
outdoor area
• When used as a heater it provides
up to 3m radius of warmth
• Inca stylised design
• Use with washed sand in base
and optional fire base tiles for
easy maintenance and better
performance
• Antique red

• The Chimenea requires 1.5m
clearance from the top of the
chimney to any combustible surface
above such as a pergola, sailcloth,
awning etc.
• Only use the Chimenea on a non
combustible surface (not timber).
• Ensure the Chimenea is at least 1.5m
from any combustible surface.
• If you have a spark arrestor
accessory ensure it is in the
correct position following the
instructions supplied.
• Follow the correct lighting and fire
management advice included in
these instructions to ensure that you
get the most out of your product.
• When not in use, ensure Protective
cover (Raincoat accessory sold
separately) is on correctly or that
the unit is stored undercover.
• After approximately every 5 to 7
fires the ash should be removed so
the height of the fire is not
continually raised.
• If possible, position the Chimenea
where the fire can be seen from
inside the house as well as the out
door area.
• A Chimenea performs better with its
back towards any prevailing breeze.
• To ensure the Chimenea performs
correctly check that the chimney is
vertical, by viewing both from directly
in front and from the side.
SAFE POSITIONING
GENERAL CARE & MAINTENANCE
-2-

-3-
• For best results include a permanent
firebase inside fire chamber (see
diagram below).
• The Chimenea must be used with
sand (not supplied) in the base.
• The sand raises the fire to the
required height for optimum
heating performance.
SETTING UP THE FIRE CHAMBER
Permanent
Firebase
Sand
Product Size Washed Sand Amount
Medium Chimenea 12-15 Litres
Large Chimenea 14-17 Litres
• It also allows the fire to be easily
seen through the Chimenea mouth
enhancing the ambience, an
important part of the unique charm
and character of your Chimenea.

PERMANENT FIREBASE INSTALLATION
‘SAND ONLY’ FIREBASE INSTALLATION
FIREBASE MAINTENANCE
Use a permanent firebase (not supplied)
for better performance and easier
maintenance.
1. Place only the required amount of
washed sand into the fire chamber
as specified in the table on page 3.
2. Without compacting the sand, mould
it into a shallow “birds nest” shape
measuring about 40mm deep at the
centre, rising to 60mm at each side.
3. Using the correct firebase tile pack
for your size Chimenea as
designated on the packaging; place
the round tile centrally in the “bird’s
nest”. Add remaining ceramic tiles in
circles around the centre tile; as
shown on the firebase tile pack.
4. Use a couple of handfuls of sand
as “grout”; spread around across
the top of the tiles to fill in between
the gaps. Firmly pat the sand
around the top and remove any
excess sand.
1. Place only the required amount of washed sand (not supplied) into the fire
chamber as specified in the table.
2. Without compacting the sand, mould it into a shallow “birds nest” shape
measuring about 40mm deep at the centre, rising to about 80mm at each side.
NOTE: Use only as much sand as required.
3. The sand only firebase “birds nest” will flatten out over time and needs to be
reshaped every time the ash is removed.
After approximately every 5 - 7 fires the ash should be removed and the sand base
reconstructed to the “birds nest” shape.
Advantages of a permanent firebase:
• It centralizes the fire within the
chamber for best all round radiant
heating performance.
• Increases insulation between the
fire and the surfaces below the
Chimenea
• Achieves best fuel economy using
low flame height fires over a base of
glowing coals.
• Simplifies ash removal. The sand
only firebase “bird nest” will
flatten out over time and needs
to be reshaped every time the ash is
removed.
-4-

-5-
The Chimenea is designed to efficiently use the minimum amount of fuel to get the
maximum amount of radiant heat. Each size Chimenea has been made with a
specific ratio between the area of the mouth opening and the diameter of the flue.
With the right size fire the Chimenea will draft correctly with minimal smoking and
optimum heat output; at the same time as conserving your fuel.
• The fire should be kept to a size
which fills the visible area of the fire
chamber mouth, and the flames are
below the internal base of the
Chimney.
• Once the fire is underway the use of
recommended dry fuels as described
in these instructions will result in
smoke free operation under items
like pergolas or verandas.
• Adding extra fuel to furnace the
Chimenea will not necessarily give
better performance.
• The fire heats the walls of the
Chimenea, which then radiates heat
to the surrounding area.
BE PATIENT AND ALLOW THE
WALLS TO HEAT.
FIRE MANAGEMENT
IMPORTANT

Use the following fuels for Small to Medium Chimeneas:
Charcoal Red river gum charcoal
Double split red gum, yellow
box, grey box pieces
Roughly cut to 200mm long and 50mm thick. Larger size
pieces are too big for Chimeneas & may lead to overloading
/ furnacing; which may damage the Chimenea
Sunbrix Solid
Briquettes
An excellent slow burning smokeless fuel, best used
50 / 50 with wood / charcoal
Hot Rox Processed Wood
‘Logs’
Hexagonal logs with a centre hole. For small and medium
Chimeneas break the pieces in half
Small pieces of Mallee Root No larger than grapefruit size pieces
Kindling
Dry Hardwood kindling is best as it is reliable and virtually
smokeless. Softwoods, building site off cuts, and old
fencing are ok as kindling. Kindling should not be used as
general fuel as they heat up and die down very quickly.
NOTE: Use of recommended fuels will result in minimal ash generation and lower
maintenance requirements.
RECOMMENDED DRY FUELS
-6-

-7-
• Never light a Chimenea (or any other
non-flue device) indoors or in any
fully enclosed space. Proper
ventilation must always be provided.
• Supervision of toddlers, young
children, and pets is required. Use
the fire screen accessory in front
of the open firebox mouth whenever
the Chimenea is alight.
•
Moving Chimeneas can be hazardous.
Never move when in use.
• Moving your Chimenea is a 2 person
job. Pass 2 heavy duty ropes under
each side of the Chimenea (inside of
the stand legs).
• NEVER attempt a one person lift.
•
Follow best practice lifting procedures
such as never bend down to lift;
always bend your knees only; with
heavy lifting.
SAFETY
• Never place a cap on top of the
Chimney when it is alight.
• Never douse the fire with water.
• The fire should die out by running out
of fuel.
•
Never leave the Chimenea unattended.
EXTINGUISHING YOUR CHIMENEA FIRE

MAINTENANCE REQUIREMENTS
Progressive build up of charcoal and ash gradually raises the height of the fire with
progressive reduction of radiant heating performance. When the fire gets too high
the flames will reach the shoulders of the fire chamber.
Periodic removal of accumulated ash is advisable; by scooping down to the top of
the firebase, using disposable gloves or a brush and dust pan being careful to avoid
disturbing the firebase.
Only remove cold ashes which are fully extinguished.
WHEN NOT IN USE: The Chimenea should be protected from moisture; to prevent
rust over long periods. It should be kept undercover or covered with a Raincoat
accessory (not included).
WET CHIMENEA: If your Chimenea does get wet internally, as soon as possible
empty the fire chamber completely; dry out the inside with a fan forced heater. The
Chimenea is dry when it has regained its metallic ring when tapped.
ASHES BUILD UP
WEATHER PROTECTION
-8-
SPARK ARRESTOR BBQ GRILLER
FIREBASE 17 TILE SET FIREBASE 9 TILE SET RAINCOAT
This manual suits for next models
1
Table of contents