2
ITALIANO
CARATTERISTICHE TECNICHE
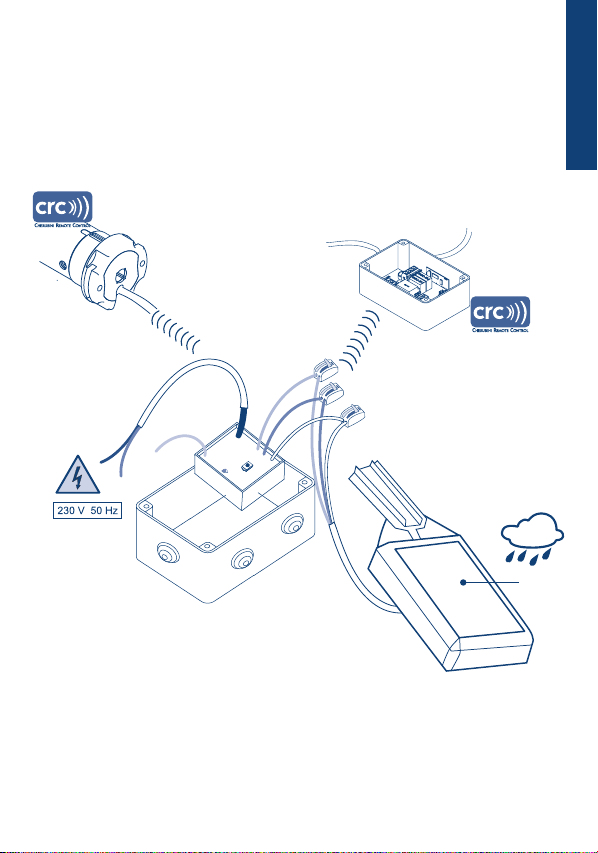
- Alimentazione 230 Vac
- Potenza assorbita 2 W
- Frequenza di trasmissione 433,92 MHz
- Codica Rolling code
- Modulazione AM/ASK
- Portata radio 10-15 m
- Temperatura di funzionamento -10°C +55°C (scheda elettronica)
-10°C +90°C (elemento sensibile)
- Grado di protezione IP44 (contenitore plastico)
- Dimensioni (escluso cablaggio) 80 x 80 x 40 mm (contenitore plastico)
120 x 60 x 20 mm (elemento sensibile)
- Peso 300 g (elettronica)
200 g (elemento sensibile)
ISTRUZIONI PER LA SICUREZZA
- L’installazione deve essere eseguita da personale tecnico nel pieno rispetto delle norme
di sicurezza, soprattutto per quanto riguarda i collegamenti elettrici.
- A monte della centralina prevedere un interruttore bipolare automatico per la protezione
dai corto circuiti, con distanza di apertura dei contatti di almeno 3 mm.
- I dispositivi di disconnessione devono essere previsti nella rete di alimentazione
conformemente alle regole di installazione nazionali.
- In fase di primo utilizzo consultare anche il manuale d’istruzioni del motore o della centralina.
- Il cavo di alimentazione di questo dispositivo di comando può essere sostituito solo dal
costruttore o da un suo tecnico accreditato.
- L’apparecchio non è destinato ad essere usato da persone (bambini compresi) le cui
capacità siche, sensoriali o mentali siano ridotte, oppure con mancanza di esperienza o
di conoscenza, a meno che esse abbiano potuto beneciare, attraverso l’intermediazione
di una persona responsabile della loro sicurezza, di una sorveglianza o di istruzioni
riguardanti l’uso dell’apparecchio.
GARANZIA
Il mancato rispetto di queste istruzioni annulla la responsabilità e la garanzia CHERUBINI.
CHERUBINI S.p.A. dichiara che il prodotto è conforme alle pertinenti normative di
armonizzazione dell’Unione: Direttiva 2014/53/UE, Direttiva 2011/65/UE.
Il testo completo della dichiarazione di conformità UE è disponibile facendone richiesta
sul sito: www.cherubini.it.
DICHIARAZIONE DI CONFORMITÀ UE