Introduction 5
■ Using the steering wheel remote
control, press + to adjust the
volume.
■ Turning on the Infotainment system
power will set the volume level to its
previous selection (when it is less
than the maximum starting
volume).
■ If the volume level is louder than the
maximum starting volume level
when the Infotainment system is
turned on, the Infotainment system
is adjusted automatically to the
maximum starting volume level.
MUTE
Press ∧ VOL ∨ on the control panel
and then press p to turn the mute
function on and off.
Auto volume control
Once the speed-compensating sound
volume setup starts operating, the
volume will automatically be
controlled according to the vehicle’s
speed to offset the noise from the
engine and tires.
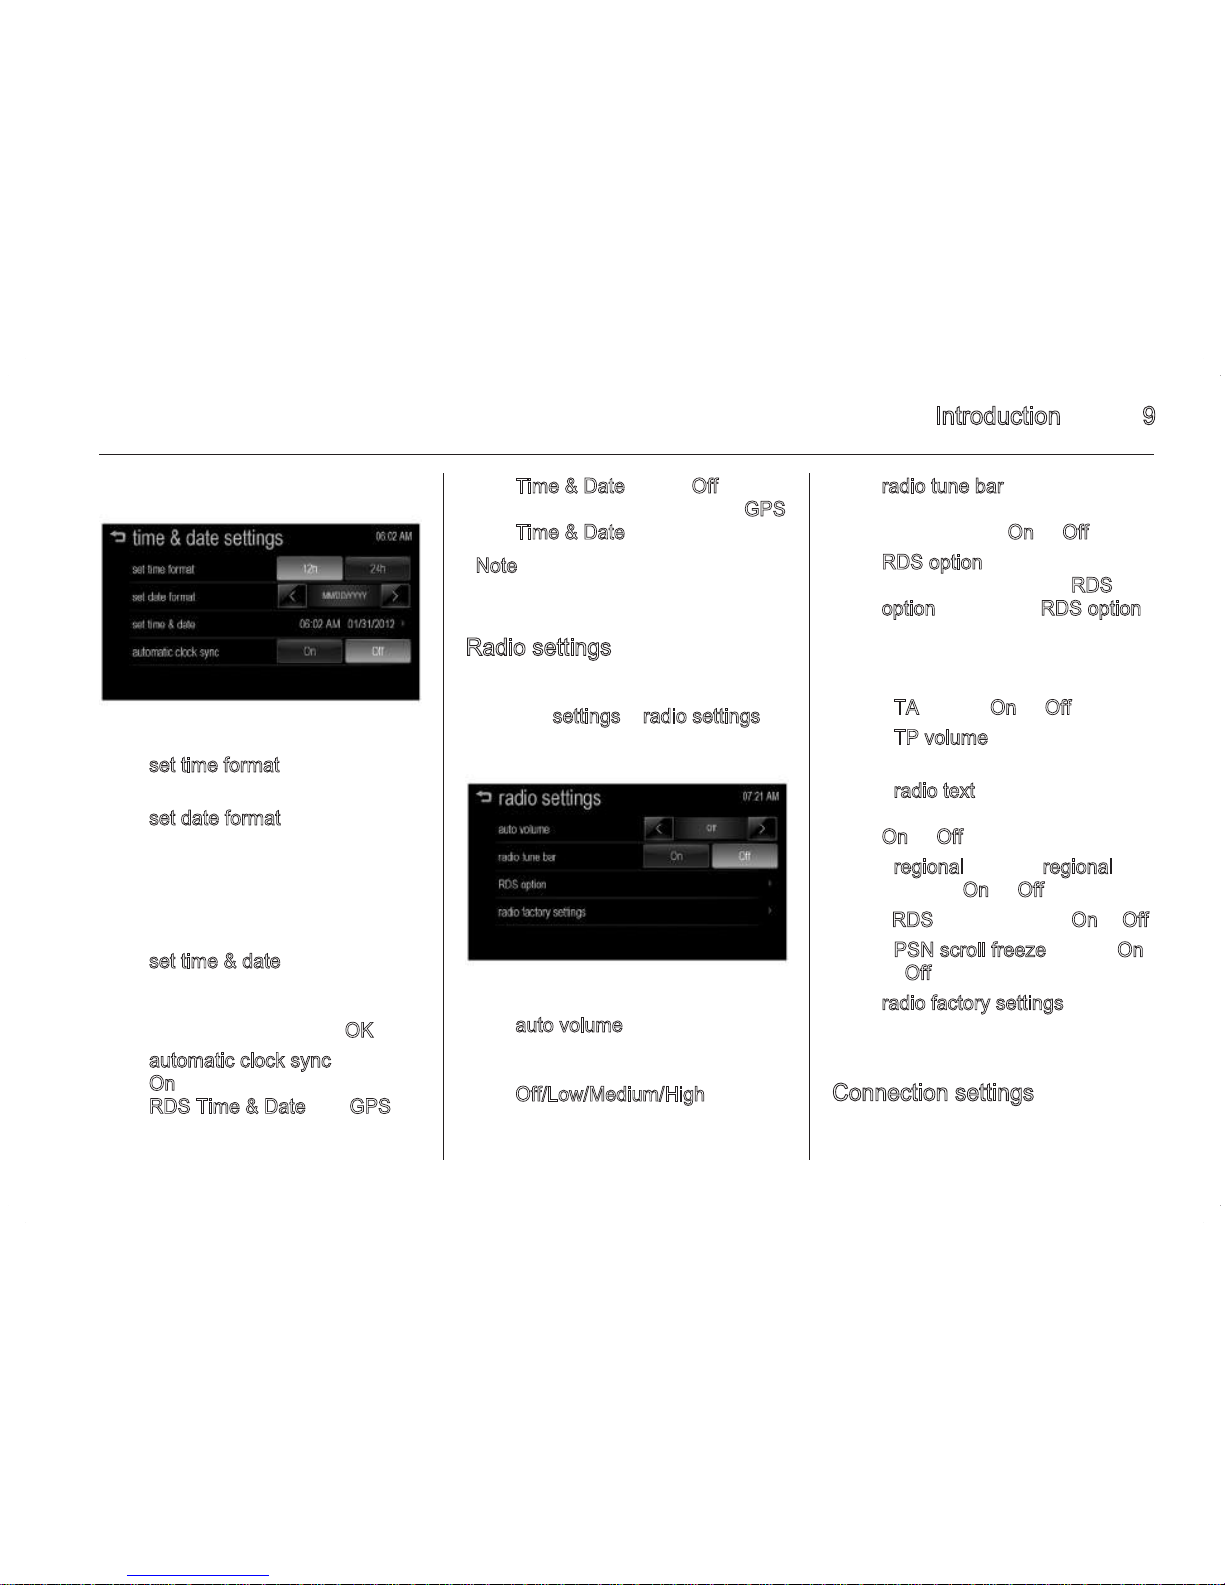
1. Press ; on the control panel.
2. Press settings > radio settings >
auto volume.
(Only for Type 1 model)
(Only for Type 2 model)
3. Set Off/Low/Medium/High by
pressing < or >.
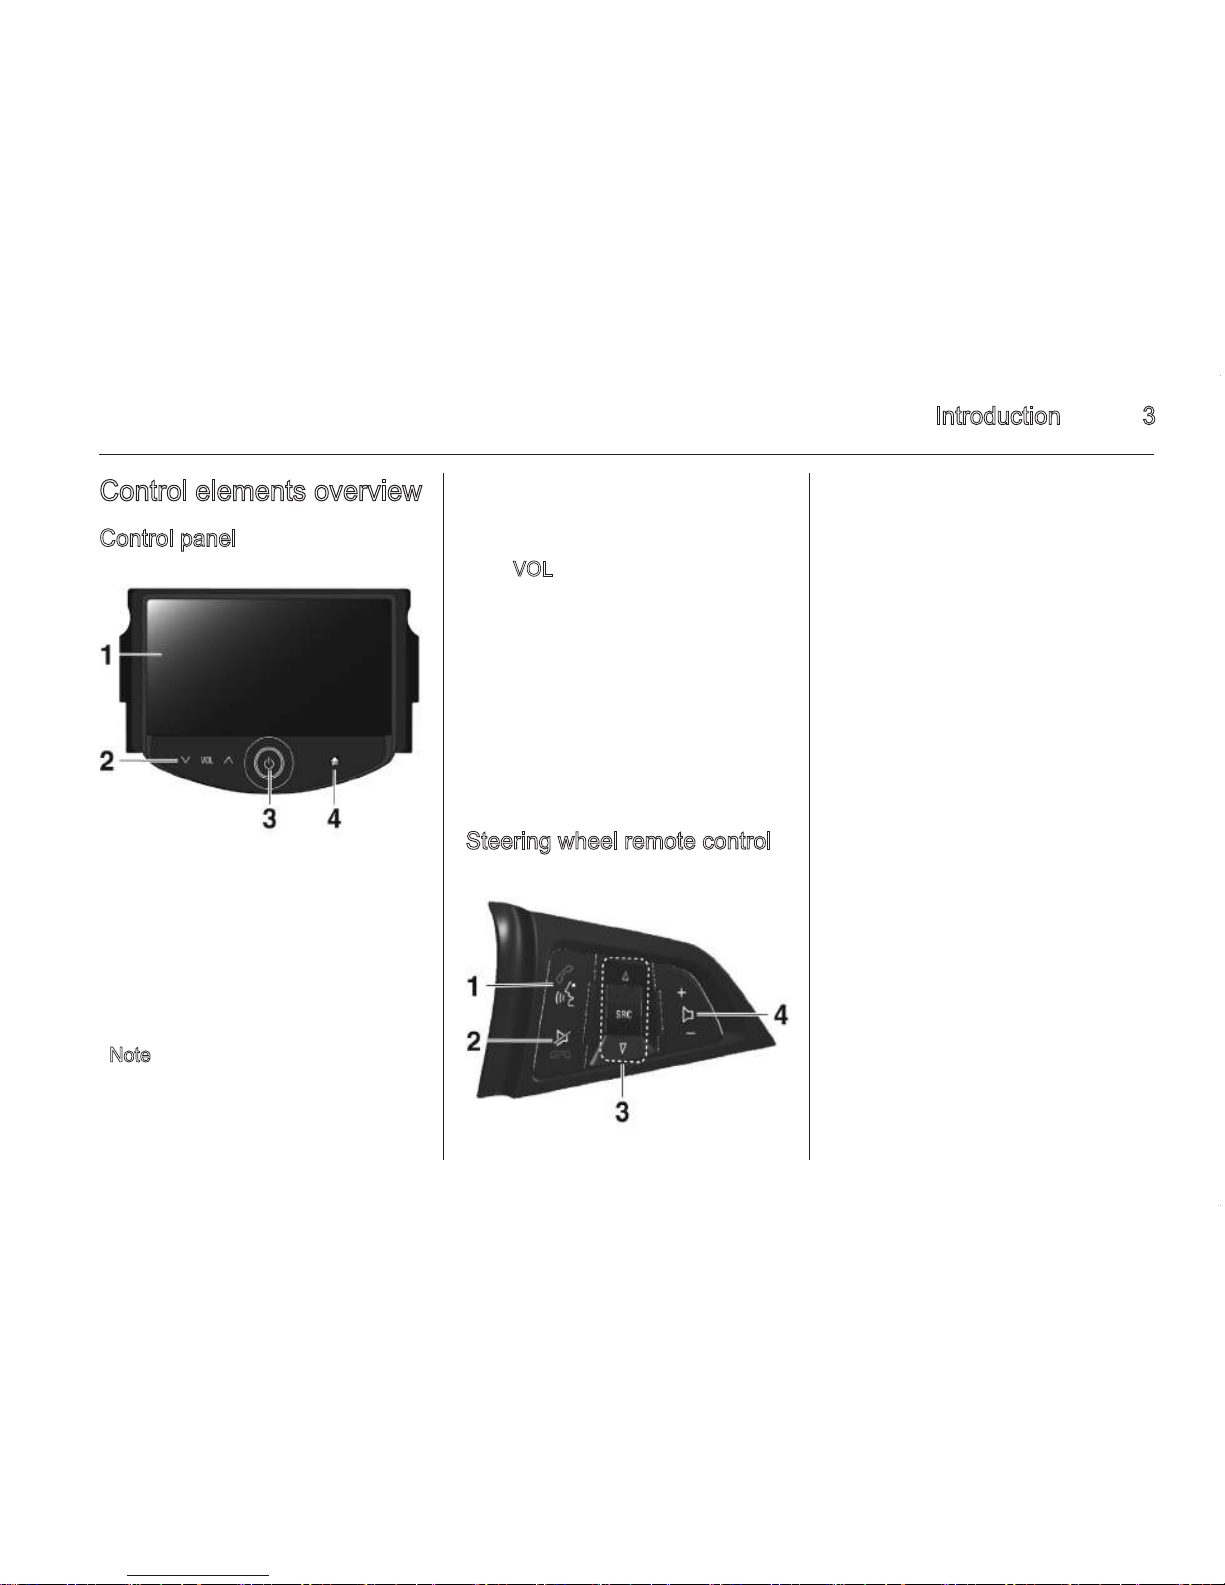
4 Introduction
R/S button (seek)
◆ Pressing in FM/AM mode:
receives the previous or next
preset station.
◆ Pressing in MP3, USB mode :
plays the previous or next file.
◆ Pressing in iPod/iPhone mode:
plays the previous or next song.
◆ Pressing in Bluetooth music
mode: plays the previous or
next music.
◆ Pressing and holding in FM/AM
mode: quickly moves through
the stations while the button is
pressed. Once released,
automatically searches for
broadcast which can be
received.
◆ Pressing and holding in MP3,
USB, iPod/iPhone mode:
quickly scans forwards or
backwards while the button is
pressed. Once released,
returns to normal playback.
4. + buttons (volume)
Press the + button to increase the
volume.
Press the - button to decrease
the volume.
Operation
System on/off
■ Press and hold m on the control
panel to turn the power on. The last
audio or movie will be executed.
■ Press and hold m on the control
panel to turn the power off. The
time, date and temperature are
displayed on the screen.
Note
The temperature is displayed when
the ignition switch (car ignition key)
is in the ON position.
Turning on/off automatically
When the ignition switch (car ignition
key) is in the ACC or ON position, the
Infotainment system is turned on
automatically.
When the ignition switch (car ignition
key) is in the OFF position and the
user opens the door of the vehicle, the
Infotainment system is turned off
automatically.
Note
If the user presses and holds m on
the control panel when the ignition
switch (car ignition key) is in the OFF
position, the Infotainment system is
turned on. But the Infotainment
system is turned off automatically
after about 10 minutes.
Volume control
Press ∧ VOL ∨ on the control panel to
adjust the volume. The current sound
volume is indicated.