Circuitmess Jay-D User manual

Introduction
The beginning
Prefer video instructions?We got you covered! You can follow along with our Jay-
D video build guideat this link.
Welcome to CircuitMess Jay-D build guide!
By following this build guide, you'll learn how to assemble your own mini DJ
mixtable.With Jay-D, you’ll learn how microcomputers and other electronic
components are used for sound production. You'll also get a bit closer to becoming
a DJ superstar!
Check out the anatomy guide before you start to learn more
about the components you're about to assemble.
A great addition to this guide that leads you through all the steps of the build is the
anatomy guide that explains the components on the main board in more depth.
You can check it outhere!
Get ready to have some fun!<br>
Age group
Jay-D is designed for everyone that's at least 11 years old - like it says on the box.
Some of the assembly steps should be approached carefully, so make sure to have
an adult jump in if you need some help with soldering or tightening the bolts later
in the process. It's okay to ask for help.
Don't worry though! We'll go through the assembly step by step and provide some
useful tips along the way. We'll give you a heads-up if there's something important
to keep in mind while assembling.
i
Jay-D Build Guide

Assembly time
It should take you approximately4 hours to fully assemble your Jay-D.
Of course, the assembly time depends on your previous knowledge and
experience. If you don't have any experience yet, don't worry! It just might take you
a little longer to get into the groove and overcome the challenges in the beginning.
Skills
You don't need to have any specific skills before getting your hands dirty with this
DIY project.
The main objective here is to have fun and learn something new.
So hold on tight, read all the instructions, and get ready to have fun! This is a great
opportunity and your first step in your big engineering career.
Learning with Jay-D
As previously mentioned, Jay-D will teach you a few useful things in the following 4
hours or so.
Here's what you will learn:
What components are needed for digital sound production
What are the sound waves and how can they be produced using computers
and various electronic components
What is a DAC and how it can be controlled for simultaneous playback of
multiple sound files
How a DJ mixtable works
How to code custom light shows for your Jay-D mixtable
How to code a custom sound effect into your Jay-D turntable
What's in the box?
Let's meet all the components that arrived in
the box!

Open your Jay-D box and check if you have all the components. Make sure to lay it
all on a clean surface where you'll inspect if everything is there according to the
photo and the list below.
In case something is missing, please contact us at [email protected].
Send us a photo of everything that came in the box, and we'll get back to you as
soon as possible to resolve the issue.
Here is the list of components:
1. Main circuit board – connects all the chips together
2. Display board – 128*160 TFT color display
3. Acrylic casing
4. A bag of other small components such as resistors, pushbuttons, nuts, and
bolts (we'll go over that in the next step)
5. Two 5W speakers
6. Custom-made plastic knobs
7. USB-C cable for charging and programming the device
8. 4GB Micro SD card with a bunch of royalty-free beats preloaded

Check all the small components
1. Rotary encoders (x7)
2. Plastic caps for sliders (x3)
3. Small black pushbuttons (x2)
4. Small black button caps (x2)
5. Male pin header
6. Headphone jack
7. Brass spacers (x4)
8. Medium metal bolts (x11)
9. Big metal bolts (x5)
10. Adhesive rubber feet (x6)
11. Black nylon spacers (x2 long, x1 short)
12. Slider potentiometers (x3)
13. Metal nuts (x13)
14. The smallest metal bolts (x7) (we used the black ones in the photos, but
yours should be silverish like the rest of the bolts)
Meet the tools
Mandatory tools
In this chapter, we'll explain what tools you'll need to assemble your Jay-D.
If you have your CircuitMess Tools pack in front of you, you should be all set!
In case you got the Jay-D kit without the Tools pack, this is a good time to borrow
some of the tools or purchase them.
The SD card is already inserted into Jay-D's SD card slot!

The tools required are essential whenever you are assembling, fixing, or modifying
electronic devices and are the tools of the trade for every maker/hardware
hacker/modder/electrician.
All the tools from the box
1. Soldering iron
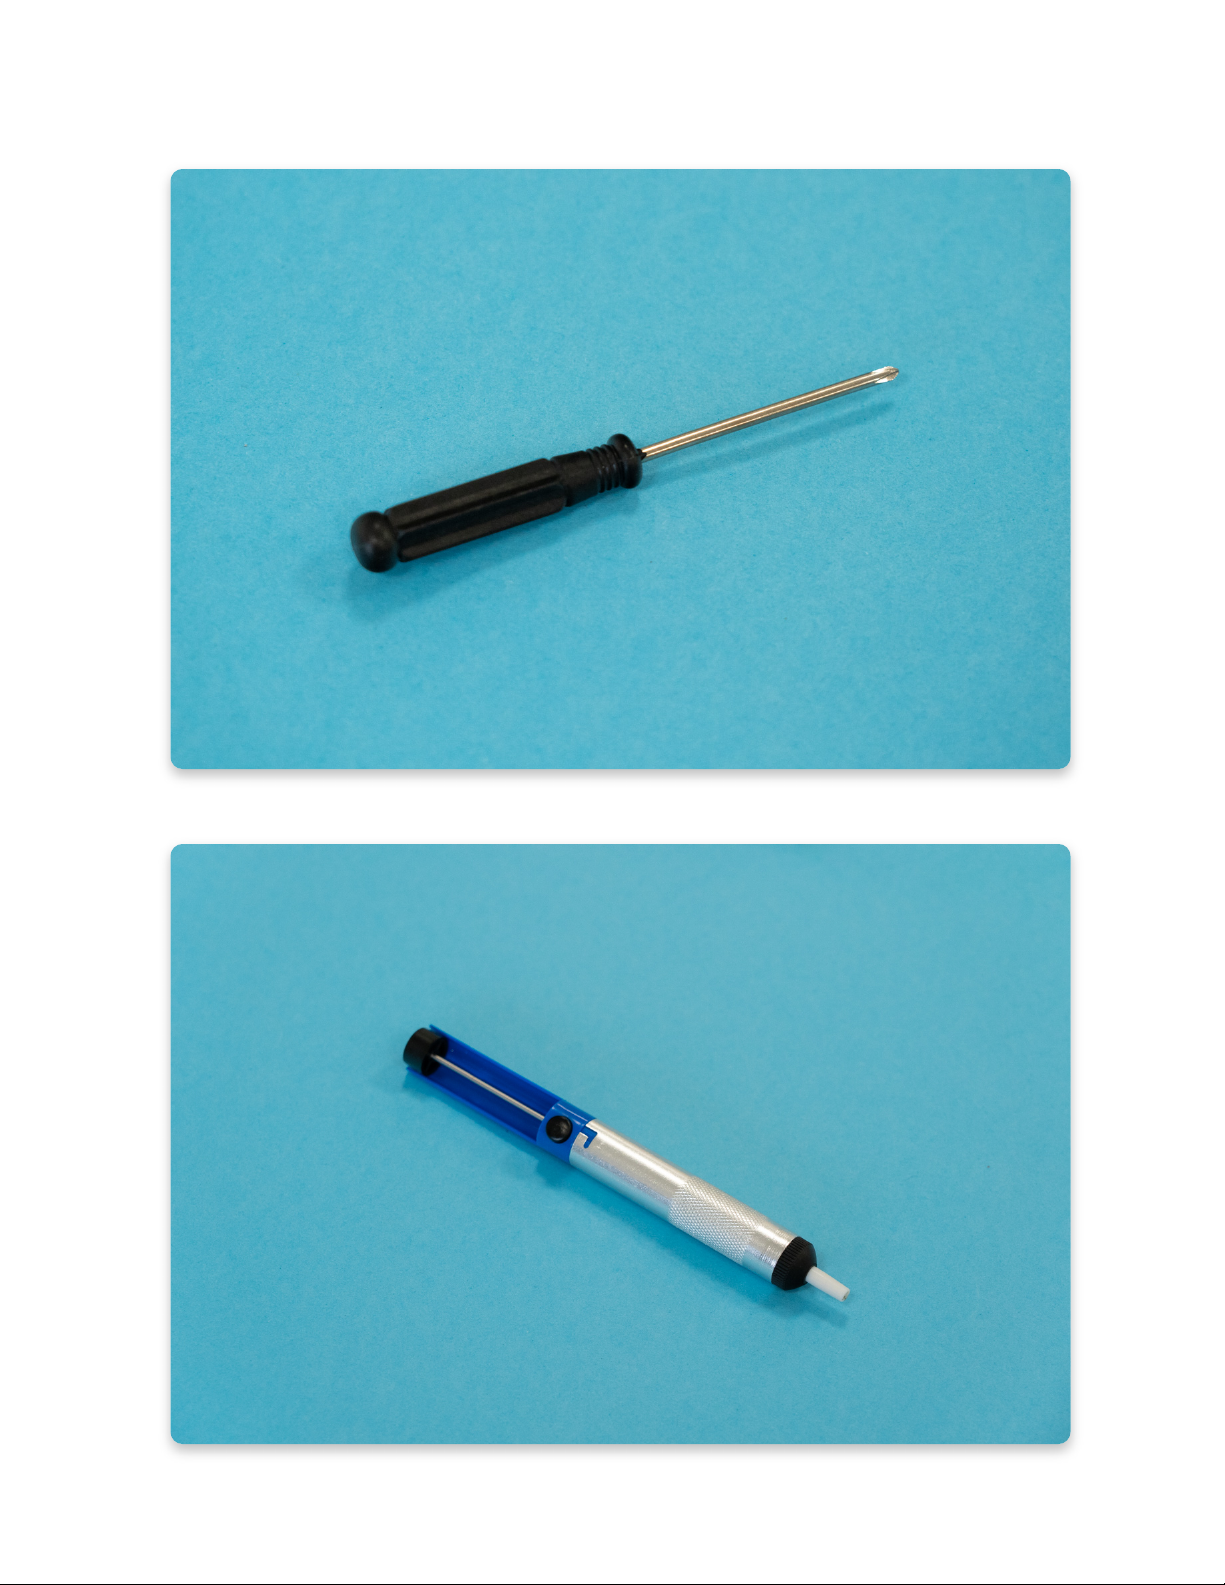
2. Desoldering vacuum tool (solder sucker)
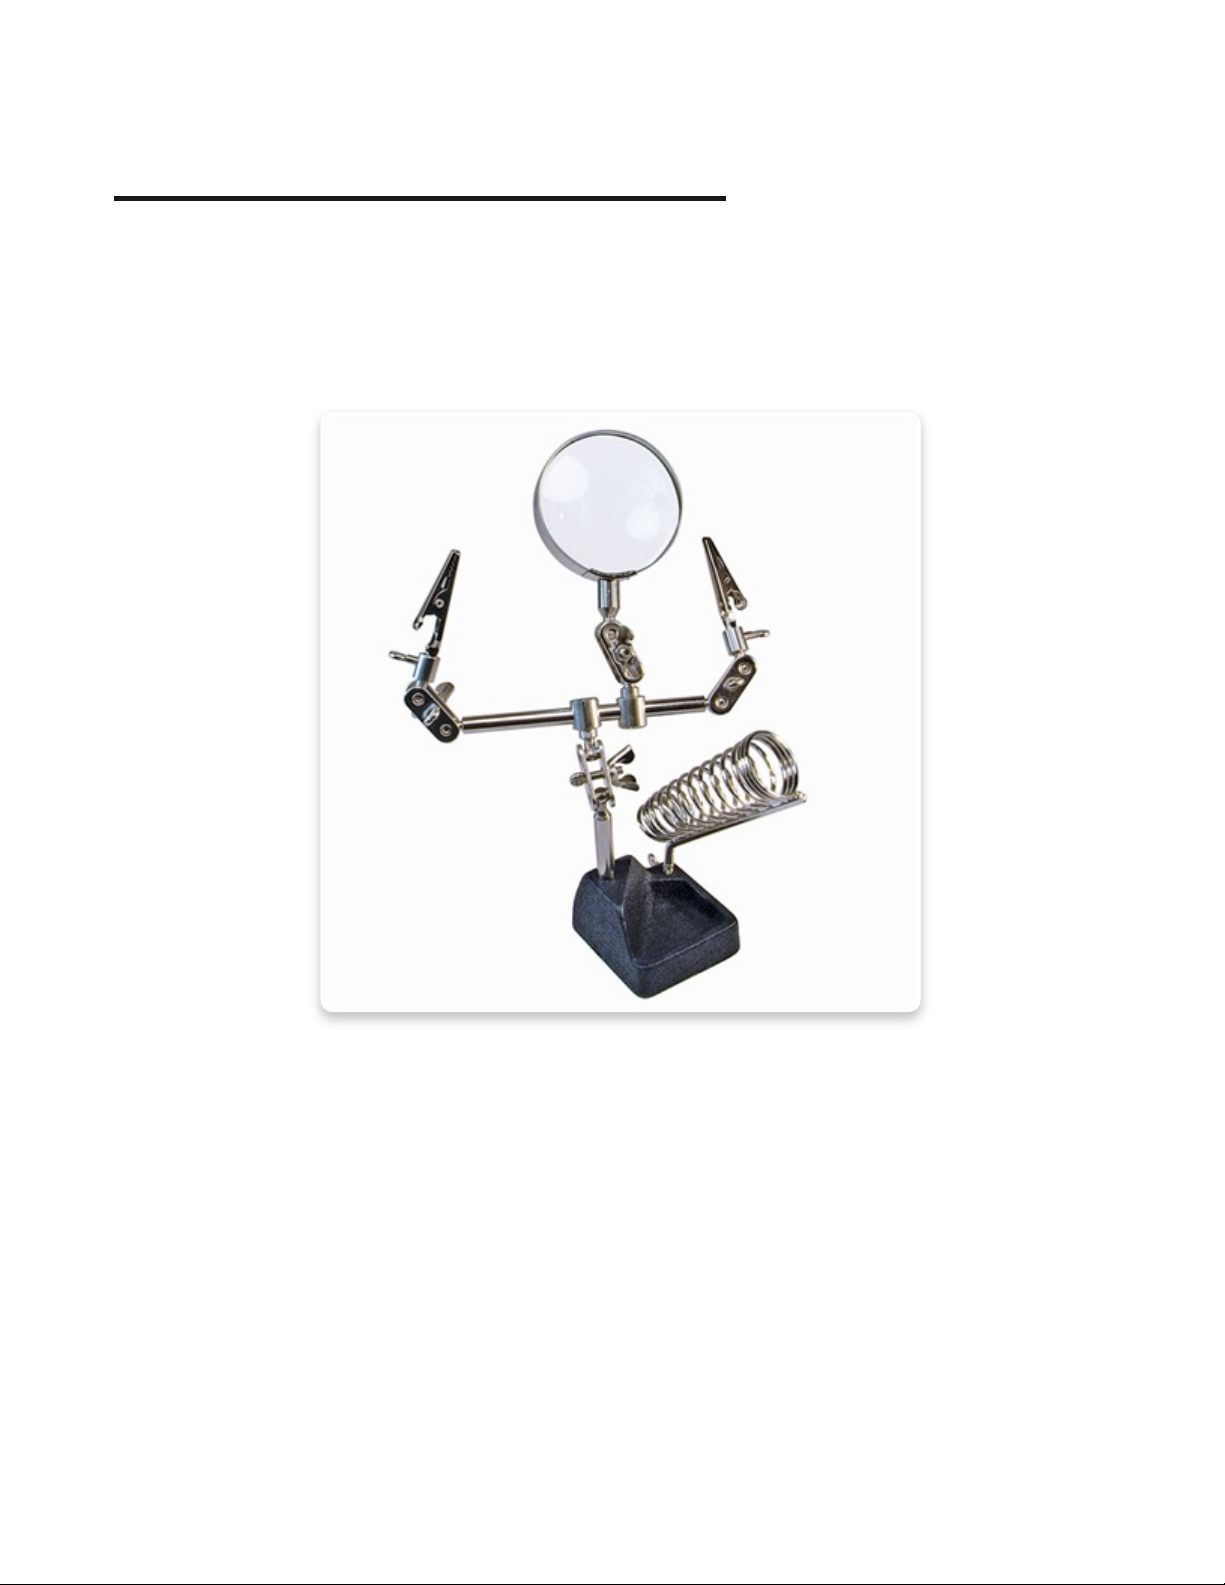
3. Soldering iron stand
4. A small reel of rosin-cored solder
5. Cleaning sponge
6. Phillips screwdriver
7. Diagonal cutter pliers
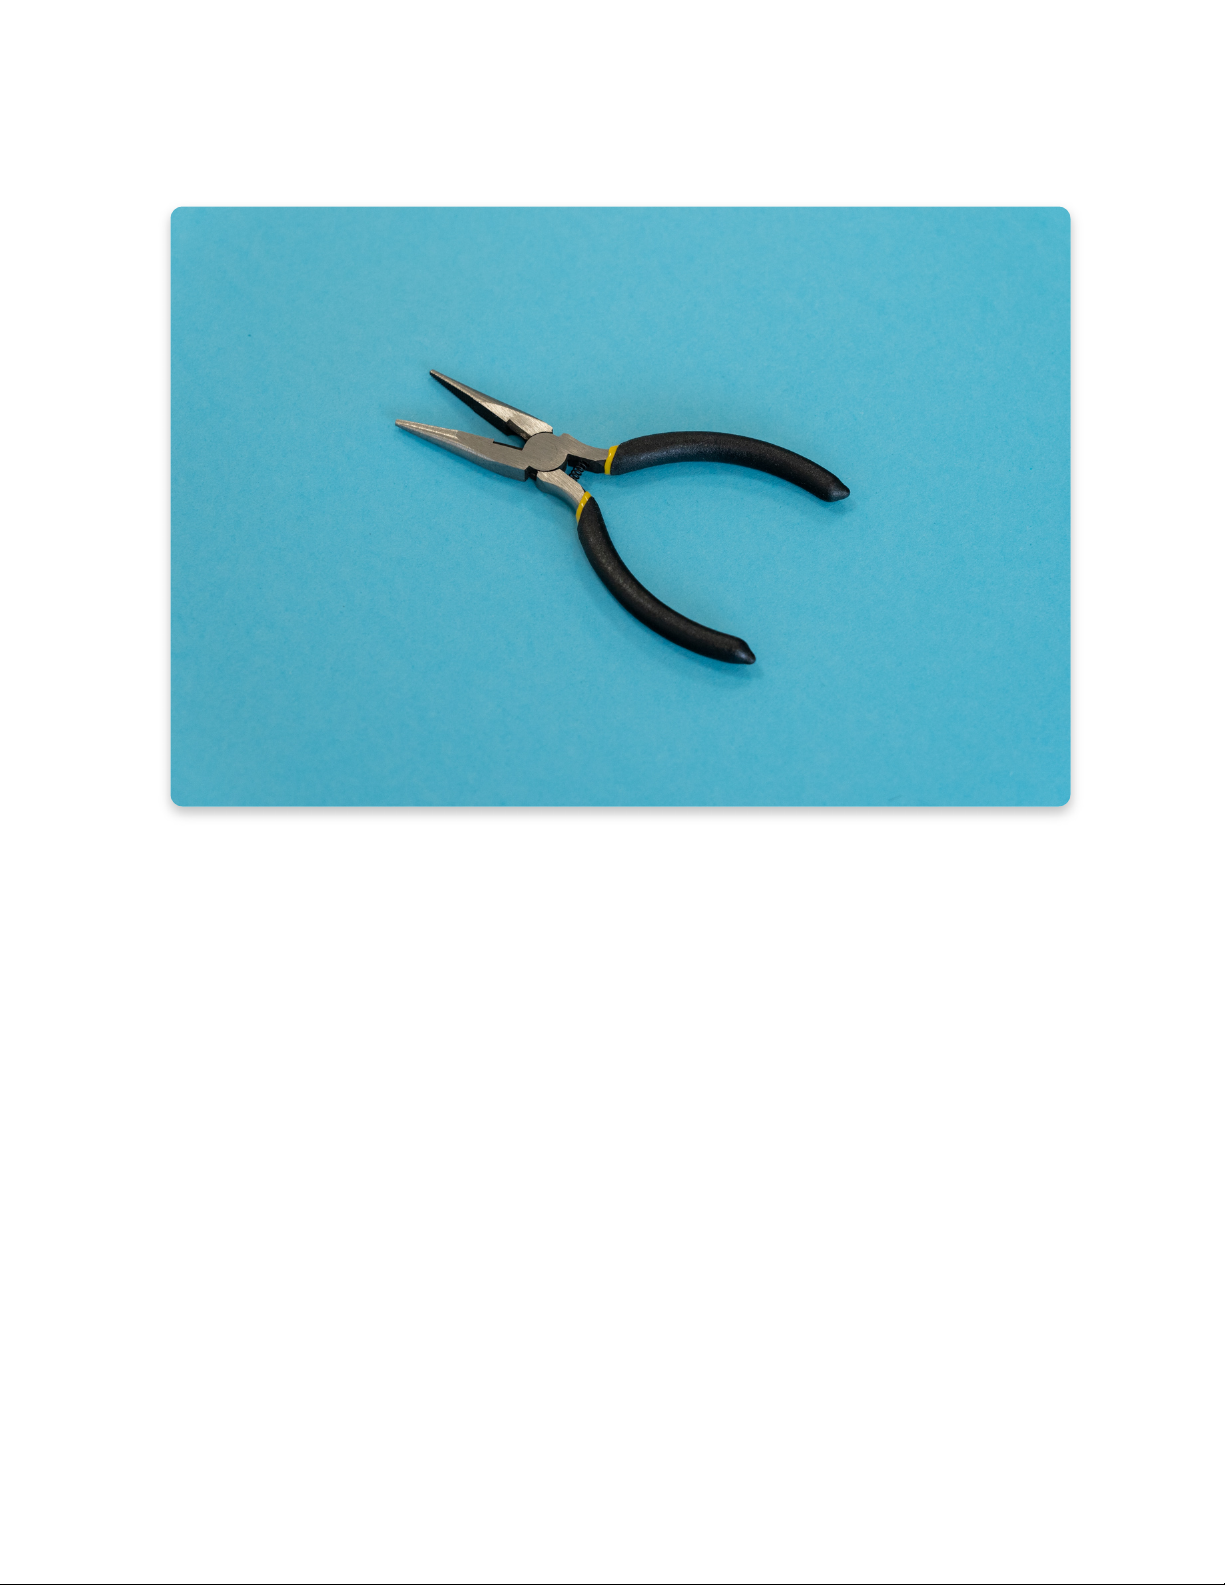
8. Needle-nose pliers
Soldering iron
This is the most important tool in a maker’s arsenal.
For Jay-D's assembly, any entry-level soldering iron will suffice.
If you plan to dive into the world of DIY projects, you should consider getting a more
expensive one with more features. There are also many soldering irons with
interchangeable tips that can be particularly useful when working with much
smaller components.
There are two types of soldering irons you could have received in your tools pack.
The first one is white with a temperature regulator, and the second one is blue with
a small metal button. Both of them will do the job of soldering the components in
place and there is no big difference between them.
You will find the instructions on how to properly solder and take care of both
soldering irons in the next chapter.
The soldering iron from the Tools pack

Diagonal cutter pliers
With pliers like these, you’ll be able to trim the legs of soldered components and
cut wires!
We prefer this type shown in the picture (Plato, model 170), but any other type will
do.
Diagonal cutter pliers
Needle-nose pliers
You’re going to need pliers like these when assembling the casing, or when
plugging in some tricky connectors!
They’re generally useful when doing some fine mechanical work.
Soldering sponge
This small piece doesn't seem like much until you soak it in some water. It then
turns into a super solder-cleaning sponge! Use it after soldering a couple of
joints to remove the excess solder from the tip of your iron. Make sure that the
sponge isn't dripping wet or bone dry - it should be damp.

Needle-nose pliers
Standard cross screwdriver
You’ll need this cross (Phillips) screwdriver to assemble the casing together.
A standard 2.0mm cross screwdriver should do the trick.

Standard cross screwdriver
Desoldering vacuum tool (solder sucker)
This tool is useful when cleaning up soldering mistakes, but it isn’t necessary for
assembly.
If you plan on doing some hacking, modding, or hardware repairs in the future,
having this is always a good idea.
Desoldering vacuum tool

Additional useful tools
Helping third hand with magnifier
This could make your soldering experience a little more enjoyable, especially
when doing some more complicated projects.
Helping hand with a lot of additional tools
Multimeter
A multimeter can be used for many things: testing tricky connections, measuring
battery voltage, testing resistors & capacitors, measuring the current
consumption, and more.
It’s a useful tool when you’re trying to figure out what went wrong with any
electronics kit.

Multimeter
Solder wick
You can use solder wick along with the desoldering vacuum tool to clean up any
soldering mistakes. Just put it on the wrongly soldered joint and press on it with a
hot soldering iron, then it will soak up the excess solder like a sponge!
Useful for fixing solder joints when they cannot be easily reached with a solder
sucker.

Solder wick
Assembly
Soldering introduction
The first thing that you'll do as a part of the Jay-D assembly process is soldering!
Have you ever done that before? If your answer is no, we suggest you look at the
following few links where you'll find useful tutorials and blogs about soldering. It will
only take you 10 minutes to get into the zone and understand how it's done. Here
are the links:
Adafruit’s video tutorial featuring Collin Cunningham – A tutorial featuring
Collin Cunningham, a super charismatic electronics guru.
Adafruit’s standard soldering tutorial – A great and thorough video tutorial. An
absolute must-read, even if you know how to solder. Make sure to check the
“common soldering mistakes” section at the end.
Sparkfun’s video soldering tutorial – Another well-made how-to-solder video
tutorial.
Sparkfun’s standard soldering tutorial – A detailed tutorial made by Sparkfun.

A little bit of heat + some solder = a connection!
There are several rules of soldering that everybody,
regardless of their skill level, should follow at all times.
Never inhale the dust and the fumes that can be produced by the soldering
iron! These can be hazardous, so please don't inhale them.
Never touch the tip of the soldering iron! Even if the soldering iron is turned off
or completely disconnected from the power source, there is still a possibility
that it’s very hot and, therefore, can cause very uncomfortable pain if
touched.Always keep it facing away from your hands. If you’re finished with
the soldering iron, unplug it from the power source and leave it to cool off for
at least five minutes before putting it back in the box.
Clean the soldering iron! The sponge is your best friend while soldering. Make
sure to use it often and clean your soldering iron if you wish to have an easy
and simple soldering experience.Carefully hold one part of the sponge with
one hand and wipe the tip of the soldering iron on the other part of the
sponge to remove the extra solder. Repeat the process until the tip of the iron
is nice and clean from the old solder.

Check your solder joints twice (at least)! Most of the malfunctions in the
world of electronics are due to bad solder joints, so regardless if this is your
first or 100th soldering project, always make sure to inspect your joints multiple
times before proceeding to the next step.
Keep the soldering iron on the stand when you’re not using it.
Know how much solder is needed! Make sure to put just enough solder, not
too much, and not too little, since both can cause the device to malfunction.
Don’t leave any residual solder on the board! The solder should only be on
the parts where the pins connect to the board. Everything else should be
clean. Little pieces of solder all over the board are a big no-no!
Now go over these rules a couple of times so you don't forget them!
If you follow these rules, your soldering experience should be easy peasy.
Using the soldering iron
The soldering iron is very easy to use but only when used properly.
If you have purchased the CircuitMess tools pack with your Jay-D kit, you have
gotten a white soldering iron with a temperature regulator.
Remember the rules mentioned previously? Good!Let's go over the instructions on
how to use the soldering iron now...
If you're using your soldering iron for the first time or need help with cleaning its tip,
check our video tutorial.
Soldering iron instructions

Step 1
Set up your soldering iron so it stands on the stand - as shown in the photo. After
that, plug it into a power outlet.

Step 2
Set the temperature to350° by turning the regulator. There is a small black arrow
next to the regulator wheel, so make sure that it points to the right temperature,
like in the photo.
Your soldering iron is now ready to use, but give it a minute or two, so it can heat
up. The safest way to let it heat up is to leave it on the stand while you wait!
Set the temperature to 350°
Step 3
Once you're done with soldering (don't worry, we'll let you know when that time
comes), you'll unplug the iron from the power outlet to turn it off.
Please use the soldering iron stand every time you are not using the soldering iron
to make sure you don't burn the surface or the circuit board!
Make sure to not touch the soldering iron tip for at least five minutes after you
have turned it off.

Chapter One - Soldering the
components
Now when you learned about soldering, it's time to put that into practice. Ready?
Part One - Soldering the first component
Let's start by soldering the headphone jack.
Here are the parts necessary for this step:
The circuit board
The headphone jack.

It's important that you solder this component in the right place. Make sure that you
have the circuit board facing upwards, as shown in the photos. Once you find the
place for the headphone jack pins in the corner of the board (where the black and
white stripes are) adjust the component so it fits all the way in.

Adjust the component in its place
Once the pins are in, turn the board upside down while ensuring the headphone
jack doesn't fall out. There are five soldering connections you'll have to make here.

Turn the circuit board upside down and get ready to solder the first component
Now it's time to solder the first pin!
Firstly, carefully place the soldering iron on the first pin, so that it’s touching both
the pin and the little plated area around the hole that the pin is going through.
Leave it like that for about ten seconds so it heats up and then apply the tip of the
solder to it. The solder should easily melt and spread evenly around the joint.
Making the first connection
Repeat the process four more times after soldering the first pin to the board.

This is how your soldering connections should look
When you solder every pin, turn the board again so you can see its front side.
Check if the headphone jack sits tightly in its place.
Table of contents