CLARIUS Clarius STAR User manual

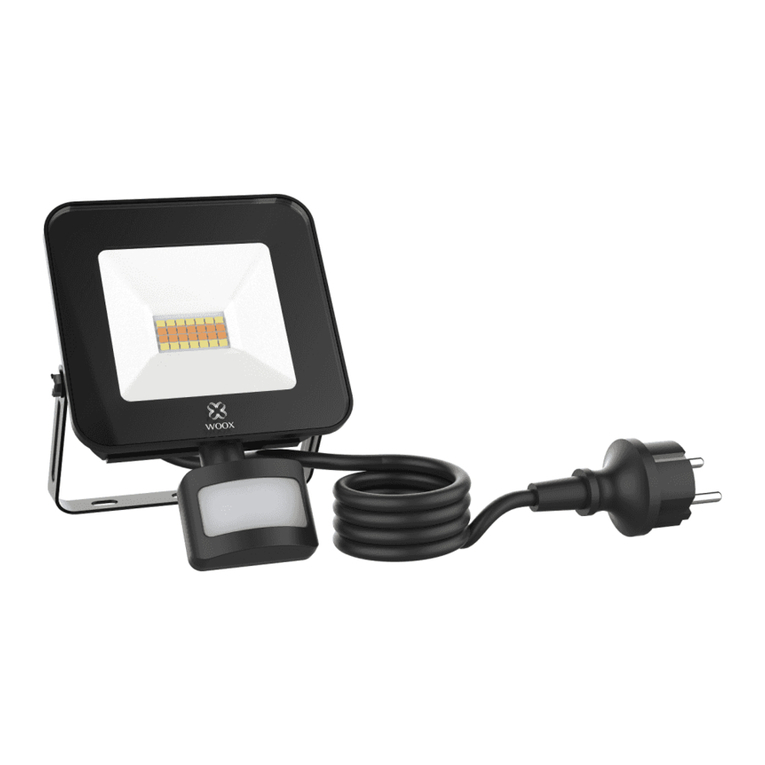
20W Floodlight without PIR
Model: VCS-20
20W Floodlight with PIR
Model: VCS-20-PIR
OPERATION
SPECIFICATION
INFORMATION ON WASTE DISPOSAL FOR CONSUMERS OF ELECTRICAL & ELECTRONIC EQUIPMENT
When this product has reached the end of its life it must be treated as Waste Electrical & Electronic Equipment
(WEEE). Any WEEE marked products must not be mixed with general household waste, but kept separate for the
treatment, recovery and recycling of the materials used.
Contact your local authority for details of recycling schemes in your area.
PRODUCT CODE VCS-20 VCS-20-PIR
DESCRIPTION LED Floodlight (20W) LED Floodlight with PIR (20W)
HOUSING COLOUR Black Black
LUMENS 2500 + 2500 +
VOLTAGE 170-240VAC 50Hz 170-240VAC 50Hz
IP RATING IP65 IP65
ADJUSTABLE OUTPUT ✓ ✓
DETECTION CIRCUIT N/A Passive Infra-Red (PIR)
PIR ANGLE N/A 120º
PIR RANGE N/A 12m
ACTIVATION TIME N/A 10 Secs - 10 Mins
WEIGHT 1Kg 1Kg
DIMENSIONS 153mm H x 61mm D x 241mm W 161mm H x 61mm D x 241mm W
IMPORTANT OPERATION & MAINTENANCE INSTRUCTIONS
PARTS INCLUDED TOOLS REQUIRED
DO NOT position the light near ammable or combustible materials (such as wood, cloth, paper) or near
ammable, combustible or explosive liquids, solids, gases or equipment.
DO NOT direct the light into a persons eyes. The light has a very intensive light output, which if incorrectly used
could cause eye damage.
ALWAYS disconnect the mains power supply before servicing or performing any maintenance.
ALWAYS maintain the light in good condition, with repairs only undertaken by a qualied electrician.
ONLY carry out repairs using genuine parts. Non-authorised parts may be dangerous and will invalidate the
warranty.
If the external exible cable or cord of this luminaire is damaged, it shall be replaced by a special cord or cord
exclusively available from the manufacturer or his service agent.
The light source of this luminaire is not replaceable; when the light source reaches its end of life the whole
luminaire shall be replaced”.
Clean the oodlight only with a soft dry cloth. Do not use any abrasive or chemical cleaners.
1 x Clarius Star with Bracket
2 x Fixing Screws
2 x Wall Plugs
1 x Allen Key
1 x Instructions
Electric / hand-held drill
Masonry drill bit
Electricians screwdriver
Large cross-head screwdriver
Small cross-head screwdriver
Wire cutters
THIS PRODUCT IS SUITABLE FOR WALL MOUNTING ONLY
Controls for the oodlight are located under the removable cover:
Power: Adjusts output power of LEDs
LUX: Adjusts ambient light level of which oodlight operates
PIR Range: Adjusts the range sensitivity of the PIR motion
sensor
Time: Adjusts oodlight on time when PIR is triggered
NOTE: To switch on oodlight continuously follow
the following sequence.
1. Switch power on
2. After 1-2 sec turn off
3. After 1-2 sec turn on
4. Floodlight will remain on until the power is
removed.
TIME
PIR
LUX
POWER
LUX
POWER
VCS-20 - Without PIR
VCS-20-PIR - With PIR
Clarius® STAR
Floodlight
Quick Installation Guide
Unit 2, Birch Business Park, Whittle Lane, Heywood, Greater Manchester, OL10 2SX, UK
w: www.gjd.co.uk t: +44 (0) 1706 363 998 e: [email protected]

120º
CLARIUS STAR - INSTALLATION AND OPERATING INSTRUCTIONS
IMPORTANT SAFETY INSTRUCTIONS
POSITIONING
The Clarius Star oodlight is a low energy high power outdoor LED oodlight which is suitable for Installation on
solid walls in a range of locations including entrances, gardens, staircases, garages and outdoor parking areas.
WARNING: THIS PRODUCT MUST BE INSTALLED BY A QUALIFIED ELECTRICIAN AND CHECKED FOR SAFE
OPERATION BEFORE USE
PLEASE FOLLOW THESE INSTRUCTIONS CAREFULLY BEFORE ATTEMPTING TO INSTALL AND OPERATE THIS LIGHT
The unit requires connection to a 170-240VAC 50Hz mains electrically supply.
This risk of electric shock should be minimized by the installation of appropriate safety devices including the
incorporation of an RCCB (Residual Current Circuit Breaker) into the main distribution board.
DO NOT wire this oodlight directly into the lighting circuit. Use a switched fused spur. Cables should always be
protected against short circuit and overload by use of an RCD.
Ensure the voltage marked on the product is the same as the electrical power supply to be used.
DO NOT install the oodlight where it is likely to be knocked, hit or near an exhaust outlet e.g. boiler ue, dryer
outlet.
This oodlight is suitable for outdoor lighting applications, for domestic use only. Do not use in areas where an
explosive or chemical atmosphere may exist. Do not use in areas where ventilation is restricted.
The Clarius Star is suitable for mounting on plasterboard, wood or masonry surfaces. Highly ammable surfaces such
as plastic or polystyrene must not be used. Do not install on damp or conductive surfaces such as metal. It should be
placed away from any ammable materials.
Ensure that there is space around the oodlight to allow adequate circulation of air.
Before drilling any xing holes, check that there are no hidden obstructions behind the mounting surfaces such as
pipes or cables.
The recommended height for installation of the oodlight is between 3-5 metres.
The oodlight can be orientated vertically or horizontally as shown:
The oodlight is suitable for connection to a 170-240VAC, 50Hz, earthed supply. It is designed for permanent
connection to xed wiring, which must be a suitable circuit protected by an RCD and fuse of the correct rating.
Ensure that the mains supply is switched off before commencing installation.
It is recommended that the unit is connected to the domestic lighting circuit via a 5 Amp fused spur and using
3-core round exible cable of at least 1mm2 gauge (waterproof cable should be used for outdoor installations).
It is also advisable to install a single pole wall switch to allow easy control of the oodlight.
Before commencing installation check that you have all the tools that you need.
• Check that the oodlight and its mains lead are not damaged. If there is any damage, return it to the place of
purchase. Do not attempt to repair it yourself.
• Choose your location to x the oodlight, taking into account the guidance above.
• Use the oodlight bracket to mark the position of the xing holes.
• Drill the xing holes and x the oodlight into position using the screws and wall plugs provided.
• Check that is securely xed.
• Connect the mains lead from the oodlight to an IP rated junction box. Ensure that the correct polarities for
Live, Earth and Neutral are observed i.e.
Connect the green/yellow earth wire to the terminal ‘E’
Connect the brown live wire to the live terminal ‘L’
Connect the blue neutral wire to the neutral terminal ‘N’
After wiring, check that there are no bare wires, all the wires have been correctly connected and that the cable
restraint has been tightened.
• Before connecting power, perform the electrical tests specied in the current building and IET Wiring
regulations to ensure that the installation is safe and that the wiring has been performed correctly.
• Switch on the electricity to check that oodlight illuminates. Adjust the angle of the oodlight so that it
illuminates the required area. Tighten the oodlight brackets.
INSTALLATION TO BE UNDERTAKEN BY A QUALIFIED ELECTRICIAN
PIR SENSOR POSITIONING
4M 8M 10M
MOST EFFECTIVE
Movement across the scan area
LESS EFFECTIVE
Movement directly towards or away from scan area
VerticallyHorizontally
When mounted horizontally ensure that the
removable access cover is to the under side
120º
This manual suits for next models
2
Other CLARIUS Floodlight manuals
Popular Floodlight manuals by other brands

Francis Searchlights
Francis Searchlights A7199 User instruction & installation manual
Linly
Linly LL-M29 user manual

Stairville
Stairville LED PAR 18 owner's manual

UNILITE
UNILITE RF-3300 manual
Rebel Light
Rebel Light URZ0037-2 quick start guide

WE-EF
WE-EF ULC200 LED Installation and maintenance instructions
