Classic Flame 23DE9047 User manual

ATTENTION
IF YOU HAVE ANY PROBLEMS OR QUESTIONS, EMAIL
OR CALL CUSTOMER SERVICE BEFORE YOU RETURN
THIS PRODUCT TO THE STORE WHERE IT WAS PURCHASED.
in English Call: 866-661-1218
in Spanish Call: 866-661-1218
in French Call: 866-374-9203
ATENCIÓN
SI TIENE ALGÚN PROBLEMA O PREGUNTAS,
ENVÍE UN MENSAJE DE CORREO ELECTRÓNICO O LLAME AL SERVICIO
DE ATENCIÓN AL CLIENTE ANTES DE DEVOLVER
ESTE PRODUCTO A LA TIENDA EN LA QUE LO COMPRÓ.
Línea para llamadas en inglés: 866-661-1218
Línea para llamadas en español: 866-661-1218
Línea para llamadas en francés: 866-374-9203
STOP STOP
PARE PARE
ATTENTION
Pour appeler en anglais, composez le 866-661-1218
Pour appeler en espagnol, composez le 866-661-1218
Pour appeler en français, composez le 866-374-9203
STOP STOP
INSTRUCTION MANUAL ENCLOSED
MANUEL D'INSTRUCTIONS À L’INTÉRIEUR
MANUAL DE INSTRUCCIONES ADJUNTO
INSTRUCTION MANUAL ENCLOSED
MANUEL D'INSTRUCTIONS À L’INTÉRIEUR
MANUAL DE INSTRUCCIONES ADJUNTO
POUR TOUT PROBLÈME OU TOUTE QUESTION,
ENVOYEZ UN COURRIEL OU APPELEZ LE SERVICE À LA CLIENTÈLE
AVANT DE RETOURNER CE PRODUIT OÙ VOUS L’AVEZ ACHETÉ.

E-1
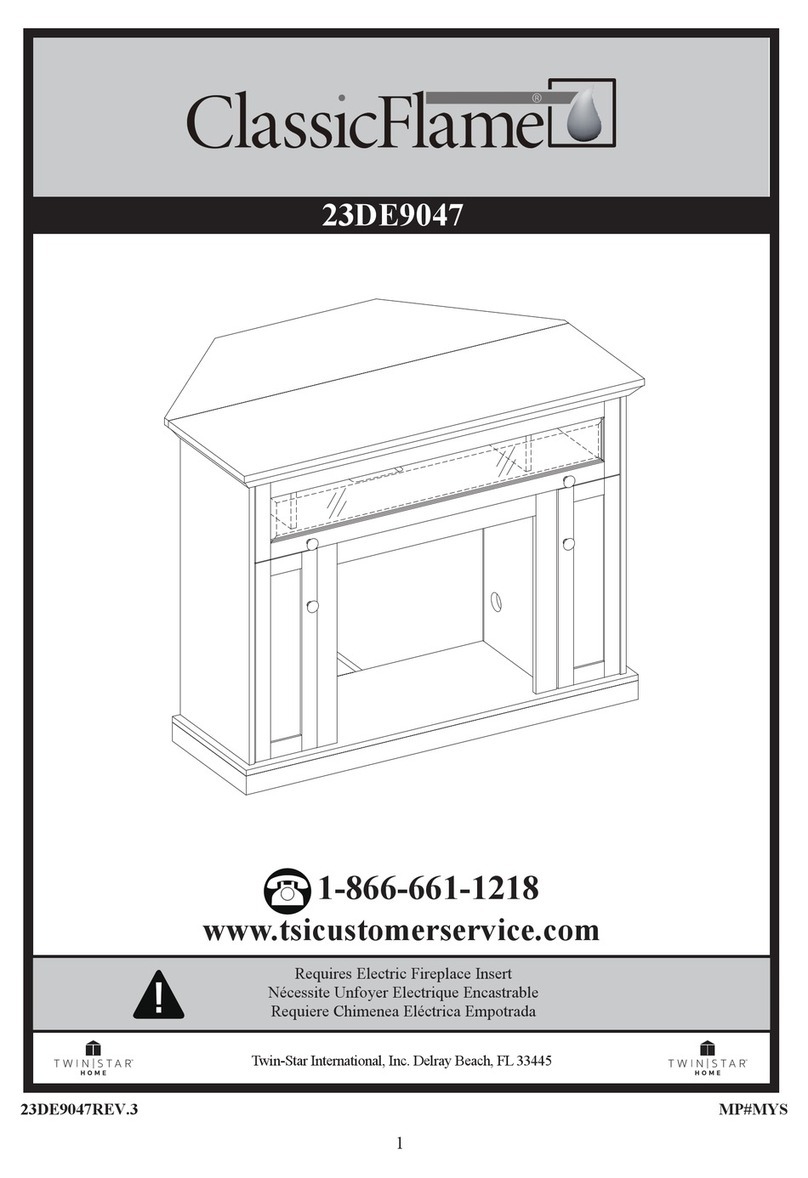
WOOD FIREPLACE MANTEL
WOOD MANTEL ASSEMBLY INSTRUCTIONS
23DE9047
ATTENTION
For Customer Service:
ALSO Requires-Electric
Fireplace Insert with Heater
In English call: 866-661-1218
In French call: 866-374-9203
In Spanish call: 866-661-1218
Twin-Star International, Inc.
Delray Beach, FL 33445
Made in China
Printed in China
Wall Mantel Corner Mantel
PARTS LIST
PART DESCRIPTION QUANTITY
PARTS
Hearth/Base
Center Left Side Panel
Center Right Side Panel
Center Shelf
Left Side Panel
Right Side Panel
Mantel/Top
Center Left Front Panel
Center Right Front Panel
Center Front Panel
Wood Shelf
Side Back Panel
Center Back Panel
Left Front Door
Right Front Door
Securing Block
Left Upper Side Panel
Right Upper Side Panel
"L" corner brace
Top corner extension
HARDWARE
Camlock (U-1,U-2)
Wood Dowel
Shelf Pin
Screw
Knob (with bolt)
Euro Hinge (Z-a,Z-b)
Wood Screw
Touch-Up Pen
A
B
C
D
E
F
G
H
I
T
W
K
R
J
X
Y
L
M
Q
P
U
N
O
Y1
V
Z
Y2
Z1
1
1
1
1
1
1
1
1
1
1
2
2
1
1
1
1
1
1
1
1
39+1 extra
42+1 extra
8
32
4
4
24
1

E-2
PLEASE READ AND FOLLOW ALL SAFETY TIPS
GETTING STARTED
1. Before assembly, CAREFULLY use scissors or utility knife to cut and unwrap all parts. Make sure you do
not discard the hardware.
2. Make sure that you have all the parts listed. If you are missing any parts please email Customer Service:
1-866-661-1218 in Spanish. Please identify the parts you need and model number. Make sure to include
your name and address.
CAUTION:
DO NOT MOVE MANTEL OR INSERT WHILE PLUGGED INTO POWER SUPPLY.
HELPFUL HINTS
Some steps are more easily handled with two adults.
OF THE FIREPLACE SO AS NOT TO SCRATCH THE HEARTH/BASE.
Phillips head screwdriver. NEVER OVER TIGHTEN BOLTS.
Do not sit on any part of the mantel.
CARE & CLEANING
Camlock installation.
For correct installation, screw U-1 must be
inserted and tightened in the pre-drilled hole.
Camlock U-2 must be inserted into the
pre-drilled hole with the cross positioned in the
direction of screw U-1.
To avoid scratching the finish of
Now it is time to assemble your Fireplace. All
panels are labeled Left and Right as viewed
from the front of unit.
your new mantel place all parts on a
scratch free surface such as a rug or
carpet.

E-3
1. Locate the Center Left Side Panel (B), Center
Right Side Panel (C), Center Shelf (D) and set
out face down on a scratch-free surface. Insert
Wood Dowel (N) and Screw (U-1) into the
holes in the center shelf, make sure to tighten
(U-1). Push Center Left Side Panel (B) and
Center Right Side Panel (C) snug to the
Center Shelf (D). Use a Phillips head
screwdriver to tighten (U-2).
B
C
D
U-1
N
U-2
Center
Shelf
Center
Left
Side
Panel
Center
Right
Side
Panel
I
T
N
U-1
U-2
H
2. Locate the Center Left Front Panel (H), Center
Right Front Panel (I), Center Front Panel (T)
and set out face down on a scratch-free surface.
Insert Wood Dowel (N) and Screw (U-1) into
the holes in the front panels, make sure to
tighten (U-1). Push Center Left Front Panel (H)
and Center Right Front Panel (I) snug to the
Center Front Panel (T). Use a Phillips head
screwdriver to tighten (U-2).
Center
Right
Front
Panel
Center Front Panel
Center
Left
Front
Panel

E-4
U-1
U-2
N
A
4. Locate Hearth/Base (A) and set out face down
on a scratch-free surface. Insert Wood Dowel
(N) and Screw (U-1) into the holes in
Hearth/Base, make sure to tighten (U-1). Attach
the completed assembly from step 3 to the
Hearth/Base. Use a Phillips head screwdriver
to tighten (U-2). Hearth/Base
U-1
N
U-2
3. Insert Wood Dowel (N) and Screw (U-1) into
the holes in the completed front panels, Attach
completed front assembly to the completed
assembly from step 1, then tighten (U-2).

E-5
5. Attach the Euro Hinge (Z-a) to the Right
Side Panel (F), then use a Phillips head
screwdriver to tighten the Wood Screw (Y2 )
through the pre-drilled holes.
Repeat for the opposite side.
6. Attach the Euro Hinge (Z-b) to the Right
Front Door (X), then use a Phillips head
screwdriver to tighten the Wood Screw (Y2)
through the pre-drilled holes.
Repeat for the opposite side.
EY2 Z-a
F
JX
Z-b
Z-b
Y2
Left
Side
Panel
Right
Side
Panel
Wood
Screw
Right
Front
Door
Left
Front
Door
Euro
Hinge

E-6
U-1
N
G
U-2
9. Insert one Wood Dowel (N) and Screw (U-1)
into each of the pre-drilled holes in the
side up on top of completed assembly. From
the inside, attach the Mantel use a Phillips
head screwdriver to tighten (U-2).
Mantel/Top
U-1
U-2
N
L
E
F
M
the pre-drilled holes in center shelf. Attach the
upper side panels (L, M) on the top of the
assembly from the step as shown in diagram.
Use a Phillips head screwdriver to tighten
(U-2).
8. Locate Left Side Panel (E), insert Wood
7. Insert one Wood Dowel (N) and (U-1) into
Dowel (N) and screw (U-1) into the holes in
the Hearth/Base, make sure to tighten (U-1).
Attach the Side Panel to the Hearth/Base.
Use a Phillips head screwdriver to tighten
(U-2).
And Repeat for the opposite side.
Left
Upper
Side
Panel
Right
Upper
Side
Panel

E-7
K
K
R
Y1
Y1
ab
c
X
J
V
10. Locate Side Back Panel (K) and Center Back
Panel (R), attach to the back of the completed
assembly from step 9. Use a Phillips Head
screw driver, tighten screws (Y1) through
the pre-drilled holes in the Back Panels to the
completed assembly.
11. Locate Right Front Door (X) and Left Front
Door (J). Slide door hinge keyhole into panel
hinge bracket. (Diagram 1)
Use Phillips Head Screwdriver to tighten
screws.(Diagram 2)
TO ADJUST HINGES
To adjust door forward or backward change
keyhole slot position.
(As Shown In Diagram 3a)
To adjust door right or left loosen / tighten
screw. (As Shown In Diagram 3b)
To adjust door up or down adjust bracket
height.(As Shown In Diagram 3c)
12. Attach the Knob (V) to the Left Front Door
(J) and Right Front Door (X), use the bolts
attached through the pre-drilled holes in the
doors. Then use a Phillips Head Screwdriver
to tighten the bolts.
Left
Front
Door
Right
Front
Door
Knob
Center Back Panel
Side
Back
Panel
Side
Back
Panel

E-8
PLEASE READ ALL “ELECTRIC
FIREPLACE INSERT” INSTRUCTIONS
PRIOR TO INSTALLING ELECTRIC
INSERT IN YOUR COMPLETED
FIREPLACE MANTEL. INSTALL
THE INSERT IN YOUR FIREPLACE
14. Lift insert carefully into the back of the unit
and center in the insert opening. Do not
drag insert across Hearth/Base (A) as it may
scratch your unit.
15. Insert Wood Dowel (N) and Screw (U-1) into
the holes in the Hearth/Base, make sure to
tighten (U-1). Attach Securing Block (Y)
to hold insert from back. Use a phillips head
screwdriver to tighten (U-2).
MOVE YOUR COMPLETED UNIT
ONLY SHORT DISTANCES. MOVE
COMPLETED UNIT WITH GREAT
CARE. IT TAKES TWO PEOPLE TO
MOVE COMPLETED UNIT INTO ITS
FINAL POSITION.
Securing
Block
Y
U-1
U-2
N
Completed
Unit
Electric Fireplace
Insert
Install
Insert
From
Back
O
W
13. Choose desired height of shelf and place the
four Shelf Pins (O) into same height shelf
holes inside side Panels. Insert Wood Shelf
(W), allow Wood Shelf (W) to rest on the
Shelf Pins (O).
Wood
Shelf
Shelf
Pin

E-9
U-1
NN
U-2
Q
P
U-1
U-1 N
N
N
U-2
U-2
16. Locate the “L” Corner Brace (Q), Top Corner
Extension (P) and set out face down on a
scratch-free surface.
Insert one Wood Dowel (N) and Screw (U-1)
into the the holes at the rear of the Top Corner
Extension (P), make sure to tighten (U-1).
Push the “L” Brace snug to Top Corner
Extension (P). Use a Phillips head
screwdriver to tighten (U-2). Set part aside.
17. Tighten Screw (U-1) into the holes in the back
of the mantel top and the bottom of the Base.
Insert the Wood Dowel (N) into the holes.
Attach the Completed assembly from step 15
into place at the back of Mantel. Use a
Phillips head screwdriver to tighten (U-2).
Twin-Star International, Inc.
Delray Beach, FL 33445
In English: 1-866-661-1218
In French: 1-866-374-9203
In Spanish: 1-866-661-1218
Model# 23DE9047
Made in China
Printed in China
2010,Twin-Star International, Inc.
"L" Corner
Brace
Top Corner
Extension

5HTXLHUH8Q+RJDU(OpFWULFR
3DUD&KLPHQHD&RQ&DOHQWDGRU


ab
c


F-1
MANTEAU DE FOYER EN BOIS
CONSIGNES D’ASSEMBLAGE DU MANTEAU EN BOIS
23DE9047
ATTENTION
Pour le service à la clientèle :
Nécessite aussi - Foyer
encastrable électrique avec
chauffage
pour le service en anglais, composez le 866-661-1218
pour le service en français, composez le 866-374-9203
pour le service en espagnol, composez le 866-661-1218
Twin-Star International, Inc.
Delray Beach, FL 33445
Fabriqué en Chine
Imprimé en Chine
MANTEAU MURAL MANTEAU D’ANGLE
LISTE DES PIÈCES
PIÈCE DESCRIPTION QUANTITÉ
PIÈCES
Âtre/Base
Panneau latéral gauche central
Panneau latéral droit central
Étagère centrale
Panneau latéral gauche
Panneau latéral droit
Manteau/Partie supérieure
Panneau avant gauche central
Panneau avant droit central
Panneau avant central
Tablette en bois
Panneau arrière latéral
Panneau arrière central
Porte avant gauche
Porte avant droite
Bloc de retenue
Panneau latéral supérieur gauche
Panneau latéral supérieur droit
Écharpe en "L"
Prolongation de l'angle supérieur
QUINCAILLERIE
Camloc (U-1,U-2,)
Goujon en bois
Clavette d'étagère
Vis
Bouton (avec boulon)
Charnière (Z-a,Z-b)
Vis à bois
Crayon pour retouches
A
B
C
D
E
F
G
H
I
T
W
K
R
J
X
Y
L
M
Q
P
U
N
O
Y1
V
Z
Y2
Z1
1
1
1
1
1
1
1
1
1
1
2
2
1
1
1
1
1
1
1
1
39+1 extra
42+1 extra
8
32
4
4
24
1
Other manuals for 23DE9047
1
Table of contents
Languages:
Other Classic Flame Indoor Furnishing manuals
Popular Indoor Furnishing manuals by other brands

Regency
Regency LWMS3015 Assembly instructions

Furniture of America
Furniture of America CM7751C Assembly instructions

Safavieh Furniture
Safavieh Furniture Estella CNS5731 manual

PLACES OF STYLE
PLACES OF STYLE Ovalfuss Assembly instruction

Trasman
Trasman 1138 Bo1 Assembly manual

Costway
Costway JV10856 manual


