Classic Flame FP35091 User manual

FP35091
Français P.28
Español P.15
English P.2
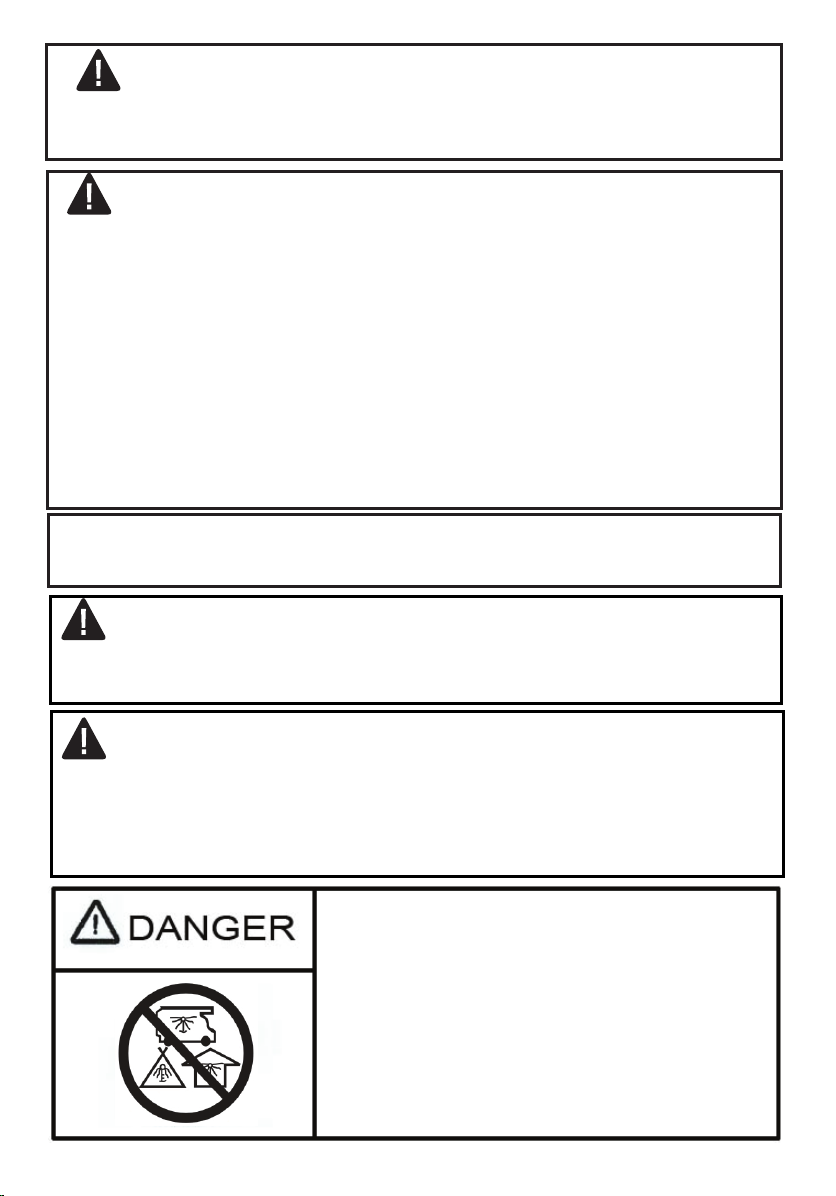
WARNING: For outdoor use only.
Installation and service must be performed by a qualied
installer, service agency, or the gas supplier.
INSTALLER: Leave this manual with the appliance.
CONSUMER: Retain this manual for future reference.
DANGER
FIRE OR EXPLOSION HAZARD
If you smell gas:
• Shut off gas to the appliance.
• Extinguish any open ame.
• If odor continues,leave the area immediately.
• Afer leaving the area,call your gas supplier or re
department.
Failure to follow these instructions could result in re or
explosion, which could cause property damage,personal
injury,or death.
WARNING: If the information in this manal is not followed
exactly, a re or explosion may result causing property
damage,personal injury, or loss of life.
WARNING
Do not store or use gasoline or other ammable vapors and
liquids in the vicinity of this or any other appliance.
An LP-cylinder not connected for use shall not be stored in
the vicinity of this or any other appliance.
CARBON MONIXIDE HAZARD
This appliance can produce carbon
monoxide which has no odor.
Using it in an enclosed space can kill
you.
Never use this appliance in an
enclosed space such as a camper,
tent,car or home.
3FP35091REV1.0
REGISTER YOUR NEW PURCHASE online!
Thank you for purchasing our product.Please take a moment to
visit tsicustomerservice.com to register your new purchase:
Merci d’avoir acheté ce produit.Veuillez prendre un court instant pour vous
rendre sur tsicustomerservice.com et enregistrer votre nouvel achat :
Gracias por adquirir nuestro producto.Tómese un momento para visitar
tsicustomerservice.com y registrar su nueva adquisición:
INSCRIRE VOTRE NOUVEL ACHAT • REGISTRAR SU NUEVA COMPRA
When registering your product, be sure to sign up for our updates to receive important service information and helpful tips.We value
your privacy and will never share your personal information with other organizations.The information you submit is used only for
providing product related services to you.
Lorsque vous enregistrez votre produit,assurez-vous de vous inscrire à nos mises à jour an de recevoir d’importantes informations
concernant les services et de précieux conseils.Nous accordons de l’importance à votre vie privée et nous ne communiquerons
jamais vos informations personnelles à d’autres organisations. Les informations que vous fournissez sont utilisées uniquement pour
vous offrir des services en lien avec les produits.
Si vous n’êtes pas en mesure d’effectuer l’enregistrement, conservez votre preuve d’achat pour le remplacement de pièces.
Cuando registre su producto,asegúrese de suscribirse para recibir actualizaciones importantes sobre el servicio y consejos útiles.
Valoramos su privacidad y no compartiremos su información personal con otras organizaciones. La información que envíe se usará
solo para proporcionarle servicios relacionados con el producto.
DEPENDABLE CUSTOMER SERVICE • SERVICE À LA CLIENTÈLE • ATENCIÓN AL CLIENTE CONFIABLE FIABLE
Questions? |Des questions? | ¿Tiene preguntas?
Call customer service Monday to Friday 8:30 am – 5:30 pm EST.
Appelez le service à la clientèle Lundi – Vendredi 8h30 – 17h30 (HNE)
Llame al servicio de atención al cliente.De lunes a viernes de 8:30 a.m.a 5:30 p.m.(hora estándar del este)
1.866.661.1218
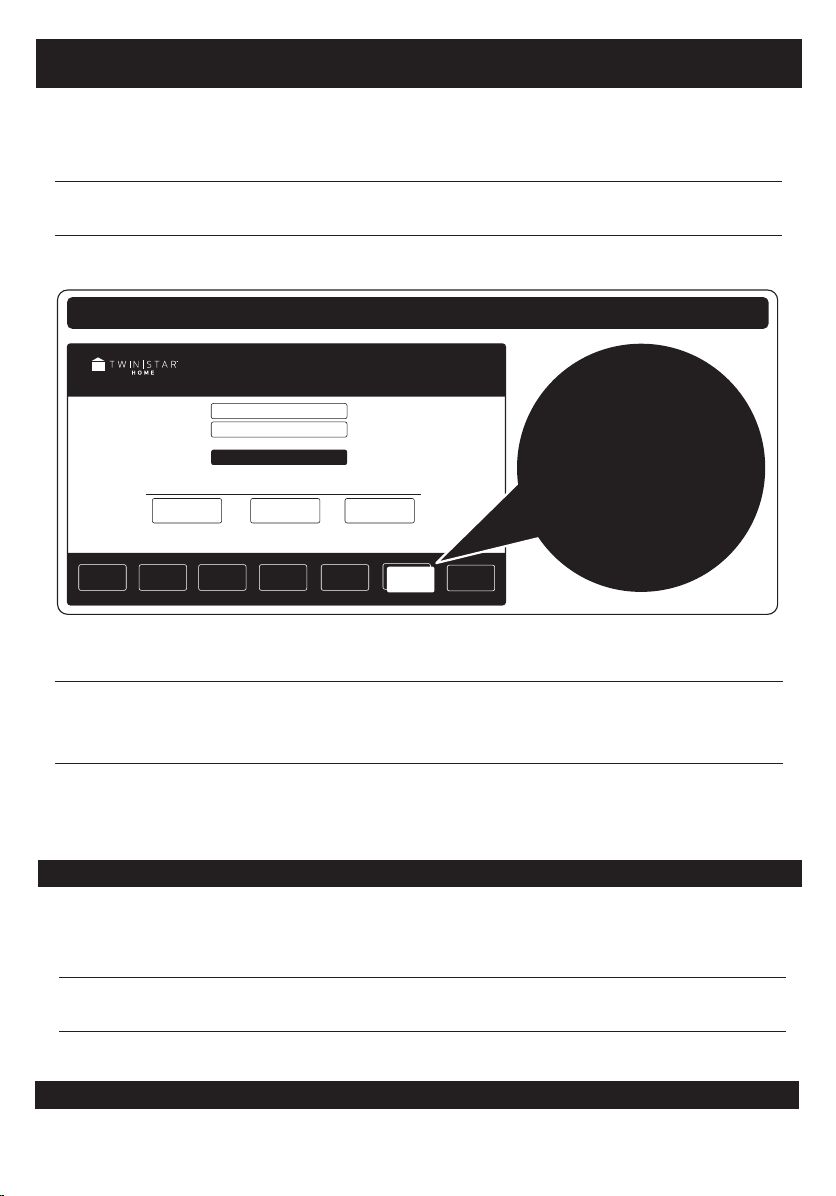
Login
New Registration
Product
Manuals FAQs Help Videos Manufacturer
Warranty
Retailers
Returns
Order
Tracking
log in >
Customer Service Portal
Twin-Star Customer Service online resource to Order Parts,
Product Registration, and to request Product and General Information DON’T FORGET TO
REGISTER YOUR PRODUCT
ONLINE TO RECEIVE SPECIAL
OFFERS, TIPS AND MORE!
N’OUBLIEZ PAS D’ENREGISTRER VOTRE PRODUIT EN LIGNE
AFIN DE RECEVOIR DES OFFRES SPÉCIALES,
DES CONSEILS ET PLUS ENCORE!
NO OLVIDE REGISTRAR SU PRODUCTO EN LÍNEA
PARA RECIBIR OFERTAS ESPECIALES,
CONSEJOS Y MÁS!
tsicustomerservice.com
Product
Registration

4
FP35091 REV1.0
PRODUCT DETAILS AND NOTES
DÉTAILS ET NOTES DU PRODUIT/DETALLES DEL PRODUCTO Y NOTAS
Place of purchase/Lieu de l’achat/Lugar de compra:
Date of purchase/Date de l’achat/Fecha de compra:
Model #/No de modèle/Número de modelo:
Notes/Remarque/Notas:

5FP35091REV1.0
SAFETY INFORMATION
Before you assemble or operate this unit,please carefully read this entire manual. Failure to
do so may result in a re, explosion, injury or death.
WARNING
• The installation of this unit must adhere to local codes or either the National Fuel Gas
Code,ANSI Z223.1/NFPA54, OR CAN/CGA-B149.1,National Gas and Propane Installation
Code.
• THIS UNIT IS INTENDED FOR OUTDOOR USE ONLY! This product shall be used outdoors,in a
ventilated space and shall not be used in any enclosed area.
• This unit is to be used with propane gas only! (sold separately)
• Do not attach a remote gas supply to this unit.
• Only use propane gas for this unit.
• Do not use any solid fuel or charcoal for this unit.
• When igniting this unit, stay away from the burner as the ame will light up and may
cause injury.
• LP GAS WARNING: Do not use any more than 1/4in depth lava rocks/pumice stones/
LavaGlass™ above the burner holes. Doing so will suffocate the ame.
• If the propane gas tank is leaking gas,you may hear,see, or smell a hiss. Do the following:
1. Disconnect the propane gas tank.
2. Do not attempt to x the problem yourself.
3. Contact your gas supplier or re department for help.
• Applying too much propane may result in gas pooling and will not burn.Allow fresh air
into the unit so that the remaining gas may escape.
• Do not use a ame to check for gas leaks.
• The max. inlet supply pressure: max. Gas supply 11 in w.c. (2.74kPa)
• Use LP propane tanks with the following dimensions: diameter 12 in, height 18 in - capacity
20 lbs.
• You must use a propane tank that has a collar to protect the gas valve.
• DO NOT ll tank over 80 percent full.
• The tank system must be set up for vapor withdrawal.
• Discontinue use if any part of the propane tank is damaged. Rust and dents may be
hazardous and should be inspected by a gas supplier.
• Do not burn anything other than the provided materials for this re table.
• Keep away from the unit for the rst 20 minutes after igniting your unit for the rst time, as
lava rocks/pumice stones/LavaGlass™ could pop out and cause injury.Should any rocks
pop out, discard them.
• Always ensure that lava rocks/pumice stones/LavaGlass™ are completely dry before use.
Failure to do so will cause them to crack or pop.

6
FP35091 REV1.0
• Do not operate the unit until all parts are fully assembled.
• Do not paint or color any part of this heating unit.
• The unit may be hot while in use,do not attempt to move it while in use.
• Never leave this heating unit unattended while in use.
• This unit is not intended for cooking.
• Keep any ammable items away and do not use any other replace cover for this unit.
• Keep a safe distance to avoid burning skin or clothing.
• Do not sit or rest hands or feet on this heating unit.
• Never place hands or ngers on the upper portion of this unit while in use.
• Keep all electrical cords and fuel supply hose away from heated surfaces.
• Combustible material should not be within 72 inches of the top of the unit, or within 48
inches around the entire unit.
• Keep the appliance area clear and free from combustible material, gasoline and other
ammable vapors and liquids.
• If the ame goes out while burning, turn the gas valve off.Wait 5 minutes before repeating
the initial lighting procedure. Once you have a ame started, hold down the control knob
for 1 minute.
• Do not add water to the unit.
• Do not operate unit if any part has been under water. Immediately call a qualied service
technician to inspect the appliance and replace any part of the control system and any
gas control that has been under water.
• Do not disconnect any part while the unit is in use.
• Do not store a spare propane tank on or near this unit.
• If the heating unit is indoors, detach the propane tank and leave outdoors.
• Do not operate on a boat or vehicle.This unit must be used on a at surface and outdoors
ONLY.
• Always remove protective cover before operating (if applicable).
• Do not set the protective cover over the unit until it is turned off and completely cooled
down.
• Check for leaks after not using the unit for long periods of time.
• Children should never operate this unit. Children must be supervised while near this unit.
• Keep the gas tank at least 5 feet away from the unit when lit.(if external tank)
• The maximum gas supply pressure is 250psi.
SAFETY INFORMATION

7FP35091REV1.0
•All installation and repair should be done by a qualied professional.This unit should be
inspected annually and cleaned regularly.
•Inspect all elements of this heating unit before each use and inspect the burner at
intervals.the burner must be replaced prior to the appliance being put into operation if it
is evident that the burner is damaged.the replacemant burner shall be that specied by
Twin-Star Home.
• Keep the hose out from any pathways to eliminate any accidental damage.(if external
tank)
• Be aware of the hazards of high temperatures and stay away from the unit to avoid any
burns or injury.
• The gas supply tank should be constructed and marked with the specications for the LP
gas tanks of the U.S. Department of Transportation or the National Standard of Canada
CAN/CSA-B339,LP gas tanks,spheres and tubes for Transportation of Dangerous Goods;
and Commission.
• The LP gas tank must have a listed overlling prevention device and a QCCI or Type I,
(CGA810) LP gas tank connection.
• This heating appliance should not be used on plastic or articial wood decks.
•Children and adults should be alerted to the hazards of high surface temperatures and
should stay away to avoid burns or clothing ignition.
• Young children should be carefully supervised when they are in the area of the appliance.
• Clothing or other ammable materials should not be hung from the appliance or placed
on or near the appliance.
• Any guard or other protective device removed for servicing the appliance shall be
replaced prior to operating the appliance.
• Installation and repair should be done by a qualied service person.The appliance should
be inspected before use and at least annually by a qualied service person. More frequent
cleaning may be required as necessary. It is imperative that the control compartment,
burners and circulating airways of the appliance are kept clean.
IF APPLICABLE:
• Allow the heating item to cool completely before placing on the lid.
• DO NOT use the heating item while the lid is installed.Always remove the lid while the
heating item is in use.
SAFETY INFORMATION
8
FP35091 REV1.0
SAFETY INFORMATION
Only use the regulator and hose assembly provided with this unit.Replacement parts must
be supplied directly by Twin Star Home®.
Inspect the burner before use of this unit. If the burner shows any kind of damage,do not
operate the appliance.For assistance with repair or replacement of the burner or any other
parts, please contact 866-661-1218 Customer Service.
NOTE:You must follow all steps to assemble this heating item properly. Make sure the gas
valve is turned“OFF” before assembling. Do NOT attempt to assemble without proper tools.
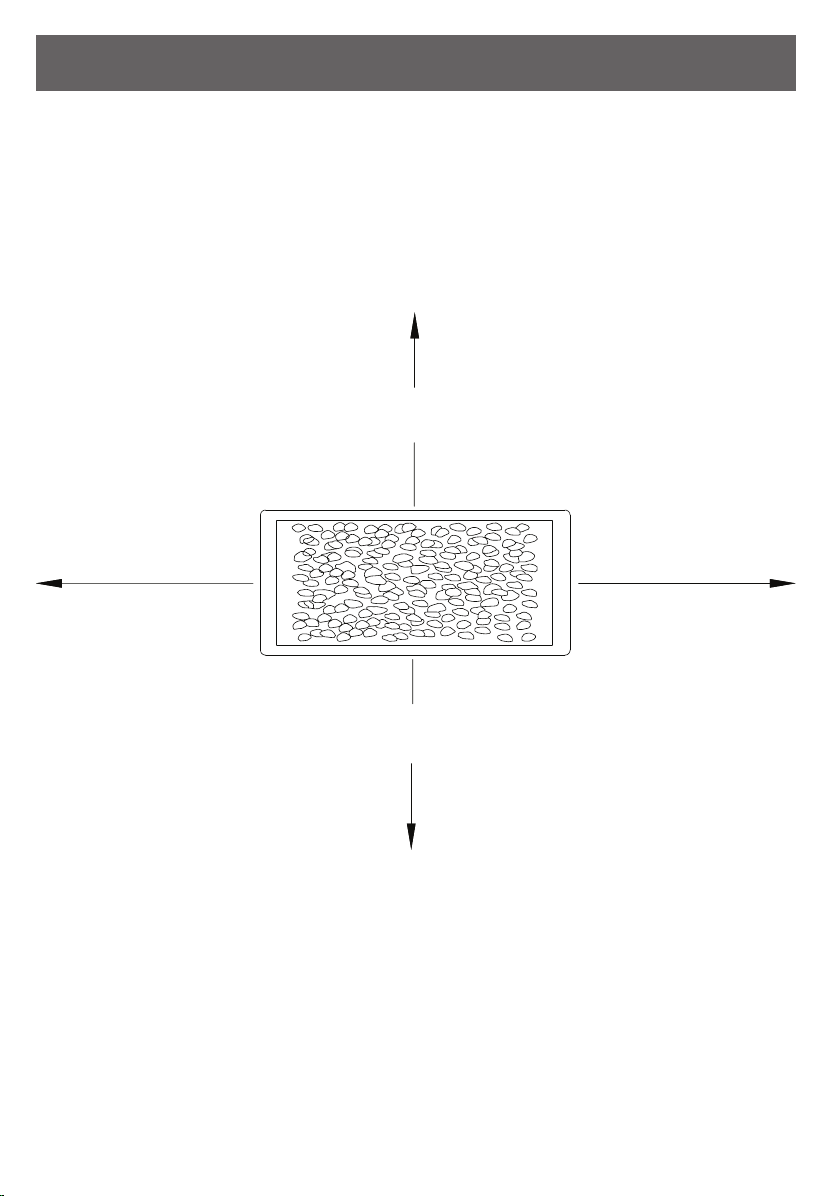
Combustible materials should not be within 72 inches of the top of the unit, or within 48
inches around the entire unit.
Min.Clearance
48in(121.9cm)
Min.Clearance
48in(121.9cm)
Min.Clearance
48in(121.9cm)
Min.Clearance
48in(121.9cm)
9FP35091REV1.0
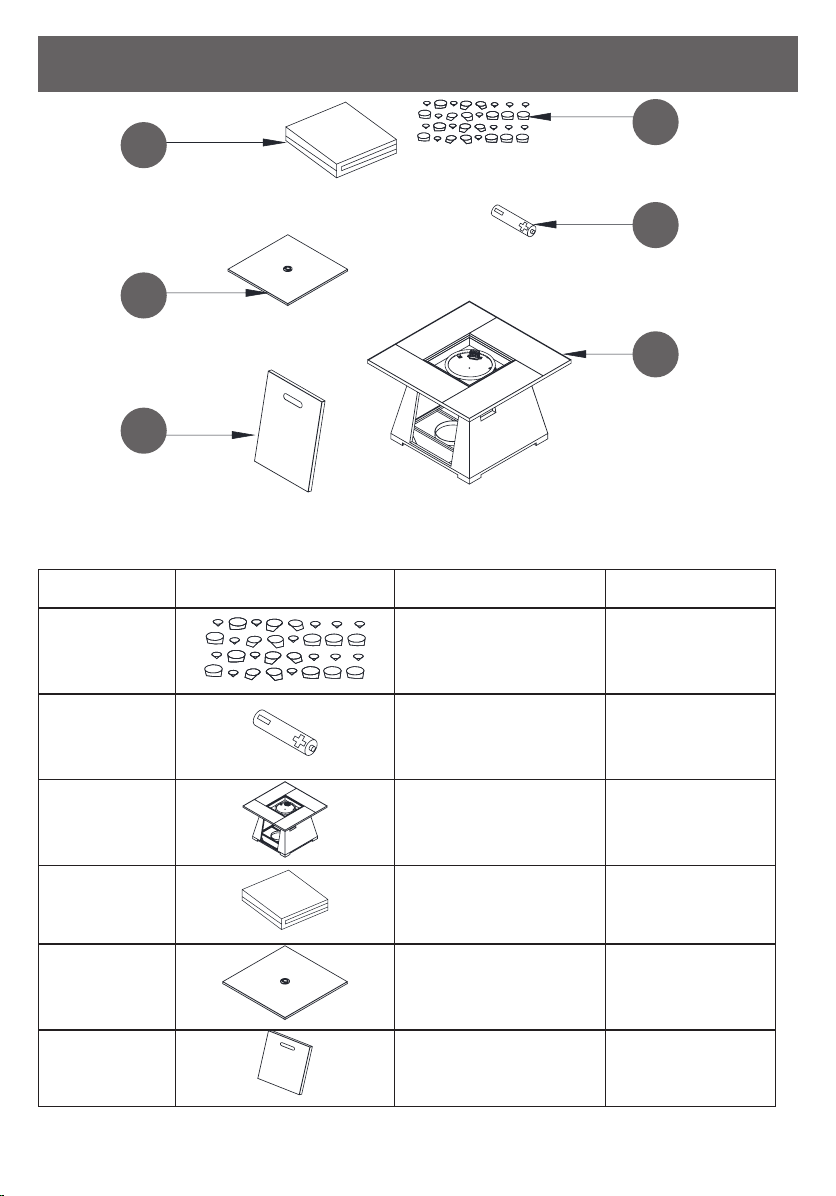
Item Picture Description Qty
ALava Rocks 1 Box
BAAA Battery 1 pc
CMainframe of Fire Table 1 pc
DProtective Cover 1 pc
ECover 1 pc
FDoor 1 pc
Warning: Failure to position the parts in accordance with these diagrams or failure
to use only parts specically approved with this appliance may result in property
damage or personal injury.
PACKING CONTENT
A
B
C
D
E
F
10
FP35091 REV1.0
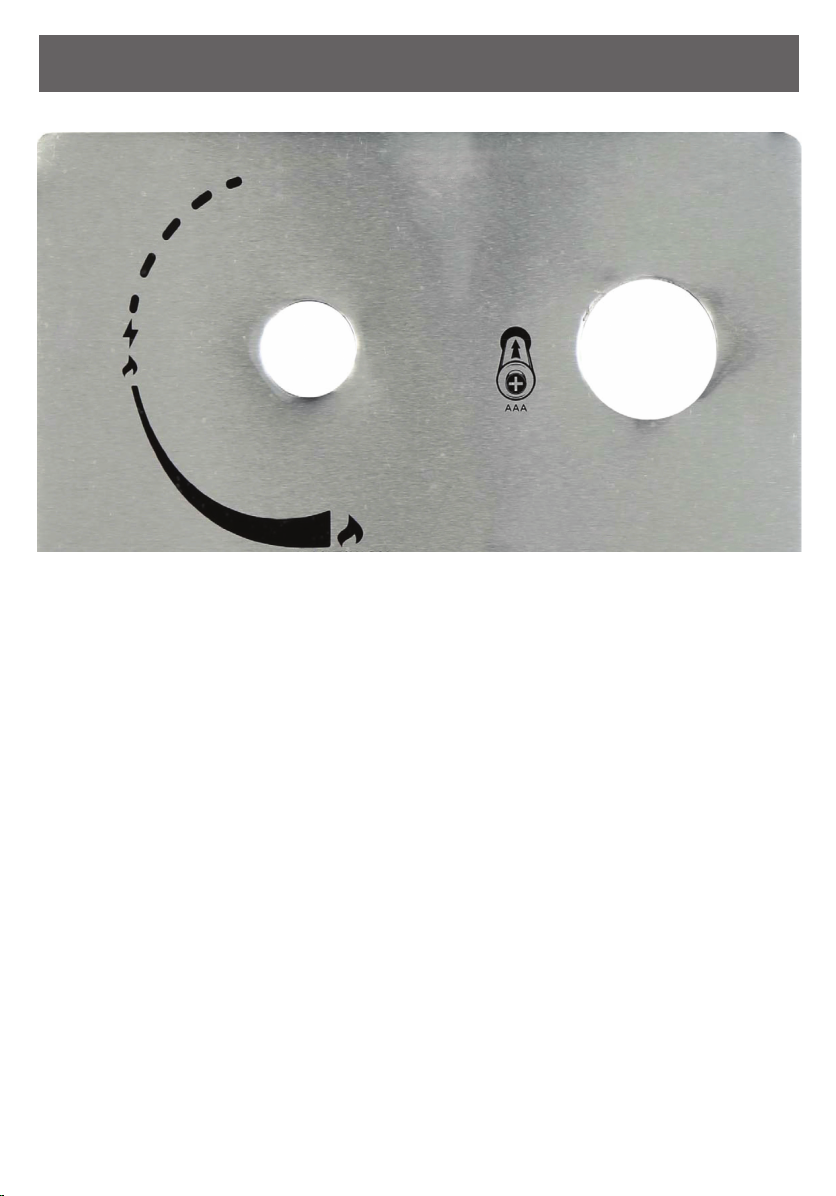
IGNITER CONTROL BOARD
LIGHTING INSTRUCTIONS
1) Read all instructions before lighting.
2) Burner Control Knob must be in "OFF" position.
3) Make sure that the fuel supply is property connected and open at the tank.
4) Push and hold Igniter Button to create sparks.
5) While holding the Igniter Button, push and turn the Control Knob to LOW to light the
burner.
6) If ignition does not occur in 5 seconds,push and turn the Control Knob to "OFF".Wait 5
minutes and allow gas to dissipate.
7) Once the burner is lit, continue to push the knob in for another 20 seconds and release.
8) If the igniter does not light the burner, use a long match or extended butane lighter.
TURNING OFF
1) Push and turn the Control Knob clockwise to the "OFF" position.
2) Turn the gas off at its source (cylinder or quickconnect).
CAUTION
Gas supply must be turned off at
the gas source when this appliance
is not in use.
Igniter Button
OFF
LOW
HIGH

11 FP35091REV1.0
This Safety Information passage holds information that :
1) Shows you the Regulator (pre-connected to the Fire Table / Column)
2) The Charge Valve of the Gas Tank and its relevant Valves
The Fire Table / Column holds the Gas Tank INTERNALLY and EXTERNALLY.
The owner/ user must know each part of the unit including the Charge Valves
and Regulator. The Charge Valve of the Gas Tank and the Regulator are pre
connected to the Fire Table / Column.The components of the Gas Tank and the
Fire Table / Column Regulator are illustrated below.
B
Black coupling nut
Regulator
A
Cylinder valve Pressure relief valve
Bleed -off valve
Turn clockwise
to reseal
Fire Table / Column that has an internal housing for Gas Tank Cylinders, where
the Gas Tank is held inside the Table / Column.The Gas Tank is held and bound in
place inside the Fire Table / Column with the Metal Ring and locked down with a
Wing Screw/ Nut.
USER'S GUIDE TO CONNECTING THE GAS TANK
A.The Charge Valve of the Cylinder shown with
other connecting valves and coupling nut.These
form the top of the Gas Cylinder.
B.The Regulator is shown pre-connected to the hose
and the Fire Table / Column.

12
FP35091 REV1.0
Loading of Gas Tank into the Fire Table / Column
The Fire Table/ Column has a Door. Remove the Door and
leave the Door on the oor.
Inside, you will see a Metal Stand with pre-attached Wing
Screw/ Nut.
Proceed to Unscrew the Wing Screw/ Nut
Load the Gas Tank/ Gas Cylinder as indicated by the
bold black arrow.
Place the Tank/ Cylinder gently and snugly into the
Metal Stand.
Position the Wing Screw/ Nut in place.
Turn the Wing Screw until it fully tightens into the Nut.
The Gas Tank/ Gas Cylinder is now secured in place.
Connecting the Fire Table / Column to the Gas
Cylinder
Step 1 : Plug the Black Coupling Nut on the
Regulator to the Cylinder Valve.
Step 2 :Turn the Black Coupling Nut
CLOCKWISE until fully locked into position.
Step 3 : Check for leaks by brushing a soap
and water mixture on all connections.
Turn the gas supply on.If extra large
bubbles form on any connection there
may be a leak. If you smell gas or a leak is
discovered, IMMEDIATELY turn the gas valve
off, disconnect Propane Gas tank.
Do not use the appliance until the leak is
repaired.
Pie.A
Pie. B
Black coupling nut turn
clockwise to connect.
Regulator
Cylinder valve Pressure relief valve
Bleed -off valve
Turn clockwise
to reseal

13 FP35091REV1.0
ASSEMBLY INSTRUCTIONS
1. Remove the cover from the top of Fire Table.
2. Check that the control knob for the gas supply system is turned to the “OFF”
position before starting any assembly.
OFOFFF

14
FP35091 REV1.0
3. Put your hand into vent opening to lift and remove the Door from the Fire Table
/ Column .
4. Put the 20 lb. propane gas tank (not included) into the tank holder.Turn the
wing screw on the outside of the tank holder clockwise to tighten the tank into
the tank holder.

15 FP35091REV1.0
5. Turn the Cylinder Valve on the tank in a clockwise direction to TURN OFF
SUPPLY of the LP Gas supply.
Attach the preassembled Regulator from the Fire Table/ Column to the
Cylinder Valve by turning the Black Regulator Coupling Nut clockwise.
Make sure it is fastened securely and tighten connections - by HAND only.
Black coupling nut
turn clockwise to
connect.
Regulator
Cylinder valve
Pressure relief valve
Bleed -off valve
Turn clockwise
to reseal
6. Replace and Close the Door back to the Mainframe of the Fire Table/ Column .
16
FP35091 REV1.0
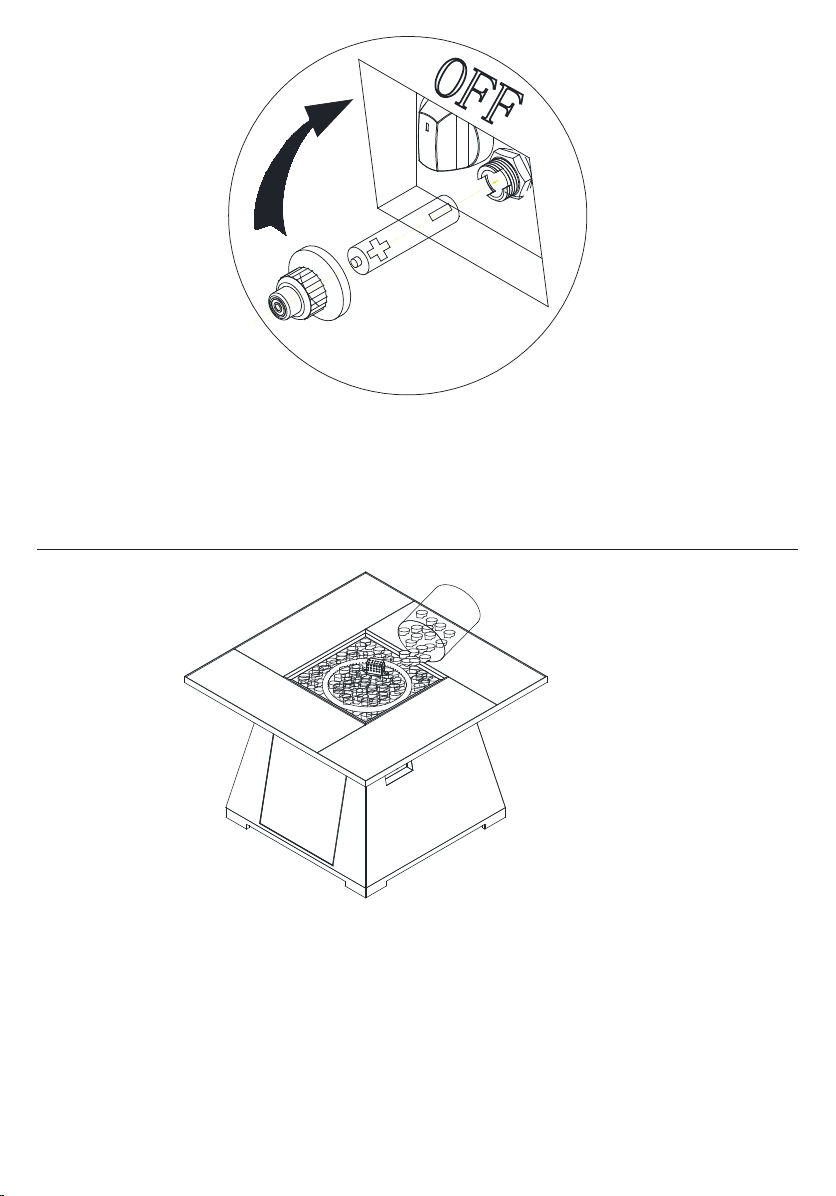
7. Remove the Electronic Igniter Cap on the electronic ignitor by unscrewing and
slide the Battery into the battery slot.
Make sure the positive side of the Battery faces outward.
Screw the Electronic Igniter Cap over the battery, tightly.
OFF
8. Subject to your preference, you may pour Lava Rocks over the Burner Ring.The
Guard MUST NOT BE BLOCKED. Refer to guidance below:
Note: Do not place more than 1/4 inch depth of lava rocks above the burner
holes.Doing so will suffocate the ame.
Note: Do not place more than 6KG of lava rocks above the burner holes.Doing
so will suffocate the ame.

17 FP35091REV1.0
9. Put the cover back on the re table after the unit is turned OFF.
To ensure proper function,the Guard on the Burner should never have
lava rocks covering it..
CORRECT INCORRECT
Guard
DONOT PLACE LAVA
ROCKS ON THE GUARD.
KEEP GUARD CLEAR.
18
FP35091 REV1.0
Observe ame colour and ame height when the
Fire Table/Column after being lit :
1.) Flame color should be yellow / blue.
2.) Flame height burns at 2 - 10 inches high.
Wait 10 minutes after extinguishing ame prior to replacing a lid (if applicable)
or protective cover onto the Fire Table / Column.
Before performing a leak test,be sure:
1.) DO NOT press the igniter .
2.) You are in a spacious outdoor area.
Connect the Propane Gas tank to the Regulator and turn the Valve on the unit to
the "OFF" position.
Brush soap and water mixture onto all connections.
Turn the gas supply on;if extra large bubbles form on any connection there may be
a leak. If you smell gas or a leak is discovered, IMMEDI ATELY turn the gas valve off,
disconnect Propane Gas tank.
Do not use the appliance until the leak is repaired.
The Fire Table / Column has a Door. Remove the Door and leave the Door on
the oor. Inspect the Gas Hose before use the Fire Table / Column.
If there are signs of wear or abrasion on the hose,you must replace the Gas
Hose .And the Gas Hose must be supplied directly by manufacturer.
Lava rocks could pop up and strike somebody's face during the process of
lighting this unit.
Stand away from the Fire Table / Column for the initial 30 minutes after igniting.
OPERATIONS

19 FP35091REV1.0
SAFETY INFORMATION
USING YOUR FIRE TABLE/ COLUMN
Before each use,inspect the Gas Hose.Replace Gas Hose.if there are any signs of
cutting, wear or abrasion.
Before you light your Fire Table/ Column, please proceed / adopt the following
steps :
1. Make sure the Control Knob is in the "OFF" position.
2. Open the Door and slowly open the Valve on the Propane Gas Tank by
turning the Contol Knob counterclockwise.
3. Close the Door on the Main Frame of the Fire Table / Column.
4. Push and hold in the Electronic Igniter to create sparks within the electrode
continue to hold.
5. Push in the Control Knob and turn to the "LOW" position.
Keep holding down the Control Knob to allow gas to ow for 15 seconds.
6. If ignition doesn't occur within a few seconds release the Control Knob and
rotate to the "OFF" position.
Wait for 5 minutes for gas to clear and then repeat the above lighting
instructions.
7. Once the Fire Table/ Column is lit, the ame intensity may be controlled by
turning the Control Knob between the "LOW" and "HIGH" positions.
8. Instructions on properly locating the gas hose including locating the hose out
of pathways where people may trip over it or in areas where the hose may be
subject to accidental damage.
9. Observe ame height when lit:
9.1.) Flame color should be yellow/ blue.
9.2. ) Flame height burns at 2 - 10 inches high.
To Shut Down your Fire Table/ Column, please proceed/ adopt the following steps :
1. Turn Control Knob clockwise to the "OFF" position.
2. Close the Cylinder Valve on the Propane Gas tank if you DO NOT intend to use it
for a long time.
SAFETY INFORMATION: TO SHUT DOWN YOUR
FIRE TABLE/ COLUMN

20
FP35091 REV1.0
OPERATION
Inspect the hose before each use of the appliance.The hose assebbly must be
replaced prior to the appliance being put into operation if there is evidence of
excessive abrasion or wear, or if the hose is damaged.The replacement hose shall
be specied by Twin-Star Home.
Before performing a leak test,be sure that no sparks can occur and you are in
a spacious outdoor area.Connect the propane gas tank to the regulator and
turn the valve on the unit to the “off” position. Brush a soap and water mixture
on all connections.Turn the gas supply on; if bubbles occur on any connection,
there may be a leak.If you smell gas or a leak is discovered turn the gas valve
off, disconnect propane gas tank and do not use the appliance until the leak is
repaired.
Do not use the heating unit without inspecting the gas hose. If there are signs of
wear or abrasion,
you must replace the hose (if applicable). Pumice stones/lava rocks/LavaGlass™
could pop up and strike somebody’s face during the process of lighting this unit;
stand away from the unit for the rst 20 minutes after igniting. Flame height should
be a yellow/blue color between 2 - 10 inches in height.
Wait 5 minutes after extinguishing ame prior to placing a lid (if applicable) or
protective cover on the heating item.
To Light
1.Make sure the control knob is in the “off” position. Slowly open the valve on the
propane gas tank by turning the knob counterclockwise.
2.Push and hold in the electronic igniter to create sparks within the electrode,
continue to hold.
3.Push in the control knob and turn to the “low”position.Keep holding down the
control knob to allow gas to ow for 45 seconds.
4.If ignition doesn’t occur within a few seconds release the control knob and rotate
to the “OFF” position.Wait for 5 minutes for the gas to clear and then repeat the
above lighting instructions.
5.Once the red product is lit,the ame intensity may be controlled by turning the
control knob between the “low” and “high” positions.
To Extinguish
1.Turn control knob clockwise to the“low” position; let the knob pop up and
continue turning the control knob to the“off”position.
2.Close the cylinder valve on the propane gas tank if you don’t intend to use it for
a long time.
Table of contents
Languages:
Other Classic Flame Outdoor Fireplace manuals


Popular Outdoor Fireplace manuals by other brands


Sunnydaze Decor
Sunnydaze Decor STEEL CHIMINEA quick start guide

Desa
Desa VK42EN Series OWNER'S OPERATION AND INSTALLATION MANUAL

PEAKTOP
PEAKTOP HR17501AB instruction manual

höfats
höfats FIRE KITCHEN Assembly instructions

Outdoor Plus
Outdoor Plus VISTA manual

Firegear
Firegear FPB-G16RBSMT-N Installation and operating instructions