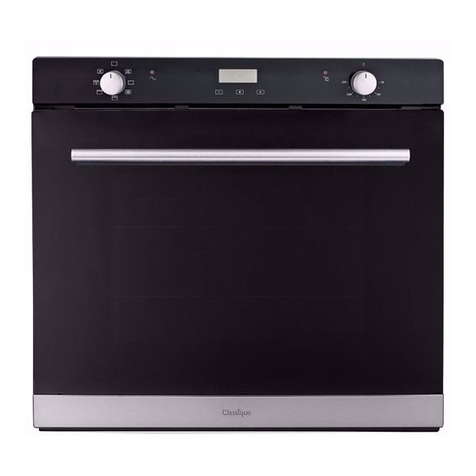
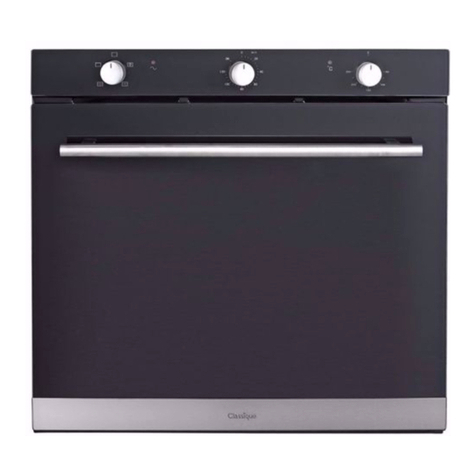
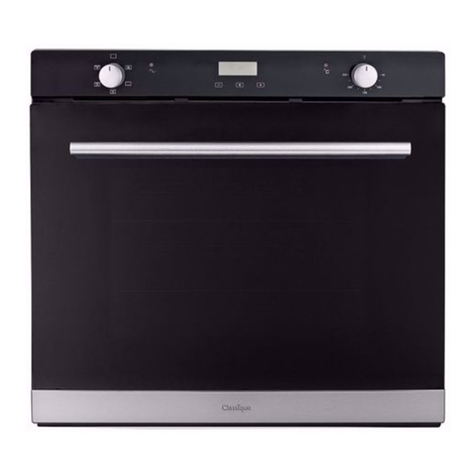
Classique CLO69XLS User manual

User manual for your Classique
600mm Built-in Oven
CLO69XLS
NOTE: This user manual contains important information including safety & installation
points which will enable you to get the most out of your Classique appliance. Please
keep it in a safe place so that it is readily available for future reference.

Contents
Important safety information 1
Environmental note 3
Installation 4
Using the appliance
Description of the appliance 7
Before first use 9
Setting the clock 10
Selecting an oven function and temperature 11
Using the timer 14
Cleaning and maintenance 19
Troubleshooting 22
Cooking guidelines 24
Technical information 27

1
Important safety information
Your safety is of the utmost importance. Please make sure that you read this
instruction booklet before attempting to install or use the appliance. If you are
unsure of any of the information contained in this booklet, please contact the
retailer where you purchased your appliance from.
General Information
This appliance is designed for domestic household use and can be built into a standard
kitchen cabinet or housing unit.
The adjacent furniture or housing and all materials used in the installation must be able to
withstand a minimum temperature of 85°C above the ambient temperature of the room it
is located in, whilst in use.
Certain types of vinyl or laminate kitchen furniture are particularly prone to heat damage
or discoloration at temperatures below the guidelines given above.
Any damage caused by the appliance being installed in contravention of this temperature
limit, or by placing adjacent cabinet materials closer than 4mm to the appliance, will be
the liability of the owner.
For use in leisure accommodation vehicles, please refer to the appropriate information
given in the installation instructions for this appliance.
The use of this appliance for any other purpose or in any other environment without the
express agreement of our company will invalidate any warranty or liability claim.
Repairs may only be carried out by an authorised service agent, log onto
www.classique.co.nz to locate an agent near you.
This appliance complies with all current safety legislation. We do wish to emphasise that
this compliance does not remove the fact that the appliance surfaces will become hot
during use and retain heat after operation.
Child Safety
Classique strongly recommend that babies and young children are prevented from
being near to the appliance and not allowed to touch the appliance at any time.
If it is necessary for younger family members to be in the kitchen, please ensure that
they are kept under close supervision at all times.

2
General Safety
Do not place heavy objects on the oven door or lean on the oven door when it is open,
as this can cause damage to the oven door hinges.
Do not leave heated oil or fat unattended, as this is a fire risk.
Do not place pans or baking trays directly on the base of the oven cavity, or line it with
aluminium foil.
Do not allow electrical fittings or cables to come into contact with areas on the
appliance that get hot.
Do not use the appliance to heat the room it is located in or to dry clothing.
Do not install the appliance next to curtains or soft furnishings.
Do not attempt to lift or move cooking appliances by using the oven door or handle, as
this may cause damage to the appliance or result in injury to the person lifting the
appliance.
Cleaning
Cleaning of the oven should be carried out on a regular basis.
Great care should be taken whilst using this appliance and when following the cleaning
procedure outlined in this user manual. IMPORTANT: The appliance must be
disconnected from the mains before following the cleaning procedure.
Installation
This appliance must be correctly installed by a suitably qualified person,
strictly in accordance with the manufacturer’s instructions.
The manufacturer declines any responsibility for injury or damage, to person or
property, as a result of improper use or installation of this appliance.
Heat, steam and moisture will be created during use of the appliance, take care to avoid
injury and ensure that the room is adequately ventilated. If the appliance is going to be
used for prolonged periods of time, then additional ventilation may be required.
Please consult with your qualified installer if you are in any doubt about the amount of
ventilation that you will require.

3
Environmental note
Note: Before discarding an old appliance, switch off and disconnect it from the power supply. Cut
off and render any plug useless. Cut the cable off directly behind the appliance to prevent misuse.
This should be undertaken by a competent person.
This appliance is marked according to the European directive 2002/96/EC on Waste electrical
and Electronic Equipment (WEEE). By ensuring this product is disposed of correctly, you will
help prevent potential negative consequences for the environment and human health, which
could otherwise be caused by inappropriate waste handling of this product/
The symbol on the product or on the documents accompanying the product indicates that this
appliance may not be treated as household waste. Instead it shall be handed over to the
applicable collection point for the recycling of electrical and electronic equipment.
Disposal must be carried out in accordance with local environmental regulations for waste
disposal. For more detailed information about treatment, recovery and recycling of this product,
please contact your local city office or local waste management office.
The packaging materials that we use are environmentally friendly and can be recycled. Please
discard all packaging material with due regard for the environment.

4
Installation
Electrical connection
WARNING: THIS APPLIANCE MUST BE EARTHED.
This appliance should be wired into a 16 A double pole switched fused spur outlet, having
3 mm contact separation and placed in an easily accessible position adjacent to the
appliance. The spur outlet must still be accessible even when your oven is located in its
housing to enable the appliance to be disconnected from the mains supply.
To connect the oven power cord, loosen and remove the cover on the terminal block, in
order to gain access to the contacts inside. Make the connection, securing the cord in
place with the cable clamp provided and then immediately close the terminal block cover
again.
If you have to change the oven power cord, the earthing (yellow/green) conductor must
always be 10 mm longer than the line conductors.
Care must be taken to ensure that the temperature of the mains supply cable does not
exceed 50°C.
If the mains supply cable is damaged, then it must be replaced by an appropriate
replacement which can be obtained from Spares Department.

5
Installing the oven into the kitchen cabinet
The kitchen area should be dry and aired and equipped with efficient ventilation.
When installing the oven, easy access to all control elements should be
ensured.
Positioning the appliance
Ensure that the aperture that you will be fitting the oven into is of the size given
in the above diagram.
The oven must be fitted into an oven housing with the ventilation cut-outs
shown in the “Ventilation requirements” section on the next page.
Ensure that the rear panel of the furniture housing unit has been removed.
Ensure that the oven has been securely fixed into the housing unit. The fixing of
the oven into the housing is made by using four screws. These should be
screwed through the oven cabinet and into the housing unit.

6
Ventilation requirements
(Figure shows the ventilation and cut-out requirements for the installation of the
appliance into a standard kitchen unit).
(Figure shows the ventilation and cut-out requirements for the installation of the
appliance into a tall housing unit).
Ensure that the oven has been securely fixed into the
housing unit. The fixing of the oven into the
housing is made by using four screws. These
should be screwed through the oven cabinet
and into the housing unit.
A
A
A
A

7
Description of the appliance
Control panel
Side rack lamp
Wire rack
Oven door
Door handle
Description
Illustration
Qty.
Oven unit
1
Side rack
1 pair
Roasting dish
1
Oven rack
2
Wire insert for
roasting dish
1
Pizza stone
1
Telescopic runner
1 pair
Screw and nut
4
M
A
U
T
O

8
Control panel
1) Oven function selector knob
2) Power indicator light (The light will be on, when a function is selected.)
3) Oven programmer/timer
4) Oven heating indicator light (The light will be on, when the oven is heating.)
5) Thermostat control knob
6) LED display
Oven programmer/timer display
7) “AUTO”: Automatic function symbol
8) : oven heating symbol
9) “﹒”: Time adjustment symbol
10) :Minute minder symbol
11) “+”: Plus button
12) “M”:Manual button
13) “-“: Minus button
14) “00﹒00” : time display
(The first two digits refer to hour.
The last two digits refer to minute)
50
100
150
200
250
M
A
U
T
O
1 2 34 5
6
0

9
Before first use
oTo remove any residue from the oven that may have been left from the
manufacturing process, you should select the fan oven function and set the
thermostat to its maximum temperature setting.
oIt is perfectly normal for a smell to be produced during this process.
oYou should make sure that any windows in the room are left open during this
process.
oIt is advisable for you not to remain in the room whilst the burning off process is
taking place.
oYou should leave the oven on maximum setting for 30 –40 minutes.
oAfter the oven cavity has cooled, it should then be cleaned with warm soapy
water, using either a sponge or soft cloth. No abrasive cleaners should be used.
oOuter parts of the oven should be cleaned with warm soapy water, using either a
sponge or soft cloth. No abrasive cleaners should be used.
oWe would recommend that an appropriate stainless steel cleaner and polish is
regularly used on the stainless steel surfaces of this appliance.

10
Setting the clock
After the oven is power connected, the numbers on the timer display will flash.
Press Manual button “M” (symbol 12) for 3 seconds; the oven enters into standby
mode, andTime adjustment symbol “﹒”(symbol 9) is flashing. Use Plus button
“+” (symbol 11) and Minus button “-“(symbol 11) to set clock time. After choosing
the correct numbers, release the buttons and wait for 5 seconds. The Time
adjustment symbol “﹒”(symbol 9) will stop flashing. Now the time is set.
Time readjustment: To readjust the time, press Manual button “M” (symbol 12) for
3 seconds, to turn off the timer. Then press Manual button “M” (symbol 12) for 3
seconds again, to turn on the timer. The Time adjustment symbol “﹒”(symbol 9)
will be flashing again. Follow the above steps to readjust the time.

11
Selecting an oven function and temperature
After your appliance is connected to your mains supply for the first time, the
numbers on the timer display will flash. Before you can select a cooking function or
set a temperature, you must set the appliance into “manual operation” mode.
To select manual operation mode, press the manual button (12) on the control
panel for 3 seconds
The oven function selector knob should be used to select the
particular mode of cooking that you require. The appliance
will utilise different elements within the oven cavity,
depending on the oven function that you select. When a
function is selected, the power indicator light will come on.
The oven has 9 functions for your choosing:
DEFROST: This function runs the fan to reduce the defrosting time of frozen
foods without using heat. This is a great, hygenic way to gently defrost food.
Useful for frozen foods, or drying wet bakeware.
CONVENTIONAL BAKE: Also known as Traditional Bake or simply Bake,
this function uses elements in the top and bottom of the oven cavity. The
bottom element is concealed. To maximise the cooking result, cook on a
single shelf. Great for cakes, muffins, and bread.
FAN FORCED: Heat from a special element by the fan is evenly distributed
as the fan runs. Handy when cooking on several shelves at once.
HALF GRILL: Only half the grill element is active. Handy for grilling, toasting,
or crisping single servings or small amounts of food.
FULL GRILL: The grill element at the top of the oven cavity is active.
Ideal for grilling, toasting, or crisping a full shelf of food.
0

12
FAN GRILL: The grill element at the top of the oven cavity produces
a browning effect, while the fan helps to distribute the hot air.
FAN & LOWER ELEMENT: Heat comes from the concealed lower element.
The fan helps to distribute the air evenly around the oven cavity.
FAN BAKE: Heat comes from elements in the top and bottom of the
oven cavity while the fan helps to distribute air evenly.
PIZZA : Heat rises to the top from the concealed lower element. Ideal for
creating a crisp base.
Thermostat control knob
The oven thermostat control knob sets the required
temperature of the oven. It is possible to regulate the
temperature within a range of 50 - 250°C.
Turn the control knob clockwise.
Oven operating light
This light will come on to indicate that the oven’s heating
elements are in operation. The light will turn off when the
temperature set on the thermostat control knob has been
reached. It will cycle on and off throughout the cooking
time.
You should not place food inside the cavity, until the correct cooking
temperature has been reached.
150
250
200
0
100
50
150
250
200
0
100
50

13
Warnings
oKeep the oven door closed when using any of the grill functions.
oDo not use aluminum foil to cover the grill pan or heat items wrapped in
aluminum foil under the grill. The high reflectivity of the foil could potentially
damage the grill element.
oYou should also never line the base of your oven with aluminum foil.
oDuring cooking, never place pans or cookware directly onto the
oBottom of your oven. They should always be placed on the shelves provided.
oThe grill heating element and other internal components of the oven
becomes extremely hot during operation, avoid touching it inadvertently
when handling the food which you are grilling.
oImportant: Be careful when opening the door, to avoid contact with hot parts
of the oven and steam.
oThe drip tray handle should only be used to reposition the drip tray and NOT
for removing it from the oven cavity. When removing the drip tray, you should
ALWAYS use an oven glove.
oThe drip tray handle should not be left in position when the appliance is
switched on.
oA steam cleaner is not to be used.
oWarning: Accessible parts may become hot during use. Young children
should kept well away when in use.
oDo not use harsh abrasive cleaners or metal scrapers to clean the oven door
glass as this can scratch the surface, which may result in the oven glass
shattering.

14
Using the timer
After you select the function and temperature, the oven will be working. You can
use the timer to control the working period of the oven.
1) Minute minder
The minute minder function is a countdown time that can be set on the oven
programmer/timer. When the countdown time has finished, an audible signal will
sound.
Press Manual button “M” (symbol 12) one time. The Minute minder “ ” (symbol
10) will flash. The display will show “00﹒00”. Use Plus button “+” (symbol 11) and
Minus button “-“(symbol 11) to set a period. After choosing the correct numbers,
release the buttons and wait for 5 seconds. The Minute minder “ ” (symbol 10)
will stop flashing. And the screen will display the clock time again. Now the timer is
set. If you have set 2 minutes, the oven will alarm in 2 minutes, after the timer is set.
Press any button to turn off the alarm. Or the alarm will be turned off automatically
in 7 minutes. And then the Minute minder “ ” (symbol 10) will disappear.
To check how much time left after the timer is set, press Manual button “M”
(symbol 12) one time.
To readjust the timer, press Manual button “M” (symbol 12) one time. And then
follow the above steps.
To terminate the timer, press Manual button “M” (symbol 12) one time. The screen
will display the left time. Use Minus button“-“(symbol 11) to decline the number to
“00﹒00”. Release the buttons and wait for 5 seconds. The Minute minder “”
(symbol 10) will disappear.
The maximum countdown time that can be set is 23 hours and 59 minutes.
If the oven is in use whilst using the minute minder function, the oven will not
switch off at the end of the countdown time. You must turn the oven function
selector knob and the thermostat control knob to their OFF positions.
2) Cooking duration

15
This function will allow you to set a countdown time similar to the minute minder
function, however the oven will switch off at the end of the cooking time.
Press Manual button “M” (symbol 12) two times. The Automatic function
symbol “AUTO” (symbol 7) will flash. The display will show “00﹒00”. Use Plus
button “+” (symbol 11) and Minus button “-“(symbol 11) to set a period. After
choosing the correct numbers, release the buttons and wait for 5 seconds. The
Automatic function symbol “AUTO” (symbol 7) will stop flashing. And the screen
will display the clock time again. Now the timer is set. If you have set 2 minutes, the
oven will alarm and turn off automatically in 2 minutes, after the timer is set.
Meanwhile, then the Automatic function symbol “AUTO” (symbol 7) will
disappear. Press any button to turn off the alarm. Or the alarm will be turned off
automatically in 7 minutes.
If you have finished cooking, turn the oven function selector knob and thermostat
control knob to OFF position.
To check how much time left after the timer is set, press Manual button “M”
(symbol 12) two times.
To readjust the timer, press Manual button “M” (symbol 12) two times. And then
follow the above steps.
To terminate the timer, press Manual button “M” (symbol 12) two times. The
screen will display the left time. Use Minus button “-“(symbol 11) to decline the
number to “00﹒00”. Release the buttons and wait for 5 seconds. The Automatic
function symbol “AUTO” (symbol 7) will disappear.
The maximum countdown time that can be set is 10 hours.

16
3) Cooking end time
This function is similar to the semi-automatic function, however instead of setting a
countdown time, you select the time at which you want the oven to be turned off.
Press Manual button “M” (symbol 12) three times. The Automatic function
symbol “AUTO” (symbol 7) will flash. The display will show the clock time. Use
Plus button “+” (symbol 11) and Minus button “-“(symbol 11) to set a time. After
choosing the correct numbers, release the buttons and wait for 5 seconds. The
Automatic function symbol “AUTO” (symbol 7) will stop flashing. And the screen
will display the clock time again. Now the timer is set. If you have set “00﹒02”, the
oven will alarm and turn off automatically at 00:02. Meanwhile, then the Automatic
function symbol “AUTO” (symbol 7) will disappear. Press any button to turn off
the alarm. Or the alarm will be turned offautomatically in 7 minutes.
If you have finished cooking, turn the oven function selector knob and thermostat
control knob to OFF position.
To check the ending time of cooking after the timer is set, press Manual button “M”
(symbol 12) three times.
To readjust the timer, press Manual button “M” (symbol 12) three times. And then
follow the above steps.
To terminate the timer, press Manual button “M” (symbol 12) three times. The
screen will display the time you set. Use Minus button “-“(symbol 11) to decline
the number to the clock time. Release the buttons and wait for 5 seconds. The
Automatic function symbol “AUTO” (symbol 7) will disappear.
The maximum end time that can be set is 10 hours into the future.
4) The cooking reservation
This function will allow you to set the cooking start time and the cooking end time.
Press Manual button “M” (symbol 12) two times. The Automatic function
symbol “AUTO” (symbol 7) will flash. The display will show “00﹒00”. Use Plus
button “+” (symbol 11) and Minus button “-“(symbol 11) to set a period (Assume
you set 2 minutes). While the Automatic function symbol “AUTO” (symbol 7) is
still flashing, Press Manual button “M” (symbol 12) again. Assume It is 00:00 at

17
the moment. The display will show “00:03” (it is equal to 1 minute plus clock time
plus the period you set.). Use Plus button “+” (symbol 11) and Minus button
“-“(symbol 11) to set a time (Assume you set “00:13”). After choosing the correct
numbers, release the buttons and wait for 5 seconds. The Automatic function
symbol “AUTO” (symbol 7) will stop flashing. The Heating symbol will
disappear. The screen will display the clock time again. The oven enters into
standby mode. Now the reservation is set well. If you have set 2 minutes, the oven
will start to cook in 2 minutes, with the Heating symbol on the display again.
And then the oven will turn off automatically at 00:13, if you have set cooking end
time “00:13”. Meanwhile, the Automatic function symbol “AUTO” (symbol 7) will
disappear. Press any button to turn off the alarm. Or the alarm will be turned off
automatically in 7 minutes.
If you have finished cooking, turn the oven function selector knob and thermostat
control knob to OFF position.
To check how much time left for the oven to start cooking, press Manual button
“M” (symbol 12) two times.
To check the ending time of cooking, press Manual button “M” (symbol 12) three
times.
To readjust or terminate the starting time of cooking, press Manual button “M”
(symbol 12) two times. And then follow the same steps as clause (2) Cooking
duration.
To readjust or terminate the ending time of cooking, press Manual button “M”
(symbol 12) three times. And then follow the same steps as clause (3) Cooking
end time
The maximum cooking duration time that can be set is 10 hours.
The maximum end time that can be set is 10 hours into the future.
Adjusting the audible signal
The audible signal has 3 tones. To adjust the signal you should proceed as follows:

18
Press the plus (11) button and you will hear an audible signal. This is the audible
signal which is currently set.
IMPORTANT: The oven timer must not be in any form of countdown mode and the
oven in use symbol (8) must be lit.
Table of contents
Other Classique Oven manuals
Popular Oven manuals by other brands
Siemens
Siemens HM876G2.6A User manual and installation instructions

Zanussi
Zanussi FB550 Use and care instructions
Aspes
Aspes AHM6700DX user manual
Lincoln
Lincoln Impinger II - Advantage Series Service manual
Cascade Sciences
Cascade Sciences CVAC-9.3 Installation & operation manual
GE
GE PLS624RT Owner's manual and installation instructions
