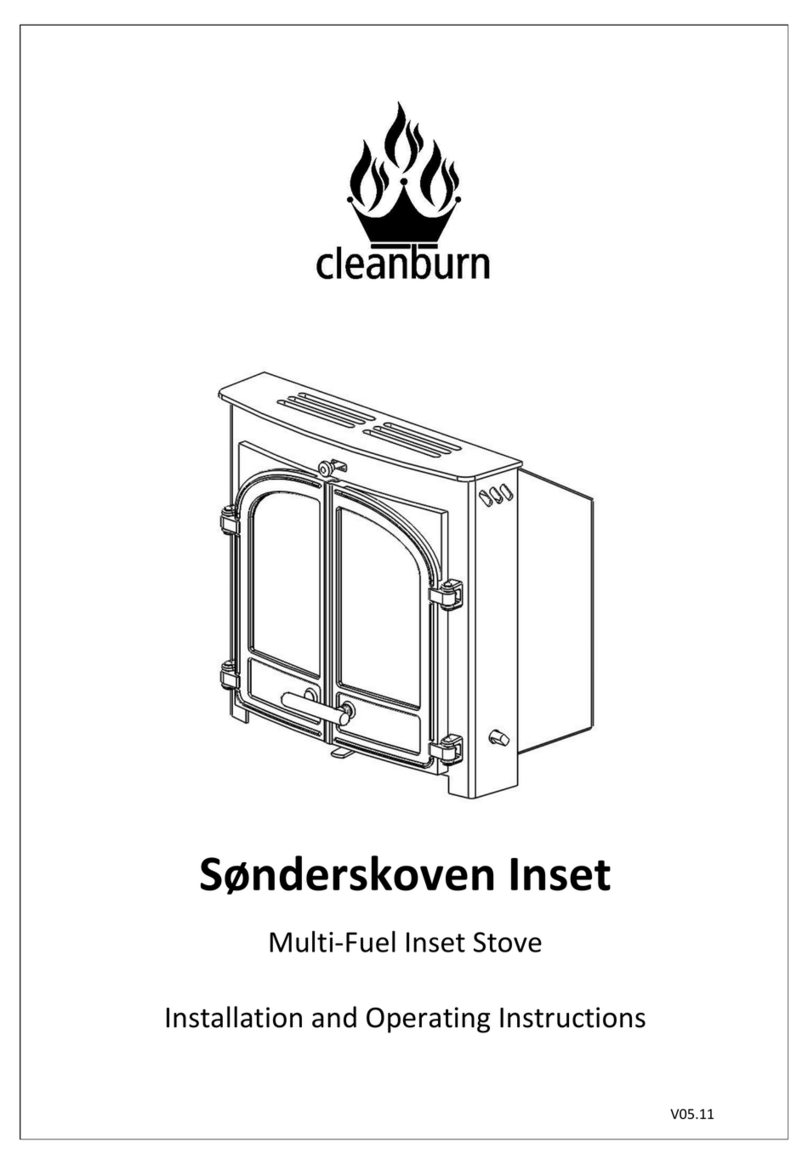
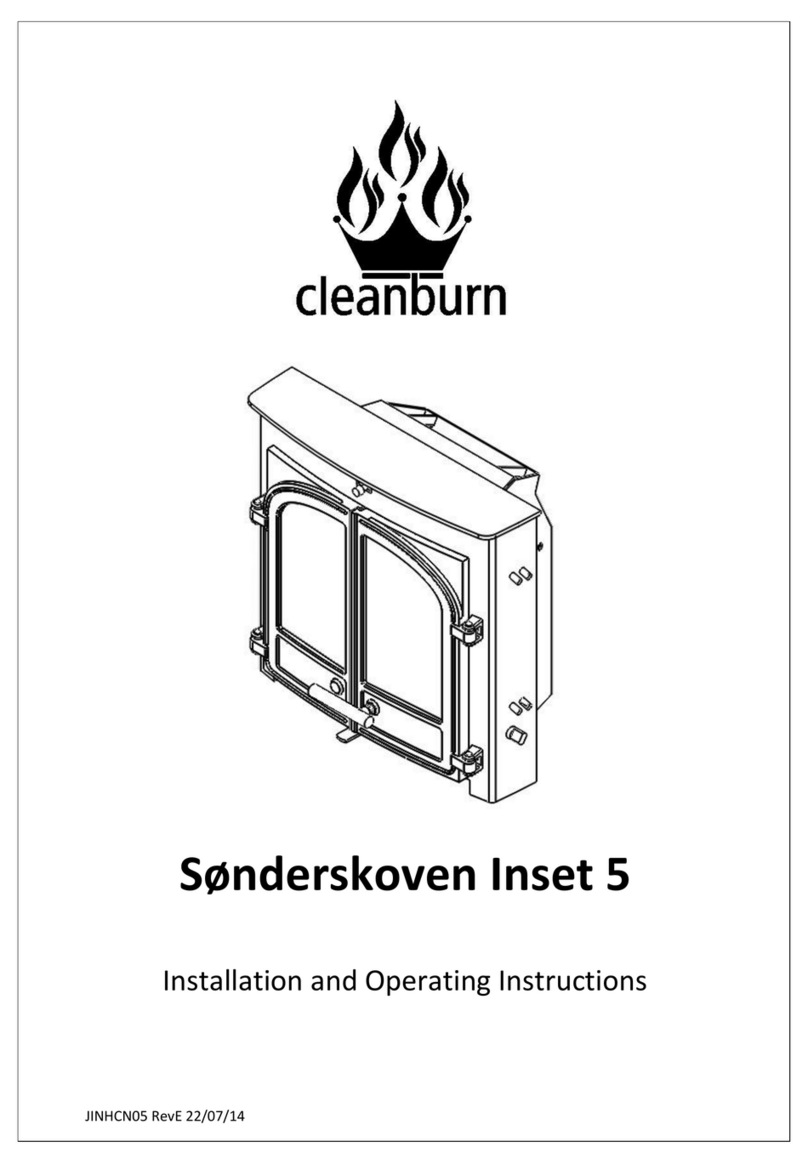
Cleanburn Skagen Manual

JINHCE08 revC 26/10/11
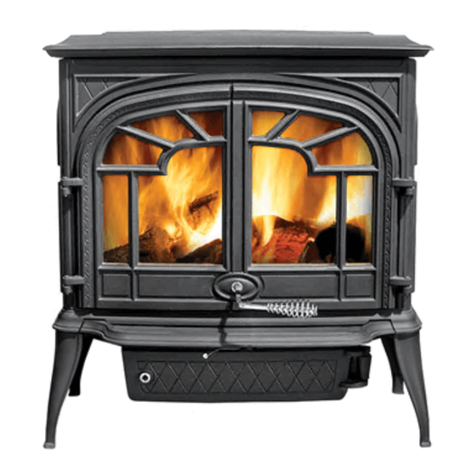
Skagen
CleanburnStove
Skagen
CleanburnStove

JINHCE08 revB 03/10/11
Installation & Operating Instructions
TechnicalSpecification
Appliance Mass
125 kg
Total Efficiency
79.0 %
Nominal Heat Output
6.0 kW
Mean CO Emission @13% O
2
)
0.16 %
Mean Flue Gas Temperature
280 °C
Flue Gas Mass Flow
5.0 g/s
This appliance is not for se in shared fl e
This appliance is s itable for intermittent b rning

JINHCE08 revB 03/10/11
TableofContents
General Guidance............................................................................................................2
Competent Persons Scheme........................................................................ 2
CO Alarms .................................................................................................. 2
Health & Safety Precautions....................................................................... 2
Handling...................................................................................................... 2
Fire Cement................................................................................................. 2
Asbestos ...................................................................................................... 3
Metal Parts .................................................................................................. 3
Modification................................................................................................ 3
Safety...............................................................................................................................3
Aerosols ...................................................................................................... 3
Fireguards ................................................................................................... 3
Do not Over-Fire......................................................................................... 3
Fume Emission............................................................................................ 3
CO Alarm.................................................................................................... 4
In the Event of a Chimney Fire................................................................... 4
Assembly Instructions.....................................................................................................5
Removal of Heat Shield .............................................................................. 5
Flue Collar .................................................................................................. 5
Blanking Plate ............................................................................................. 6
Rear Flue Pipe Installation.......................................................................... 6
Fitting of Heat Shield.................................................................................. 6
Removal of Internal Components ............................................................... 7
Side Bricks ............................................................................................................................................... 7
Rear Brick ................................................................................................................................................ 8
Baffle / Throat Plate Fitting ........................................................................ 8
Air Controls ................................................................................................ 8
Installation Instructions...................................................................................................9
Chimney...................................................................................................... 9
Connection to the Chimney ........................................................................ 9
Flue Draught ............................................................................................. 10
Air Supply................................................................................................. 10
Hearth/ Material Clearances ..................................................................... 10
Recessed Appliance................................................................................................................................ 11
Free-Standing Appliance........................................................................................................................ 11
Commissioning & Handover .................................................................... 11
Operating Instructions...................................................................................................12
Aerosol Sprays .......................................................................................... 12
Air Controls .............................................................................................. 12
Primary Air............................................................................................................................................. 12
Secondary and Tertiary Air .................................................................................................................... 12
Riddling Grate........................................................................................... 13
Notes on Wood burning ............................................................................ 13

JINHCE08 revB 03/10/11
Lighting the Stove..................................................................................... 13
Reduced Combustion ................................................................................ 13
Recommended Fuels ................................................................................. 14
General Maintenance.....................................................................................................15
Baffle......................................................................................................... 15
Stove Body................................................................................................ 15
Glass Panel................................................................................................ 15
Firebricks .................................................................................................. 15
Door Catch ................................................................................................ 15
Rope .......................................................................................................... 16
Chimney and Flue ways............................................................................ 16
Periods of Prolonged Non-Use ................................................................. 16
Gaskets...................................................................................................... 16
Troubleshooting ............................................................................................................16
Fire will not burn ...................................................................................... 16
Fire blazing out of control......................................................................... 17
Spares Information ........................................................................................................18
Door Spares............................................................................................... 18
Door Handle.............................................................................................. 19
Body Spares .............................................................................................. 20
Air Controls .............................................................................................. 21

JINHCE08 revB 03/10/11
2
GeneralGuidance
It is important that your stove is correctly installed as Cleanburn cannot accept
responsibility for any fault arising through incorrect use or installation.
Theseinstructionscoverthebasicprinciplestoensuresatisfactoryinstallationofthestove,althoughdetail
mayneedslightmodificationtosuitparticularlocalsiteconditions.
TheinstallationmustcomplywithcurrentBuildingRegulations,nationalandEuropeanstandards, ocal
Authoritybyelawsandotherspecificationsorregulationsastheyaffecttheinstallationofthestove.
TheBuildingRegulationsrequirementsmayalsobemetbyadoptingtherelevantrecommendationsinthe
currentissuesofBritishStandardsBS8303andBSEN152871.
CompetentPersonsScheme
Cleanburnrecommendthatthisstoveisinstalledbyamemberofanaccreditedcompetentpersonsscheme
e.g.HETAS.
Iftheinstallerisnotamemberofacompetentpersonsscheme,itisalegalrequirementtonotifyyourlocal
buildingcontrolbodyinadvanceofanyworkstarting.
COAlarms
Building regulations require that whenever a new or replacement fixed solid fuel or wood/biomass
appliance is installed in a dwelling, a carbon monoxide alarm must be fitted in the same room as the
appliance.
Further guidance on the installation of the carbon monoxide alarm is available in BS EN 50292:2002
and from the alarm manufacturer’s instructions.
Provision of an alarm must not be considered a substitute for either installing the appliance correctly
or ensuring regular servicing and maintenance of the appliance and chimney system.
Health&SafetyPrecautions
SpecialcaremustbetakenwheninstallingthestovesuchthattherequirementsoftheHealthandSafetyat
WorkActaremet
Handling
Adequatefacilitiesmustbeavailableforloading,unloadingandsitehandling.
FireCement
Sometypesoffirecementarecausticandshouldnotbeallowedtocomeintocontactwiththeskin.Incase
ofcontact,washimmediatelywithplentyofwater.

JINHCE08 revB 03/10/11
3
Asbestos
This stove contains no asbestos. If there is a possibility of disturbing any asbestos in the course of
installationthenpleaseseekspecialistguidanceanduseappropriateprotectiveequipment.
MetalParts
Wheninstallingorservicingthisstove,careshouldbetakentoavoidthepossibilityofpersonalinjury.
Modification
Nounauthorizedmodificationofthisapplianceshouldbecarriedout.
Safety
WARNING –
This appliance will be hot when in operation and due care should be taken. The supplied
operating tool or gloves may be used to open the door and operate the air controls.
Aerosols
Donotuseanaerosolsprayonornearthestovewhenitisalight.
Fireguards
Always use a fireguard in the presence of children, the elderly or the infirm. The fireguard should be
manufacturedinaccordancewithBS8423–Fireguardsforusewithsolidfuelappliances.
DonotO erFire
Itispossibletofirethestovebeyonditsdesigncapacity.Thiscoulddamagethestovesowatchforsignsof
overfiring.
Ifanypartofthestovestartstoglowred,thestoveisinanoverfiresituationandthecontrolsshouldbe
adjustedaccordingly.
Neverleavethestoveunattendedforlongperiodswithoutfirstadjustingthecontrolstoasafesetting.
Carefulairsupplycontrolshouldbeexercisedatalltimes.
FumeEmission
WARNING NOTE
Properly installed, operated and maintained, this appliance will not emit fumes into the dwelling. The
appliance door(s) must be kept closed at all times, except for when de-ashing and refueling, during which
occasional fumes may occur. However, Persistent fume emission is potentially dangerous and must not
be tolerated.
If fume emission does persist, then the following immediate action should be taken: -
1. Open doors and windows to ventilate the room and then leave the premises.
2. Let the fire go out.
3. Check for flue or chimney blockage and clean if required.
4. Do not attempt to re-light the fire until the cause of the fume emission has been identified and
corrected. If necessary, seek expert advice.
The most common cause of fume emission is flueway or chimney blockage. For your own safety these
must be kept clean at all times.

JINHCE08 revB 03/10/11
4
Adverse weather – In a small number of installations, occasional local weather conditions (e.g. wind from
a particular direction) may cause downdraught in the flue and cause the stove to emit fumes. In these
circumstances, the stove should not be used. A professional flue installer will be able to advise on
solutions to this problem (e.g. anti-downdraught cowl).
COAlarm
Your installer should have fitted a CO alarm in the same room as the appliance. If the alarm sounds
unexpectedly, follow the instructions given under “Warning Note” above.
Donotfitanextractorfaninthesameroomasthisappliance.
IntheE entofaChimneyFire
Raisethealarm
CalltheFireBrigade
Closeapplianceaircontrols
Movefurniture,ornamentsetcaway
Placeafireguardinfrontofstove
Checkthechimneybreastforsignsofexcessiveheat.
EnsuretheFireBrigadecangainaccesstoyourroofspaceinordertocheckforfirespread.

JINHCE08 revB 03/10/11
Assembly
Instructions
Remo alofHeatShield
Toremovetheheatshield,removethebutton
flextheheatshieldbypullingtheheatshieldtowardsyouuntil
right
handedgeclearsthestovebody
handedgeclearofthestovebody
andremove.
FlueCollar
WindtheeightM6studssuppliedintothefixingholesinthefluecollarand
blankingplateuntilfingertight.
Place the gasket in position on
manoeuv
thefixingholes.
SecureinplaceusingtheM6nutsandwashers.FitthetwoM8coach
boltsinthefluecollartoblankofftheoptionaldamperhandleholes.
5
Instructions
Toremovetheheatshield,removethebutton
headscrewandthen
flextheheatshieldbypullingtheheatshieldtowardsyouuntil
the
handedgeclearsthestovebody
andpopsout. ifttheleft
andremove.
FlueCollar
WindtheeightM6studssuppliedintothefixingholesinthefluecollarand
blankingplateuntilfingertight.
Place the gasket in position on
either the top
or rear outlet
manoeuv
ringthefluecollarintoposition,
takingcaretolineupthestudswith
thefixingholes.
SecureinplaceusingtheM6nutsandwashers.FitthetwoM8coach
boltsinthefluecollartoblankofftheoptionaldamperhandleholes.
WindtheeightM6studssuppliedintothefixingholesinthefluecollarand
or rear outlet
(as required),
takingcaretolineupthestudswith

JINHCE08 revB 03/10/11
BlankingPlate
FittheFlueGasketandBlankingPlateontheremainingfreeoutlet
Secureit,usingtheM6nutsand
studs.
RearFluePipeInstallation
Forrearflueinstallations,
theknock
removed.
Removethe
heatshieldasinstructed
holdingtheknock
outsectionintheheatshieldandremove.
anysharpedgesontheheatshield
leftbehindbythe
FittingofHeatShield
Tofittheheatshield,positiontheleft
shield until the ri
place.
preventanyrattle.
Do not over tighten the screw, as this will damage the heat shield
6
FittheFlueGasketandBlankingPlateontheremainingfreeoutlet
.
studs.
theknock
outintherearheatshieldmustbe
heatshieldasinstructed
onpage5.Carefullycutthroughthetabs
outsectionintheheatshieldandremove.
Carefullyremove
leftbehindbythe
tabs.
FittingofHeatShield
Tofittheheatshield,positiontheleft
handedgeandthenflextheheat
shield until the ri
ght
hand edge clears the stove body
place.
Insert and lightly tighten the supplied button
preventanyrattle.
Do not over tighten the screw, as this will damage the heat shield
Heat Shield Knockout
handedgeandthenflextheheat
hand edge clears the stove body
and pops into
Insert and lightly tighten the supplied button
head screw to
Do not over tighten the screw, as this will damage the heat shield

JINHCE08 revB 03/10/11
Remo alofInternalComponents
The Fire Bricks, in this appliance, are factory fit
sequencethatyouwillneedtoemploywhenservicingyour
SideBricks
2.
RemovealloftheGrateBars.Takecaretonoticewhichare
theupperandwhicharethelowerbars.Thiswillallowcorrect
replacement.
4.
SlidethebottomedgeoftheSideBrickstowardsthecentreof
thestove.Itmaybenecessarytorotatethecambartoallow
this.OncetheSideBricksareclearoftheretainingtabatthe
topofthestove,theycanberemoved.
7
Remo alofInternalComponents
The Fire Bricks, in this appliance, are factory fit
ted. The following set
of diagrams
sequencethatyouwillneedtoemploywhenservicingyour
stove.
1. RemoveFrontPlate
byliftingitupoutoftheslotsoneither
side.Rotatetoremovefromthestove.
RemovealloftheGrateBars.Takecaretonoticewhichare
theupperandwhicharethelowerbars.Thiswillallowcorrect
3.
SlidethefrontedgeofeachSidePlatetowardsthecentreof
thestove. ifttheSidePlatesandremove.
SlidethebottomedgeoftheSideBrickstowardsthecentreof
thestove.Itmaybenecessarytorotatethecambartoallow
this.OncetheSideBricksareclearoftheretainingtabatthe
topofthestove,theycanberemoved.
of diagrams
show the removal
byliftingitupoutoftheslotsoneither
side.Rotatetoremovefromthestove.
SlidethefrontedgeofeachSidePlatetowardsthecentreof
thestove. ifttheSidePlatesandremove.

JINHCE08 revB 03/10/11
RearBrick
Pullthetopedgeof
Stove.
Baffle/ThroatPlateFitting
8
Pullthetopedgeof
each
RearBrickforwardandliftthebrickoutofthe
Stove.
ToinstalltheBaffle,slidetheleft
handendoftheBaffleup,
and over the support. Push the B
affle to the left until the
right
handedgeclearstheothersupport.SlidetheBaffleback
totherightuntilitsitscentrallyinthestove.Checkthatthe
two tabs at the front of the Baffle are between the Baffle
Supports.
AirControls
Toremovetheaircontrols,firsta
djustbothcontrolknobsto
maximu
mopen (turnfully clockwise).
the control unit forwards and remove it from the stove.
Before re
fitting, adjust the controls to maximum ope
Failure to do this may result in damage to the gasket
material.
RearBrickforwardandliftthebrickoutofthe
handendoftheBaffleup,
affle to the left until the
handedgeclearstheothersupport.SlidetheBaffleback
totherightuntilitsitscentrallyinthestove.Checkthatthe
two tabs at the front of the Baffle are between the Baffle
djustbothcontrolknobsto
mopen (turnfully clockwise).
Then, carefully pull
the control unit forwards and remove it from the stove.
fitting, adjust the controls to maximum ope
n.
Failure to do this may result in damage to the gasket

JINHCE08 revB 03/10/11
9
InstallationInstructions
Chimney
ThechimneyheightandthepositionofthechimneyterminalshouldconformtoBuildingRegulations.
Checkthatthechimneyisingoodcondition,dry,freefromcracksandobstructions.
Thediameteroftheflueshouldnotbelessthan150mmandnotmorethan200mm.
Ifanyoftheserequirementsarenotmet,thechimneyshouldbelinedbyasuitablemethod.
If there is no existing chimney then either a prefabricated block chimney in accordance with Building
RegulationsApprovedDocumentJ,oratwinwalledinsulatedstainlesssteelfluetoBSEN1856canbe
used. These chimneys must be fitted in accordance with the manufacturer’s instructions and Building
Regulations.
Ifthechimneyisbelievedtohavepreviouslyservedanopenfireinstallation,itispossiblethatthehigher
fluegastemperaturefromthestove mayloosen depositsthat werepreviouslyfirmlyadhered,with the
consequentriskofflueblockage.Itisthereforerecommendedthatthechimneyissweptasecondtime
withinamonthofregularuseafterinstallation.
Ifyouhaveanydoubtsaboutthesuitabilityofyourchimney,consultyourlocaldealer/stockist.
ConnectiontotheChimney
Thechimneymustbesweptbeforeconnectiontothestove.
Anexistingfireplaceopeningcanbebrickeduporsealedwitharegisterplate.
Ashortlengthoffluepipeofminimum150mminternaldiametermaythenbeusedtoconnectthestoveto
the chimney. This flue pipe should be made of 316 grade stainless steel or vitreous enamelled steel,
nominalthickness1.2mm.
Ensurethatthepipeendisnocloserthan76mmtothechimneywalls.
Thelengthofanyhorizontalrunoffluepipemustnotexceed150mm.
Itisessentialthatallconnectionsbetweenthestoveandchimneyfluearesealedandmadeairtight.
BoththechimneyandfluepipemustbeaccessibleforcleaningandifANYpartofthechimneycannotbe
reachedthroughthestove(withbaffleremoved),asootdoormustbefittedinasuitableposition.

JINHCE08 revB 03/10/11
10
FlueDraught
Ifthedraughtexceedstherecommendedmaximum,adraughtstabilisermustbefittedsothattherateof
burning can be controlled and to prevent over firing. If the reading is less than the recommended
minimum then the performance of the appliance will be compromised. The flue draught should be
checkedunderfireathighoutput.
MinimumDraught–1.2mmWaterGauge
MaximumDraught–2.5mmWaterGauge
AirSupply
Theroomorspacecontainingthisapplianceshouldhavepurposeprovidedventilation(wherenecessary)
inaccordancewithBuildingRegulations.
Dueconsiderationshouldbegiventoairrequirementsforanyotherapplianceinthesameroomorspace.
Anyairopeningmustbekeptclearfromblockageorobstruction.
Hearth/MaterialClearances
Yourstovemustbeinstalledonafloorwithadequateloadbearingcapacity,otherwisesuitablemeasures
shouldbetaken.
Usetheadjustingscrewsinthefeettolevelthestove.
Allnoncombustiblewallscloserthan300mmtothestoveshouldbeatleast75mmthick.
MinimumDistancestoCombustibleMaterial
BehindtheStove 250mm
AttheSideoftheStove 200mm
ToFurniture 800mm
Note:combustiblematerialreferstoanymaterialthatwilldegradewhensubjectedtoheate.g.plaster.
Nocombustiblematerialmustbestoredunderneaththestove.
Warning!
Please ens re that there is s fficient
clearance to comb stible material
from the stove and connecting fl e
pipe.
Clearance distances to the stove and
fl e pipes specified in Doc ment J
of B ilding Reg lations as well as
any other relevant legislation sho ld
be followed.

JINHCE08 revB 03/10/11
RecessedAppliance
Thestovecanberecessedintoasuitablysizedfireplace
werecommendthat afreeairgapof150mmisleftaroundthesidesand topof thestoveandatleast
50mmatthebackofthestovetoobtainmaximumheatoutputandforaccesstotherearofthestove.
Thehearthshouldextendatleast225mmfrom
If the stove is to stand in an appliance recess, it should stand wholly above a solid, non
hearth,atleast125mmthick(thismayincludethethicknessofasolidfloor).
FreeStandingAppliance
If the stove is not to
stand in an appliance recess, it may stand wholly above a hearth made of non
combustibleboard/sheetmaterialortiles,atleast12mmthick.
Thehearthshouldextendatleast150mmfromthesidesandrearofthestove,andatleast225mmfrom
thefrontofthestove.
Commissioning&Hando er
Uponcompletionoftheinstallation,allowasuitableperiodoftimeforanyfirecementandmortartodry
out.
Asmallfiremaythenbelitandcheckedtoensurethesmokeandfumesaretakenfromthestoveu
chimneyandemittedsafelytoatmosphere.
Donotrunthestoveatfulloutputforatleast24hours.
Oncompletionoftheinstallationandcommissioning,ensurethattheoperatinginstructionsandoperating
toolsforthestoveareleftwiththecust
Advisethecustomeronthecorrectuseoftheappliancewiththefuelslikelytobeusedonthestoveand
warnthemtouseonlytherecommendedfuelsforthestove.
Advisetheuseronwhattodoshouldsmokeorfumesbeemittedfromthestove.
The
usershouldbewarnedtouseafireguardtoBS8423inthepresenceofchildrenand/orinfirmpersons.
11
Thestovecanberecessedintoasuitablysizedfireplace
withaminimum50mmclearanceallaround
werecommendthat afreeairgapof150mmisleftaroundthesidesand topof thestoveandatleast
50mmatthebackofthestovetoobtainmaximumheatoutputandforaccesstotherearofthestove.
Thehearthshouldextendatleast225mmfrom
thefrontofthestove.
If the stove is to stand in an appliance recess, it should stand wholly above a solid, non
hearth,atleast125mmthick(thismayincludethethicknessofasolidfloor).
stand in an appliance recess, it may stand wholly above a hearth made of non
combustibleboard/sheetmaterialortiles,atleast12mmthick.
Thehearthshouldextendatleast150mmfromthesidesandrearofthestove,andatleast225mmfrom
Uponcompletionoftheinstallation,allowasuitableperiodoftimeforanyfirecementandmortartodry
Asmallfiremaythenbelitandcheckedtoensurethesmokeandfumesaretakenfromthestoveu
chimneyandemittedsafelytoatmosphere.
Donotrunthestoveatfulloutputforatleast24hours.
Oncompletionoftheinstallationandcommissioning,ensurethattheoperatinginstructionsandoperating
toolsforthestoveareleftwiththecust
omer.
Advisethecustomeronthecorrectuseoftheappliancewiththefuelslikelytobeusedonthestoveand
warnthemtouseonlytherecommendedfuelsforthestove.
Advisetheuseronwhattodoshouldsmokeorfumesbeemittedfromthestove.
usershouldbewarnedtouseafireguardtoBS8423inthepresenceofchildrenand/orinfirmpersons.
withaminimum50mmclearanceallaround
,but
werecommendthat afreeairgapof150mmisleftaroundthesidesand topof thestoveandatleast
50mmatthebackofthestovetoobtainmaximumheatoutputandforaccesstotherearofthestove.
If the stove is to stand in an appliance recess, it should stand wholly above a solid, non
combustible
stand in an appliance recess, it may stand wholly above a hearth made of non
Thehearthshouldextendatleast150mmfromthesidesandrearofthestove,andatleast225mmfrom
Uponcompletionoftheinstallation,allowasuitableperiodoftimeforanyfirecementandmortartodry
Asmallfiremaythenbelitandcheckedtoensurethesmokeandfumesaretakenfromthestoveu
pthe
Oncompletionoftheinstallationandcommissioning,ensurethattheoperatinginstructionsandoperating
Advisethecustomeronthecorrectuseoftheappliancewiththefuelslikelytobeusedonthestoveand
usershouldbewarnedtouseafireguardtoBS8423inthepresenceofchildrenand/orinfirmpersons.

JINHCE08 revB 03/10/11
12
OperatingInstructions
Thisapplianceisnotsuitableforuseinasharedflue
Thisapplianceshouldnotbeoperatedwiththedoorsopen
AerosolSprays
Donotuseanaerosolsprayonornearthestovewhenitisalight.
AirControls
Thisstovehasbeendesignedtoburnfarmoreefficientlythanatraditionalstove,withtheobviousnotable
featureofcleanglass.
However,forthisproducttoworkproperlyitmustbeusedcorrectly.
Itisessentialthatthestovehasanadequateairsupplyforcombustionandventilation.
PrimaryAir
Primary air is controlled via the lefthand control knob. Turning it clockwise increases the amount of
PrimaryAir.Thisprovidesaconventionalairdraughttothebedofthefire.
SecondaryandTertiaryAir
SecondaryandTertiaryairiscontrolledviatherighthandcontrolknob.Turningitclockwiseincreases
theamountofSecondaryandTertiaryair.TheSecondaryairprovides“Airwash”thatkeepsacleanand
uninterruptedviewofthefire.Tertiaryairaidsingoodsecondarycombustionofthefuelandreducing
emissionsintothechimneyandenvironment.
Warning!ThisAppliancewillbehotwheninoperationandduecareshouldbetaken.
WeadvisethatsuitableglovesareusedwhenoperatingthePrimaryandSecondaryaircontrols,andwhen
openingthedoor.
PrimaryAirControl Secondary and Tertiary
AirControl

JINHCE08 revB 03/10/11
13
RiddlingGrate
YourCleanburnstoveisfittedwithalocomotivetypegrate.Sothatdeashingcanbecarriedoutcleanly
andeasily,itisriddledfromtheoutsideofthestovewiththedoorsclosed.
Toburnwood,pushtheoperatingtoolupandawayfromyou.
Whenleftinthisposition,airisrestrictedthroughthebedofthefireprovidingasolidbasetobuildupa
bedofash.
Itmightprovebeneficialwhenburningmorereactivefuelstoleavethegrateina“neutral”position,thus
directingsomeunderfireairandsomeoverfireairtothefirebed.
NotesonWoodburning
Witha1.75kgloadofwood,thestovewillneedtoberefuelledapproximatelyonceeveryhour.
Woodcanbestackedinthestove,butcaremustbetakenthatlogsdonottouchthebaffle.
Woodburnsmostefficientlywiththesecondaryaircontrolintheopenpositionandtheprimarycontrol
closed.Adjustingthesecondarycontrolwillcontroltheburnrateofthestove.
Noteprimaryandsecondaryairisneededtolightthestove,seesectionentitled‘ ightingtheStove’
LightingtheSto e
Werecommendthatyouhavetwoorthreesmallfiresbeforeyouoperateyourstovetoitsmaximumheat
output.
Thisistoallowthepainttocureinsteadilyandtogivealongservicelifeofthepaintfinish.
Duringthiscuringinprocessyoumaynoticeanunpleasantsmell.Itisnontoxic,butforyourcomfortwe
wouldsuggestthatduringthisperiodyouleavealldoorsandwindowsopen.
First,loadthefirewithstartingfuel,i.e.paper,drysticksand/orfirelighters.
ightthefireatthebaseleavingallaircontrolsopen.Allowthefueltoreachasteadyglowandbuildthe
fireupgradually.Onceyouhaveagoodfireestablishedacrossthegratebed,furtherfuelcanbeaddedas
required.
ReducedCombustion
In order to shutdown the stove, closethe primary control,then close the secondary airby turning the
knobsfullyanticlockwise.
Ifthecontrolsareleftinthisposition,thefirewillbestarvedofairandwilldiedown.
Ifyouwanttorevivethefireitisrecommendedthattheprimaryaircontrolisopenfirst,andthenoperate
thesecondaryaircontrol.
Warning!Thestovewillremainhotforaconsiderabletimeafterthefirehasbeenextinguished.

JINHCE08 revB 03/10/11
14
RecommendedFuels
Cleanburnrecommendthatwoodlogsareburntinthisappliance.
Burnonlydry,wellseasonedwood,whichshouldhavebeencut,splitandstackedforatleast12months,
withfreeairmovementaroundthesidesofthestacktoenableittodryout.
Burningwetorunseasonedwoodwillcreatetardepositsinthestoveandchimneyandwillnotproducea
satisfactoryheatoutput.
Onlyauthorisedsmokelessfuelsmaybeusedinsmokecontrolareas.
Warning!Petroleumcokefuelsorhouseholdwastemustnotbeburntonthisappliance.
Thisapplianceshouldnotbeusedasanincinerator.Noliquidfuelsshouldbeburntonthisappliance.
Shouldanydifficultiesariseoverfuelqualityorsuitability,consultyourlocalapprovedcoalmerchantor:
HETAS td–Telephone01242673257–www.hetas.co.uk
SolidFuelAssociation–Telephone0800600000–www.solidfuel.co.uk

JINHCE08 revB 03/10/11
15
GeneralMaintenance
ThisAppliancerequiresregularmaintenancebyacompetentengineer.
Baffle
Thisshouldberemovedandcleanedatleastonceamonthtopreventanybuildupofsootorflyashthat
couldleadtoblockedfluewaysanddangerousfumeemission.
Ifthebaffleisremovedthechimney/fluewaycanbesweptthroughtheappliance.
Sto eBody
Thestoveisfinishedwithaheatresistantpaintandthiscanbecleanedwithasoftbrush.
Donotcleanwhilstthestoveishot.
ThefinishcanberenovatedwithCleanburnstovepaint.
GlassPanel
Cleantheglasspanelwhencoolwithproprietaryglasscleaner.
Highlyabrasivesubstancesshouldbeavoidedasthesecanscratchtheglassandmakesubsequentcleaning
moredifficult.
Wetlogsonheatedglass,abadlyaimedpokerorheavyslammingofthedoorcouldcracktheglasspanel.
Theglasswillnotfracturefromheat.
Firebricks
Innormaluse,thesecanlastformanyyears.Itispossiblehowever,tocrackthemiflogsarecontinually
jammedagainstthemoriftheyarefrequentlystruckwithapoker.
Check periodically for seriously cracked bricks, which can be replaced with new, available from your
dealer.
DoorCatch
Thedoorcatchmayrequireadjustmenttomaintainthedoorseal.
Toadjustthecatch:
oosentheM6grubscrew.
Rotatethecatchshaftonecompleteturntoachievethecorrectdooroperation.
Tightenthegrubscrew.

JINHCE08 revB 03/10/11
16
Rope
Checktheropearoundthedoor.Ifropeisbecomingdetached,useCleanburnropegluetoreattachit.If
theropeisinapoorcondition,areplacementropekitmaybeorderedfromtheCleanburnstovesspares
range.
ChimneyandFlueways
Itisimportantthatthechimney,fluewaysandanyconnectingfluepipearesweptregularly.Thismeans
atleastonceayearforsmokelessfuelsandatleasttwiceayearforwoodandotherfuels.
The baffle will need to be removed from its supports in order to sweep the chimney (see assembly
instructions).
Onlywirecentredsweeps’brushesfittedwithaguidewheelshouldbeused.
Ifitisnotpossibletosweepallpartsofthechimneythroughtheappliance,ensurethereisadequateaccess
tocleaningdoors.
PeriodsofProlongedNonUse
If the stove is to be left unused for a prolonged period of time then it should be given a thorough
clean to remove ash and unburned fuel residues. To enable a good flow of air through the appliance
to reduce condensation and subsequent damage, leave the air controls fully open
GlassGasket
TheglassgasketusedonthisapplianceisproducedfromaheatresistantmaterialcalledManniglas.
Theglassgasketwillhavetobereplacedwhenanewpieceofglassisfittedasthegasketsbecomebrittle
afterfiringthestove.
Overtimeyoumayalsofindthatthegasketchangescolour.
Thisisduetoareductioninthepigmentusedinthemanufactureoftheproductandnocauseforconcern.
Troubleshooting
Firewillnotburn
Checkthat:
Theairinletisnotobstructedinanyway.
Chimneysandfluewaysareclear.
Asuitablefuelisbeingused.
Thereisanadequateairsupplyintotheroom.
Anextractorfanisnotfittedinthesameroomasthestove.
Fluedraughtisaboveminimumlevel(seeinstallationinstructions).

JINHCE08 revB 03/10/11
17
Fireblazingoutofcontrol
Checkthat:
Thedoorsaretightlyclosed.
Theaircontrolsareallintheclosedposition.
Asuitablefuelisbeingused.
Theglassretainingclipsarenotloose.
Thedoorropesealsareingoodcondition
Fluedraughtisbelowmaximumlevel(seeinstallationinstructions).
Table of contents
Other Cleanburn Stove manuals
Popular Stove manuals by other brands

Thelin
Thelin GNOME How to replace

Tim Sistem
Tim Sistem Rittium 14 Installer manual

Quadra-Fire
Quadra-Fire DV-40 Installation, operation, venting and maintenance instructions

Desa
Desa Comfort Glow S26PT OWNER'S OPERATION AND INSTALLATION MANUAL

Hamlet
Hamlet Camborne Operating & installation manual

Lumme
Lumme LU-HP3640C user manual

RED
RED River Series instruction manual

L'Artistico
L'Artistico Pellicano M14 Installation, use and maintenance manual

Masport
Masport F33-NG1 Owners & installation manual

Sierra Products
Sierra Products Pellet Stoves Specification sheet

Quadra-Fire
Quadra-Fire SAPPHIRE-D-CSB owner's manual

Jøtul
Jøtul GF 160 DV Installation and operation instruction