Clear-Com DX210 User manual

HME # 400G752
Rev A 11/3/16
1301 Marina Village Parkway, Suite 105
Alameda, Ca. 94501 USA
www.clearcom.com
Quick Reference Guide
DX210
Power/Mode
lights
Power/Mode
lights
Power button
Power button
Button Functions
or Power On/Off To Intercom Channel 1, including 2-wire/4-wire connections
or Increase Volume To Intercom Channel 2, including 2-wire/4-wire connections
or Decrease Volume
To All Wireless Headsets & Beltpacks, Base, ISO Relay and
AUX OUT (if activated)
Settings & Adjustments
All-In-One Headset Lights Off:
Be sure Headset power is off.
Press & hold while you press & release the Power button.
Beltpack Sidetone Adjustment:
Press & hold while you repeatedly press to increase or to decrease.
Beltpack
For Technical Support
In The Americas and Asia – Tel: +1.510.337.6600 or 1.800.462.4357 Menu option 1 – Hours: 8:00am-5:00pm Pacic Time
In Europe, Middle East and Africa – Tel: +44.1223.815000 – Hours: 8:00am-5:00pm GMT
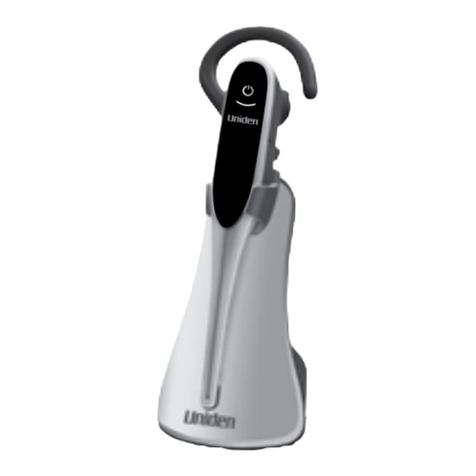
All-In-One Headset
STATUS REG AUTO NULL Local Headset Controls
Register Beltpack (BP) or All-In-One Headset (HS)
¾Be sure BP/HS is turned off.
¾Press REG button on base station.
– STATUS display on base station shows “o” for registration mode.
¾On BP/HS, press and hold while you press / and then release all buttons.
– Power lights blink red, then green and go off, and one power light comes on green.
– Registration number appears on base station STATUS display.
AUTO NULL Adjustment (only if using 2-wire interface)
¾If echo is heard in wireless Beltpacks or All-In-One Headsets on CH1 or CH2:
¾Use pointed object (e.g. pen) to press & hold CH1 or CH2 AUTO NULL button for 2 seconds.
CAUTION: Before pressing the AUTO NULL button, be sure there are no open microphones
on the wired system. Notify wired system users that a loud noise may occur in their headsets
during the auto null adjustment.
The system may be out of operation for approximately 25 seconds during this adjustment.
Local Headset Communication
¾SEL button selects communication with IC1 or IC2, or IC1 & IC2 or ISO.
– IC1 or IC2, or IC1 & IC2 or ISO lights indicate selection.
¾TALK button
– Press & release quickly to “latch on” for open communication.
–Press&holdwhiletalkingformomentarycommunication–releasewhennished.
¾VOLUME control adjusts audio level in local headset earpiece.
¾MIC LEVEL control adjusts audio level going out from local headset microphone.

DX SERIES LED AID
Powering on any DX base station will produce on the LED display the number “8” for approximately
3 seconds.
Blank display indicates the base is ready for operation.
You can register beltpacks under this condition.
Single horizontal bar indicates the base is in secondary mode and registering to a base has been
initiated and successfully linked with a primary base. You can register beltpacks in this mode.
Two horizontal bars indicate that the base is in secondary mode and ready to be synced with a primary
base. You cannot register beltpacks in this mode you must sync to a primary base rst.
Three horizontal bars indicate the base is in secondary mode and has been linked with a primary base
but the primary base is no longer available to the secondary. It takes a few seconds for the secondary
to recognize that the primary is not available and revert to a primary state. However, you can register
beltpacks under this condition.
Syncing Secondary to Primary Bases Feature
To sync the bases, perform the following steps:
¾Press the REG or REGISTER BELT-PAC* button on the primary base and then press the REG or
REGISTER BELT-PAC* button on the secondary base to begin the sync process.
¾As you repeatedly press the REG or REGISTER BELT-PAC* button on the secondary you will see
the numbers 1, 2, and 3 cycle through on the display. The numbers indicate the three available
quadrants. Note: The primary is in the 0 quadrant by default.
¾To select a quadrant, simply release the button at a desired number and wait. If successful, you
willbrieyseeablankdisplayfollowedbyasinglehorizontalbarinthesecondary LED display.
For additional secondary bases, assign each base to its own quadrant. Refer to the appropriate
equipment manual for primary to secondary conversion.
After the bases are synced when the secondary is powered up the number “8” will appear followed by one of the
numbers below on the secondary base LED display:
The number “1” indicates the quadrant
the secondary has been placed in.
The number “2” indicates the quadrant
the secondary has been placed in.
The number “3” indicates the quadrant
the secondary has been placed in.
The letter “F” will appear when the base registry is at its maximum of 15 registered beltpacks. You will
need to clear the registry to add a beltpack. To clear the registry power down the base. Hold down the
CLR/BND or RESET REGISTRATION*buttonrstandthenpowerthebaseonwhenyouseethe“8”on
the LED display release the CLR/BND or RESET REGISTRATION*. If done successfully you will see a
small "c" on the LED display.
Spectrum Friendly Feature
Spectrum Friendly option: Hold down the CLR/BND (or RESET REGISTRATION*)buttonrstthenpressand
hold down the REG (or REGISTER BELT-PAC*) button till you see the letter “A” or “L” or “H”. Then release both
buttons and quickly press the CLR/BND (or RESET REGISTRATION*) to cycle through the “A” or “L” or “H”.
options. Stop at your selection and wait for the LED display to go blank and a lower case “c” will appear on the
status LED. After this procedure is performed all bases, beltpacks and communicators will need to be re-registered
to the base.
2400 to 2483.5 MHz is the operating frequency range.
2401.92 to 2439.94 MHz is the operating frequency range.
2443.39 to 2481.41 MHz is the operating frequency range.
The lower case “c” will appear when the registry on the base station is cleared. To clear the registry
power down the base. Hold down the CLR/BND or RESET REGISTRATION*buttonrstandthen
power the base on when you see the “8” on the LED display release the CLR/BND or RESET
REGISTRATION*. If done successfully you will see a small "c" on the LED display.
NOTE: The display indicates that the registry of a base station has been cleared of all beltpacks
and secondary base stations that were registered to the base station.
Another method to clear the registry would be to start by holding down the CLR/BND or RESET
REGISTRATION*buttonrstandthenpressingtheRESET button until you hear a small click and then
release the CLR/BND or RESET REGISTRATION* button. If done successfully you will see a small "c"
on the LED display. We recommend you use a very small paper clip.
The lower case “o” will appear when the REG or REGISTER BELT-PAC* button is pressed and
indicates that the base is ready to register a beltpack.
When registering beltpacs on DX bases that can carry 15 beltpacs please note that the numeric
countdisplayedontheLEDwillbeinhexadecimal.ThismeansthattheLEDwillrepresenttherst10
beltpacs as 0 to 9. Beltpack 11 will be represented by the letter “A”, beltpack 12 will be represented by
the letter “B” and on up to beltpack 15 as “E”. Please see below.
Beltpack or Headset 1234567891011 12 13 14 15
Registry 0123456789ABCDE
NOTE
* Button has the same function but
with a different description on the
equipment due to vintage.
NOTE
* Button has the same function but
with a different description on the
equipment due to vintage.
Table of contents
Other Clear-Com Headset manuals
