ClimaTemp Portables CT-60 User manual

OPERATION MANUAL
1
OPERATION MANUAL
CT-60
READ THIS MANUAL CAREFULLY FOR INSTRUCTIONS ON CORRECT
INSTALLATIONAND USAGE,AND READ ALL SAFEGUARDS
PORTABLE SPOTAIR
CONDITIONER

OPERATION MANUAL
2
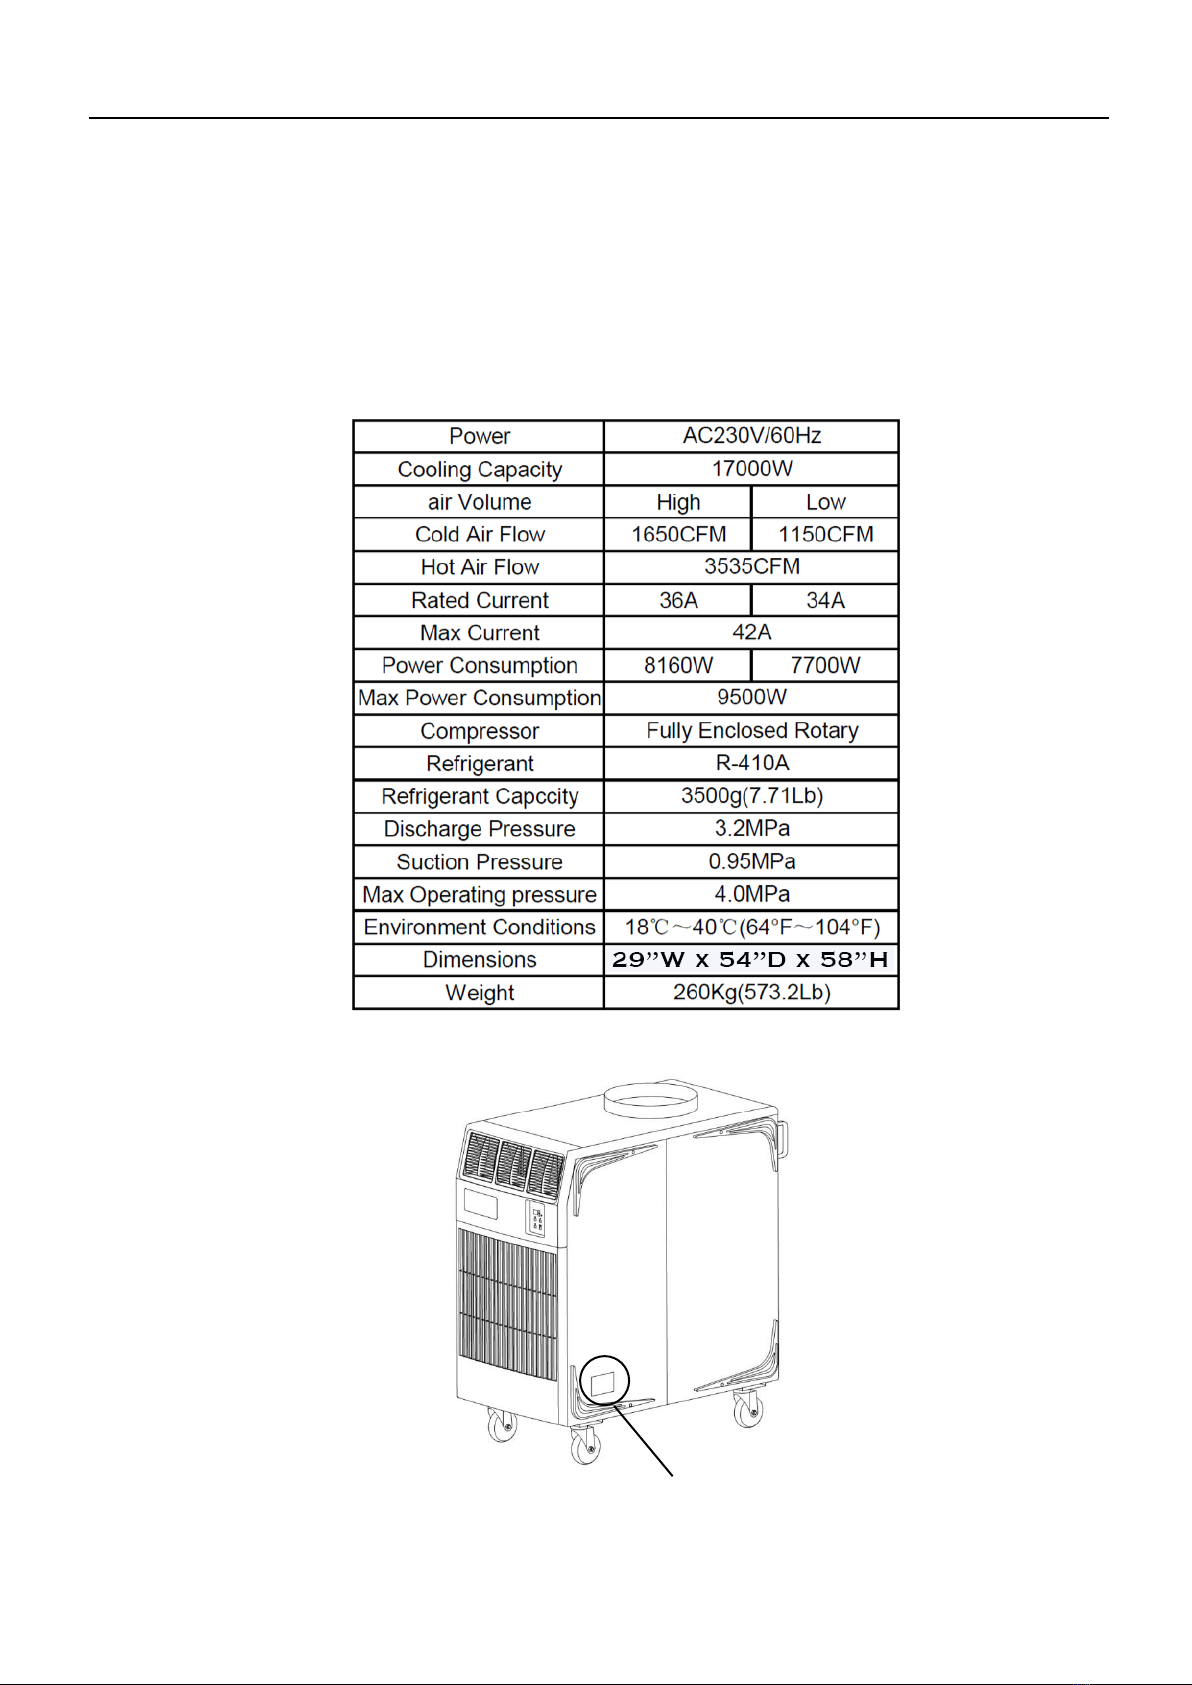
SERIALNUMBER LOCATIONAND IDENTIFICATION
The serial number and name plate can be located near the lower right side of the unit.
Nameplate Label
Nameplate Label Position
Serial Number

OPERATION MANUAL
3
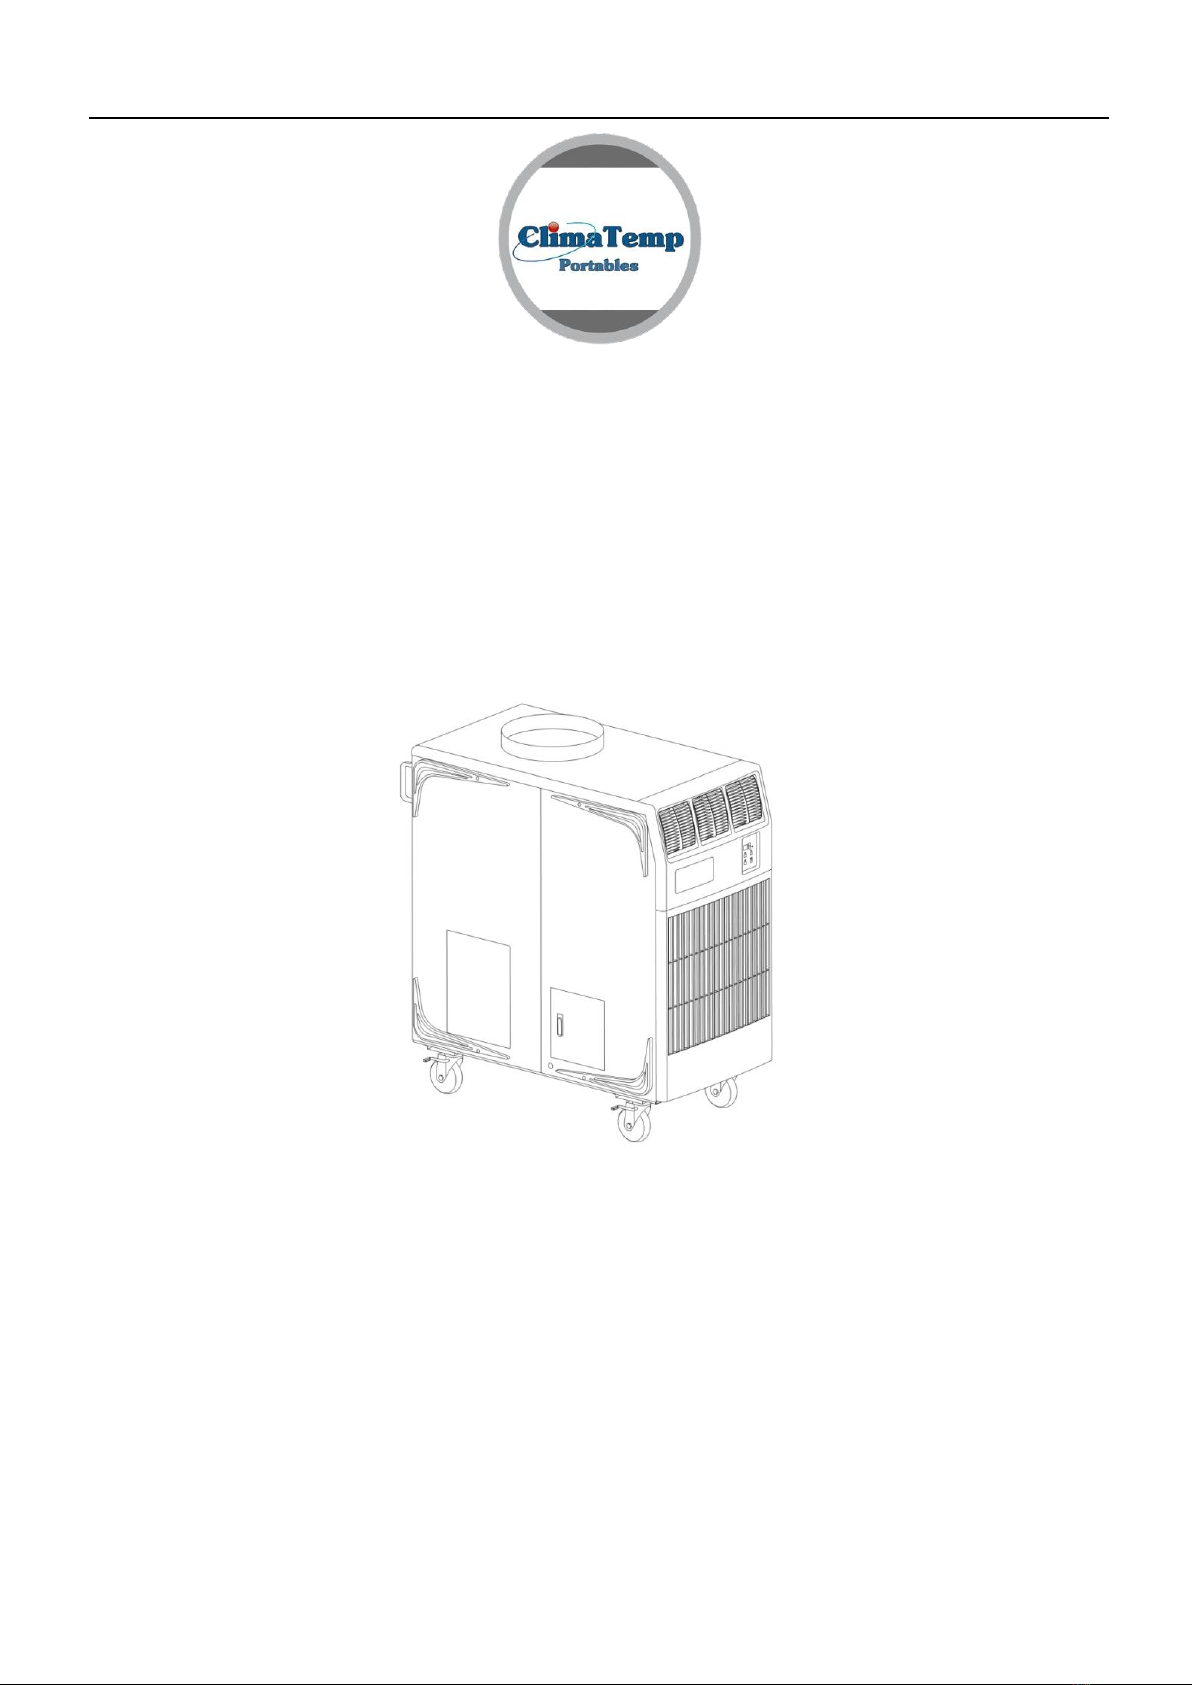
Congratulations on your purchase of a ClimaTemp Commercial Portable spot air conditioner.
Exclusive engineered features only from ClimaTemp.
•Slim deign to fit through a standard doorway.
•Efficient 2 speed evaporator airflow.
•Design Patent- protected metal condenser coil decorative cover overlay with slide out
filters.
•QuickMove Condenser and Evaporator filters. For quick effortless cleaning.
•Stylish and functional side bump guards to protect the unit from dents and scratches.
•Rear power cord pocket for storing power cord.
Features:
•Provides 60,000 Btu/h of cold air... maximum spot cooling to quickly cool any
environment.
•LED Controller.
•Operates on standard 208/230V power.
•Built in Beckett Brand Condensate pump with overflow shutdown and alarm.
•Diagnostic codes for easy troubleshooting
•Automatic Restart if power is lost.
•No costly installation necessary. Roll it to anywhere.
•Provides cooling down to 64°F ambient.
•Wide operating range from 64°F to 104°F.
•Built rugged for everyday use and designed for the rental industry.
•Classic design for a great look in all commercial applications.
•High quality heavy duty locking castors for effortless movement.

OPERATION MANUAL
4
INVENTORY
After unpacking your ClimaTemp Portable spot air conditioner, please check to make
sure you have the following items:
1.
CT-60 Portable spot air conditioner
2.
Operation Manual
Note: If any of these items were not included in the box or appear damaged,
please contact your ClimaTemp Portable spot air conditioner reseller for
replacement.
Left Side
Handle
Right Side
Handle
Protector

OPERATION MANUAL
5
INSTALLATION & GENERAL SAFETY INFORMATION
•Do not use the unit at conditions above 104 ℉(40℃) or below 64 ℉(18℃).
•Unit Designed for indoor usage only. Do not submerge or spray water on the
spot cooler. This may cause fire, electric shock or malfunction.
•Do not place fingers, hand or objects into the air outlet or inlet.
•Do not use in harsh environments containing corrosive gas or vapors. This
will deteriorate and damage components and electronics resulting in shock,
fire, and leaks.
•Use 208/230V-60hz, 1Phase power supply only. Securely plug into grounded
50amp outlet.
•Do not use any type of extension cable which may cause a risk of fire or electric
shock.
•Do not bend or kink power cable. Damage to power cord can cause electric
shock or injury.
•Do not place anything on the top of the machine. Do not stand or place hands
or fingers inside of the unit while in operation.
•Install unit on smooth level ground. Lock the castors breaks to minimize
rolling
and movement.
•Always power off unit by the control panel, do not turn off by removing plug
from power source.
•Condenser exhaust should always be ducted to the exterior or outside
for maximum cooling.
•Do not pinch, minimize or constrict the duct size of the exhaust (16”) as this
may cause then unit to malfunction or damage to the unit.
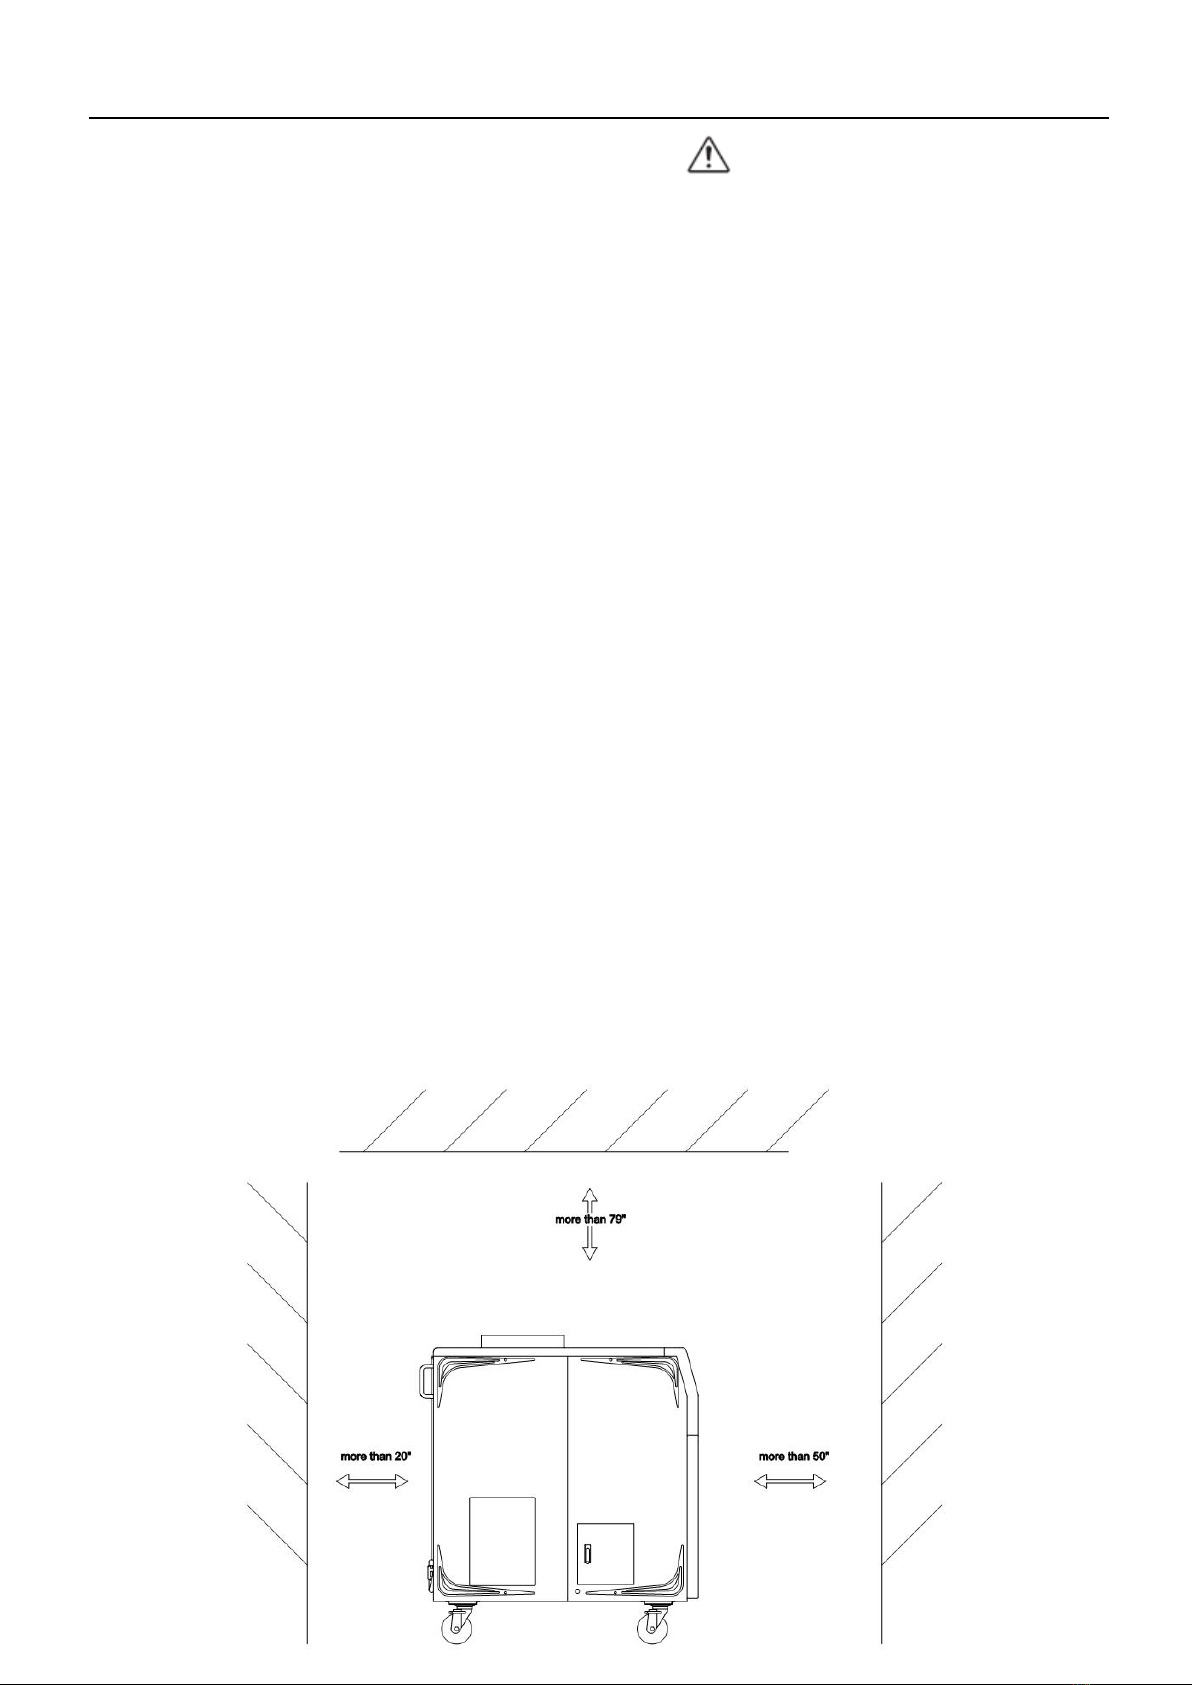
When in operation, the front and back of the machine should be more than 20" from the
wall or other barrier. The cold air exhaust should be at least 50" away from any barrier
and hot air exhaust should be more than 79" from roof or barrier.

OPERATION MANUAL
6
INSTALLATION (cont.)
Moving the Unit
Unlock the casters and push the Portable spot air conditioner unit using the side
handles to a flat, level surface and set the casters to the LOCKED position.
Right Side
Handle
Left Side
Handle

OPERATION MANUAL
7
INSTALLATION (cont.)
Plugging in the Unit
1.
Check the prongs and surface of the power cord plug for dust/dirt. If dust and/or dirt
are present, wipe off with a clean, dry cloth.
2.
Check the power cord, plug and prongs for damage or excess play. If any damage or
excess play is found, contact ClimaTemp Portables or a qualified technician for
repair.
WARNING:
If the power cord or plug is damaged, replacement should only be performed by
qualified electrical personnel.
CAUTION: The power source should be a dedicated single outlet circuit with UL listed
short-circuit and ground fault protective breaker. Do not share the AC outlet with any
other instrument or equipment. The minimum power supply rating and the maximum
fuse size for each corresponding model are listed below.
MODEL
MINIMUM POWER SUPPLY RATING
RECOMMENDED
FUSE SIZE
CT-60
208/230V, single phase,60Hz,50A
50A maximum

OPERATION MANUAL
8
OPERATION
Control Panel
Before operating the unit, it is important to familiarize yourself with the basic controls
located on the control panel.

OPERATION MANUAL
9
OPERATION(cont.)
Operating Method
1.
Power Switch:
After plugging into power, the power switch LED indicator will illuminate, press the
POWER button to turn on and turn off the unit.
2.
Air volume selection:
Press Fan Speed to select the high or low air volume.
3.
Fahrenheit and Celsius Temperature setting
Procedure: Press and hold the Fan Speed button while plugging the unit into the
power supply; once the digital display shows CF, release the Fan Speed button. If the
current setting is in Celsius, the indicator will display ℃. If the current setting is in
Fahrenheit, the indicator will display
F
.
Press the temperature button to change to C
or press the timer button to change to F. Store the settings by pressing the Fan
Speed button.
4.
Temperature setting
Press the temperature button, the temperature button will start to blink. Press the up
and down adjustment button on the display to set the temperature you desire. Once
selectedwait15secondsandyourpreferredtemperaturewillbeset.Thedisplaywill
showthetemperature of theenvironment(asdefault).Therangeis18
℃
~35
℃
(64
F
~95F). When the environment temperature is higher than the setting temperature,
the compressor will engage, producing cold air. When the environment temperature
is lower than the setting temperature, the compressor will disengage and shut off.
5.
Fan Only Mode
To operate in fan mode, press the temperature UP button to its highest setting (95).
This will operate the unit in fan mode only.
6.
Time setting
Press timer button, the timer LED turns on, temperature light will turn off, the display
will show the time our unit will turn off (12 hours), press up and down button to
change the time (1-12 hours), 3 seconds later the display will show the temperature of
the environment again, the temperature light will turn on.
7.
Alarm indicator/unit error
When the unit detects a condensate pump malfunction, or an overcurrent, overheat,
or other trouble is detected by the unit, the alarm indicator will turn on. When the
unit stops working, LED display will show the error code.

OPERATION MANUAL
10
LED Display Error Codes:
Code
Description
Reason
CO
Compressor Over-current
Protection
Surrounding Temperature too high.
Hot air exhaust is obstructed.
Input voltage is too high or too low.
Compressor problem.
Relay problem.
P
Pressure too high in cooling system
Surrounding Temperature too high.
Hot air exhaust is obstructed.
Surrounding Temperature to low.
tc
Evaporator Frost Protection
Cold air exhaust system is obstructed
FL
Water level warning/Pump failure
Check Pump
t1
Inlet air sensor problem
Connector problem or sensor
damaged
t3
Evaporator temperature sensor
problem
Connector problem or sensor
damaged

OPERATION MANUAL
11
Condensate Pump
The CT-60 is equipped with a built-in condensate pump. The pump will eliminate the need
for emptying out a drain tank.
General Pump information and Troubleshoot
During COOL mode, condensate water accumulates in the condensate pump. When
the pump reservoir becomes full, the pump will engage and discharge the condensate.
•Ensure condensate line is free of kinks. Clogs in the condensate line will cause a
malfunction and property damage due to leaks.
•If an audible chirping sound can be heard and LED displays “FL”, the unit will stop
operation.
•After turning off the power and breaker to the unit, remove any dirt or debris inside
the pump and check the pump for any blockages.
When performing maintenance or troubleshooting of the pump, stop the operation
of the unit and turn off the breaker to avoid possible electric shock or injury.

OPERATION MANUAL
12
Hose Installation
Attach condensate line to pump by accessing the pump door located on the lower left side
of the unit. When hanging hose from the ceiling make sure not to exceed 20’ vertically.
Run the hose at a downward slope from its highest point. Always attach condensate line
to pump with a secure hose clamp.
Condensate pump lift max height is 20 feet. Run the hose downward at ¼” per foot
from its highest point. Pump may malfunction and cause property damage from leaks if
not properly installed.
Testing of Condensate Pump
1. Turn unit on.
2. Pour water into the inlet hole on the condensate pump reservoir.
3. Make sure pump is running by checking the condensate outlet line for water drainage.
4. Reinsert the inlet hose into the inlet hose of the condensate pump.
Condensate line access hole

OPERATION MANUAL
13
DAILY INSPECTION & MAINTENANCE
Checking the Condensate Pump
1. Open the condensate pump access door.
2. Confirm pump is level.
3. Confirm condensate line is attached to the pump securely by a clamp.
4. Make sure there are no kinks in condensate line.
5. Do not exceed 16’ height with condensate line.
Clean the Air Filters
Clean the air filters once a week. If the unit is used in a dusty environment, more
frequent cleaning may be required. A dirty filter can reduce air output resulting in a
decrease in the cooling capacity and damage to the compressor and components.
Filter Removal Method
1.
Turn the unit off by pressing the Power button.
2.
Remove the two air filters.
Note: To remove the front evaporator filter, slide the filter by pulling the filter out of
the machine’s front evaporator panel. To replace the filter slide filter back into
evaporator panel.
To remove the rear condenser filter, pull filter up and out of the condenser frame. To
replace filter, slide filter back into condenser frame with tab facing up.

OPERATION MANUAL
14
Filter Cleaning Method
1.
Remove filters. Dust, dirt and particulate can be removed from the filter with a
vacuum cleaner, or rinse in cold or lukewarm water. If the
element is extremely dirty, wash with a neutral
detergent.
2.
After the element has been cleaned, rinse with
clean running water, allow to dry, then reinstall filters into unit.
End of Season Maintenance.
1.
Place power cord in power cord pocket.
2.
Remove all water from condensate pump. Service and clean pump.
3.
After cleaning the unit completely dry with scratch resistant cloth.
4.
Unit should be operated in fan mode (bring unit to highest set point) to dry
for 2-3 hours.
5.
Cover unit to prevent dust and humidity.

OPERATION MANUAL
15
TROUBLESHOOTING
Check the following items before calling your ClimaTemp Portable spot air conditioner
reseller or a qualified technician.
CONDITION
POSSIBLECAUSE
REMEDY
Unit does not
operate
1. Ground fault breaker trip or
breaker trip from power source.
1. Reset breaker or reset power cord
GFCI if applicable.
2. No Power to control board.
2. Check power source.
Water leaking
1. Drain pan port plugged
1. Clear drain pan outlet.
2. Drain line Misaligned or not seated into
pump.
2. Place and secure the drain line back into
condensate pump.
3. Condensate line plugged or clogged.
3. Check drain line for clogs or kinks. Replace
if necessary.
4. Unit not level.
4. Reposition or move unit to a level surface.
No cooling.
1. The surface of the condenser is dirty.
1. Clean (vacuum) the surface of the
condenser. Do not use water or coil
cleaner.
2. Exhaust fan malfunction.
2. Repair, replacement of exhaust fan motor.
3. Temperature of the external
environment is too high
3. Use the unit only if surrounding
temperature is between 64F and 104F
4. The capacitor of the compressor is
damaged.
4. Replace the capacitor
5. Input voltage is too high or too low.
5. Make sure voltage is correct.
6. Compressor thermal overload
protection
6. Restart theunitafter ithas cooled down.
7. Compressor motor is damaged.
7. Repair, replace Compressor motor if
needed.

OPERATION MANUAL
16
Parts List Breakdown

OPERATION MANUAL
17
Limited Warranty
ClimaTemp Portables Inc. warrants its portable air conditioner products and accessories against defects
in material or workmanship. Under ordinary use ClimaTemp will, at its sole discretion, repair or replace
any defective product or part covered by this warranty. Warranty coverage is (12) months for all parts on
the ClimaTemp product and (36) months on the compressor or compressor components. This warranty is
in effect from the date of purchase on any invoicing for the end user. This Limited warranty is conditional
on the return of the part or unit to the manufacturer with approval in which all goods and services are
freight prepaid from the customer or distributor. This warranty does not cover malfunctions or misuse
beyond ClimaTemp’s control including improper operation, neglect, abuse, abnormal use, incorrect
electrical connections, and failure to perform routine maintenance. Furthermore, ClimaTemp will not be
responsible for improper installation that damages unit or components. Any shipping damage or improper
transport is not covered under this warranty.
DISCLAIMEROF WARRNTY EXCEPT AS EXPRESSLY PROVIDED INTHISSTANDARD WARRANTY POLICY STATEMENT, CLIMATEMP
PORTABLESHEREBY EXPRESSLY DISCLAIMS ALL REPRESENTATIONS, CONDITIONS AND WARRANTIES,WHETHER EXPRESS OR
IMPLIED,INCLUDING BY WAY OFEXAMPLE AND NOT LIMITATION, THE IMPLIED WARRANTIES OFTITLE,MERCHANTABILITY,
NONINFRINGEMENT AND FITNESS FOR A PARTICULAR PURPOSE. LIMITATION ON LIABILITY NOTWITHSTANDING ANYTHING
HEREIN TO THE CONTRARY, IN NO EVENT WILL CLIMATEMP PORTABLES BELIABLE FOR ANY SPECIAL, INCIDENTAL, PUNITIVE
ORCONSEQUENTIAL DAMAGES WHATSOEVER, INCLUDING LOSS OF PROFITS, WHETHER ARISING IN CONTRACT, TORT,
WARRANTY OR OTHERWISE, EVEN IF IT HASBEEN ADVISED OFTHE POSSIBILITY OF SUCH DAMAGES. THE LIMITATIONS SET
FORTH HEREWILL APPLY EVEN IF THE REMEDIES OF ERROR CORRECTION, REPAIR OR REPLACEMENT, REPERFORMANCE OF
SERVICESAND REFUND OFPAYMENTS COMPLETELY FAIL OF THEIR ESSENTIAL PURPOSE.NOTWITHSTANDING ANYTHING
HEREIN TO THE CONTRARY, THE LIMIT OF CLIMATEMP PORTABLES (WHETHER IN CONTRACT, TORT, NEGLIGENCE, STRICT
LIABILITY, BY STATUTEOR OTHERWISE) TO CUSTOMER OR TO ANY THIRD PARTY WITH RESPECT TO WHICH SUCH CLAIM IS
MADE.GOVERNING LAW AND JURISDICTION
ClimaTemp Portables Inc.
844-349-5665
www.Clima-Temp.com


This manual suits for next models
1
Table of contents
Other ClimaTemp Portables Air Conditioner manuals
Popular Air Conditioner manuals by other brands

Whynter
Whynter ARC-12SDH instruction manual

MegaLife
MegaLife NEBULA GREEN R32 Use and Installation Instructions

Mitsubishi Electric
Mitsubishi Electric NTXFKs15a112a Series manual

Hitachi
Hitachi RAS-10NHZ4(H) instruction manual

Samsung
Samsung AR18NSWSPWKXCV Service manual

Samsung
Samsung AS07P2GE/XCH Owner's instructions