Cloud Telematics Atlas User manual

USER MANUAL
V1.2


DISCLAIMER
This is an auxiliary product for recording the external images of
vehicles, which does not have the function of guaranteeing the
safety of users.
Virtus Fleet accepts no liability for any driving accident caused by
product failure, information loss, operation of the product and any
loss caused by the product. By using this product, you agree to
these terms.
Due to differences in vehicle condition, driving mode and driving
environment, some functions of this product may not work
properly. Power issues, operation beyond normal temperature and
humidity, collision, memory card damage amongst other reasons,
may lead to loss of footage; we do not guarantee that all data on
the camera/SD cards can be completely saved or retrievable under
any extreme circumstances. The driving video recorded by this
product is for reference only.
Please ensure to take care when installing the product, making sure
that the driver’s line of sight or any air bags are not blocked.
Please use the standard car charger head, power cord and other
accessories of this product to avoid any failure caused by the
discrepancy of specications. Virtus Fleet shall not be responsible
for any loss of recording caused the use of a non-standard power
cable.
Please use a high-quality SD card with 16GB to 128GB storage
capacity, with transmission speeds no less than MLC Class 10
standard. Inferior memory may cause problems, such as the
nominal reading and writing speed inconsistent with the actual
reading and writing speed, and the nominal capacity inconsistent
with the actual capacity. If video is lost or damaged due to the use
of inferior memory card, Virtus Fleet shall not be liable.

The default le partition format of the storage card may not be
consistent with the format supported by this product. Please
format it in the device when you insert it in the device for the rst
time. Do not insert or unplug the memory card in the boot state, or
damage may be caused to the SD card.
As SD cards (along with all digital storage) will degrade with use
we recommend that you check your recordings occasionally for
inconsistencies (such as unexplained gaps in recording). In case of
such situation, please replace the SD card in due time.
Virtus Fleet due not assume any responsibility for the failure caused
by the memory card.
The device is equipped with a built-in super capacitor battery that
should not be removed. Batteries (battery packs or combination
batteries) shall not be exposed to such conditions as sunlight,
re or similar overheating. Do not attempt to replace any internal
battery.
Please keep the equipment dry, avoid any contact with water to
prevent battery failure. If battery deformation, swelling or leakage
occur during operation or storage, please stop using the device
immediately and contact the after-sales service department to
prevent and further issues.
Do not subject the device to any unnecessary shock or vibration, to
avoid damage to the device, resulting in dysfunction or becoming
unusable.
If the device needs cleaning, please do not use any chemical
solvent or detergent to clean the equipment. It would be best to
use a dry cloth, if possible.
Please keep the product away from any strong magnetic eld, as
this may cause damage to the equipment. Do not use this product
in high temperatures above 60°c and low temperatures below-10°c.
After prolonged operation, the outer casing may get hot, this is
normal behaviour but will need to be handled with care.
Please use this device within the scope permitted by law.

APPEARANCE
ITEM NO. DESCRIPTION ITEM NO. DESCRIPTION
1 Mount/Bracket 6 Mini USB Connector (for rear cam)
2 Speaker Hole 7 Memory Card Slot
3 Camera Lens 8 Power Button
4 Mini USB Connector (for power) 9 Indicator Light
5 Rest Button 10 Microphone
INSTALLATION INSTRUCTIONS
1. FRONT CAMERA INSTALLATION:
1.1 - Please clean the windshield glass before installation. Take the
static sticker from the box and stick it on the front windshield, in
the recommended area shown below in red. Squeeze the bubbles
between the static sheet and the glass during installation.
1.2 - As shown in the gure below, remove the protective sticker
on the camera bracket and place the camera in the middle of the
electrostatic sticker. Please press the base of the bracket by hand
to ensure that the high-temperature adhesive is in close contact
with the static adhesive.

1.3 - In line with the image below, lay the power cable along the
top of the front windshield, down pillar Aand around the glove
compartment on the passenger side, ending at the cigarette lighter
port.
1.4 - Adjust the angle of the camera to ensure correct positioning.
This can be seen via the smartphone application.
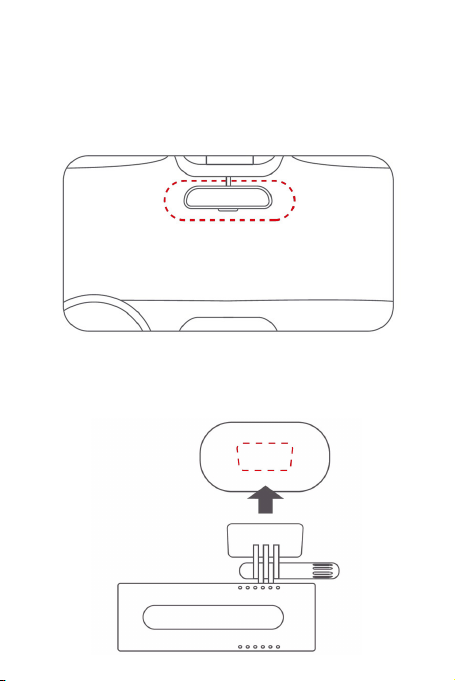
2. REAR CAMERA INSTALLATION:
2.1 - Take the electrostatic
sticker from the box and place it
onto the rear windshield in the
recommended position, as shown
on the right.
Please wipe the glass before
installation and squeeze the
bubbles between the static paste
and the glass during installation.
A
Centre position of rear windshield

2.2 - Remove the protective
sticker on the camera bracket and
place the camera in the middle of
the electrostatic sticker.
Press the base of the bracket to
ensure that the camera adhesive
is in close contact with the static
adhesive.
2.3 - Run the secondary camera cable through the vehicle (see
image below) and connect it to the main camera unit.
2.4 - Adjust the angle of the secondary camera, to suit your
required viewing angle, which can be rotated 360 degrees. In
addition, the image can be ipped 90 degrees to allow either
horizontal or vertical installation. The default position is shown in
the gure below
KEY FUNCTIONS
This product has only one button which is the power button.
Pressing the power button for different lengths of time, will
achieve different functions, as shown in the graph.
OPERATION FUNCTION
Touch and hold for 2 seconds Camera ON / OFF
Press once WiFi ON / OFF
Press 3 times Format memory card
Press 5 times Reset camera
PRODUCT PARAMETERS
Model Name: Atlas
Product Code: VF9100
Device Description: Dash Camera
Speaker: Yes
Microphone: Yes
Picture Pixels: 200W
Video Pixels: 200W
Memory capacity: 1GB
SD Capacity: Up to 128GB
Image Resolution: 1080P at 30FPS
SMARTPHONE APPLICATION USAGE GUIDE:
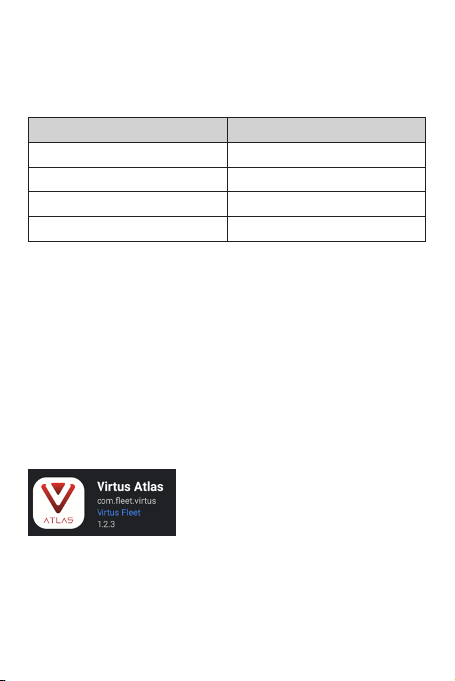
This product needs to be used in combination with the Virtus Atlas
smartphone application. Please search Virtus Atlas in either the
Google Play Store or the Apple App Store to install.
Once the app is downloaded and the camera is powered up, you
can access the device by searching for the WiFi SSID called Atlas.
Initial password: 12345678
PLEASE NOTE: Some Android phones require mobile data to be
disabled and location services to be enabled in order to connect
to the camera correctly.
APPLICATION OPERATION
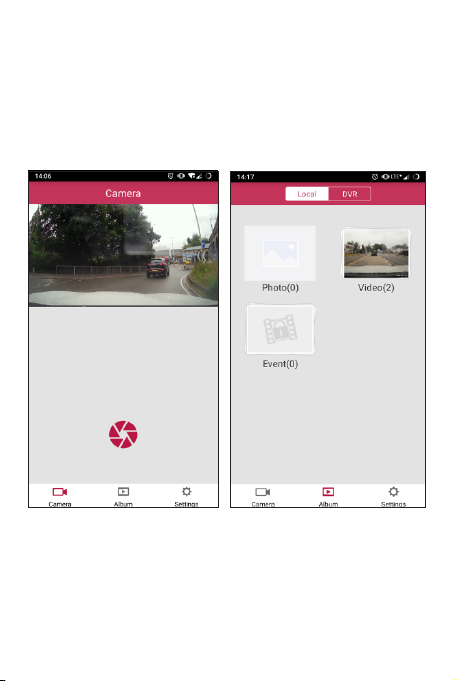
Initially when you open the app the live view will be displayed.
Underneath the main video you have the option of taking a picture
with the red shutter icon, as shown below.
To access your recorded video tap on the icon labelled Album at
the bottom of the screen. From here you can access video stored
on the camera (from the icon at the top of the screen labelled
DVR) or video saved to your device (from the icon at the top of the
screen labelled Local).
PLEASE NOTE: For the location to be displayed alongside your
video, the le needs to be downloaded from the camera and
played back within the Local tab.
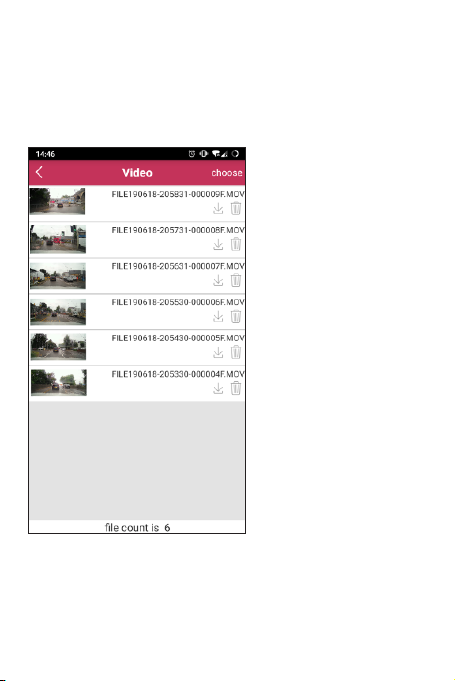
To save a le to your device, go to Album, DVR then choose either
Photo, Video, or Event.
Once the le list has loaded tap the downward facing arrow. This
le will then be available in Local for you to view or send any time.
You can also delete the le by using the icon that looks like a bin.
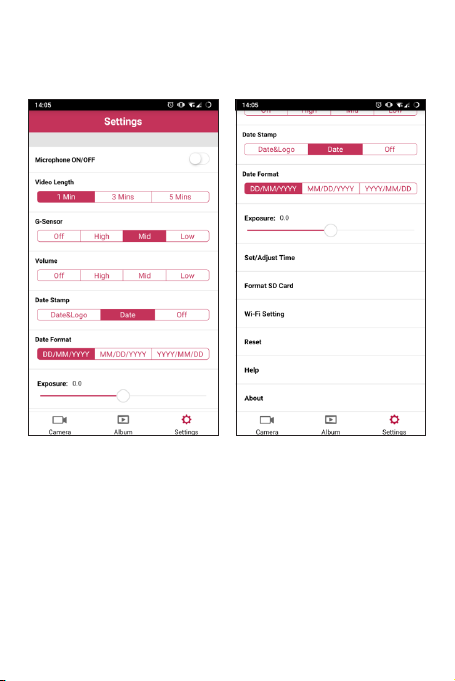
To access the settings tap on the icon labelled Settings at the
bottom of the screen. Here you can change options such as audio
recording, G-sensor sensitivity, and le length. You can also adjust
the time and format the SD card from the device itself.

NOTES

NOTES


This manual suits for next models
1
Table of contents


