Cocraft KCM22B User manual

ENGLISHSVENSKANORSKSUOMIDEUTSCH
Ver. 20180824
Original instructions
Bruksanvisning i original
Originalbruksanvisning
Alkuperäinen käyttöohje
Original Bedienungsanleitung
Art.no Model
41-1580 KCM22B
Important:
Read the entire instruction manual
carefully and make sure that you fully
understand it before you use the
equipment. Keep the manual for future
reference.
Viktig information:
Läs hela bruksanvisningen noggrant och
försäkra dig om att du har förstått den
innan du använder utrustningen. Spara
bruksanvisningen för framtida bruk.
Viktig informasjon:
Les disse anvisningene nøye og forsikre
deg om at du forstår dem, før du tar
produktet i bruk. Ta vare på anvisningene
for seinere bruk.
Tärkeää tietoa:
Lue nämä ohjeet huolellisesti ja varmista
että olet ymmärtänyt ne, ennen kuin
alat käyttää laitetta. Säilytä ohjeet
myöhempää tarvetta varten.
Wichtiger Hinweis:
Vor Inbetriebnahme die komplette
Bedienungsanleitung sorgfältig
durchlesen und aufbewahren.
41-1580
TWO-STAGE SNOW BLOWER
SNÖSLUNGA
SNØFRESER
LUMILINKO
SCHNEEFRÄSE
CLEARING WIDTH 56 CM

ENGLISH
2
Two Stage Snow Blower
Art.no 41-1580 Model KCM22B
Please read theentire instruction manual before using theproduct and then save it for future
reference. We reserve theright for any errors in text or images and any necessary changes
made to technical data. In theevent of technical problems or other queries, please contact our
Customer Services (see address details on theback).
Safety
Read the entire instruction
manual before use.
Use hearing protection.
Wear eye protection.
Danger – rotating auger.
Danger – rotating fan blades.
Beware of flying objects.
Make sure onlookers are
kept at a safe distance.
Turn off theengine before
you clean thedischarge
chute.
Keep unauthorised persons
a safe distance away from
the machine.
Never start the machine indoors
or in a poorly ventilated area.
The engine’s exhaust contains
deadly carbon monoxide.
Remove thespark plug cap
from thespark plug before
service.
Wear protective gloves.
Wear safety footwear.
Never start theproduct
indoors.
Poisonous gases.
Smoking and the use of
naked flames is forbidden.

ENGLISH
3
General safety instructions
• Make sure that you have read theentire instruction manual and understood all thesafety
instructions and warnings. Familiarise yourself with thecontrols and make sure that you
understand how theproduct works before beginning work.
• Never let children or others who do not have adequate knowledge of these instructions use
theproduct.
• Local regulations may restrict theage of theoperator.
• Never use theproduct in thevicinity of others, especially children or animals.
• Remember theuser/driver is always ultimately responsible for accidents caused by theproduct.
• Be careful of falling or slipping, especially while thesnow blower is in reverse. Never use
theproduct whilst under theinfluence of drugs, alcohol or medicine. Do not use theproduct
if you are tired or sick.
• Theproduct must only be repaired by qualified service technicians and only using genuine
spare parts.
• Never use accessories not approved for use by themanufacturer or theretailer where
theproduct was purchased.
Safety precautions during use
Warning
• Keep away from rotating parts. If you come near theauger and impleller it can amputate your
hands and feet.
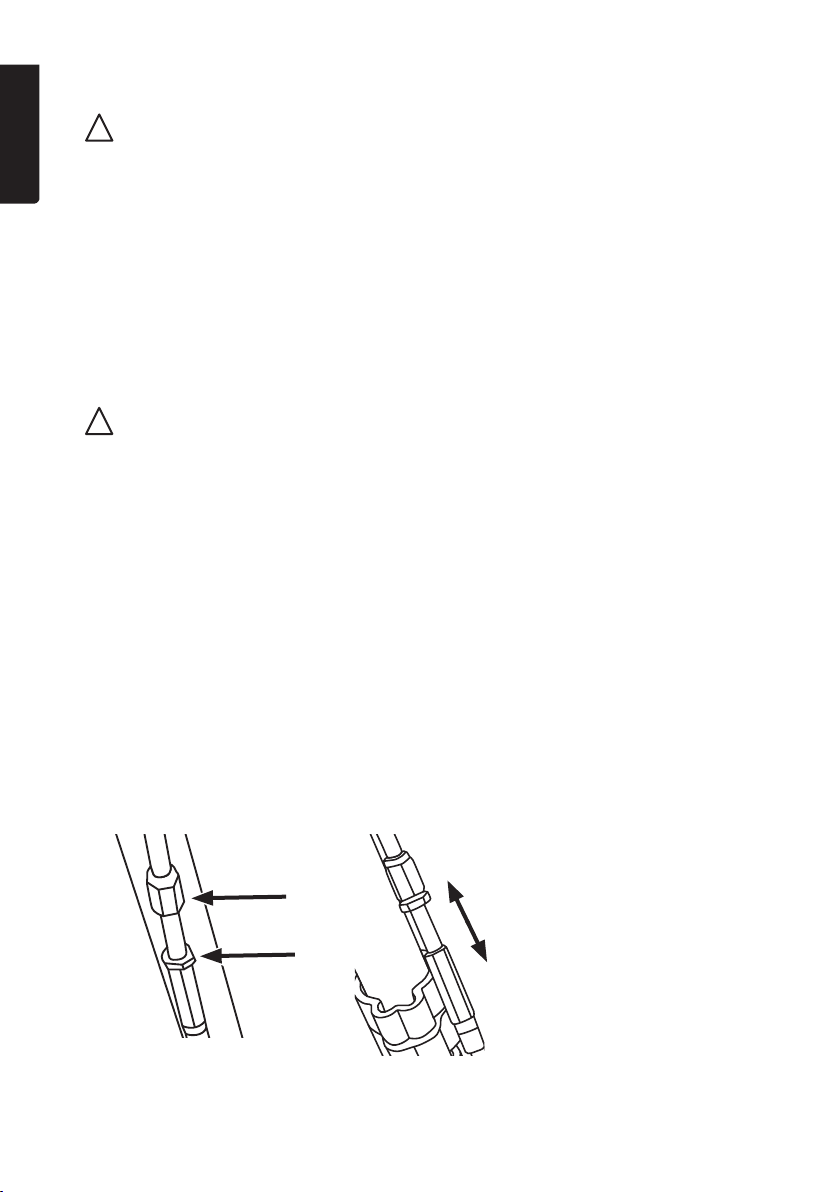
• Use theincluded tools for cleaning thechute.
• Before cleaning or servicing, disengage all controls, turn off theengine and stay by thehandle
until all moving parts have stopped.
• To avoid accidents, never point thechute at any person. Be extra careful when using on dirt
roads, etc.
• Certain engine parts will become very hot during use. Risk for burn injuries.
• Theproduct must not be used for any other purpose than for removing snow.
• Be careful when using on gravel paths, pavement and roads. Be attentive to possible
hazards and traffic. Avoid steep inclines.
• Never direct discharged snow towards public roads or traffic.
• Turn off theengine immediately if you have struck aforeign object. Inspect themachine carefully
after such anincident. Do not use theproduct until any possible damage has been repaired.
• If theproduct begins to vibrate abnormally, turn off theengine immediately and find thecause.
Vibrations are usually asign of aproblem.
• Existing safety features must not be disconnected or made inoperative.
• Never use thesnow blower in thevicinity of fences, cars, windows, inclines, etc. without
properly adjusting thedischarge chute.
• Always keep children out of thearea to be cleared of snow.
• Never overload theblower by driving it too fast.
• Be very careful when reversing. Always look behind you for possible obstacles.
• Never let anyone stand in front of theproduct.
• Never use thesnow blower in conditions of inadequate visibility or lighting.
• Make sure you are steadily balanced and have afirm grip on thehandles while using
thesnow blower.
• Use only theincluded cleaning tool to clean out thechute and impeller housing.
Never use your hands.
• Never use theproduct on aroof.

ENGLISH
4
15
8
9
10
11
7
6
2
3
4
Package contents
• Snow blower with control panel and handle lever for auger
• Drive clutch lever
• Discharge chute with deflector
• Wheels
• Shear pins, screws, nuts and washers
Controls and functions
1. Auger clutch lever
2. Gear controls (4 forward gears and 1 reverse gear)
3. Fuel tank
4. Skid plate (one on each side)
5. Drive clutch lever
6. Handle for changing thedirection of thechute
7. Discharge chute with deflector
8. Cleaning tool for impeller housing
9. Impeller housing
10. Auger
11. Scraper blade

ENGLISH
5
12
13
14
15
16
17
18
12. Primer bulb
13. Choke
14. Petrol tap
15. Throttle
16. Starter handle
17. Power switch
18. Combined dipstick/oil filler cap
Assembly
Handle and controls
1. Connect theclutch wire to thedrive clutch lever (5).
2. Attach thehandle to thecontrol panel
using theincluded screws, cable
holders, nuts and washers.

ENGLISH
6
5. Attach theauger drive control
wire to thecable clamp on
theprotective cover.
3. Slot thehandles into
thebrackets and secure it with
thescrews, nuts and washers.
4. Attach thegear control to
theshifter and tighten thelock
nut.
Discharge chute
1. Attach thesprings on thechute
into thebracket on thechute
holder.
2. Fit thechute onto theholder.

ENGLISH
7
3. Attach thefront clamp. Make
sure that it is completely snug
over both sides.
4. Mount therear clamp. Make sure that it meets thefront clamp on both sides.
5. Pull thehooks on both sides together
using theincluded screw.
Wheels
Push thewheels onto theaxis, attach
thelocking pins and fold over theshackle.

ENGLISH
8
Instructions for use
Oil level checks and rells
Information
• Theengine has acombined dipstick/oil filler cap.
• Theengine is designed to be used with several different products. This is why it has anoil
filler cap also on theleft side. When theengine is assembled in this snow blower it is best to
use theplug on theright side.
Thesnow blower comes without oil in theengine. Theengine oil MUST be filled before
theengine is turned on.
1. Remove theoil filler cap
(18) on theright side of
theengine.
2. Pour in theincluded oil.
After you have refilled
theoil it must reach up to
thefiller hole and be visible
on thedipstick. Check
thesticker on theengine.
Check theoil without
screwing thedipstick down
into thehole. You only need
to hold thedipstick against
thehole.
Preparations
• Make sure that thearea being cleared is free from loose stones and foreign objects.
• Make sure that thecontrols are easily manoeuvrable and that they return to their original position
when released.
• Disengage all controls before starting theengine.
• Plan ahead and think about where thecleared snow will be ejected in order to avoid personal
injury or property damage caused by flying objects.
• Never use thesnow blower without wearing suitable clothing. Use appropriate footwear with
solid traction, especially in slippery conditions.
• Under no circumstances may maintenance and service be performed when theengine is on
(unless otherwise directed in theinstruction manual).
• Always use safety glasses or avisor when operating or carrying out maintenance on thesnow blower.
• Adjust theheight of theauger housing so that there is enough free clearance when driving over
gravel or similar.
• Let thesnow blower adjust to outdoor temperatures before use.
Before use
Before switching thesnow blower on, always make sure that theinner impeller can move freely and is
not jammed by any obstruction. Small stones can accumulate between theinner impeller (theimpeller
behind theauger) and thedrum and prevent theimpeller from rotating; theimpeller might also have
frozen to thedrum. Iftheinner impeller cannot rotate, thedrive belt will soon wear out.

ENGLISH
9
After use
Store thethesnow blower tilted forwards alittle so that snow and water run out and don’t collect
inside thehousing causing theimpeller to freeze solid.
Refuelling
Warning Petrol is highly flammable.
• Use 95 or 98 octane unleaded petrol.
• Never mix in more than 10% ethanol in thefuel.
• Store thefuel in acontainer that is suitable for petrol.
• Always refuel outdoors and never smoke whilst refuelling.
• Do not overfill. Thefuel level should be at alevel with thelevel
gauge in thefill-tube holder under thefuel cap (FUEL LEVEL).
• Fill with fuel before starting theengine. Never open thefuel cap
for filling when theengine is running or when warm.
• Replace thefuel cap securely and wipe off any excess fuel.
Start
Important: Check theoil and fuel levels before starting thesnow blower. Make sure that
both thedrive and auger clutch levers are released.
1. Set thepower switch (17) to the ON position.
2. Set thethrottle (15) to maximum (to theright,
towards thepicture of thehare).
3. Set thechoke (13) to thecold start position (to
theleft). If theengine is warm, set thechoke fully to
theright.
4. Switch thepetrol tap (14) to ON (fully to theright).
5. Press in theprimer bulb (12) 3−5 times. Cover
thevent hole in thecentre of theprimer bulb when
pressing it in. In cold weather conditions theengine
may need to be primed again. If theengine is warm,
press theprimer bulb once only.
6. Slowly pull thestarter handle (16) until you feel
some resistance. Then pull thehandle briskly
and with force to start theengine. Do not release
thehandle but keep it in position and then slowly
return it to its original position.

ENGLISH
10
Important:
• Once theengine has been started and is warm, slowly move thechoke to its original position
(to theright).
• If theengine should stall, restart it with thechoke (set in themiddle position) for ashort time.
Once theengine is running smoothly, slowly return thechoke to its original position.
Turning off the engine
1. Reset thechoke back into place.
2. Set theswitch to the OFF position.
3. Carefully clean theentire snow blower and move thecontrols back and forth afew times to
prevent them freezing into position.
Safety checks
Important: Check that the auger is working properly the first time you use the snow blower
and also before every new season. Always allow for some amount of free play in the wire controlling
the auger clutch.
1. Start the snow blower and depress the clutch lever. Let the auger run for about 10 seconds.
Repeat this procedure several times.
2. Release the clutch lever and inspect the auger from the front. Make sure that the auger is
completely motionless and shows no tendency of rotating.
3. If the auger is rotating or showing a tendency to rotate once the clutch lever is released, turn
off the engine and adjust the clutch control wire.
Checking and adjusting the auger wire and drive clutch wire
Thewires have been adjusted by themanufacturer but they may need checking/adjusting before
thesnow blower is used.
Auger
• When theengine is running, make sure that theauger is standing still and theclutch levers
are released. Depress theclutch lever, theauger should rotate at full speed.
• If theauger does not turn when engaged while theengine is running then theamount of free
play in thewire is too great. Do thefollowing:
1. Loosen thelock nut (B).
A
B
2. Adjust thewire so that there is
some free play in it (increase
thedistance in theadjustment)
by unscrewing theadjusting
screw (A).
3. Tighten thelock nut.
4. Start theengine and check
performance.

ENGLISH
11
If theauger rotates even through thelever is not depressed while theengine is running then
theamount of free play in thewire is too little. Do thefollowing:
1. Adjust thewire to increase thefree play in it (decrease thedistance in
theadjustment).
2. Start theengine and check performance.
Drive
If theblower has atendency to move forward without having theclutch engaged,
then thewire is too taut.
1. Adjust thewire so that there is some free play in it (decrease
thedistance in theadjustment) using thesame procedure used
for adjusting theauger wire described earlier.
2. Start theengine and check performance.
If theblower does not move forward when theclutch
lever is depressed, then thewire is too loose.
1. Adjust thewire by decreasing thedistance in
theadjustment.
2. Start theengine and check performance.

ENGLISH
12
1. Loosen theskid plate locking nuts.
2. Adjust them depending on thesurface.
3. Tighten thelocking nuts and check thedistance between thescraper blade and thesurface.
Operation
Skid plate adjustment
• Under normal conditions: Adjust theskid plate 0.5−1 cm lower than thescraper cutting blade
(so that theblade is 0.5−1 cm over thesurface).
• In theevent of hard packed snow: Set theskid plates slightly higher (in order to lower
thescraper blade).
• In theevent of gravel or uneven surfaces: Set theskid plates somewhat lower (in order to
raise thescraper blade).
1. Let theengine warm up for afew minutes to reach full power before beginning
snow removal.
2. Set thegear controls (2) to asuitable gear setting. Second gear is usually
appropriate for most snow removal situations.
3. Depress theauger clutch lever (1) to begin snow removal.
4. Depress thedrive clutch (5) to engage thedrive wheels and propel thesnow
blower forwards.
Important: Never move thegear controls while thesnow blower is in
motion and always release thedrive clutch before changing gears.
5. After work has been completed: Allow theengine to idle for aminute. Let
thesnow blower and auger stand still in order to let most of themoisture and
snow dry off.
Care, maintenance and storage
Important: Turn off theengine, remove theignition key and remove thespark plug cable
from thespark plug before servicing, cleaning or maintenance.

ENGLISH
13
Cleaning and inspection
• Use thecleaning tool to remove any snow or ice clogged in thechute or around theauger.
Never use your hands!
• Inspect regularly to make sure that all bolts, nuts and screws are tight and that there is no
visible damage.
• Thescraper blade and skid plates will become worn with time and should be replaced.
Use only original parts or parts approved by theretailer.
• Regularly check thefuel system for any visible signs of leakage or damage at thetank,
fuel cap or fuel lines.
• Never attempt to tamper with or modify theproduct in any way.
• Regularly check thetyre pressure, it should be between 15 and 20 psi (1−1.4 bar).
Engine service intervals
After thefirst
5 hours.
At every use
or after every
5 hours.
At every season
or after every
25 hours.
At every season
or after every
50 hours.
Check theoil level. •
Change oil. • •
Check spark plug. •
Clear area aroundmuffler. •
Changing the oil
Important:
• Check theoil level every time thesnow blower is used.
• Theblower needs to be tilted to theside to drain out all theoil. If thetank is completely full
thefuel can run out at thefuel cap.*
• You may also use asuction pump and suction out theoil from theoil filler plug.
1. Start theengine and run it for afew minutes to warm theoil so
that it runs out more easily.
2. Place anappropriate container under thedrain hole to collect
theoil when thedrain plug is removed.
3. Unscrew the plug, tilt the blower and empty of all oil. Bear in mind
that theoil might be hot.
4. Refit the drain plug and fill with new oil. Refer to theearlier section
Oil level checks and refills.
*Empty thefuel tank before you empty out all theoil. Theengine
should be cold when thefuel tank is emptied. Do thework outside
and collect thefuel in anappropriate container. If thefuel is not to be
reused, deposit it at an appropriate recycling centre.

ENGLISH
14
Spark plug
Note: Let the engine cool before unscrewing and removing the spark plug. Both the spark plug
and muffler become very hot after use. Check the spark plug before every season and replace it
if necessary.
1. Remove the spark plug cable from the spark plug. Do not
pull the cable but rather grip the spark plug cap and wiggle
it back and forth to loosen it.
2. Use a spark plug spanner to remove it from its socket.
3. Check the electrodes for any visible damage and clean with
a steel brush when necessary.
4. Make sure that the electrode gap is 0.6–0.8 mm. Special
tools for gapping (feeler gauges) are available for purchase
separately.
5. Try to screw the spark plug partway in by hand to make
sure the threads catch correctly. Tighten using a spark plug
spanner.
6. Washers on the new spark plug must be compressed
during installation. Tighten a ½ turn extra after the spark
plug is securely in place to compress the washer and
create a proper seal.
7. Turn a ¼ turn extra if you are using the existing spark plug.
Handy hint: Thread a small piece of PVC hose to the spark
plug wire end to make it easier to access when it is time to
manually thread it in the socket.
0.6–0.8 mm
Replacing the scraper blade
• Unscrew the 4 bolts holding the scraper blade
and remove the blade.
• Attach the new blade. Make sure that all the bolt
heads are on top, inside the auger housing.
• Use only original parts or parts approved by
the retailer.
Changing the skid plates
• Remove the skid plates by unscrewing
the 2 bolts in each.
• Mount the new plates. Make sure that all the bolt
heads are on the inside of the auger housing.
• Use only original parts or parts approved by
theretailer.

ENGLISH
15
Long-term storage procedures (over a month)
• Empty the fuel tank when the engine is cold. Do the work outside and collect the fuel in an
appropriate container. If the fuel is not to be reused, deposit it at an appropriate recycling centre.
• Start the engine and let it run until it is out of fuel.
• Store the snow blower in a well-ventilated area, never in an enclosed storage facility subject
to naked flames or sparks.
Lubrication
Regularly lubricate thegear controls and other moving parts with afew drops of motor oil and/or
spray (e.g. 5−56, WD-40). Do not over-lubricate!
Lubrication of and servicing the auger and replacement of
the shear pins
Theauger is equipped with shear pins that are meant to shear if theauger strikes hard compacted
ice or other foreign objects. Thesnow blower is supplied with extra shear pins so that they can
be replaced when needed.
Important: Never substitute theshear pins with ordinary bolts. This can seriously damage
thesnow blower if theauger jams on aforeign object.
Unscrew theshear pins once per season and
spray inside thedrive shaft with oil lubricant.
Lubricate theauger drive shaft’s plastic bearings.
Replacing the auger drive belt
1. Remove thewire that sits on theprotective cover
over thebelt.
2. Remove thelocking plugs that keep theprotective
cover in place over thebelt (one on each side).
3. Remove thecover.

ENGLISH
16
4. Screw thewire adjustment to theauger together so that theplay is larger.
5. Remove thescrews holding theshackle over
thedrive belt cover and remove it.
6. Remove thebelt from thepulley wheel and
push it across thespindle and impeller
housing, it is easier to do this if you fold
thebelt as shown in thepicture.
7. Hold in thetensioning wheel so that thestop lug moves away from thepulley.

ENGLISH
17
8. Remove thebelt from thepulley and
prise it away from thepulleys locking
nuts.
9. Attach anew belt. Don’t forget to
push back thetensioning wheel so
that thebelt ends up on theinside of
thestop lug.
10. Adjust thewires for correct tensions
and check theperformance.
11. Refit the bracket and the protective
cover.
Troubleshooting guide
Theengine does not start. • Is thepower switch in the “ON” position?
• Is thepetrol tap in the “ON” position?
• Is there petrol in thetank?
• Have you pressed in theprimer bulb enough times?
• If theengine is cold is thechoke in thecold start position
(completely to theleft)?
• If theengine is warm, is thechoke set fully to theright?
• Is thethrottle set fully to theright (full power)?
• Is there new petrol in thetank? Using old fuel can lead to
starting problems.
• Is thespark plug cable securely connected to thespark plug?
• Check thespark plug and replace it if necessary.
Theengine runs irregularly. Check that thechoke is in thecorrect position depending if
theengine is warm or cold.
Abnormal vibrations. 1. Turn off thesnow blower and disconnect thespark plug wire
from thespark plug.
2. Check theauger and replace any damaged parts.
3. Check that all thescrews and nuts are tightened.
Theauger does not rotate
when engaged while
theengine is running. No
snow exits thechute.
• Theauger drive clutch wire is incorrectly adjusted.
Adjust thewire according to thesection Checking and
adjusting theauger wire and drive clutch wire.
• Thechute is clogged or foreign objects are preventing
theauger from rotating.
• Theshear pins have sheared off. Replace theshear pins.
• Thedrive belt needs replacing. Check thebelt and replace it if
necessary. Refer to thesection Replacing theauger drive belt.
Theauger rotates even
when it is disengaged.
Adjust thewire according to theChecking and adjusting theauger
wire and drive clutch wire.
Theblower does not move
forward when theclutch
lever is depressed.
Adjust thewire according to thesection Checking and adjusting
theauger wire and drive clutch wire.
Theblower tends to move
forward even when theclutch
lever is not engaged.
Adjust thewire according to thesection Checking and adjusting
theauger wire and drive clutch wire.

ENGLISH
18
Responsible disposal
This symbol indicates that this product should not be disposed of with general
household waste. This applies throughout theentire EU. In order to prevent
any harm to theenvironment or health hazards caused by incorrect waste
disposal, theproduct must be handed in for recycling so that thematerial can
be disposed of in aresponsible manner. When recycling your product, take it to
your local collection facility or contact theplace of purchase. They will ensure that
theproduct is disposed of in anenvironmentally sound manner.
Specications
Type Two-stage snow blower
Clearing width 56 cm, working height 40 cm
Max snow depth Approx. 400 mm
Discharge range Up to 8 m
Engine 1-cylinder, 4-stroke petrol engine, 196 cm³, 5.6 hp (4.1 kW)
Fuel tank capacity 3.6 L
Oil capacity 0.6 L
Gears 4 forward, 1 reverse
Discharge chute 180º swivel
Discharge angle Tiltable approx. 25 degrees
Drive Self-propelled
Pneumatic rubber tyres 12ʺ
Weight 55 kg
LpA 89.5 dB (A), K = 3.0 dB (A)
LwA 97.31 dB (A), K = 3.0 dB (A)
Vibration 5.077 m/s², K = 1.5 m/s²

SVENSKA
19
Snöslunga 2-stegs
Art.nr 41-1580 Modell KCM22B
Läs igenom hela bruksanvisningen före användning och spara den sedan för framtida bruk.
Vi reserverar oss för ev. text- och bildfel samt ändringar av tekniska data. Vid tekniska problem
eller andra frågor, kontakta vår kundtjänst (se adressuppgifter på baksidan).
Säkerhet
Läs igenom hela bruks-
anvisningen före
användning.
Använd hörselskydd.
Använd skyddsglasögon.
Fara – roterande snöskruv.
Fara – roterande fläkt.
Se upp för utflygande
föremål. Se till att åskådare
befinner sig på behörigt
avstånd.
Slå av motorn före rensning
av utkastet.
Håll obehöriga på säkert
avstånd från maskinen.
Starta aldrig maskinen inomhus
eller idåligt ventilerade
utrymmen. Motorns avgaser
innehåller livsfarlig kolmonoxid.
Ta bort tändkabeln från
tändstiftet före service.
Använd skyddshandskar.
Använd skyddsskor.
Starta aldrig produkten
inomhus.
Giftiga gaser.
Rökning och öppen
eld förbjuden.

SVENSKA
20
Allmänna säkerhetsföreskrifter
• Försäkra dig om att du läst och förstått hela bruksanvisningen, alla varningar och alla instruktioner.
Bekanta dig med alla reglage och försäkra dig om att du förstår hur produkten ska användas
innan arbetet påbörjas.
• Låt aldrig barn eller personer som inte har tillräcklig kännedom om dessa instruktioner
använda produkten.
• Lokala föreskrifter kan begränsa användarens ålder.
• Använd aldrig produkten inärheten av andra, särskilt barn eller djur.
• Kom ihåg att användaren/föraren alltid är ansvarig för olyckor som orsakats av produkten.
• Var försiktig så att du inte faller eller halkar, speciellt när du backar. Använd aldrig produkten
om du är påverkad av alkohol eller mediciner. Använd den inte heller om du är trött eller sjuk.
• Produkten får bara repareras av kvalificerad servicepersonal och endast med originalreservdelar.
• Använd endast tillbehör som är godkända av tillverkaren eller av den återförsäljare där
produkten köptes.
Säkerhetsföreskrifter under användning
Varning!
• Håll avstånd till roterande delar. Kontakt med inmatningsskruv och skovlar kan amputera
händer och fötter.
• Använd medföljande verktyg för att rengöra utkastet.
• Innan rengöring eller service av produkten, frikoppla alla reglage, slå av motorn och stå kvar
vid handtagen tills alla rörliga delar har stannat.
• För att förhindra skador, rikta aldrig utkastet mot andra människor. Var extra försiktig vid
användning på grusvägar etc.
• Vissa motordelar blir mycket varma vid användning. Risk för brännskador.
• Produkten får inte användas till att slunga någonting annat än snö.
• Var försiktig vid användning på grusgångar, trottoarer och vägar. Var uppmärksam på
eventuella faror och trafik. Undvik branta sluttningar.
• Rikta aldrig utkastet mot allmän väg eller trafik.
• Slå omedelbart av motorn om du träffar ettfrämmande föremål. Inspektera därefter
produkten noggrant. Använd inte produkten förrän eventuella skador reparerats.
• Om produkten börjar vibrera onormalt, slå omedelbart av motorn och kontrollera orsaken.
Vibrationer är normalt etttecken på problem.
• Befintliga säkerhetsanordningar får inte kopplas bort eller sättas ur funktion.
• Använd aldrig produkten inärheten av inhägnader, bilar, fönsterrutor, sluttningar etc. utan
korrekt inställt utkast.
• Håll alltid barn borta från det område som ska snöröjas.
• Överbelasta inte produkten genom att köra den för fort.
• Var försiktig vid backning. Titta bakåt efter eventuella hinder.
• Låt aldrig någon stå framför produkten.
• Använd aldrig produkten i dålig sikt eller utan tillfredsställande belysning.
• Se till att ha god balans och håll stadigt ihandtagen när du använder produkten.
• Använd endast det medföljande redskapet för att rengöra utkast och skovelhus.
Använd aldrig händerna.
• Använd aldrig produkten på tak.
This manual suits for next models
1
Table of contents
Languages:
Other Cocraft Snow Blower manuals
Popular Snow Blower manuals by other brands

Farm King
Farm King ALLIED 5010 Operator and parts manual

Yard Machines
Yard Machines E600E Operator's manual

Craftsman
Craftsman 22-INCH 4-CYCLE SNOW THROWER 247.885550 Operator's manual

Snapper
Snapper ELE3190R parts manual

Toro
Toro Power Clear 38578 Operator's manual

Sno-Way
Sno-Way STD200000 Service & parts manual