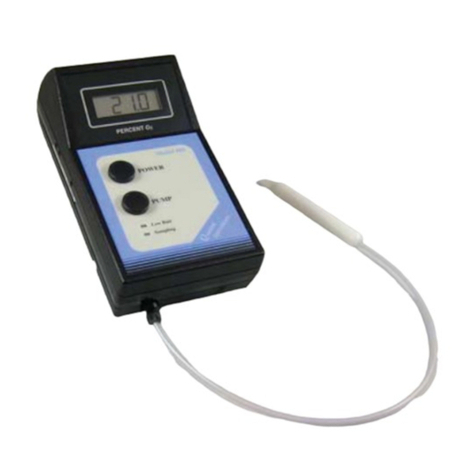
Coffee Laboratory Coffee Pro Moisture-Mac User manual

Operators Manua
l
CO
FFEE PR
O
p
670MAC

y
A
ll information, illustrations and s
p
ecifications in this manual are based
on the latest in
f
ormation available at the time o
f
publication. The right is
r
eserve
d
to ma
k
e c
h
anges at any t
i
me w
i
t
h
out not
i
ce.
2
W
arrant
y
T
his product is guaranteed to be free from defects in materials and workmanship for two (2) years
from date of retail purchase in USA or Canada and one
(
1
)
year overseas. This warranty does not
cover the batter
y
or damage resulting from misuse, neglect, accident or improper installation or
maintenance. This warrant
y
does not appl
y
to an
y
product which has been repaired or altered outside
a
n authorized factor
y
repair facilit
y.
T
he foregoing warrant
y
is exclusive and in lieu of all other warranties of merchantabilit
y
, fitness for
purpose and an
y
other t
y
pe, whether express or implied. AgraTronix neither assumes nor authorizes
a
n
y
one to assume for it an
y
other obligation or liabilit
y
in connection with its product and will not be
liable for consequential damages
.

Contents
P
age
P
roduct Warranty and Repair Progra
m
...................................................
2
O
p
eration
O
perating Conditions
..............................................................................
4
O
perational Messages
.
........................................................................... 4
O
peratin
g
Procedure
P
re
h
eat
i
n
g
.........................................................................................
5
Normal
O
peratio
n
..............................................................................
6
To Display Temperature in the Cell
.
.......................................................
.
7
To Average Test Result
s
.........................................................................
7
To Adjust
C
alibratio
n
..............................................................................
.
8
Moisture Limit
G
uidelines .......................................................................
9
C
alibration
C
onsideration
/
Limits
.........................................................
10
To
C
lear
C
alibration
.
............................................................................. 1
1
To
S
elect a Different Lan
g
ua
g
e
............................................................
11
To
S
elect a New
G
rain
S
cale or Function.............................................
12
To Turn on Backli
g
ht and Turn
O
ff Tester
..............................................
12
S
ervice
To Replace Batteries
.
..........................................................................
.
13
To
C
lean the Teste
r
.
.............................................................................. 1
3
T
roubleshoot
i
n
g
.
........................................................................
.
14
R
ecord the
S
erial Number
.
...................................................................
1
5
C
arryin
g
C
ase
.
.....................................................................................
15
N
otes ...................................................................................................
.
16
3
All information, illustrations and specifications in this manual are based
on the latest in
f
ormation available at the time o
f
publication. The ri
g
ht is
reserved to make changes at any time without notice
.

Operation
O
PERATIN
G
CO
NDITI
O
N
S
Test cell and grain MUST be free of any conden
-
s
ation or surface moisture. Moisture on
g
rain or
i
n test cell will cause high readings. Very hot or
c
ool grain will pick up moisture when it warms
or cools. The
p
ressure ca
p
o
f
the tester can
s
queeze moisture from high moisture grains,
s
uch as corn
,
into the bottom o
f
the test cell.
B
ecause gra
i
ns are
i
rregu
l
ar
l
y s
h
ape
d
an
d
may
n
ot alwa
y
s pack the same wa
y
in the test cell,
minor variations in readings may occur. To
e
nhance accuracy, always take three
(
3
)
succes
-
s
ive readin
g
s o
f
the total sample bein
g
tested
a
nd average the results. Empt
y
and refill the
tester with new
g
rain
f
rom the sample between
e
ach test.
The tester is most accurate when grain and tester are between 60
˚
F
(
16
˚
C
)
and 90
˚
F
(32˚C). The unit will, however, operate at temperatures between 33˚F (1˚C) and 120˚F
(
49
˚
C
)
. For best results, grain temperature should not be below 40
˚
F
(
4
˚
C
)
or above
1
10˚F (43˚C). If the grain temperature is 20˚F (11˚C) more or less than the temper
a
-
ture of the unit, preheat the tester per instructions on page 5. Condensation on the
grain or test cell is best avoided by having the tester and grain at about the sample
t
empera
t
ure
.
The environment to which a grain sample is exposed can appreciabl
y
change its
moisture content. Exposed to the open air,
g
rain can
g
ain or lose 1% to 2% indicated
moisture in onl
y
a few minutes. If a sample is to be held for even a short time before
being tested, it should be placed into a tightly closed, air-tight container, such as a
z
iplock bag or
j
ar
.
O
PERATI
O
NAL ME
SS
A
G
E
S
Sy
mbol Definition
S
Y
S
TEM BATTERY L
O
W
--------------------------
S
ystem battery needs replacin
g
MO
I
S
T
U
RE BEL
O
W LIMIT
-
----------------------------------
Mois
t
u
r
e
is
belo
w
li
m
i
t
MO
I
S
TURE AB
O
VE LIMIT
-----------------------------------
Mois
t
u
r
e
is
abo
v
e
li
m
i
t
ERROR (---
)
----------------------------------------------------------
Electronic Failur
e
4

Operation
O
PERATIN
G
PR
OC
EDURE – PREHEATIN
G
IMP
O
RTANT
:
If the temperature of the grain sample is 20˚F (11˚C) more or less than
the temperature o
f
the unit, preheat the tester and test as
f
ollows
:
PREHEATIN
G
PR
OC
ED
U
RE
1
.
R
emove cap
(A)
an
d
i
nspect test ce
ll
(B)
to
b
e sure t
h
at
i
t
i
s c
l
ean an
d
empty
.
2.
Press ON-OFF button
(
C
)
to turn on tester. The display
(
D
)
will show ALWAYS
A
VERAGE 3 TESTS for approximately 7 seconds, then will show ALFALFA (initial
operation) or the name o
f
the last grain tested.
3
.
W
hen the grain to be tested has been selected using the SELECT arrows (E), fill
the test cell (B) even to the top o
f
the cell with sample to be tested
.
4
.
R
ep
l
ace cap
l
oose
ly
.
DO NOT TIGHTEN.
5
.
A
fter 30 seconds, empt
y
test cell and immediatel
y
refill with fresh grain.
6. Replace cap (A) and tighten until pressure-indicator screw (F) is
fl
ush with the
top of cap
(
A
)
.
(
Use finger-flush test as illustrated in Figure 1.
)
7.
Immediately press TE
S
T button (
G
). The words TE
S
TIN
G
will be displayed for
a
bout 10 seconds, while the tester compensates for temperature. The moisture
%
and temperature will then be displayed for about 10 seconds
.
5
G
- Test Butto
n

Operation
O
PERATIN
G
PR
OC
ED
U
RE
–
N
O
RMAL
O
PERATI
O
N
1
.
R
emove cap
(A)
an
d
i
nspect
test cell
(
B
)
to be sure that it
i
s c
l
ean an
d
empt
y.
2.
Press
O
N-
O
FF button
(C)
to
turn on tester.
Th
e
di
sp
l
ay
(D)
w
ill show ALWAY
S
AVERA
G
E
3
TESTS for approximatel
y
7 seconds
,
then will sho
w
G
REEN COFFEE
(
initial opera
-
tion) or the name o
f
the last
g
ra
i
n teste
d.
3.
W
hen the grain to be tested
h
as
b
een se
l
ecte
d
us
i
n
g
t
h
e
S
ELE
C
T arrows (E), fill the
test ce
ll
(B)
even to t
h
e top
o
f
the cell with sam
p
le to be
t
es
t
ed.
4
.
(For Initial T
est Only) Before
T
T
ti
g
htenin
g
pressure cap, turn on
tester and allow to warm up for 30
s
econds be
f
ore
a
ttempting first test
.
5
.
R
ep
l
ace cap
(A)
an
d
t
i
g
h
ten unt
il
p
ressure-indicator screw (F) is
fl
ush with the top of cap
(
A
)
.
(
Use
Finger-Flush test as illustrated.)
6. Immediately press TE
S
T button
(G)
. The words TE
S
TIN
G
will be displayed for
a
bout 10 seconds, while the tester compensates for temperature. The moisture
%
and temperature will then be displayed
f
or about 10 seconds
.
7. The tester will then return to displa
y
ing the name of the last grain tested. Empt
y
the test cell and re
fi
ll with a
f
resh sample and test a
g
ain
.
N
O
TE
:
T
ake at least three readings of new grain from the
TT
s
ample collected and avera
g
e the results.
6
A
- Ca
p
B
- Test
C
ell
C
-
O
N-
O
FF Button
D
- Displa
y
E
-
S
elect Arrows
F
- Pressure-Indicator
S
crew
G
- Test Button

Operation
TO
DI
S
PLAY TEMPERATURE IN THE
C
EL
L
T
o
di
sp
l
a
y
t
h
e temperature
i
n t
h
e ce
ll
, press e
i
t
h
er t
h
e up or
down arrow on the
S
ELE
C
T button (A) to index forward or
backward through the grain (function) menu until the word
TEMPERATURE is displayed.
W
hen TEMPERATURE is displayed, press TE
S
T
b
utton
(B)
.
Th
e current temperature
i
n ce
ll
w
ill
b
e
displayed in both F
˚
and C
˚
. Temperature will be
displa
y
ed for a few seconds then will return to the
m
ain grain menu
.
N
OTE:
I
f the tester and
g
rain are differen
t
t
em
p
eratures, the mass o
f
the meta
l
t
ester will quickl
y
warm or cool the grain.
T
herefore, the temperature readin
g
is the cell temperature, no
t
n
ecessarily the temperature o
f
the grain be
f
ore being put in the cell.
TO
AVERA
G
E TE
S
T RE
S
ULT
S
1.
W
hen testing grain, the test result is dis
-
p
layed for about ten seconds. During the
p
eriod that the test moisture % and tempera
-
ture is displayed, press the MEMORY button
(
A
)
. The tester will acknowledge that it has
e
ntere
d
t
h
e rea
di
ng
i
nto memory,
b
y
di
sp
l
ay-
i
ng the current average and then the number
of stored readin
g
s. Up to 20 readin
g
s can be
s
tored into memory. I
f
the maximum number
of readin
g
s has been reached, the tester will
n
ot allow any more readings to be stored.
N
OTE: Averaging is stored for one grain onl
y
. Whe
n
a
test for a new
g
rain is performed, existin
g
avera
g
-
i
ng data
f
or the previous grain is erased when th
e
new
g
ra
i
n
’
s avera
gi
n
g
d
ata
i
s ta
k
en.
A
vera
gi
n
g
d
ata
is
retained even if batteries are removed
.
2.
Press the
A
VG button (B) to display the average of all
AA
results entered for the
g
rain bein
g
tested
.
3.
T
o clear the averaging, press the AVG button. The current average will be dis
T
T
-
played. Then press the CLEAR button (C) and the tester will then display 0.0
%
(
0
)
. This indicates that the averaging has been cleared
.
7

Operation
T
O
ADJU
S
T
C
ALIBRATI
ON
I
MP
O
RTANT: Always obtain three
(
3
)
test
r
esults from the grain elevator for the
s
amp
l
e
b
e
i
n
g
compare
d
.
A
vera
g
e t
h
ese
t
hree
(
3
)
results. Compare this average with
t
he average of three
(
3
)
tests by the
m
oisture tester
.
1.
E
ach grain scale can be individuall
y
ad
-
justed up to 5.0% by increments of 0.1%
t
o more closely match the results of an
ele
v
a
t
o
r t
es
t
e
r
.
2.
F
irst select the grain to be adjusted
.
3.
T
est the grain selected, using the sample
TT
you wish to adjust to.
O
nce valid moi
s
-
t
ure appears, press the CAL button
(
A
)
.
N
O
TE:
C
alibration of given grain cannot be pe
r
f
ormed
u
nless a valid moisture test has been pe
r
f
ormed
.
4.
O
nce
C
AL button (A) is pressed, tester will now display the obtained moisture
r
eading and the current offset applied to that moisture range
.
5.
P
ress the UP arrow (B) to raise the adjustment amount or press the D
O
WN
a
rrow
(C)
to lower. The tester will add or subtract up to 5.0% by increments of
0
.
1%
to t
h
e current mo
i
sture ran
g
e
.
6.
After the adjustment amount has been selected, press the
C
AL button
(
A
)
to
r
eturn to
g
ra
i
n tester mo
d
e.
N
O
TE:
Adjustment can NOT be made to factor
y
calibratio
n
r
t
o pro
d
uce mo
i
sture rea
di
n
g
s
i
n a tester t
h
at s
h
ow
s
“
BELOW LIMIT” or “ABOVE LIMIT” readings.
IMP
O
RTANT:
This tester incorporates Multi-Point Calibration for each grain. Therefore, once a
va
lid
test
i
s ta
k
en an
d
an a
dj
ustment
i
s ma
d
e, t
h
e a
dj
ustment w
ill
on
ly
a
ff
ect t
h
e
m
oisture range of the sample tested.
8

Operation
9
DI
S
PLAY READIN
G
MO
I
S
T
U
RE LIMIT
GU
IDELINE
S
(
Specifications and design subject to chang
e
w
ithout notice
)
N
OTE:
If grain temperature is 40˚F (4˚C) or below
, or 110˚F (43˚C) or above, and the grain moisture is
w
w
n
ear either the high or the low limit of the unit (listed above), the tester is programmed to clos
e
d
own its range of operating limits.
Moisture Range
Lo
w
Li
m
i
t
M
oisture Ran
g
e
H
igh Limit
G
REEN
CO
FFEE
......................
9.0
%
....................
3
5.0
%
PARCHMENT COFFE
E
....................
10
.
0%
....................
40
.
0%

Operation
1
0
C
ALIBRATION CONSIDERATION / LIMITS
T
ypically the moisture tester will be consistent
w
ith most elevator testers over a broad ran
g
e of
moisture levels. However, there are some things
to cons
id
er w
h
en t
hi
n
ki
ng a
b
out
y
our mo
i
sture
tester calibration.
N
OTE
:
G
raph provided is for illustratio
n
purposes only and does not re
fl
ec
t
a
ctual test data.
Tes
t
e
r Diff
e
r
e
n
ces
:Your moisture tester unit
,
ma
y
not match a given elevator tester. None of
the testers exactly match the actual weighted
moisture of an
y
given grain. There is no national standard for elevator testers. The
difference between moisture testers and various U.S.D.A. a
pp
roved elevator testers
i
s not a constant value. A correction at one moisture level ma
y
not be valid for a
different moisture level. Graph 1 shows how the moisture tester mi
g
ht compare to
an elevator tester over a broad range of moisture levels. The moisture tester, and
most elevator testers (shown in graph by solid line) will closely match those o
f
the
moisture tester
(
shown by dashed line
)
for that range, as illustrated. However, as we
get away
f
rom mid-range into the high and low moisture levels, di
ff
erences between
elevator tester and moisture tester not onl
y
become greater, but ma
y
switch from a
moisture tester readin
g
hi
g
her than elevator tester to a readin
g
lower than the elev
a
-
tor tester. For example, in
G
raph 1, the area between B and
C
represents the mid
-
ran
g
e moisture. Moisture tester readin
g
s match elevator tester readin
g
s in this area
with an accurac
y
of plus or minus 0.5 percent. The area between A and B represents
the low moisture ran
g
e. Moisture tester readin
g
s di
ff
er more
f
rom elevator tester
readings, and are LOWER than elevator tester readings. The area beween C and D
represents the hi
g
h moisture ran
g
e. Moisture tester readin
g
s a
g
ain di
ff
er more
f
rom
elevator tester readings than the
y
did at mid-range moistures, but now the readings
are HIGHER than elevator tester readin
g
s.
C
alibration Re
q
uirements
:
Graph 1 illustrates that moisture tester readings closely
match elevator tester readings for mid-range moisture levels.
(
Graph is for illu
s
-
t
ration purposes only and does not re
fl
ect actual test data.
)
Calibration chan
g
es
required for grain in this moisture range will be small, if an
y
. However, if grain is ver
y
d
ry
(L
ow
M
o
i
sture
R
ange
)
or very wet
(Hi
g
h
M
o
i
sture
R
ange
)
,
i
t may
b
e necessary
to calibrate
y
our moisture tester unit against the elevator tester using a sample of
y
our grain in both testers. Record the calibration correction required. It will be valid
f
or all testing in that moisture range for that grain.

Operation
11
TO
C
LEAR
C
ALIBRATI
ON
1
. Select
g
rain to clea
r
.
2.
Press
C
AL button
(
A
)
, tester will then
di
sp
l
a
y
l
ast ca
lib
rat
i
on t
h
at was ma
d
e.
3. Press
C
LEAR button
(
B
)
.
4.
T
ester will then display 0.0% for
T
T
both lines if the calibration has been
clea
r
ed.
NO
TE
:
I
f
y
ou press the
C
AL butto
n
–
––––
a
n
d
tester
di
sp
l
a
y
s
0
.
0%
o
n
–––––
b
oth lines
,
then no calibratio
n
–
––––
h
as been made for this grain
.
TO
S
ELE
C
T A DIFFERENT LAN
GU
A
G
E
1
.
A
t start up, the tester will alwa
y
s displa
y
the name of the last grain tested in the
current language selected. (English is the de
f
ault language
f
rom the
f
actory.)
2
.
T
o select a new language, press either the up or down arrow on the SELECT
T
T
button (A) to index
f
orward or backward
through the grain
(
function
)
menu until the
word LANGUAGE is displayed
.
3.
W
hen LAN
G
UA
G
E is displayed, press TE
S
T
button
(
B
)
. The current language selected
will be displayed. Press either the up or
down arrow on the SELECT button
(
A
)
to
i
ndex
f
orward or backward through the
gra
i
n
l
anguage menu unt
il
y
our c
h
o
i
ce
o
f
language is displayed. The seven (7)
l
anguages
(
as displayed
)
are: ENGLISH,
S
PANI
S
H
,
G
ERMAN
,
FREN
C
H
,
ITALIAN
,
SWEISH and PORTUGUESE
.
4
. Press TEST button (B) again to return to the main grain menu, which wil now be
displayed in the new language.

Operation
1
2
T
O
S
ELE
C
T A NEW
G
RAIN
SC
ALE
(O
R FUN
C
TI
O
N
)
1.
At start up, the tester will display AL
WAYS
L
L
AVERAGE 3 TESTS for approximatel
y
7
seconds, then will display the name o
f
the
last
g
rain tested, such as GREEN COFFEE
.
2.
T
o select a new grain scale, press either the
T
T
up or down arrow on the
S
ELE
C
T button
(
A
)
t
o index forward or backward throu
g
h the
g
rain
(
function
)
menu. The grains are listed
in alphabetical order followed by other tester
f
unctions.
N
O
TE:
T
o use other functions included with
TT
the
t
es
t
er
, push SELECT button (A)
rr
u
p or down to get desired
f
unction.
P
ush TE
S
T button
(
B
)
to pe
r
f
or
m
t
h
a
t f
u
n
c
ti
o
n
.
T
O
T
U
RN
O
N BA
C
KLI
G
HT AND T
U
RN
O
FF TE
S
TE
R
1.
P
ress LIGHT button (A)
.
2.
P
ress a
g
ain to turn off backli
g
ht.
N
O
TE:
T
he backlighting feature is designed
t
o
i
mprove
di
sp
l
a
y
v
i
s
ibili
t
y
i
n
l
o
w
li
g
ht conditions. In bri
g
ht li
g
h
t
c
onditions, the backlighting canno
t
be
see
n.
3.
T
o turn off tester, press ON-OFF button (B).
TT
T
ester will automaticall
y
turn itself off
2
minutes a
f
ter the last button has been
pus
h
e
d.

Service
13
TO
C
HE
C
K BATTERY P
O
WER LEVEL
S
AND REPLA
C
E BATTERIE
S
1
.
Th
e tester
i
s su
ppli
e
d
w
i
t
h
two
9
vo
l
t
alkaline batteries. The le
f
t battery (A)
p
owers t
h
e
b
ac
kligh
t c
i
rcu
i
t.
Th
e
right battery (B) powers the system
.
2.
The tester will flash a B
A
TTERY LOW
A
A
m
essage if s
y
stem batter
y
needs re
l
-
acing when unit is turned on. It will
not sa
y
this for the backlight batter
y
.
In the event that the backlight battery
i
s
l
ow, t
h
e
b
ac
kligh
t w
ill
not wor
k
.
3
.
At any time, select BA
TTERY from
AA
m
ain menu and
p
ress TE
S
T to
displa
y
the percentage available for
both batteries.
4.
The tester s
y
stem functions will
operate if no backlight batter
y
is
i
nstalled or i
f
it is low.
5
. SYSTEM B
A
TTERY LOW message
A
A
will be
p
resented when unit is turned
O
N and
t
h
e
b
atter
y
i
s
10%
or
l
ess usa
bl
e.
NO
TE
:
I
f
the backlight batte
r
y is fresh and
r
the system batter
y needs replacing,
r
th
e
b
ac
kligh
t
b
atte
r
y can be used to
r
o
perate the system by moving it to th
e
system batter
y location.
r
TO
C
LEAN THE TE
S
TER
Remove cap and wipe out inside of the tester with a dr
y
paper towel
.
NO
TE
:
G
rain may become lodged in threads of cap and
s
hould be removed with a small blade.
A
-
Li
g
h
t
B
attery
B
-
S
ystem Battery
C
- Main Menu
D
-
T
est
B
utton
E
-
S
elect Button

Troubleshooting
S
ymptom A: Unit does not power up or loses power occasionally
(
or backlighting
d
oes not operate.
)
Solution 1
:
Press ON-OFF button for shorter time. Do NOT hold button down
.
S
olution 2
:
C
heck batteries for 0% or higher. Replace as necessary
.
S
olution 3
:
Batter
y
contacts ma
y
be making poor contact. Remove batteries
a
nd pull metal contacts up
f
rom bottom o
f
compartment and above hei
g
ht o
f
p
lastic knob using needle-nose pliers.
S
ee illustration belo
w
.
Sy
mptom B
:
U
nit is inaccurate.
S
olution 1
:
Temperature o
f
the grain and unit
may be more than 20˚F
(
11˚C
)
different. Follow
p
reheat procedure (page 5)
.
S
olution 2
:
I
f
grain is at an extreme temperature,
l
et
g
ra
i
n sett
l
e to reac
h
room temperature.
R
etest
g
ra
i
n
.
S
olution 3
:
G
rain and/or test cell may have
d
eve
l
ope
d
sur
f
ace moisture from rapid chan
g
e
i
n temperature o
f
the
g
rain sample. Allow
g
rain
a
nd tester to stabilize near room temperature.
Inspect for visible moisture on
g
rain and inside
test cell. Dr
y
test cell with so
f
t cloth or blow
dryer, if necessary. Retest grain.
(S
ee page 6
).
S
olution 4
:
If the tester displa
y
s SYSTEM
BA
TTERY LOW, the test results may be
A
A
i
naccurate. Replace batte
r
y.

15
Serial Number
RE
CO
RD
S
ERIAL NUMBER
NO
TE: The tester serial number is located on the bottom of the unit.
W
rite your model number, serial number and date o
f
purchase in the space provided
b
elow. Your dealer needs this information when orderin
g
parts and when filin
g
warranty claims.
Date o
f
Pu
r
chase
__________________________________
S
erial No. _______________________________________
_
M
o
d
e
l
N
o.
________________________________________
(To be filled in by purchaser)
V
elcro is a registered trademark of VEL
C
R
O
Industries
.
C
ARRYIN
G
C
A
S
E
The carr
y
ing case is constructed of padded vin
y
l to
protect the tester
.
A
zipper bottom and Velcr
o
®
sealin
g
fla
p
p
ermit o
p
eration with tester
in carr
y
ing case
.
O
rder Part No. 06053

16
Notes

O
peradores Manuales
CO
FFEE PR
O
MOISTURE MAC
Marzo 2
009

2
qp g p j
G
arantìa
Este producto esta garantizado para estar libre de defectos en los materiales utilizados
y
su acabado
por dos
(
2
)
años a partir de la fecha de compra en USA ò Canadá y un
(
1
)
año en ultramar. Esta garantía
n
o cubre la batería ò daño resultante de uso erróneo, negligencia, accidente o mantenimiento e inst
a
-
lación inapropiada. Esta garantía no aplica a ningún producto que ha
y
a sido reparado o alterado una
autorización de re
p
aración e instalación de fabrica
.
La garantía declarada es exclusiva del resto de de las garantías de mercantibilidad, apropiadas para
el propósito
y
cualquier tipo, explicito o tácito. AgraTronix tampoco adopta ni autoriza a otro a asumir
cualquier obligación o responsabilidad con respecto a su producto
y
consecuentemente no se respo
n
-
sabilizara
p
or daños.
T
oda informaci
ó
n, ilustraci
ó
n
y
especificaci
ó
n en este manual son
basados en la ultima informaci
ó
n dis
p
onible a la hora de la
p
ublicaci
ó
n.
S
e reserva el derecho de realizar cambios sin previo aviso
.

Contenidos
Pagin
a
G
arantia de Producto y Programa de Mantenimient
o
............................
2
F
u
n
c
t
io
n
a
m
ie
nt
o
C
ondiciones de manej
o
..........................................................................
4
R
ecados de manejo................................................................................ 4
Procedimiento de
f
uncionamient
o
P
reca
l
entam
i
ent
o
.
..............................................................................
5
O
peración norma
l
..............................................................................
6
Mostrar Tem
p
eratura en la célul
a
...........................................................
7
Promedio de los resultados de la prueb
a
...............................................
7
Ajustar calibración
.
.................................................................................
8
P
au
t
a
limit
e
de
h
u
m
edad
.
.......................................................................
9
C
onsiderar calibración
/
limites
.............................................................
10
C
alibración nítida.................................................................................
.
1
1
S
eleccionar un idioma diferente
...........................................................
11
Seleccionar una función de la escala del gran
o
...................................
12
R
etroiluminado y apagado del medido
r
................................................
12
S
ervicio
C
ambiar batería
s
.................................................................................
.
13
Limpiar el medido
r
.
..............................................................................
.
1
3
Localización y resolución de problemas
.
...................... 14
R
e
g
istrar el número de serie ...............................................................
.
1
5
P
orta e
q
u
ipo
.
.......................................................................................
.
15
N
otas ...................................................................................................
.
16
3
Toda información, ilustración y especificación en este manual so
n
basados en la ultima informaci
ó
n disponible a la hora de la publicaci
ó
n.
Se reserva el derecho de realizar cambios sin
p
revio aviso.

Funcionamiento
RE
C
AD
OS
DE MANE
JO
S
ímbolo Definición
SISTEMA BATERIA DESCARG -------------------------------
N
eces
i
ta reem
pl
azars
e
HUMEDAD BAJO LIMITE
---------------------------
L
a humedad esta ba
j
o el l
í
mit
e
HUMEDAD SOBRE LIMITE
------------------------
La humedad esta sobre el l
í
mit
e
ERR
O
R
(
---
)
-
----------------------------------------------------------
Fa
ll
a
e
l
ec
tr
ó
ni
ca
4
CO
NDI
C
I
O
NE
S
DE MANEJ
O
E
l medidor de célula
y
grano DEBE estar libre de
c
ualquier condensaci
ó
n o humedad superficial.
H
umedad en el
g
rano o en el medidor de célula
c
ausar
á
lecturas de idas y venidas. El grano
mu
y
caliente o frío absorberá humedad cuando
s
e caliente o refresque. La funda de presi
ó
n del
me
did
or pue
d
e expr
i
m
i
r
h
ume
d
a
d
d
e
g
ranos
a
ltamente humedecidos, como una mazorca, en
e
l f
o
n
do
de
l m
ed
i
do
r
de
cé
l
u
l
a.
P
orqué los granos son de forma irregular
y
no
s
iempre encajan por igual en el medidor de c
é
l
u
-
l
a, var
i
ac
i
ones en
l
a
l
ectura
d
e menor
i
mporta
n
-
c
ia
p
ueden ocurrir. Para aumentar la
p
recisi
ó
n
si
empre tome tres
(3)
l
ecturas suces
i
vas
d
e
l
a
muestra total aprobada y tomar un promedio.
V
ac
i
ar
y
re
ll
enar e
l
me
did
or con un nuevo grano
de la muestra entre cada
p
rueba.
E
l medidor es más exacto cuando el grano y el medidor están entre 60˚F (16˚C)
y
9
0
˚
F
(
32
˚
C
)
. La unidad sin embargo, funcionará con temperaturas entre 33
˚
F
(
1
˚
C
)
y
1
20˚F (49˚C). Para obtener mejores resultados, la temperatura del grano no debe es
-
tar por debajo de 40
˚
F
(
4
˚
C
)
o sobre 110
˚
F
(
43
˚
C
)
. Si la temperatura del grano es 20
˚
F
(11˚C) más o menos que la temperatura de la unidad, precalentar el medidor según
i
nstrucciones en la pagina 5.
C
ondensaci
ó
n en el grano o medidor de c
é
lula es mejor
e
v
i
tarse ten
i
en
d
o e
l
me
did
or y e
l
grano con temperaturas cas
i
i
gua
l
es
.
El
me
di
oam
bi
ente a
l
cua
l
se expone una muestra
d
e
g
rano pue
d
e cam
bi
ar apre-
c
iablemente su contenido de humedad. Expuesto al aire libre el grano puede perder
o
g
anar de 1 a 2% de humedad en solo unos pocos minutos. Si una muestra va a
s
ometerse por un corto periodo antes de ser probada, deber
í
a ser colocada en un
e
nvase bien cerrado, hermético, como una bra
g
ueta o recipiente
.
Table of contents
Languages:
Other Coffee Laboratory Measuring Instrument manuals
Popular Measuring Instrument manuals by other brands

Succeeder
Succeeder SF-8200 Operation manual

Active Tools
Active Tools CoxOrb Platinum user guide

Pulsar
Pulsar Ultra 3 (UL) instruction manual

MedRx
MedRx AVANT Series installation manual

Sea-Bird Electronics
Sea-Bird Electronics SEACAT SBE 19 operating manual

PCB Piezotronics
PCB Piezotronics IMI SENSORS 603M113/ICS-1 Installation and operating manual