Thank you for choosing the Aristette II. To get the
most out of your new dryer, we recommend that you
read the instruction manual before using the machine.
Please keep this instruction manual in a safe place
near the product so that you can find safety
instructions and important information handy.
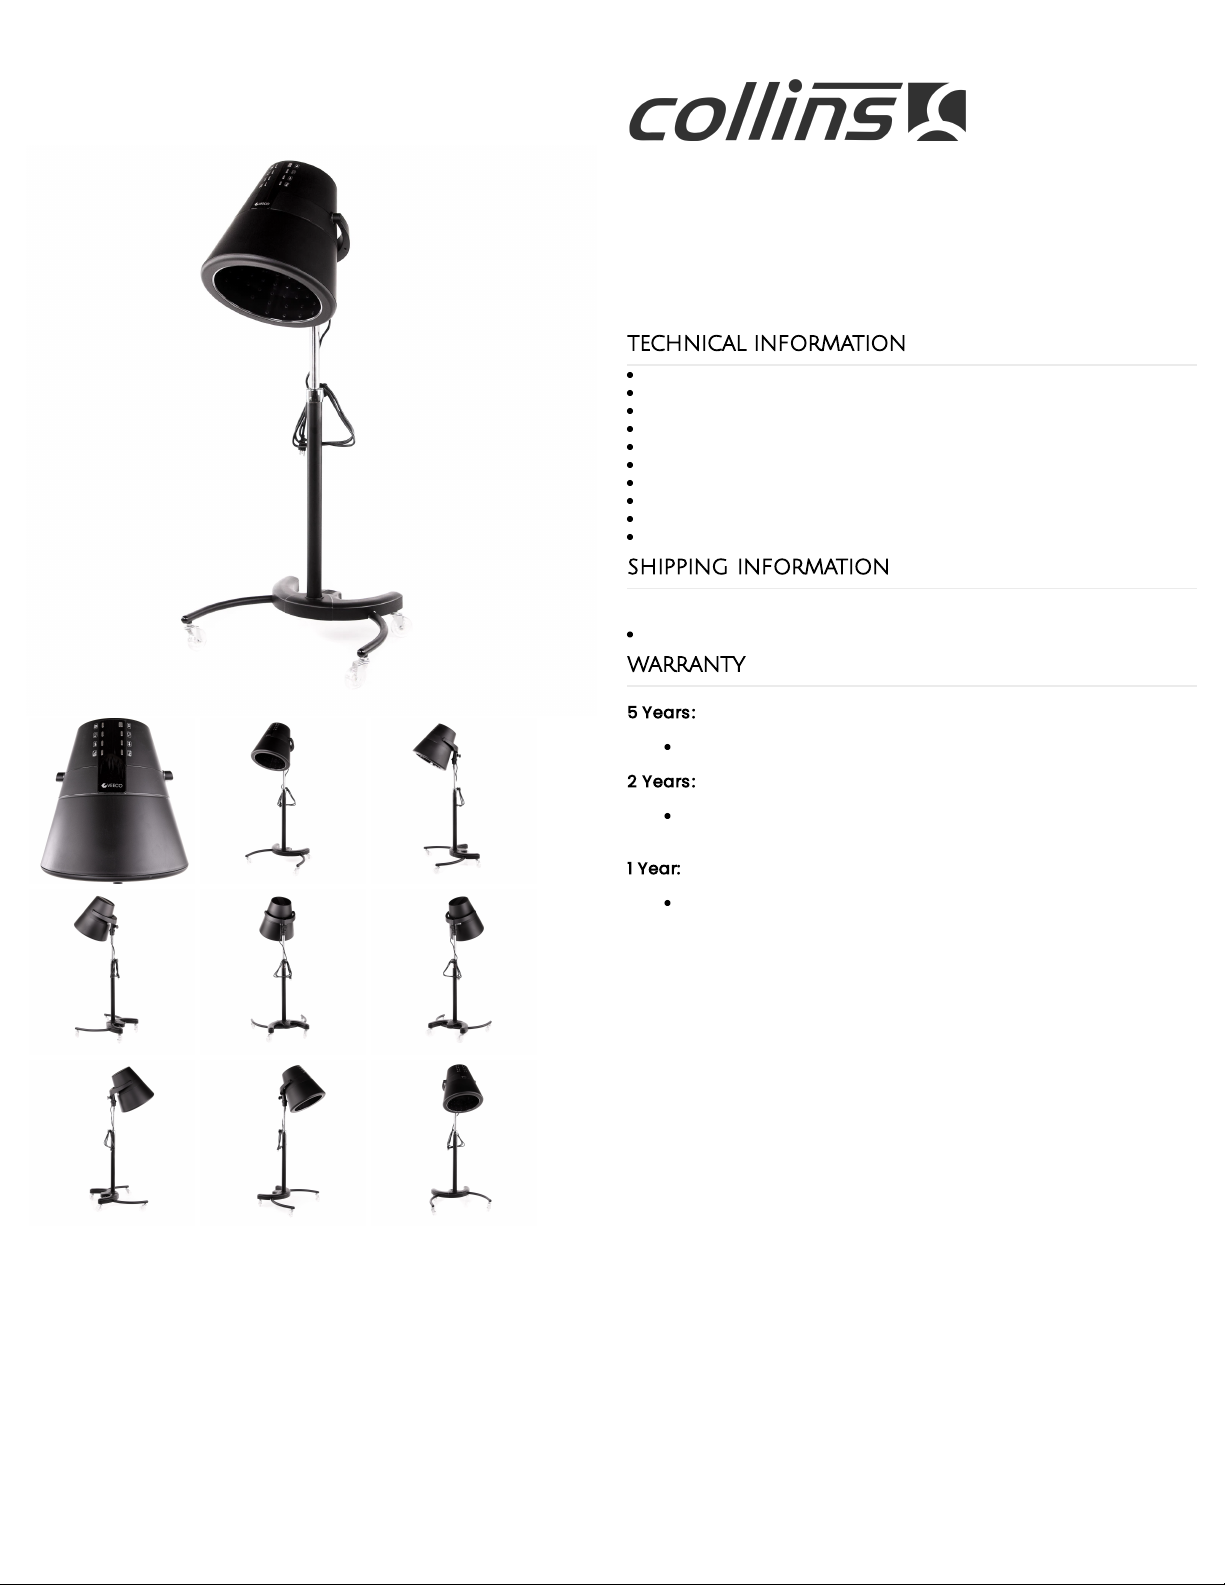
TECHNICAL PARAMETERS
110-120V~ 50/60HZ 1000W
READ THESE INSTRUCTIONS
BEFORE USING THE DRYER
1. Ensure the correct voltage is being supplied.
2. Operating environment: room temperature between
40℃ to 77℃; no more than 95% relative humidity.
3. Do not insert metal objects into the machine to
ensure user safety.
4. Do not use in flammable gases, objects and similar
environments to avoid electric shock.
5. If you experience issues with your dryer, DO NOT
disassemble or attempt to repair your dryer
yourself.
6. Do not pull the power cord to to unplug the unit.
Please grasp the power plug and pull it out; do not
move the product by pulling the power cord and
grabbing the head of the machine.
7. Do not use outdoors.
8. Do not bend, stretch or bump the power cord. If
the power cord is damaged, it must be replaced by
the manufacturer, its service department, or a
similarly qualified person to avoid danger.
9. When it is found that the dryer is damaged due to
the drop, or the internal electrical parts of the
dryer are visible. Please do not attempt to connect
the power supply. You must inform the
manufacturer or supplier immediately.
10. This device is not intended for use by children.
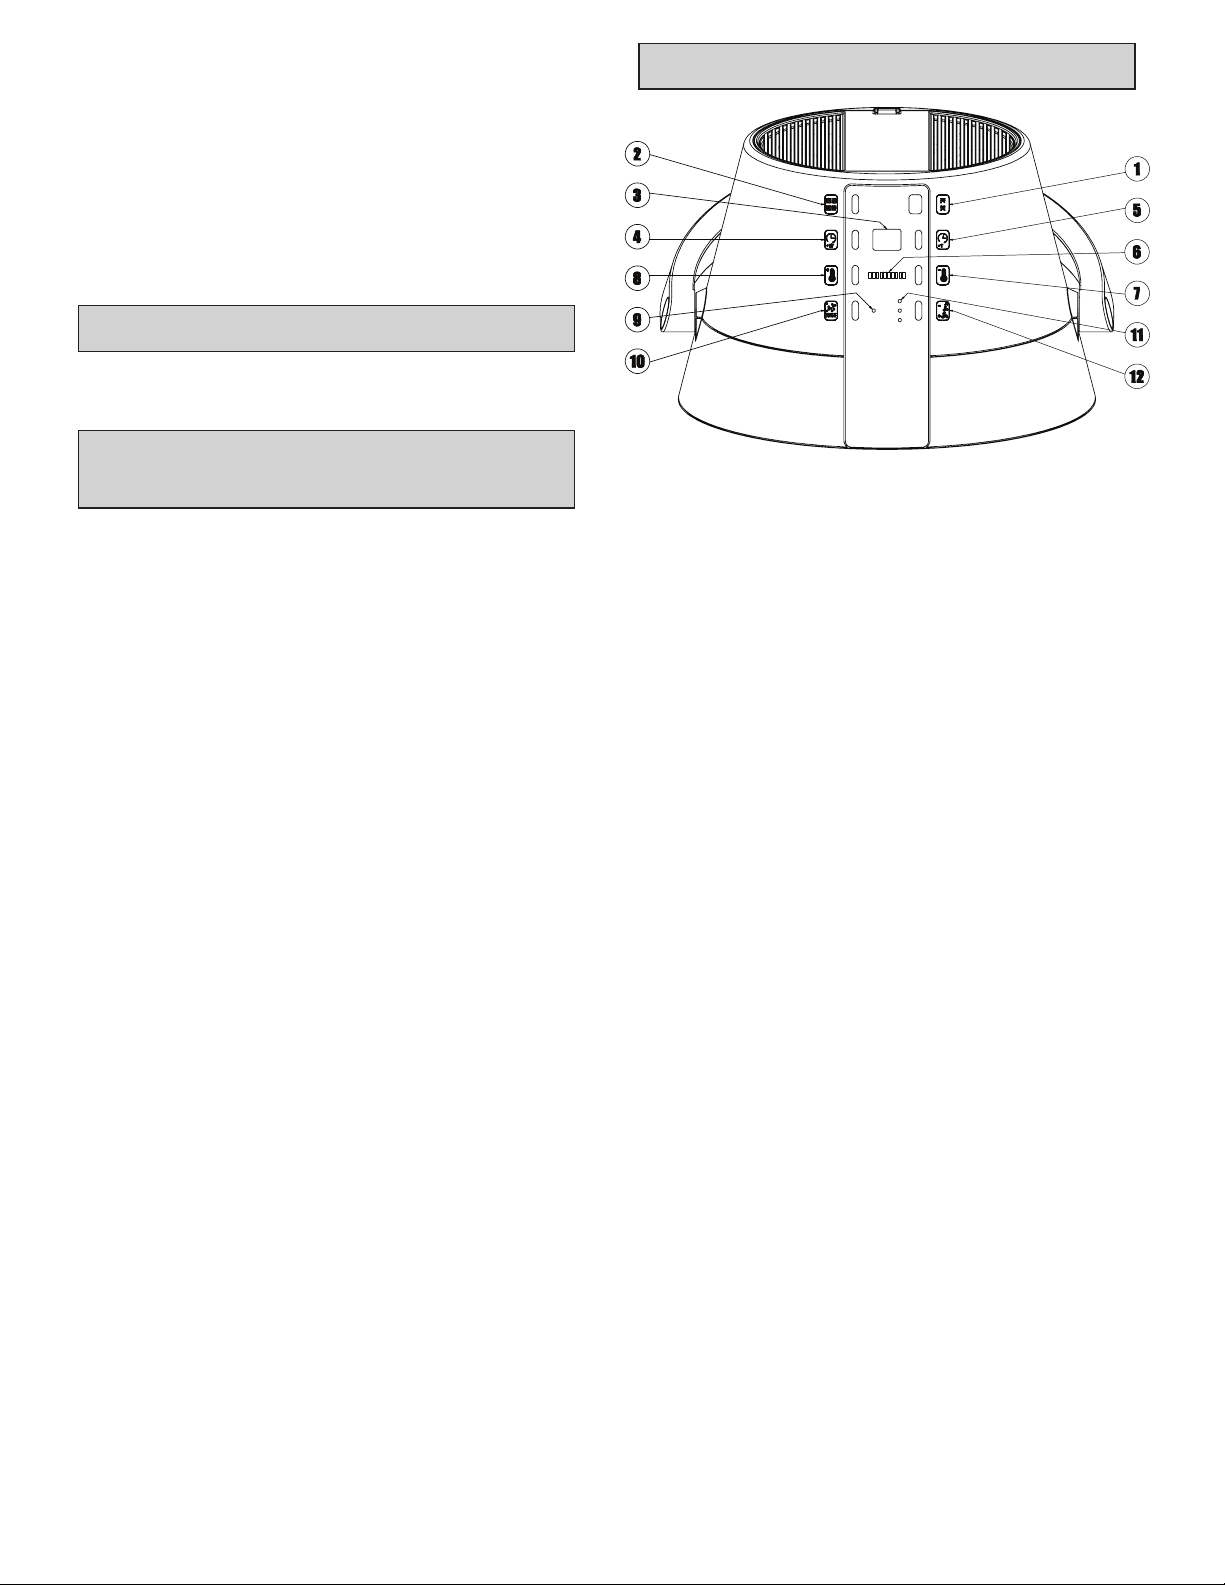
CONTROL PANEL
⑴ Main power switch
⑵ Start/Pause button
After turning the machine on, set the time,
temperature and other programs. Press this button
to enter the working mode. You may press this
button to pause the machine, the time display will
flash.
⑶ Time display
It shows the working time, max time is 60 minutes.
⑷ Time increase button +10
Each time you press it, it will increase 10 minutes; if
the display time is 60 minutes, continue to press
this button to change the time to 10 minutes.
⑸ Time increase button +1
Each time you press it, it will increase 1 minute; if
the display time is 60 minutes, continue to press
this button to change the time to 1 minute.
⑹ Temperature display
Total of 6 set temperatures.
⑺ Temperature adjustment button -
This button is used to decrease the temperature.
⑻ Temperature adjustment button +
This button is used to increase the temperature.
⑼ Ion display
When the light is on it indicates ion mode is turned
on.
⑽ Turn on/off ion mode
Press this button to turn on or off the ion mode.
⑾ Air speed adjustment button
Press this button to change the speed level, total of
3 levels.
⑿ Air speed display
It shows the air speed mode.
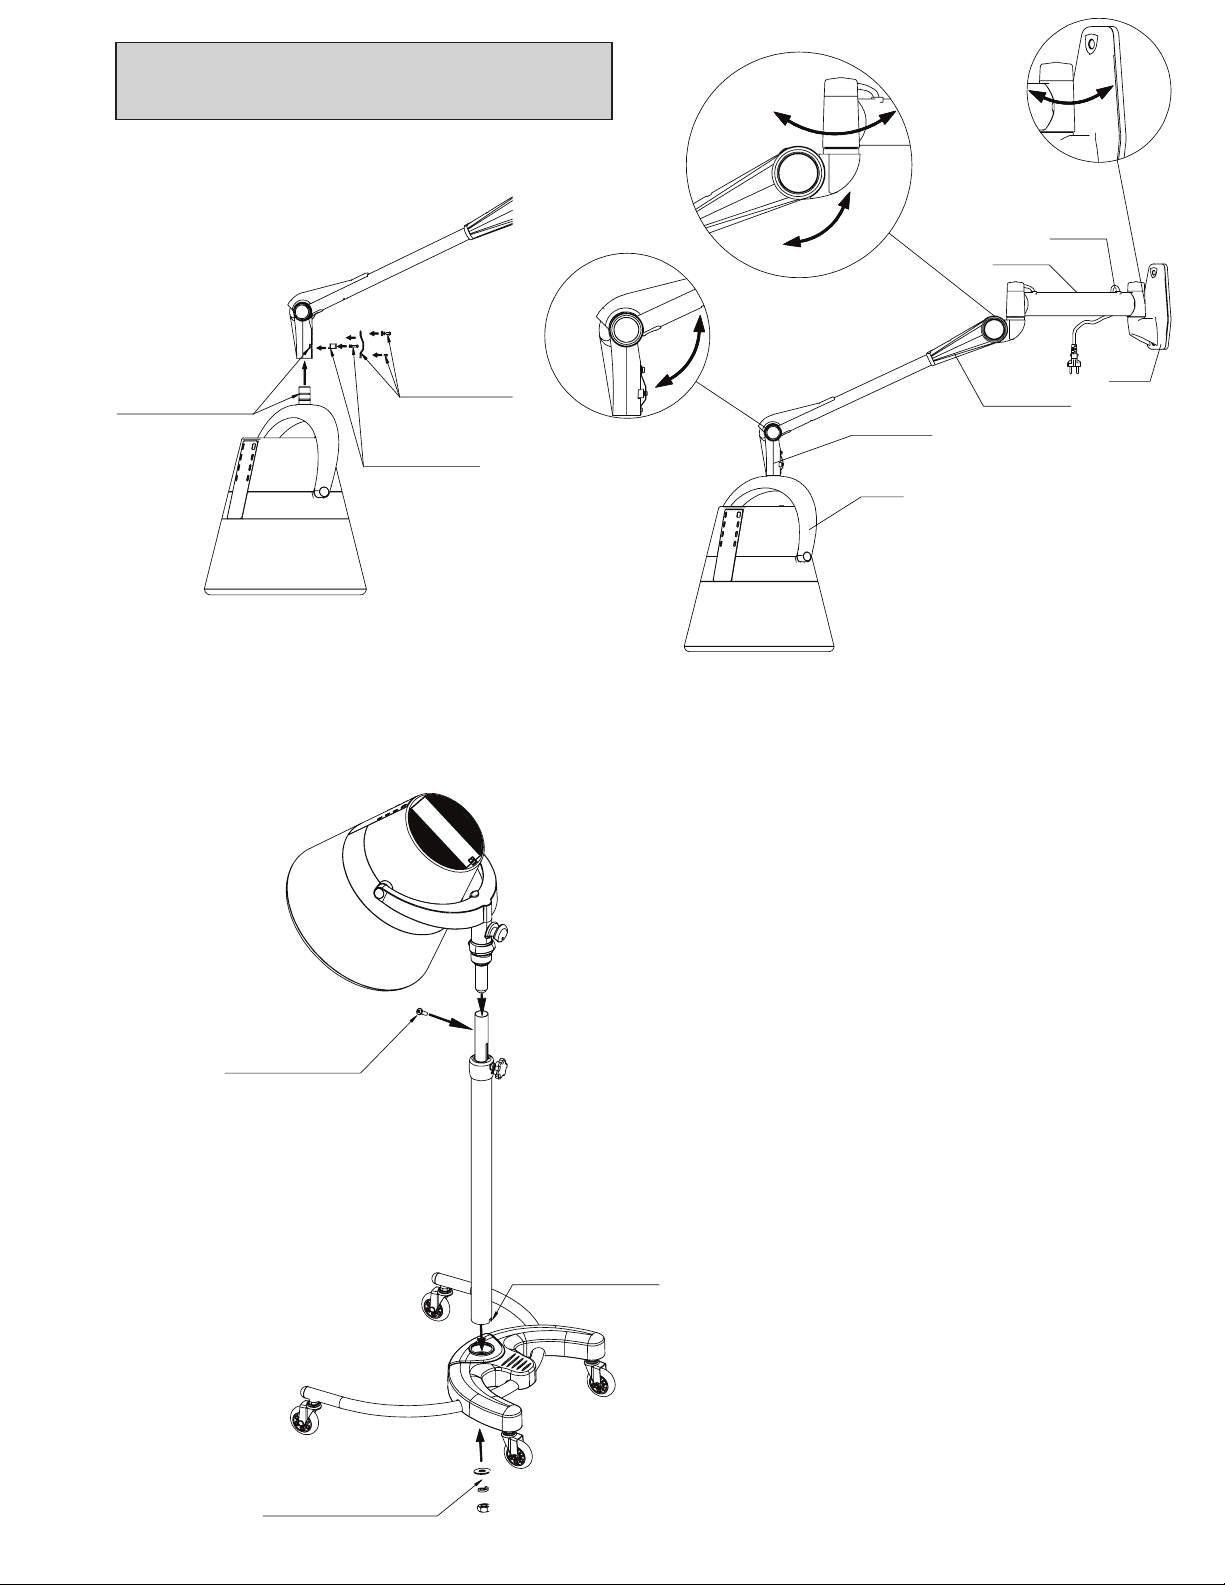
DRYER INSTALLATION
INSTRUCTIONS
Wall Mount 3524H
Floor Stand 3524S
Step 3: Place the dryer
head unit onto the slide
tube and tighten screws.
Step 1: Align the
stand tube with
the base.
Step 2: Insert bolt through
washer and locking washer.
Tighten to secure.
Head Unit Hanger
Head Unit
Moving Arm
Wall
Mount
Power Cord
Swivel Arm
Step 1: Insert the
dryer head unit on
the arm unit, then
align the slots.
Step 2: Insert the
screw and tighten.
Wall Mounting - Screw the arm frame into the pre-installed In-Wall-Backing or
Overlay Panel using wood screws. A single wall stud will not provide sufficient
support. Recommended height is 1.8-2 meters (71-79 inches) from the floor to the
bottom of the arm frame.
CAUTION:
Ensure all screws and bolts in the arm frame are
fastened and tight. Check the arm frame on a regular
bases to ensure all screws and bolts continue to be
fastened tightly
Step 3: Insert the
screw and tighten.