©2008 by PSiSC®
6.1 Note: When using adjustable feet install locker runs from left to right where
possible to provide access to adjust the legs. Locker installation must always start
from the corner for applications using a corner filler.
6.2 Have at least (4) lockers prepared with the adjustable leveling feet if applicable.
6.3 Starting in the corner or wall where the run of lockers begin, stand (2) lockers up
and thru-bolt the side panels together. (Fig 6.1) Use the locker connecting bolts
and barrel nuts provided. There will be 6 fasteners for each side to side locker
connection. (Fig 6.2)
6.4 Space these lockers from the corner according to the dimension given in the top
layout. (Fig 6.3)
6.5 Adjust the height of the lockers to the leveling line and square up the lockers
using cedar shims (for curb mounted) or adjustable feet.
6.6 Drill a ¼” hole through the back of the lockers 6” down from the locker top, inline
with a wall stud. Install a locker to wall screw to hold the lockers in place.
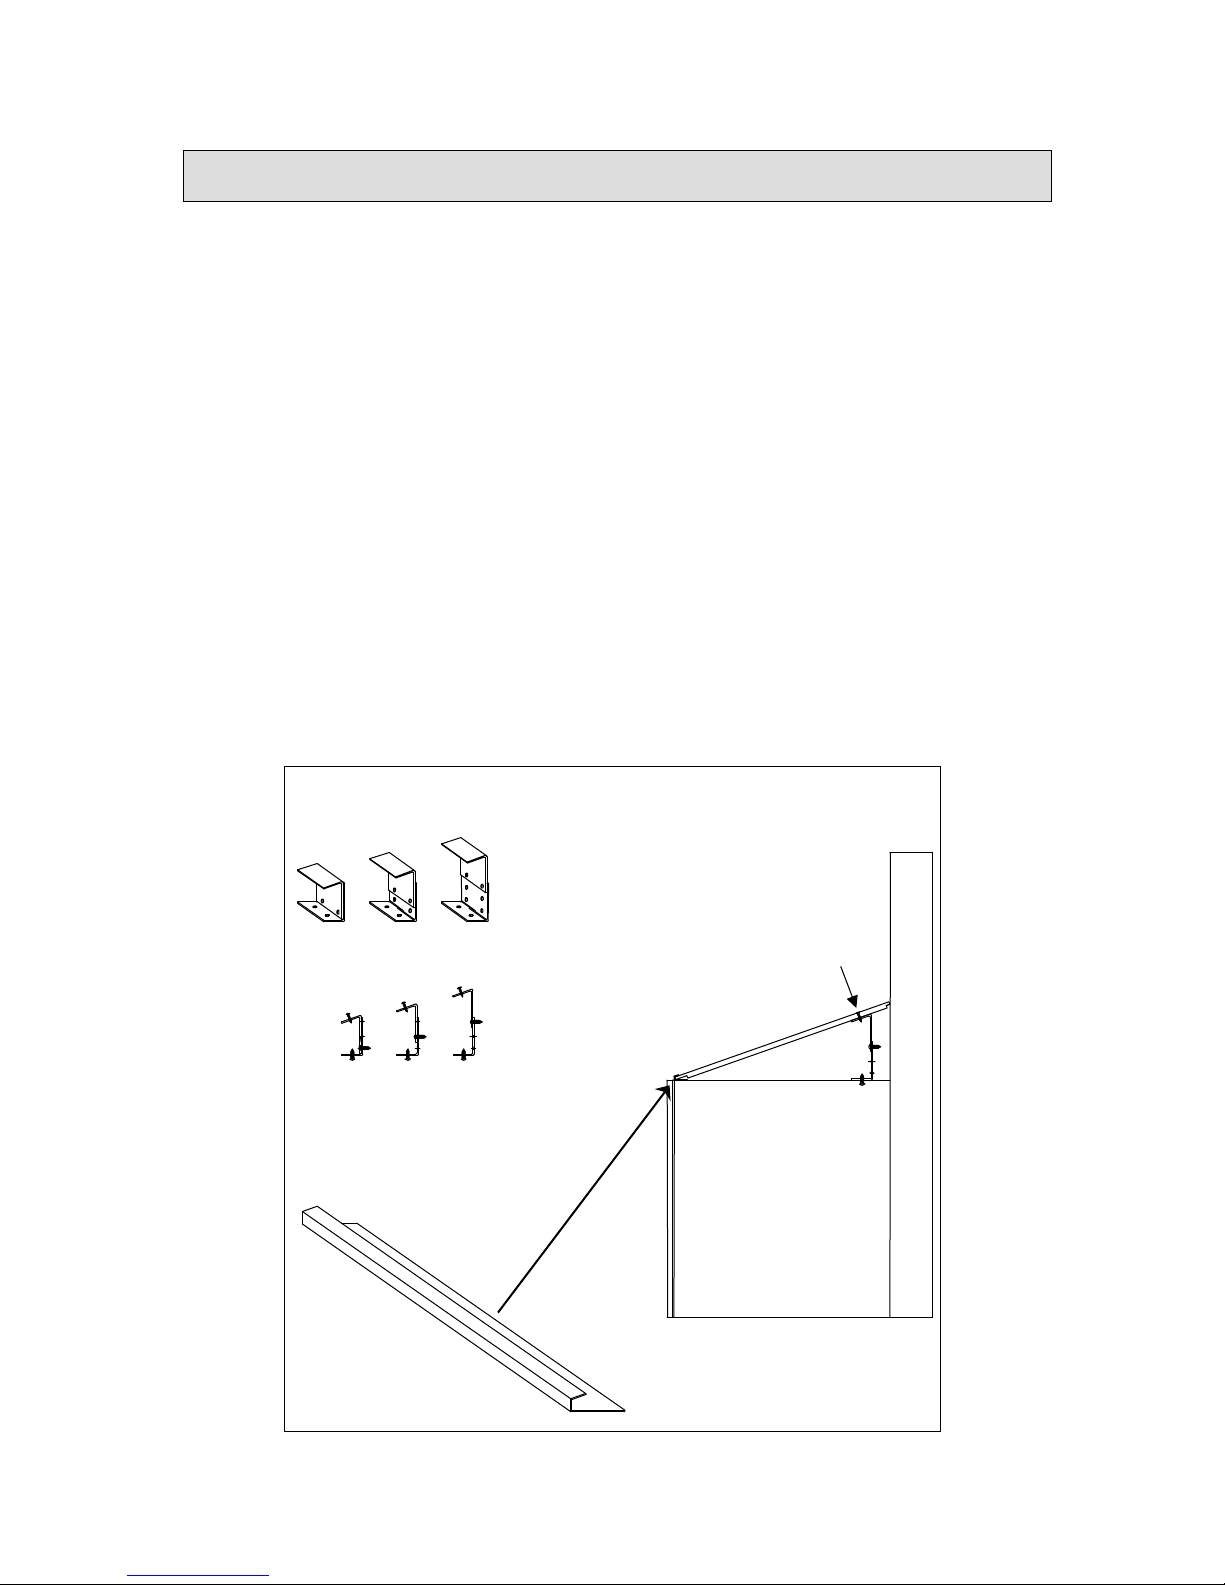
6.7 Install the proper filler or corner filler to the first locker using the supplied #10-24 x
¾” screws. Insert them into the top and bottom connecting holes predrilled in the
locker bodies. The holes in the filler bracket will align with the holes in the side
panel. (Fig 6.4)
6.8 For corner filler applications: Repeat steps 6.2 thru 6.5 for the (2) lockers to be
installed on the adjacent wall. Proceed to step 6.10 if starting the run with a
standard filler.
6.9 Position the adjacent lockers at the corner so that the corner filler brackets align
with the locker side panel. Level the lockers and attach the corner filler to the
locker. (Fig 6.5) Repeat step 6.6 to anchor these lockers to the wall.
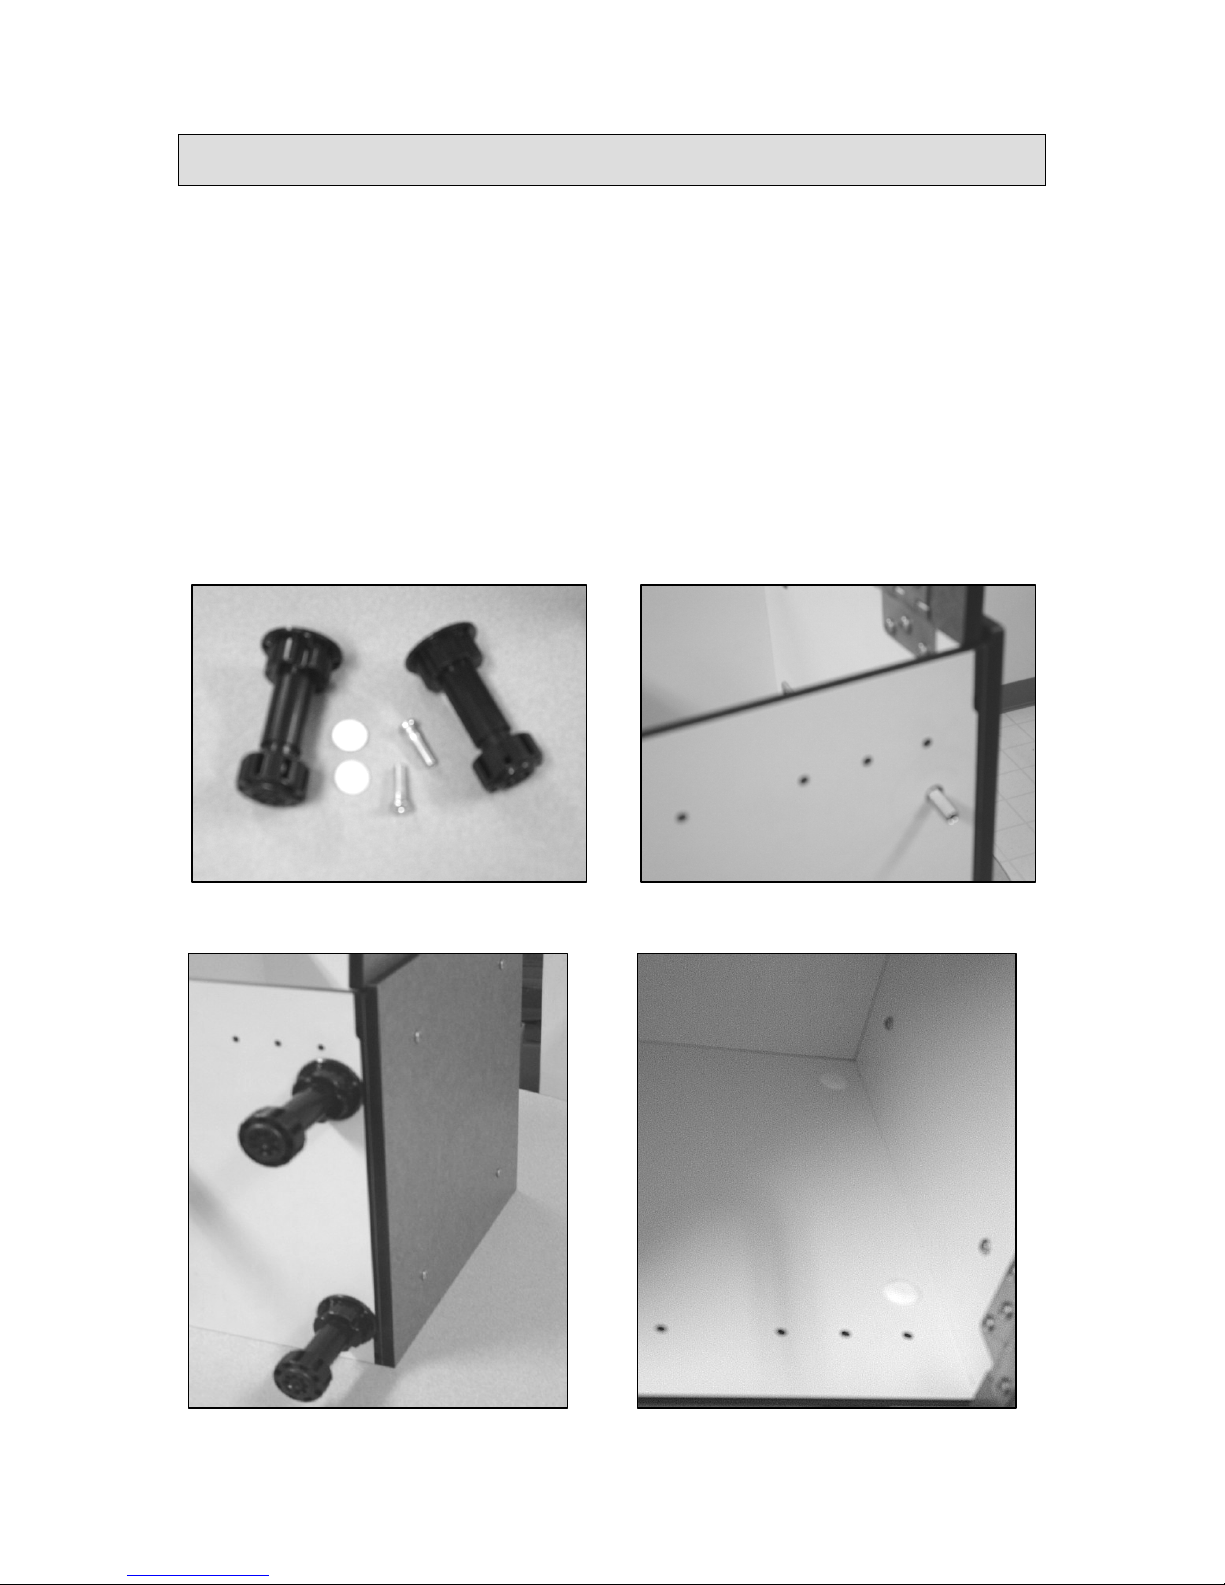
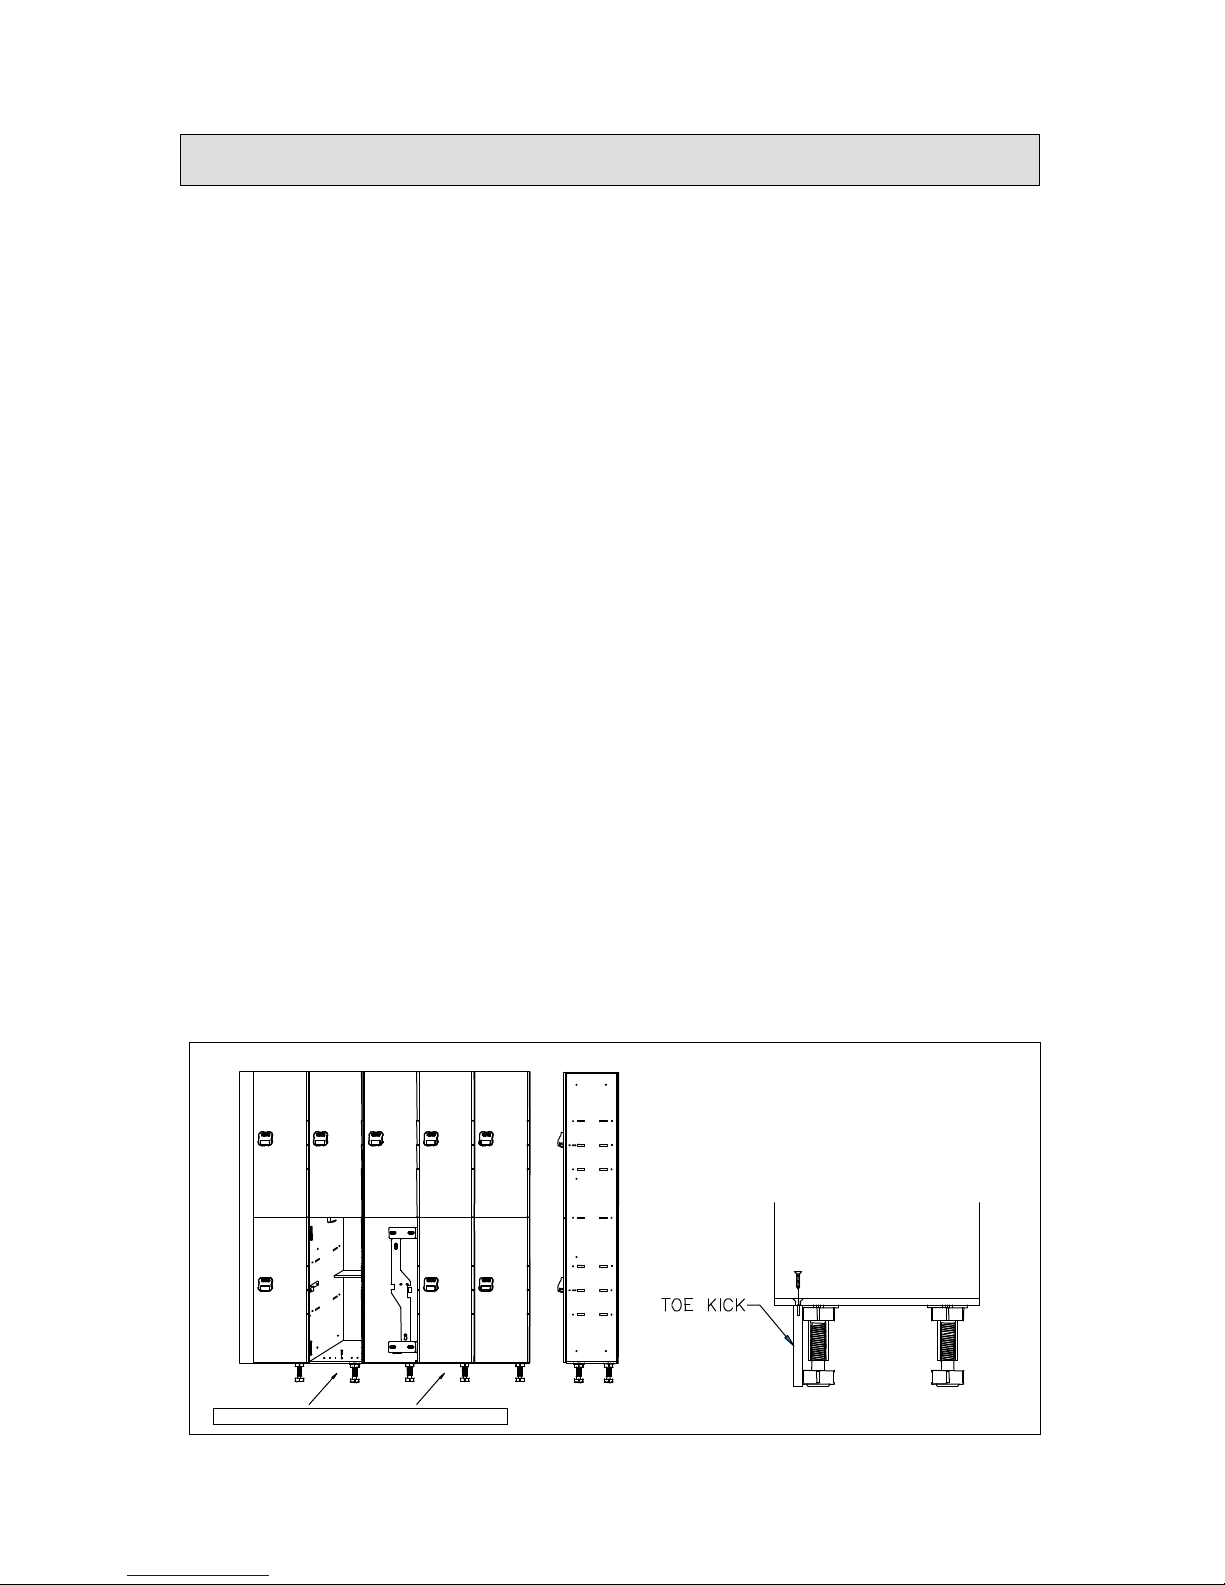
6.10 Install the adjustable feet on each locker and finish installing the rows of lockers.
(Fig 6.6)
6.11 Install the proper filler strip at the end where the locker run stops at a stub wall.
Pre fit the filler panel and scribe as necessary to the wall.
6.12 Make sure the lockers are plumb and level. Install the locker to wall screws into
the remaining studs. Drill ¼” hole in bac
k of locker 6” down and install screws.
6. Locker Installation