Comm-Tec ProPLAY User manual

1of21
COMM-TECProPLAYAudio
DigitalAudioPlayer
UserManual
Version 2.0

2of21
1. TableOf Content
1. TableOf Content................................................................................................2
2. GeneralNotes....................................................................................................3
3. Product Description.........................................................................................3
3.1Product Dimensions....................................................................................3
3.2SystemFeatures.........................................................................................4
3.3ConnectorAssignment DB-26 pinmale.......................................................5
Infrared RemoteControl......................................................................................6
4. UserInstruction...............................................................................................7
4.1QuickStartInstruction.................................................................................7
4.2NotesforCorrect Use..................................................................................7
4.3SystemSetup..............................................................................................8
4.4Operating Instructions..................................................................................9
5. USB Host Update...........................................................................................11
5.1What do youneed?....................................................................................11
5.2Setup.........................................................................................................12
5.3Content Update..........................................................................................13
6. RS-232 Commandson ProPLAYAudio..........................................................17
6.1Connection.................................................................................................17
6.2Command Code.........................................................................................17
6.3Howtocreateand define the command code inbarcode.ini........................19
7. TechnicalSpecifications.................................................................................21
Author: SvenLiebscher
Date: 15/07/08

3of21
2. GeneralNotes
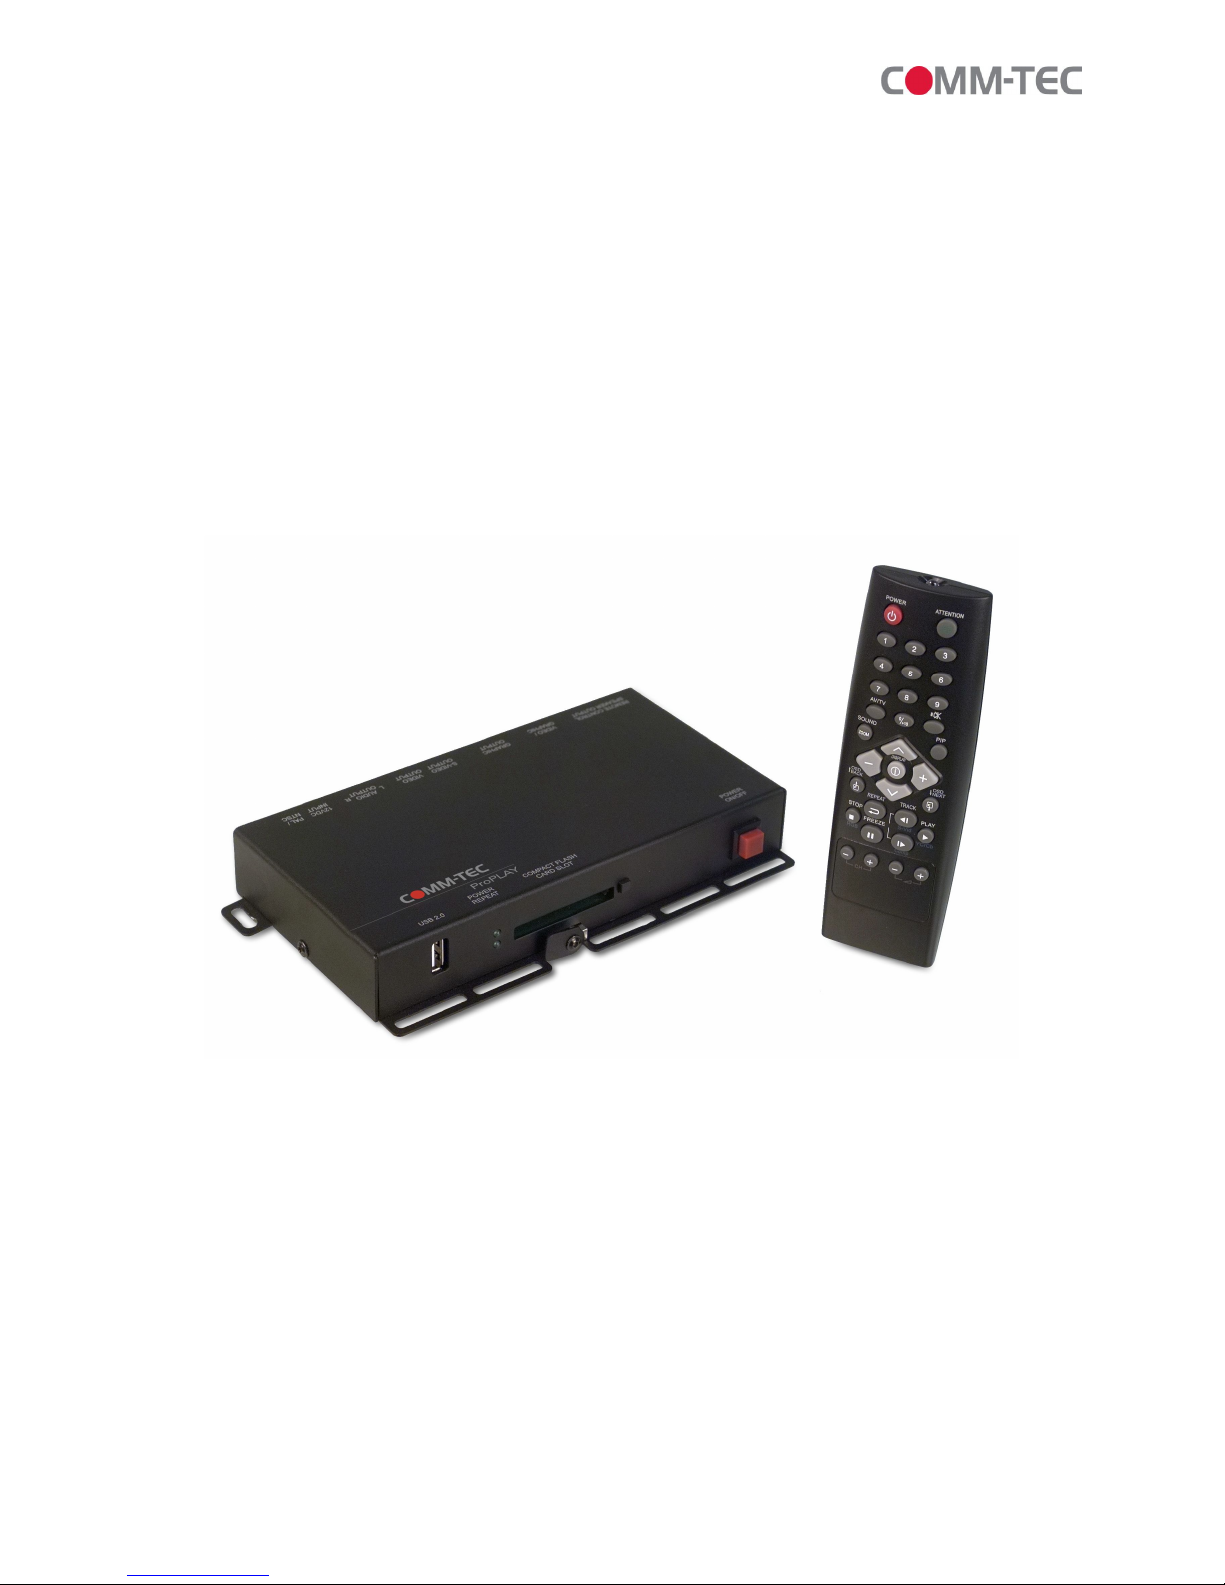
The COMM-TECProPLAYAudioisaremotecontrollableDigitalAudioPlayer. The
datawillbe played back fromaCompactFlashCard, whichisnotinthescope of
delivery.
Pleasecheck the scope ofsupply,afteryou havereceivedthe shipment. Following
hastobe included:
·ProPLAY Audio
·12Vpowersupply
·IECpowercordwithEUplug
·DB-26pinmaleplug
·Infrared remotecontrolunitincl.2xAAAbatteries
·Usermanual
Ifyourealizeahidden transport damage, pleasecontact yourinsurancecompanyor
supplierimmediately.
3.Product Description
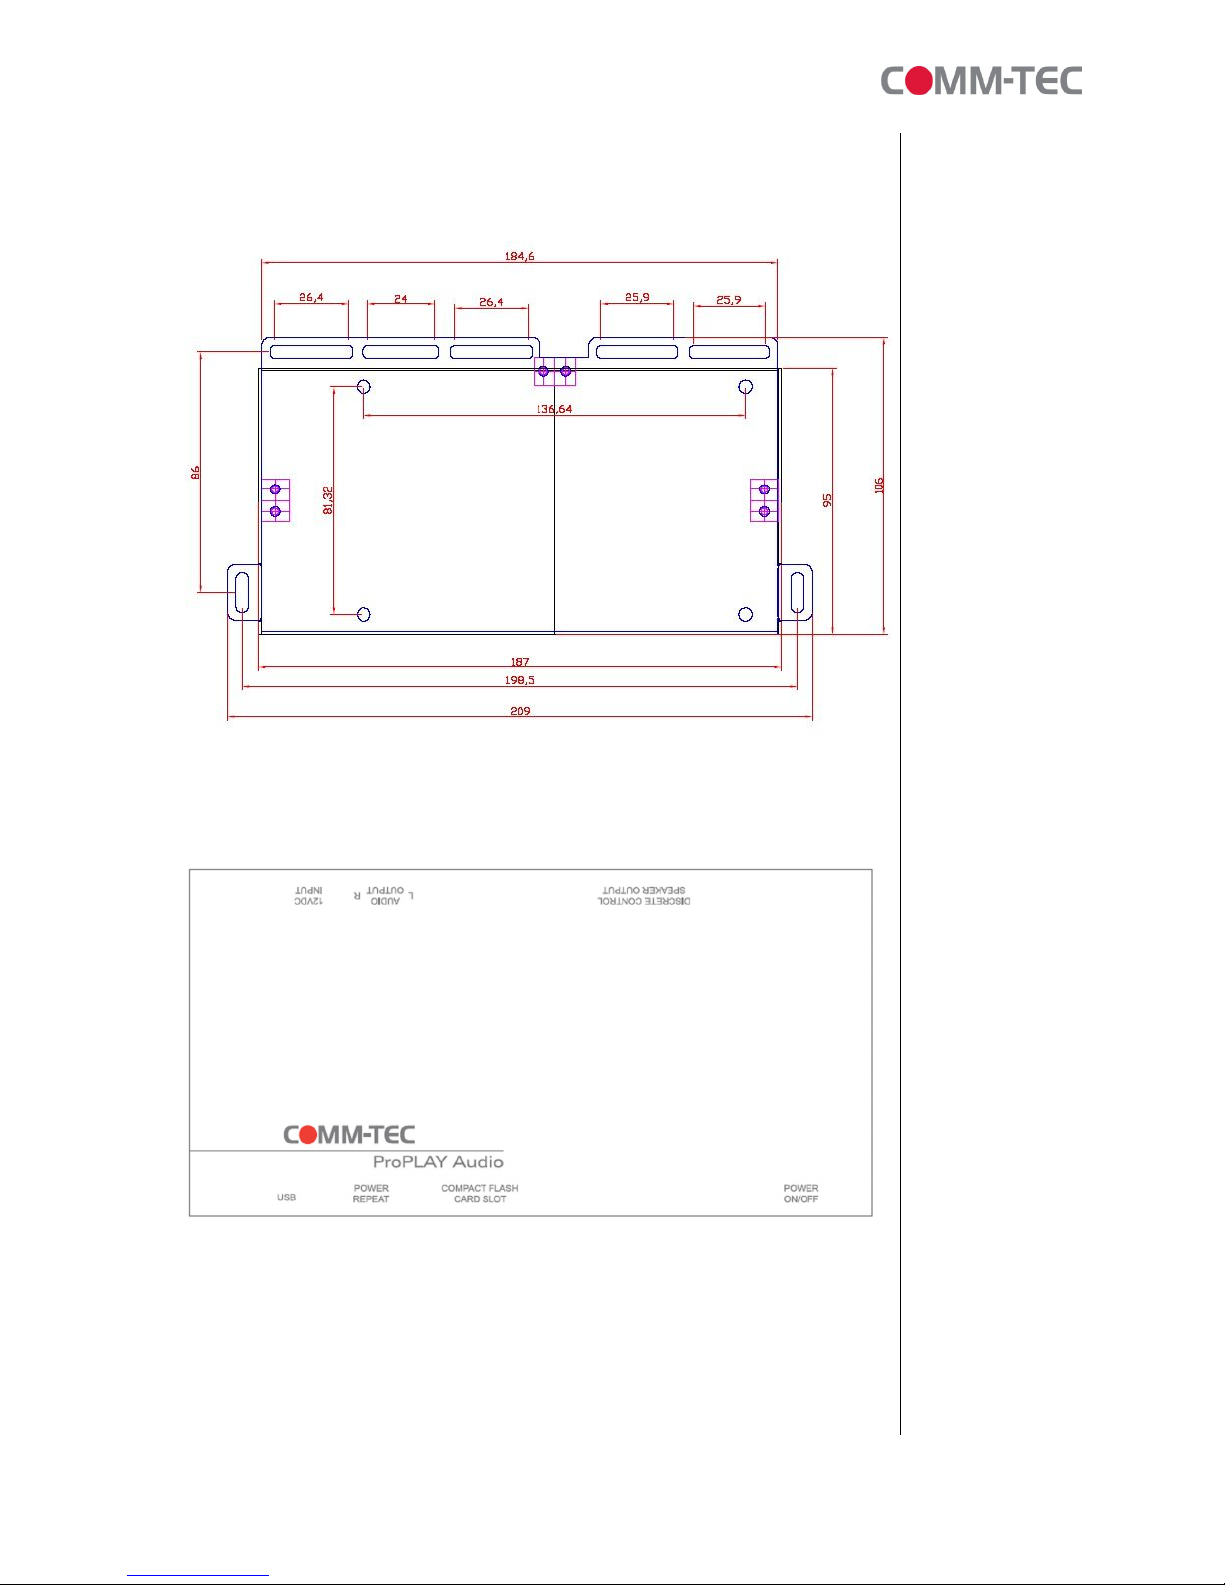
3.1 Product Dimensions
Side View(inmm)

4of21
Top View(inmm)
3.2 SystemFeatures

5of21
Description Type/ Use
CompactFlashCardSlot 25x2pinHiroseCF-IISocket
(acceptsCF Cardtypes1&2)
USB USB 2.0Port
PowerLED On(green)/Off (clear)
StatusLED Enabled (green)/disabled (clear)
Remotecontrol/Speakeroutput DB-26 pinfemaleconnector
Audiooutput –stereo right RCAjack–Right (red)
Audiooutput –stereo left RCAjack–Left (white)
12VDC Powerinputjack DC powerjack. Centerpinpositive,
2.5mm diam.
Poweron/off Rockerswitch
3.3 ConnectorAssignment DB-26 pinmale
frontviewof the plug
PinNo Description PinNo Description
1Button 1 14 Button 13
2Button 2 15 Button 14
3Button 3 16 Button 15
4Button 4 17 Button 16
5Button 5 18 Returnfor9-16
6Button 6 19 RS-232 RX
7Button 7 20 RS-232 TX
8Button 8 21 RS-232 Ground
9 Returnfor1-8 22 SpeakerL
10 Button 9 23 Ground / Signal
11 Button 10 24 SpeakerR
12 Button 11 25 Ground / Signal
13 Button 12 26 +12 Vout
1 9
10
19

6of21
3.4 Infrared RemoteControl
Specifications:
OperatingVoltage: DC 3V
Operating Temperature: -10°C~50°C
OperatingCurrent: 20 K10mA
Power Source: 2xAAA sizebatteries
Number ofkeys: 33
Oscillationfrequency: 455 kHzK2.2kHz
Arrival distance: 7m
Dimensions(H)x(W)x(D) 148mm x47.5mm x28mm
Weight Approx.75g (without batteries)
Select Station IDfor IR
enable/disable
Mute
Picture in Picture
Up/ Down
Gotonext OSDmenu
Play(Y CrCb/Component)
Tracks select
UpTrack (S-Video)
Next Track(Composite)
Volume
PowerOn/Off
DigitKeys
Selectinput source
Zoom/Sound Mode Selection
+/-key
BacktopreviousOSDmenu
Repeat
Stop(RGB)
Pause/Freeze
Volume

7of21
4.UserInstruction
4.1 Quick Start Instruction
Neverconnectordisconnect partsofthe systemwhen the systemispowered up as
thismaycauseseriousdamage.
Connection and usage arestraightforward. However,careneedstobe taken with
the following:
·Ensuring partshavebeen correctlyconnected –bothpower&signal
considerations.
·Checking thatallswitchesareset correctly.
·The inputsignaliscompatible.
·Legal&safetyrequirementshavebeen met.
·Ifyouareusing supplied accessories, ensuretheyarecorrect forthe modelof
speakers.
Nowconnect the systemasfollows:
·Connect Audiocablesfromthe ProPLAYAudiotothe speakers/ audio
equipment.
·Connect the powersupply(DC 12V@ 1.2Aminimum. -ensurecorrect+&-
orientation)tothe ProPLAY Audio.
·Poweron the speakers/ audioequipment.
·Poweron the ProPLAY Audiounit.
4.2 NotesforCorrectUse
The ProPLAYAudioisdesigned forusewithstandardaudiospeakers. Hereare
somenotesforcorrect use:
·Preparation- Beforeyou proceed,pleasefamiliarizeyourself withthe various
connectors, jacks, switchesand function buttonsof the ProPLAY Audiounit (see
item3.2-SystemFeaturesdiagrams).
·Theunit -Handlethe unit withcare; anyknockingmaycausecomponentsto
comelooseand disconnect. Operateinacooland dryplace.
·Power Input: 12VDC1.2A(minimum)isrequired;thisshouldbe aregulated
supply. Itisrecommended tousethe powersupply, whichisdelivered withthe
ProPLAY Audiounit.
·Audio output Audio-Stereo output. Volumeiscontrolled bythe switchmount
buttonsorpreset withthe ProPLAYStudiosoftware.
·DiscreteControl: Aexternalportforremotebutton control. Usercan usethis
port asatouchscreen orbutton interface.Maximumup to16 touches/buttons
can be accessed.
·DiscreteControl Cable: The cablestoanyremotebutton control shouldbe of
suitablequalityand lengthsothatimpedancedoesnot affectperformance.
Generallylengthsup to1metre(3feet)shouldbe acceptable.

8of21
·Power LED: The powerLEDindicatorshowspowerisbeing supplied tothe
player–LEDlightactivated bythe poweron/offswitch.
·StatusLED: The LEDindicatesthe statusof CompactFlashcard.
·USB2.0Port: Please see Chapter5forhowtheUSB2.0Portisbeingused.
·RS-232 Control: Baud ratemust be set to(9600, n,8,1)and recordsuffixisset
toCR (0DH).IndividualRS-232 commandscan be set up withthe ProPLAY
Studiosoftware.
·RS-232 Port: Pleaseconnect yourcontrol systemtothe DB-26 pinport of the
ProPLAY Audioaccording tothe wirering diagramm shownunder3.3
·Service &Warranty: Warrantyisinvalidatedifthe unitisdismantled inanyway.
The unit isnot userserviceableorrepairable.
CAUTION: Do not attempt toremoveanypart of the casing orinternalparts.
4.3 SystemSetup
·PowerUp
The Autoplayand Sleep playbackmode areselected when writing the audio
fileson tothe CompactFlashCardbyusing ProPLAYStudiosoftware.
Auto-Playstart up mode
·Plug intheexternal powersupply
·Insert CompactFlashCardcontaining ProPLAYStudioexported “.pll/
.prj”and otherdigital files. (e.g..mpg,.mp3, .jpg)Allfilenamesshouldbe
in8+3format (i.e.xxxxxxxx.xxx)and avoidusing anyillegal characters
like“~”,“_”,“-“,etc
·Switchthe power'on/off'switchto'on'.
·The first track of the collection of audiofileswillbe auto-played.
Sleep mode
·Plug intheexternal powersupply
·Insert CompactFlashCardcontaining ProPLAYStudioexported “.pll/
.prj”and otherdigital files. (e.g..mpg,.mp3, .jpg)Allfilenameshouldbe
in8+3format (i.e.xxxxxxxx.xxx)and avoidusing anyillegal characters
like“~”,“_”,“-“,etc
·Switchthe power'on/off'switchto'on'.
·Press the 'play' button'.
·The first track of the collection of audiofileswillbe played.
Special specifictrack playback activated byassigned button can alsobe
performedinsleep mode using ProPLAY Studiosoftware.

9of21
Auto-Loop Playback
AfterTrack1isset toplay,itwillplaytothe end, then Track2willstartplaying from
beginning toend,then Track 3etc.Whenthe ProPLAYAudioplaystothe end of the
last track,itwillautomaticallyjumpback tothe beginning of Track1,repeating tracks
1,2then 3etc.The ProPLAYAudiowill playinauto-loop playmode,solong asnone
of the function buttonsarepressed. Loop playback isthe standardplayback setting
of the ProPLAY Audio(insimpleplayand playlistmode)butthe trackplayback
sequencecan be changed asrequired using ProPLAY Studiosoftware.
4.4 OperatingInstructions
Therearetwooperating modesinProPLAYAudio– “playlistmode”and “simpleplay
mode”
.
·Playlistmode
Whenoperating inplaylistmode, bothproject file(*.prj)and playlistfile(*.pll)
must be present on the CompactFlashcard.Theseareused tocontrol the
sequenceforallaudiotracks.
The project and playlistfilearecreated using ProPLAYStudio software. Using
thissoftware, you canset simplesequencesorcomplexsequencesincluding
“jumptrack“or“nexttrack”actions. ProPLAYStudiocan alsoprogrambuttons
withdifferentfunction like“play”, “stop”,“pause”, “mute”,“previous”,“next”and
“volume”aswell asRS-232 commandstoplaytracks.
Note: Makesureall capital lettersinfilenamedefined inplaylist areconsistence
withthe filenameon CompactFlashcard.Allfilenameshouldbe in8+3format
(i.e.xxxxxxxx.xxx)and avoidusing anyillegal characterslike“~”, “_”,“-“,etc
·Simpleplaymode
Insimpleplaymode,the userjust copiesall audiofiles(.mp3)ontothe
CompactFlashcard.The ProPLAYAudiowillplaythesefilesinalphabetical
sequence.
·Scheduleplaymode
The ProPLAYAudioisabletoplaybackplaylists, controlled bydateand time
settings. Aschedule.ininamed filehastobe written inthe belowshownformat
and copied ontothe CF card.Tocreatethe corresponding playlistfiles,
ProPLAY Studioisrequired.

10 of 21
Note: The maximumnumberofscheduletasksyou can defined islimited to40.
OperatingFunctions
The following keybuttonsaredefault in“SimplePlaymode”.
PLAY (Button 1)
·Resumesplayback ofaudiofilesfromtrack 1afterSTOPhasbeen pressed.
·Resumesplayback ofthe trackfromthe pointthatit hasbeen set toPAUSE.
·Playback isreset back tothe beginning of the specifictrackwhichisbeing
played atthe timethe PLAYbuttonispressed.
STOP(Button 2)
·WhenSTOPispressed the audiofilestopsplaying
PAUSE (Button 3)
·WhenPAUSEispressed the audiofilepauses.
·Press PauseagainorPLAY toresumenormalplayback fromthe position where
itwaspaused.
REPEAT(Button 4)
·WhenREPEATispressedthe currenttrack loop back on itselfcontinuously.
·Todisablethe repeatmode press REPEAT, PLAY, PREVIOUSTRACKor
NEXT TRACK. When thetrackplaystothe end itwillplayback the nexttrack
(and etc.)asnormal.
NEXT TRACK(Button 5)
·The NEXTTRACKfunction can be activated onlywhen atrack isalready
playing.When NEXT TRACKispressed the current trackstopsplaying and
jumpsdirectlytothe start of thenexttrack.
VOLUME DECREASE(Button 6)
·Decreasesaudiooutputvolumesetting.
VOLUME INCREASE(Button 7)
·Increasesaudiooutputvolumesetting.

11 of 21
MUTE(Button8)
·WhenMUTEispressed, allthe trackswillhaveno sound.
·Press MUTEagaintoresumethenormal sound inalltracks.
Allabovebuttonscan be re-defined byProPLAY Studiosoftwareifoperating in
playlistmode.
5.USB Host Update
ImportantNotice: Thisfunction willonlybe availableonSerialNumber212000 and
higher.
Ifyouareworking withProPLAYStudioversion 1.4.020 orbelow, you haveto
manuallycopythe filesontothe CompactFlashcard.
5.1 Whatdo you need?
BeforeusingUSB memorystick on ProPLAYAudio, pleasemakesureyouhave
the followingparts:
·USB memorystick
·ProPLAYAudio(startingwithSerialNumber212000)
·Compact Flashcard
·Powersupply(DC12V)

12 of 21
5.2 Setup
Preparation
CompactFlashCard
·EnsureyourCompactFlashCardhasenoughspaceforall yourmedia
content.
·Format the Compact FlashcardwithFAT32.
·Createanewfolder“MEDIA”on CompactFlashCard.
USB MemoryStick
·EnsuretheUSB memorystick hasbeen formatted withFAT32.
·Createanewfolder“MEDIA”on USB memorystick.
·Createatextfilenamed “UPDATE.INI”(The filesizemust not be0KB)on
root directory.Referto ContentUpdate section fordetails.
·Copyall mediacontent (.mp3)intothe “MEDIA”folder. Thosefilesare
prepared foruploadingon the CompactFlashcardlater.
Connection
ConnectingUSB memorystick directlytotheUSB port on ProPLAYAudio.

13 of 21
5.3 Content Update
Uploadnewmediacontent
1. Makesurethe ProPLAYAudiomust bepoweroffbeforeinsertingthe
CompactFlashCardand USB memorystick.
2. Oncefilescopycompleted, poweroffthe ProPLAYAudiounit and
disconnect the memorystick.
2. Poweron the ProPLAYAudioand seeifall contentareupdated and
played.
Note: All mediafilesmustbe stored and running insidethe
“MEDIA”(casesensitive)folderon CompactFlashcard. The mediafile(s)stored
outside “MEDIA”
folderwillnot be played bytheProPLAYAudio.

14 of 21
Update.log
Alogfilewill becreated automaticallyon theUSB memorystick oncetheupload
process isdone successfully. Thislogfilerecordsthe historyofcontentupdate
asshownasbelowexample:
Partial Update
You canupdateanyfilesentirelyorpartially. The optionsofpartialupdateare
defined in“update.ini”storedon USBMemoryStick (update.ini). Herebelow
isthe definition of update.ini file:

15 of 21
Filespresent inbothCFandUSB
IfbothCFand USB memorystick hasthe file(s)withsamefilename, you may
havetwooptions:
Option 1–Keepthe filesinCFunchanged
Option 2–ReplacethefilesinCFbythoseinUSB
Filespresent inCFonly
Ifthe file(s)onlybefound on CFbut noton memorystick, thenthosefileswillbe
removed fromCForyou mayhaveanotheroption tokeepthe filesinCF
unchanged.
Option 1–Keepthe filesinCFunchanged
Option 2–Deletethefiles

16 of 21
Filespresent inUSB only
Ifthe file(s)onlybefound on USB memorystick but not onCF, thenthosefiles
will becopied toCF.
Option 1–Copythe filesfromUSB toCF
Option 2–Donothing

17 of 21
6.RS-232 Commandson ProPLAY Audio
6.1 Connection
Connect yourProPLAYAudiothrough RS-232 port.The baud ratesetting of9600
N81 must be used. Note:The ProPLAY Audio needsspecial firmwareforthis
function.
6.2 Command Code
All the command codesarestored and defined inthebarcode.inifilewhichis
generated byProPLAYStudio. Pleaseseethe followingexample:
[Barcode]
BC1=0001
BC2=0002
BC3=0003
BC4=0004
BC5=0005
BC6=0006
BC7=0007
BC8=0008
[0001]
rs232key=1
action=1
[0002]
rs232key=1
action=2
[0003]
rs232key=1
action=3
[0004]
rs232key=1
action=4
[0005]
rs232key=1
action=5
[0006]
rs232key=1
action=6
[0007]
rs232key=1
action=7
[0008]
rs232key=1
action=8
Theabovebarcode.inifilecontainseightcommandcodeswhichmatchwithexistingfunctionof8
buttons(PLAY,STOP,PAUSE, REPEAT, NEXT, VOLDN, VOLUPandMUTE).

18 of 21
Exampleof „Play“
Inthisexample,theplayerwillplay mediaifyou feed„30303031 0D“fromterminalthroughRS-
232.
Exampleof „Stop“
Inthisexample, theplayerwillstop if you feed „30 3030320D“ fromterminalthrough RS-232.

19 of 21
6.3 Howtocreateand definethecommandcodeinbarcode.ini
ByusingProPLAYStudio(Version 1.4.024.00),youcan add and define your
command code forthe existing8function keys(PLAY,STOP, PAUSE,
REPEAT, NEXT, VOLDN, VOLUPand MUTE). Note: Thiscommandcode
featuremustbe used inplaylistmode. Simpleplaymodecannot support this
command code.
1.Open ProPLAYStudio
2. Open an existingproject and playlist fileORcreateanewone.
3.
3. Click fromthe toolbar.

20 of 21
4. Enterthecommand codesin BarcodeKeySetting table.
Forexample:
00011 =Playcommand
00012 =Stopcommand
00013 =Pausecommand
00014 =Repeat command
00015 =Next command
00016 =VolumeUpcommand
00017 =VolumeDowncommand
00018 =Mutecommand
5. Click OK toconfirmand completethe process.
Other manuals for ProPLAY
2
Table of contents